重要な安全情報
設置およびご使用の前に、このマニュアルをよくお読みください。また、このマニュアルは保管し、今後の参考としてご利用ください。
- 重量容量: 最大積載重量33ポンド(15 kg)を超えないでください。この制限を超えると、重傷や物的損害が発生する可能性があります。
- モニターサイズ: The monitor arm supports monitors up to 42 inches. The VESA extender supports monitors from 17 to 35 inches. Ensure your monitor's size and weight are within these limits.
- VESAの互換性: The arm supports VESA patterns 75x75mm and 100x100mm. The extender converts these to 200x100mm and 200x200mm. Verify your monitor's VESA pattern before installation.
- デスクの厚さ: C-clamp requires a desk thickness between 0.39 inches (10mm) and 2.76 inches (70mm). Ensure your desk can support the combined weight of the arm, monitor, and extender.
- 組み立て: Assemble the product according to the instructions. Improper assembly may cause damage or serious personal injury.
- 可動部品: This product contains moving parts. Exercise caution during adjustment to avoid pinching or crushing injuries.
- メンテナンス: Periodically check all screws and connections to ensure they are secure. Retighten as necessary.
パッケージ内容
Verify that all components are present and undamaged before proceeding with installation. If any parts are missing or damaged, please contact MOUNTUP customer support.
- モニターアームアセンブリ
- C-Clamp ベース
- VESA Extender Bracket (2 pieces)
- VESA Extender Plate
- ハードウェアキット(ネジ、ワッシャー、スペーサー、六角レンチ)

画像: 上view of the MOUNTUP Heavy Duty Single Monitor Arm, including the main arm, C-clamp, and the VESA extender components.
仕様
| ブランド | マウントアップ |
| モデル | Heavy Duty Single Monitor Arm with VESA Extender |
| Monitor Arm Compatibility | 最大42インチのモニター |
| VESA Extender Compatibility | Monitors 17-35 inches |
| 重量容量 | 4.4 - 33ポンド(2 - 15 kg) |
| VESA Patterns (Arm) | 75x75mm、100x100mm |
| VESA Patterns (Extender) | Converts to 200x100mm, 200x200mm, 150x150mm, 100x200mm |
| デスクの厚さ(C-Clamp) | 0.39 - 2.76インチ(10 - 70 mm) |
| 高さ範囲 | 9.3~22.1インチ |
| 最大延長 | 23.8インチ |

Image: Illustration highlighting the monitor arm's robust load capacity of up to 33 lbs.

Image: Diagram showing the monitor arm's height adjustment range from 9.3 to 22.1 inches and a maximum extension of 23.8 inches.
セットアップとインストール
Step 1: Install the C-Clamp ベース
- C-clを配置しますamp base on the edge of your desk.
- Ensure the desk thickness is between 0.39 and 2.76 inches.
- C-clを締めますamp ベースがデスクにしっかりと固定されるまでネジを締めます。締めすぎないようにしてください。

Image: The monitor arm's C-clamp securely attached to a desk, demonstrating its stable mounting.
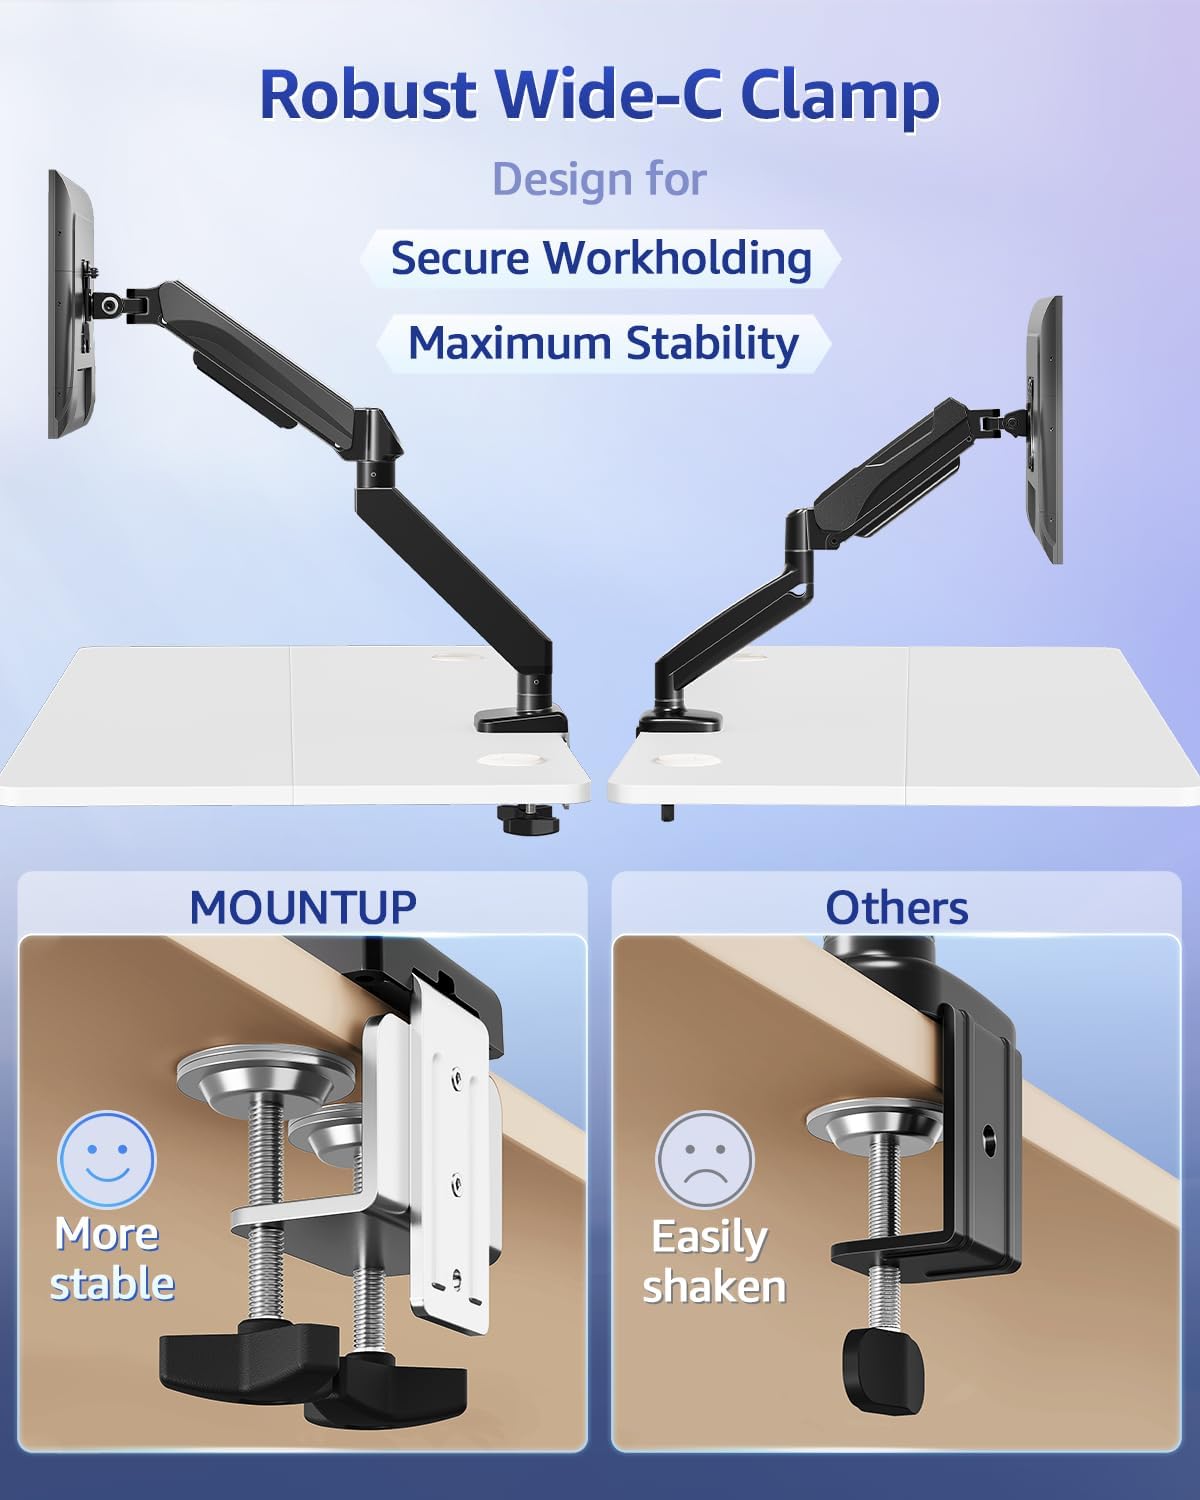
Image: A visual comparison highlighting the wider and more stable design of the MOUNTUP C-clamp compared to a standard clamp.
Step 2: Assemble the VESA Extender (if needed)
If your monitor has a VESA pattern larger than 100x100mm (e.g., 200x100mm or 200x200mm), use the VESA extender bracket.
- Attach the two extender brackets to the VESA extender plate using the provided screws. Ensure the ridge on the extender plate aligns with the brackets for a secure fit.
- Securely fasten the extender assembly to your monitor's VESA mounting holes using the appropriate screws from the hardware kit.

Image: Step-by-step visual guide for assembling the VESA extender brackets onto the main plate using screws.

画像: 詳細な view of the VESA extender plate, showing its design for adapting to various VESA patterns.

Image: A diagram illustrating the various VESA patterns (200x100mm, 150x150mm, 200x200mm, 100x200mm) supported by the extender.

Image: A visual comparison showing a monitor that previously could not be mounted (before) and how the VESA extender enables mounting for larger VESA patterns (after).
ステップ3: モニターをアームに取り付ける
- Slide the monitor (with or without the VESA extender attached) onto the VESA head of the monitor arm.
- Secure the monitor to the VESA head using the provided screws. Ensure all screws are tightened to prevent the monitor from detaching.
操作手順
モニターの位置を調整する
The MOUNTUP monitor arm allows for flexible adjustment of your monitor's position to achieve optimal ergonomics.
- 高さ調整: Gently push or pull the monitor up or down to the desired height. The gas spring mechanism will hold it in place.
- 傾き調整: Tilt the monitor screen up or down to reduce glare and find a comfortable view角度。
- スイベル調整: Rotate the monitor horizontally (left or right) to share your screen or change view方向性。
- 回転調整: モニターを 360 度回転させて、横向きと縦向きを切り替えます。
張力調整
If the monitor arm is too stiff or too loose, you may need to adjust the gas spring tension.
- Locate the tension adjustment screw on the arm (usually near the pivot points).
- Use the provided Allen wrench to turn the screw:
- 振り向く 時計回り(-) に 減らす tension (for lighter monitors or if the arm is too stiff).
- 振り向く 反時計回り(+) に 増加 張力(重いモニターの場合、またはアームがたわんでいる場合)。
- Adjust gradually and test the arm's movement after each adjustment until it holds your monitor securely at any position.
メンテナンス
- クリーニング: Wipe the monitor arm and VESA extender with a soft, damp 布で拭いてください。仕上げを傷める可能性のある研磨剤入りの洗剤や溶剤の使用は避けてください。
- 定期点検: Regularly inspect all screws and connections (C-clamp, VESA plate, arm joints) to ensure they remain tight. Retighten any loose fasteners to maintain stability and safety.
- 潤滑: ガススプリング機構はメンテナンスフリーで、潤滑も必要ありません。
トラブルシューティング
Monitor Sags or Does Not Hold Position
- 解決: The gas spring tension is likely too low for your monitor's weight. Increase the tension by turning the adjustment screw counter-clockwise (+) with the provided Allen wrench until the arm can hold the monitor in place.
- 重量を確認: Ensure your monitor's weight is within the 4.4 - 33 lbs capacity.
Arm is Too Stiff to Move
- 解決: The gas spring tension is likely too high. Decrease the tension by turning the adjustment screw clockwise (-) with the provided Allen wrench.
Monitor Wobbles
- 解決: Check if the C-clamp is securely tightened to the desk. Ensure all VESA mounting screws are tight. Verify that the monitor arm joints are properly secured.
- Desk Stability: Ensure your desk itself is stable and not prone to wobbling.
保証とサポート
MOUNTUP products are designed for durability and performance. For specific warranty information, please refer to the documentation included with your purchase or visit the official MOUNTUP webサイト。
If you encounter any issues or have questions regarding the installation or operation of your MOUNTUP Heavy Duty Single Monitor Arm and VESA Extender, please contact MOUNTUP customer support for assistance.
連絡先: Please refer to your product packaging or the MOUNTUP official web最新のカスタマー サポートの連絡先の詳細については、サイトをご覧ください。


