導入
This manual provides detailed instructions for the installation, operation, and maintenance of your Thermalright Stream Vision 360 Black CPU Liquid Cooler. Please read this manual thoroughly before installation and use to ensure proper function and longevity of the product.

Image: Thermalright Stream Vision 360 Black CPU Liquid Cooler installed in a PC case, highlighting the LCD screen and radiator.
安全情報
Always follow these safety guidelines to prevent damage to the product or injury:
- インストールする前に、コンピュータ システムの電源がオフになっており、壁のコンセントからプラグが抜かれていることを確認してください。
- 損傷を防ぐためにコンポーネントを慎重に取り扱ってください。
- Do not attempt to disassemble the cooler's pump or radiator.
- お子様の手の届かない場所に保管してください。
- Refer to the installation video or manual for specific steps.
パッケージ内容
パッケージにすべてのコンポーネントが含まれていることを確認します。
- Thermalright Stream Vision 360 Black CPU Liquid Cooler (Radiator with pre-installed fans, pump/waterblock with LCD screen)
- Mounting fasteners for AMD (AM4/AM5) and Intel (LGA1150/1151/1155/1156/1200/2011/2066/1700/1851) platforms
- SS2 all-metal buckle
- ウォーターガイドクリップ
- USB-C to USB 2.0 connection cable (for LCD screen)
- サーマルペースト

Image: Main components of the liquid cooler, showing the radiator, fans, and the waterblock with its detachable LCD module.
セットアップとインストール
The Thermalright Stream Vision 360 Black CPU Liquid Cooler is designed for straightforward installation. Ensure you have the correct mounting hardware for your CPU socket type (AMD AM4/AM5 or Intel LGA1150/1151/1155/1156/1200/2011/2066/1700/1851).
一般的なインストール手順:
- CPUを準備します。 Clean the CPU surface of any old thermal paste. Apply a thin, even layer of new thermal paste to the center of the CPU.
- ラジエーターとファンの取り付け: Mount the radiator with its pre-installed fans to an available fan mounting location in your PC case (typically top or front). Ensure airflow direction is optimal for your case.
- 取り付けブラケットの取り付け: Attach the appropriate mounting bracket (Intel or AMD) to the waterblock. The SS2 all-metal buckle provides secure compatibility.
- ウォーターブロックマウント: Carefully place the waterblock onto the CPU, aligning the mounting holes. Secure it with the provided fasteners. For AMD platforms, use the original motherboard backplate.
- ケーブルを接続する:
- Connect the pump's 4-PIN PWM cable to the CPU_FAN or AIO_PUMP header on your motherboard.
- ファン ケーブルをマザーボードまたはファン コントローラーの適切なファン ヘッダーに接続します。
- Connect the LCD screen via the USB-C to USB 2.0 cable to an available USB 2.0 header on your motherboard.
- Manage Tubing: Use the included water guide clips to route the water tubes neatly and prevent them from interfering with other components or fans.

Image: The magnetic LCD display module detaching from the waterblock, illustrating easy installation.
Software Installation (TRCC):
To customize the LCD screen and monitor system parameters, download and install the TRCC software from the official Thermalright website. The software allows for custom themes, static/dynamic picture switching, and video playback on the 3.5-inch IPS LCD screen.
インストールビデオ参照:
For a visual guide, refer to the official installation video. This video demonstrates the process for various CPU platforms.
ビデオ: 製品終了view and installation guide for the Thermalright Stream Vision 360 Black CPU Liquid Cooler.
操作手順
LCD画面のカスタマイズ:
The 3.5-inch IPS LCD screen offers a 640x480 resolution for clear display. Use the TRCC software to:
- Display real-time system monitoring data (CPU/GPU temperature, clock frequencies, usage).
- Switch between various static and dynamic pictures.
- Upload and play custom GIFs and videos.
- Apply custom themes.

Image: The LCD screen showcasing various live system monitoring displays and customizable visual themes.
Active Motherboard Cooling:
The magnetic cold head pump features an integrated 60mm fan. This fan provides direct airflow to the motherboard's core power supply module (VRM) and memory, contributing to lower component temperatures and stable CPU power delivery.
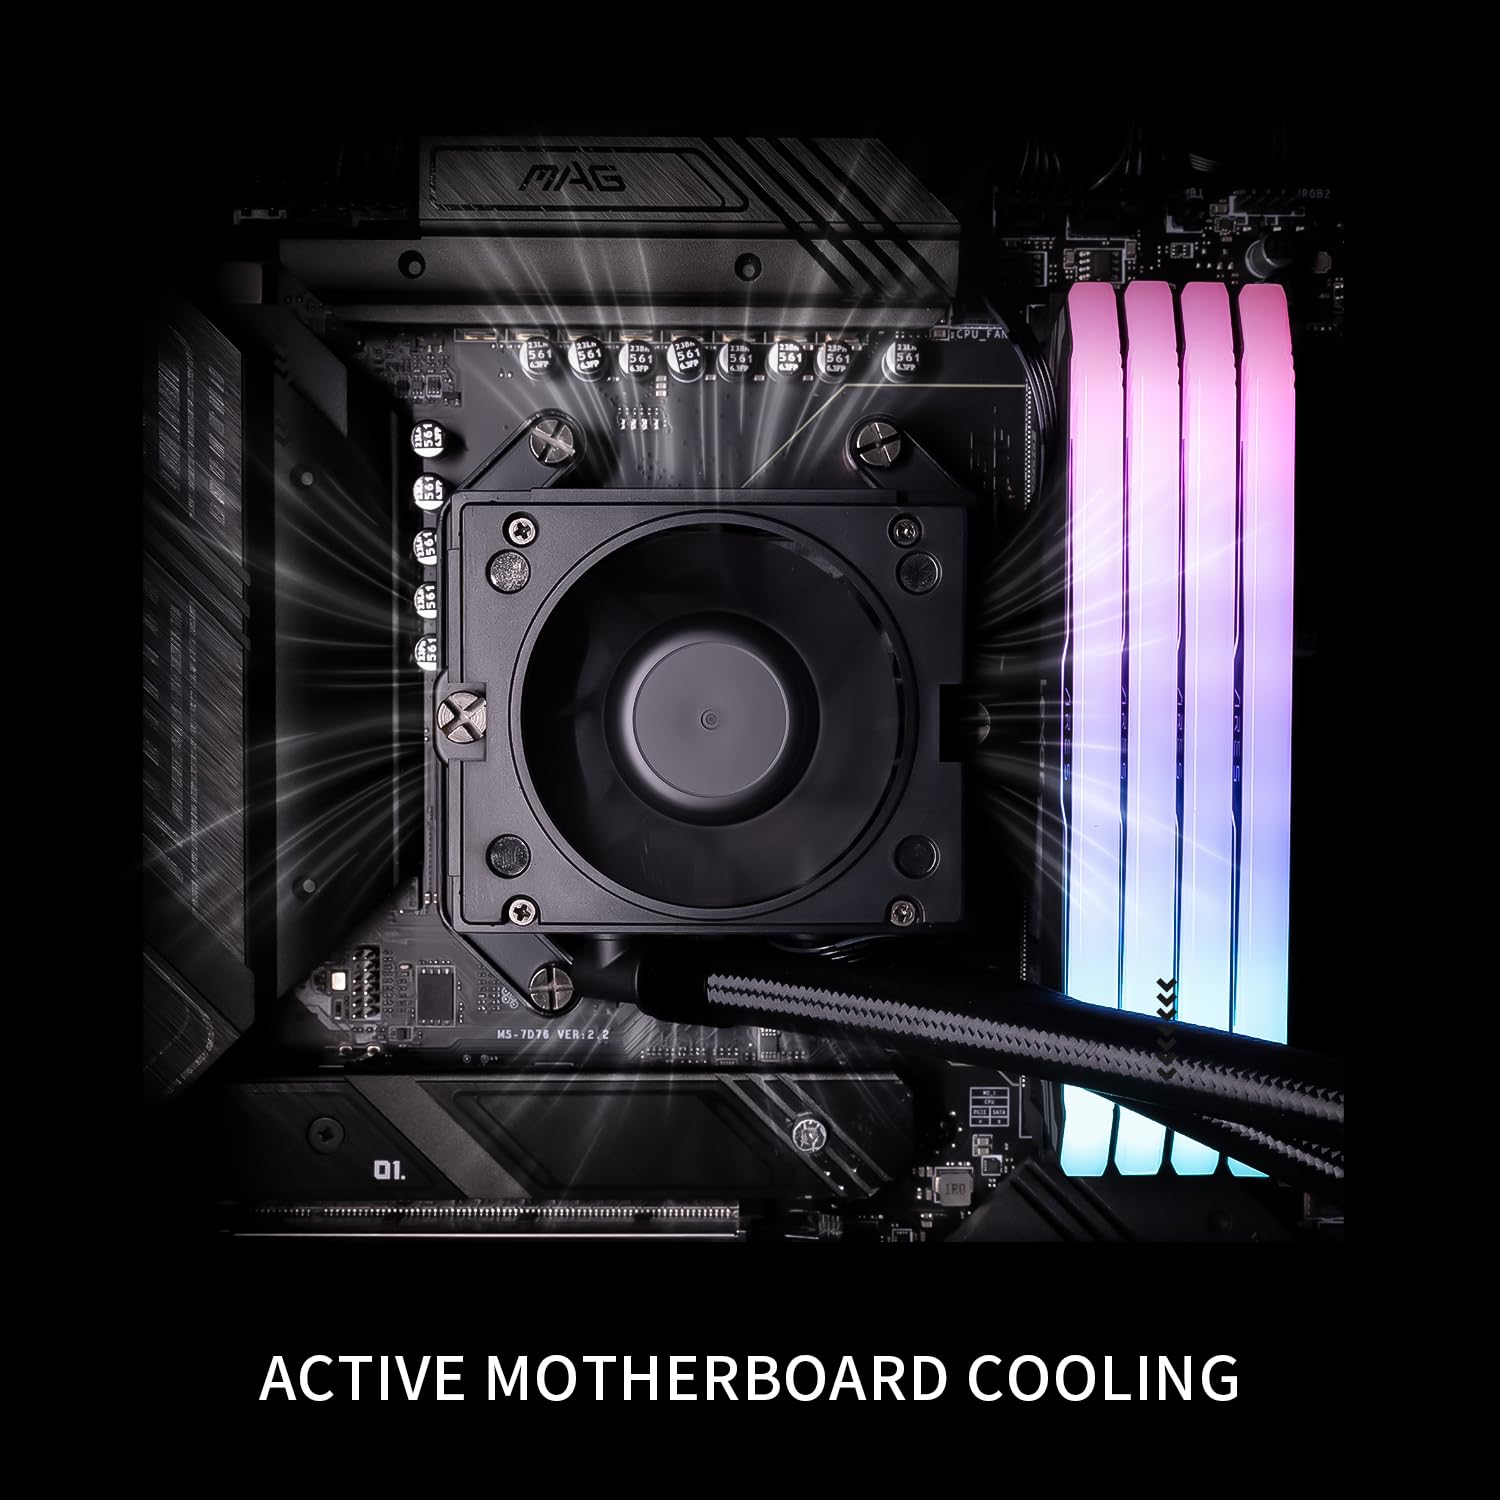
Image: The waterblock's integrated fan actively cooling the motherboard's voltage regulator modules (VRM) and RAM.
メンテナンス
- ダストクリーニング: 冷却性能を低下させる可能性のあるほこりの蓄積を防ぐために、定期的にラジエーターのフィンとファンブレードを圧縮空気で清掃してください。
- ケーブル管理 すべてのケーブルがしっかりと接続され、空気の流れを妨げていないことを確認します。
- ソフトウェアアップデート: Keep the TRCC software updated to access new features and performance improvements.
- 液面チェック: This is a closed-loop system and does not require regular liquid refills. However, monitor for any signs of leaks.
トラブルシューティング
| 問題 | 考えられる原因 | 解決 |
|---|---|---|
| 高いCPU温度 |
|
|
| LCD画面が表示されない |
|
|
| クーラーからの異音 |
|
|
仕様
| 成分 | 仕様 |
|---|---|
| モデル | Stream Vision 360 Black |
| ラジエーター寸法 | 403mm x 120mm x 52mm |
| Waterblock Dimensions | 69mm x 76mm x 92mm (cold head) |
| ポンプ速度 | 6400 回転 ±10% |
| ポンプ巻tage | DC12V |
| ポンプコネクタ | 4 ピン PWM |
| ファンモデル | TL-H12-X28-R7 |
| ファン寸法 | 120mm x 120mm x 28mm |
| ファン速度 | 2400 回転 ±10% |
| ファン空気圧 | 2.78 MM H2O |
| ファン風量 | 95.4 CFM |
| 作動音 | ≤31.4dBA |
| ファンベアリングタイプ | S-FDBベアリングV2 |
| LCD画面サイズ | 3.5インチ |
| LCDの解像度 | 640x480 IPS |
| 互換性 | AMD: AM4/AM5, Intel: LGA1150/1151/1155/1156/1200/2011/2066/1700/1851 |
| 材料 | アルミニウム |
| アイテム重量 | 6.74ポンド |

Image: Compatibility information for Intel and AMD platforms, alongside details of the radiator's internal water channels and polymer-sleeved tubes.

Image: Specifications and features of the TL-H12-X28-R7 fan, including its S-FDB V2 bearing and static pressure optimization.
保証とサポート
For warranty information, technical support, or further assistance, please visit the official Thermalright web購入サイトをご覧いただくか、カスタマーサービス部門にお問い合わせください。購入証明書としてレシートを保管してください。
正式 Webサイト: www.thermalright.com


