1. はじめに
The Machenike G3V2 Bluetooth Controller is a versatile gaming peripheral designed for multi-platform compatibility, including Switch, iOS, Android, and Windows PC. It features Hall Effect joysticks and triggers, customizable buttons, RGB lighting, and a dedicated charging station for an enhanced gaming experience.
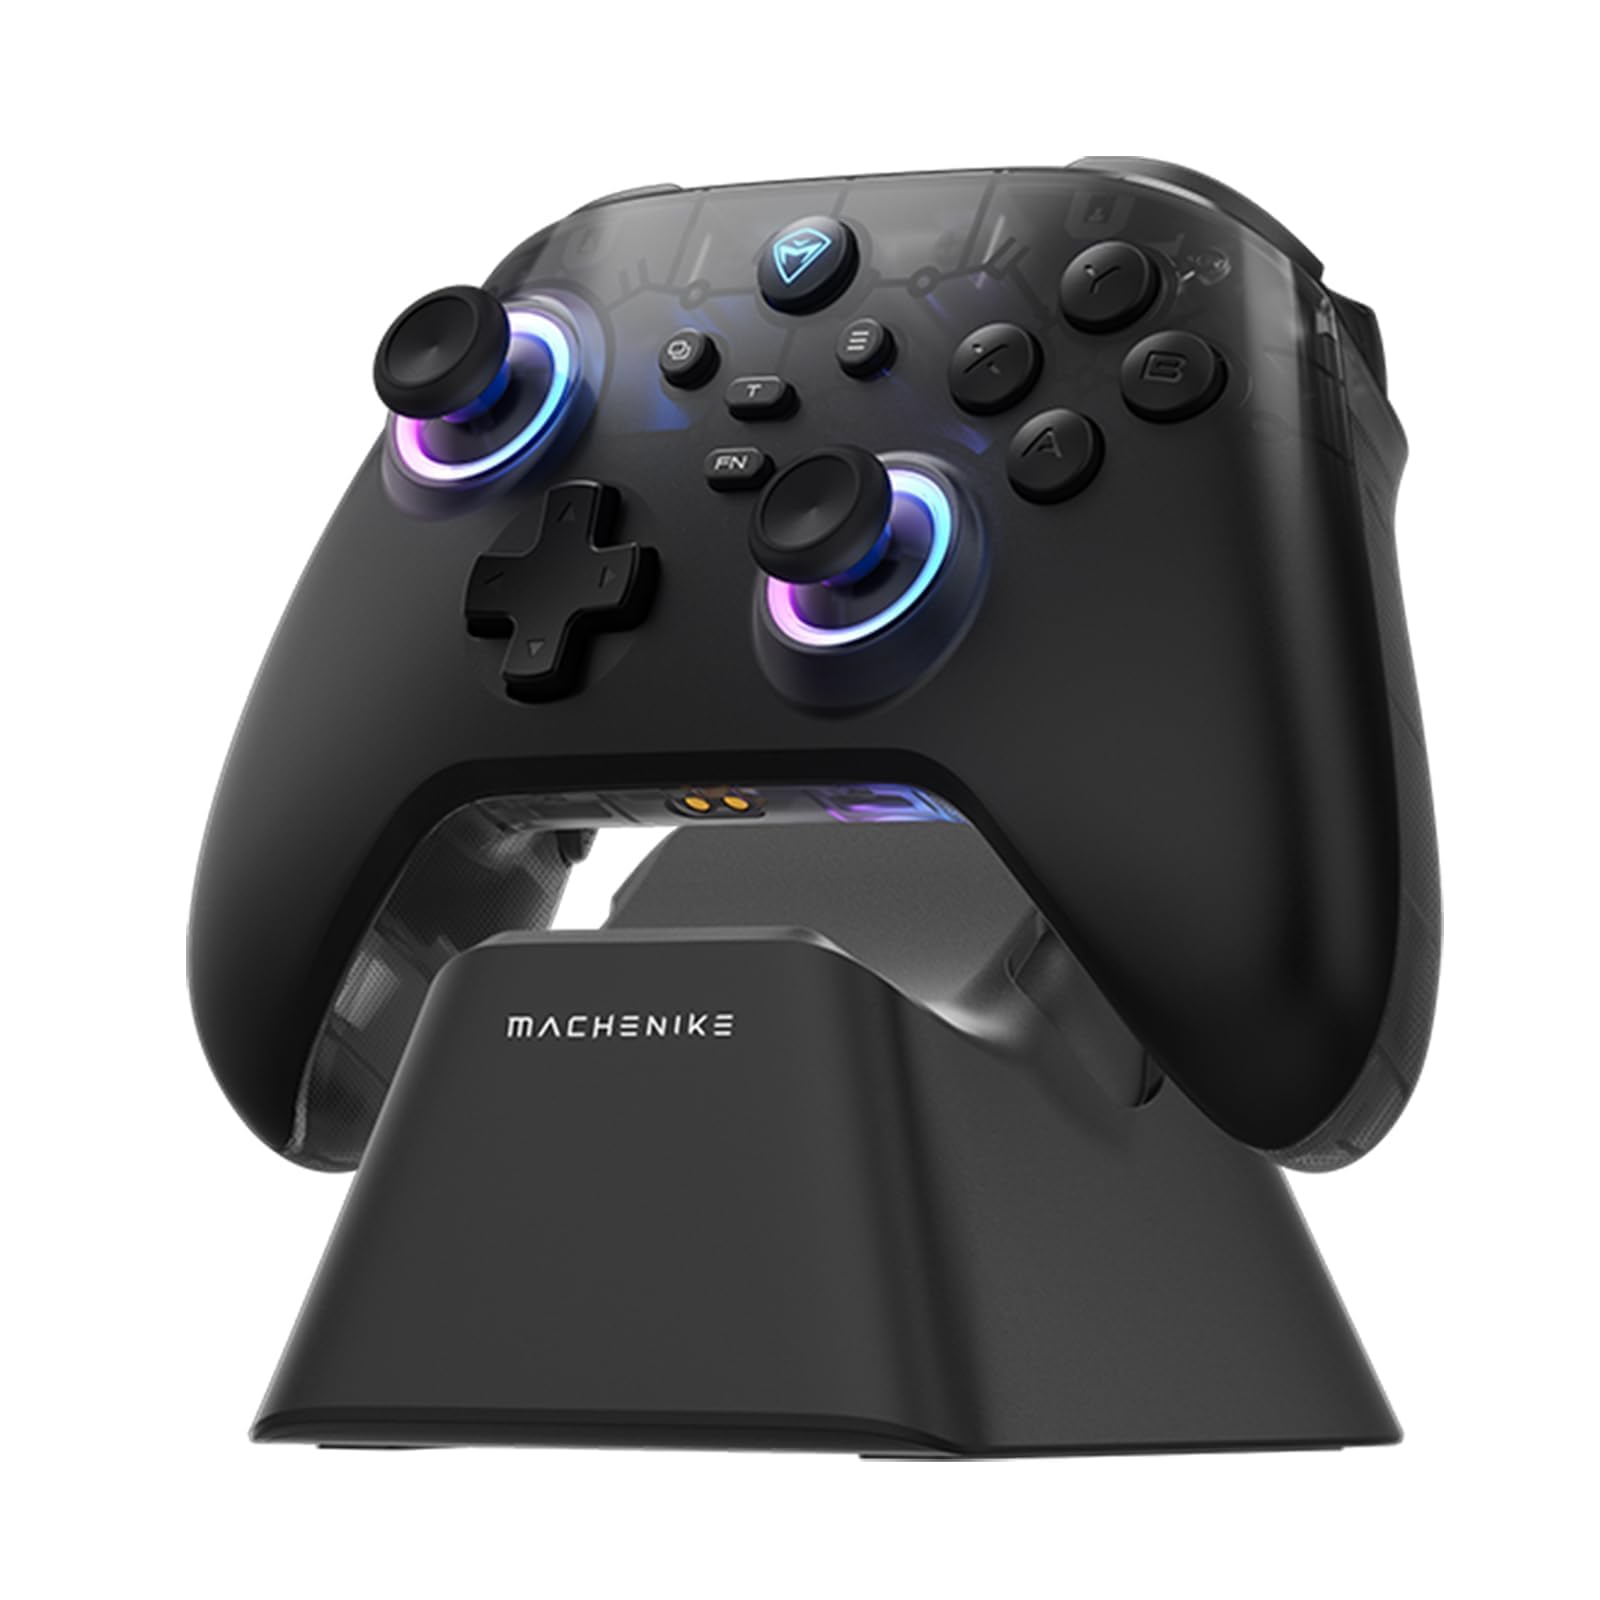
Image: The Machenike G3V2 Bluetooth Controller, showcasing its ergonomic design and vibrant RGB lighting around the joysticks.
2. 主な特徴
- Lightning-Fast 1000Hz Responsiveness: Equipped with ultra-high gaming responsiveness for instant command capture and millisecond-level feedback.
- Convenient Charging Dock: Includes a dedicated charging dock for efficient and fast recharging via USB-C, protecting the controller and ensuring optimal performance.
- Dual Hall-Effect Joysticks and Triggers: Features newly upgraded Hall-Effect sensing joysticks and high-precision trigger buttons for superior control and durability, eliminating drift.
- Customizable Force Adjustable Stick Tension: Unique force adjustment feature allows customization of joystick feedback from lightweight to precise, adapting to various game needs.
- Fast Charging & Extended Playtime: Built-in 1000mAh high-capacity battery provides extended playtime with fast-charging technology.
- マルチプラットフォームサポート: Compatible with Switch/Switch 2, iOS, Android, and Windows PC.
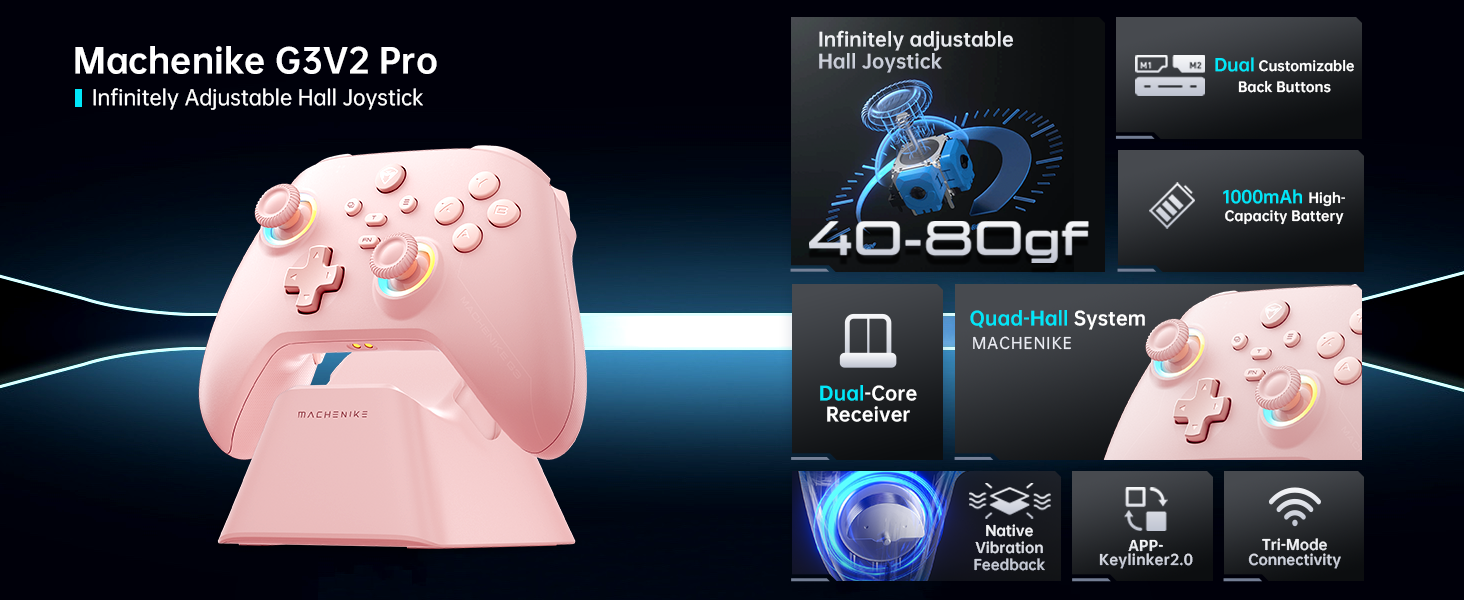
画像: オーバーview of the Machenike G3V2 controller's key features, including its Hall Effect joysticks, customizable back buttons, and connectivity options.
3. セットアップと接続
3.1 Connecting to Nintendo Switch (Bluetooth Mode)
- Ensure your controller is charged.
- コントローラーで、 Y + ホーム ボタンを同時に長押しすると、インジケーターライトがゆっくり点滅から速く点滅に変わります。これでコントローラーはSwitchのペアリングモードになります。
- Nintendo Switch で、HOME メニューに移動します。
- Select the 'Controllers' icon, then choose 'Change Grip/Order'.
- コントローラーが自動的に接続されるまでお待ちください。接続されると、コントローラーが振動し、Switch画面にアイコンが表示されます。
- を押す A コントローラーのボタンを押して確認します。
- To toggle between Switch and Xbox button layouts (A/B, X/Y swap), press FN+A.
Video: A tutorial demonstrating how to connect the Machenike G3V2 controller to a Nintendo Switch console via Bluetooth mode, including button presses and on-screen confirmation.
3.2 Connecting to PC/iOS/Android (Bluetooth/Wired/2.4G)
The Machenike G3V2 controller supports multiple connection modes for various platforms:
- ブルートゥース: For iOS, Android, and some PC setups. Activate Bluetooth on your device and search for 'Machenike G3V2' to pair.
- 2.4Gワイヤレス: Use the included USB dongle for PC and other compatible devices. Plug the dongle into your device, then power on the controller.
- 有線: Connect the controller directly to your PC or compatible device using a USB-C cable.
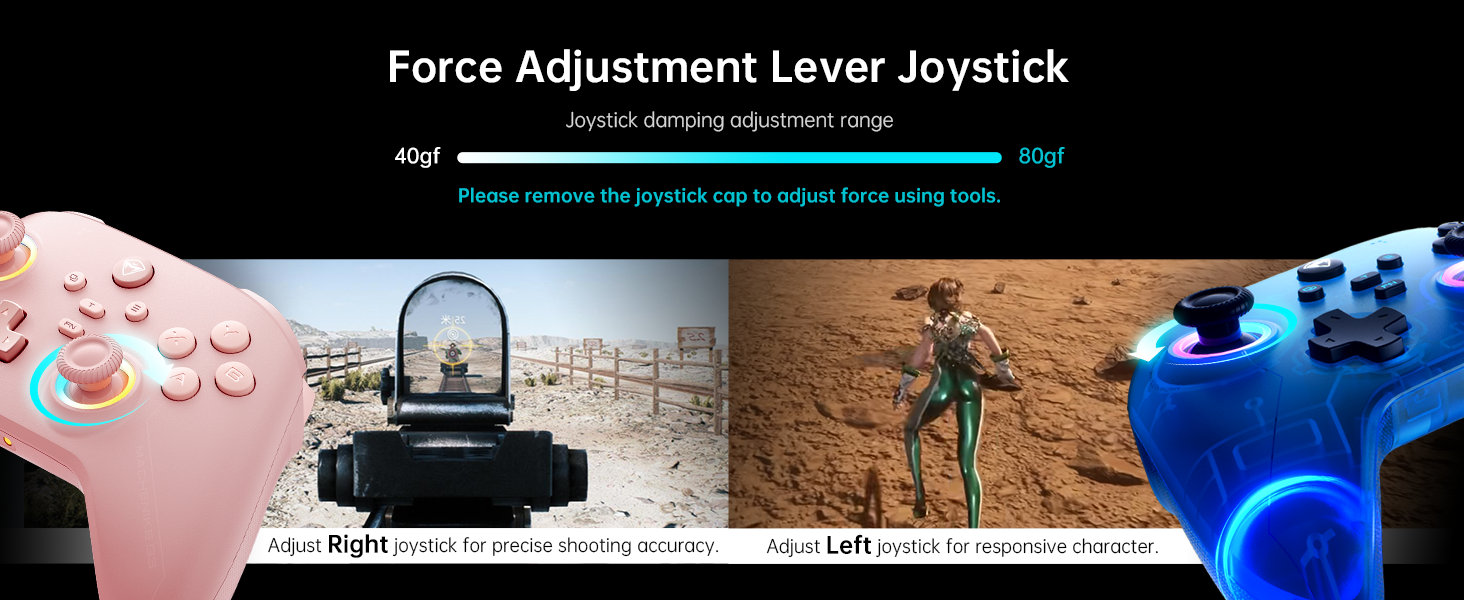
Image: The Machenike G3V2 controller highlighting its ergonomic design, anti-slip grip, and responsive triggers for comfortable and precise control.
4. 操作とカスタマイズ
4.1 プログラム可能なバックボタン(M1/M2)
The controller features two customizable back buttons (M1 and M2) that can be assigned to single keys or complex macros. This is particularly useful for games requiring quick actions or combos.
- To Assign a Single Key:
NS。 押したまま FN + M1 (or M2) simultaneously until the joystick light ring glows with a soft blue breathing effect, indicating recording mode.
b. Press the desired button you wish to assign (e.g., 'A' button).
c。 押す M1 (or M2) once to save the assignment. The light ring will flash three times, confirming successful saving. - To Clear an Assignment:
NS。 押したまま FN + M1 (or M2) simultaneously to enter recording mode.
b. Without pressing any other button, press M1 (or M2) again to save a blank input. The light ring will flash three times, clearing the previous assignment. - To Record a Macro (Multiple Keys):
NS。 押したまま FN + M1 (or M2) simultaneously to enter recording mode.
b. Press the sequence of keys you want to record (e.g., A, B, X, Y, RB, LB). The timing between key presses will be recorded.
c。 押す M1 (or M2) once to save the macro. The light ring will flash three times.
Video: A detailed guide on how to set up and record keystroke macros using the programmable back buttons (M1/M2) on the Machenike G3V2 controller.
4.2 ジョイスティックとトリガーのキャリブレーション
Calibration helps maintain accuracy and prevent drift in joysticks and triggers. This can be done whether the controller is off or connected.
- ジョイスティックのキャリブレーション:
a. を長押しします。 B + 戻る + ホーム buttons simultaneously until the blue LED starts flashing.
b. Move both joysticks in full circles (about three rotations) slowly and steadily.
c. を押します 始める ボタンを押して保存します。コントローラーの電源がオフになり、キャリブレーションが成功したことを示します。 - トリガーキャリブレーション:
a. を長押しします。 Y + 戻る + ホーム buttons simultaneously until the red LED starts flashing.
b. Press both triggers normally all the way down three times. Ensure gentle but full pressure.
c. を押します 始める ボタンを押して保存します。コントローラーの電源がオフになり、キャリブレーションが成功したことを示します。
After calibration, reconnect the controller to your device to test the new settings. Always use normal, gentle pressure during calibration for accurate results.
Video: A guide on how to calibrate the joysticks and triggers of the Machenike G3V2 controller to ensure optimal performance and accuracy.
4.3 RGB照明
The controller features dynamic RGB lighting around the joysticks. Specific controls for changing lighting modes or colors can often be found in the Keylinker 2.0 mobile application or through dedicated button combinations (refer to the app for advanced customization).
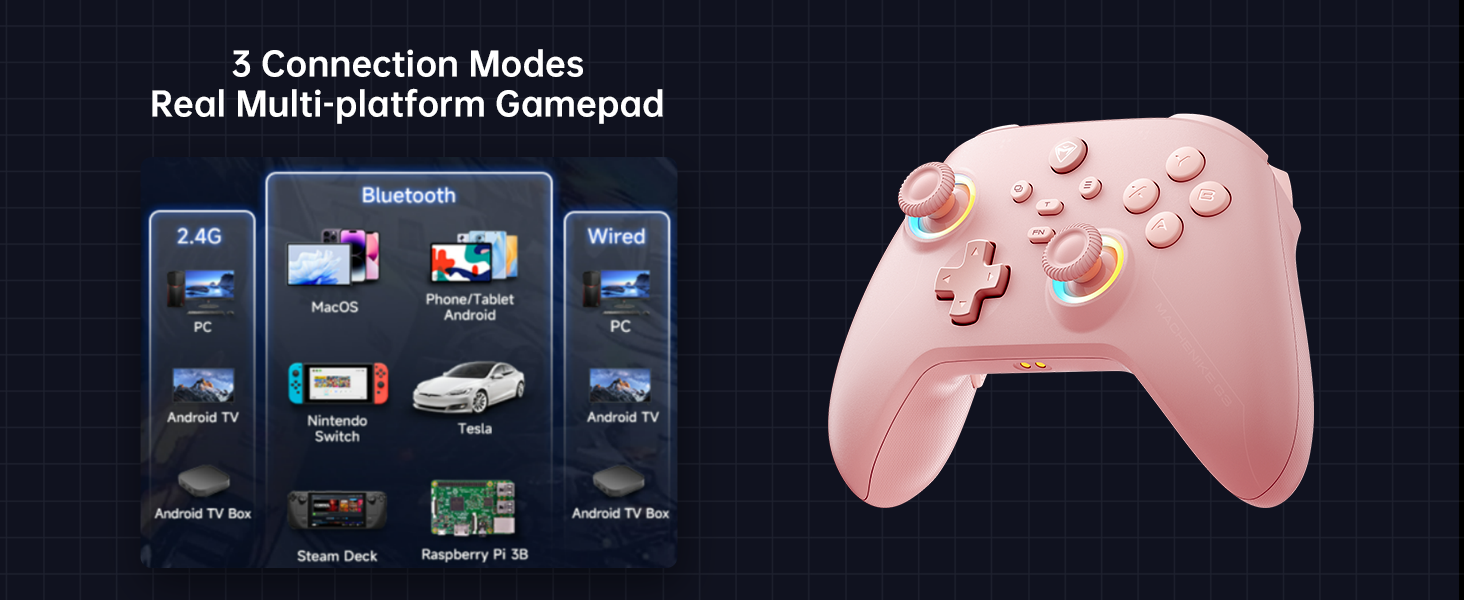
Image: The Machenike G3V2 controller illustrating its 4-level native vibration feedback, providing immersive experiences for various game genres.
5. 充電
The Machenike G3V2 controller comes with a 1000mAh high-capacity battery and a dedicated charging dock.
- 充電ドックの使用: Simply place the controller onto the dedicated charging dock. The built-in USB-C port on the dock facilitates quick recharging.
- USB-C直接充電: You can also charge the controller directly using a USB-C cable connected to a power source.
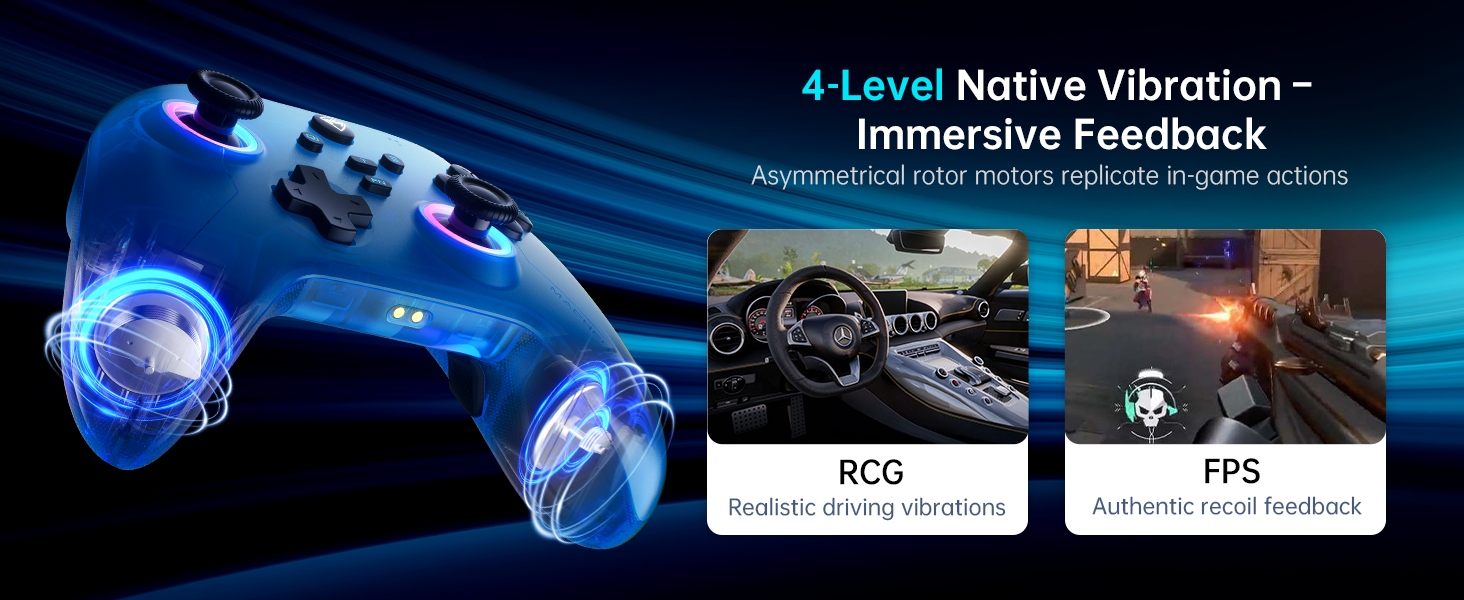
Image: The Machenike G3V2 controller resting on its dedicated charging dock, ready for an instant power boost.
6. 互換性
- サポートされているプラットフォーム: Nintendo Switch, Switch 2, iOS, Android, Windows PC.
- 互換性がない製品: Xbox, PlayStation, or GeForce Now.
- For other game platforms not explicitly mentioned, please consult customer service before purchase.
7. メンテナンス
- クリーニング: コントローラーの清掃には、柔らかく乾いた布をご使用ください。刺激の強い化学薬品や研磨剤の使用は避けてください。
- ストレージ: コントローラーは、直射日光や極端な温度を避け、涼しく乾燥した場所に保管してください。
- バッテリーのケア: バッテリーの寿命を延ばすには、コントローラーを頻繁に完全に放電させないでください。長期間使用しない場合でも、定期的に充電してください。
8。 トラブルシューティング
- コントローラーが接続されていません:
- コントローラーが完全に充電されていることを確認してください。
- Verify the correct pairing mode is activated for your device (e.g., Y+Home for Switch).
- On your device, try forgetting the controller from Bluetooth settings and re-pairing.
- For PC, try connecting via the 2.4G dongle or wired connection. - ジョイスティックのドリフトまたは不正確さ:
- Perform joystick calibration as described in Section 4.2. - トリガーの問題:
- Perform trigger calibration as described in Section 4.2. - ボタンが反応しない:
- Ensure the controller is properly connected.
- Check if any programmable back buttons (M1/M2) have unintended assignments (clear them if necessary).
- Reconnect the controller. - 充電の問題:
- Ensure the charging dock or USB-C cable is properly connected.
- 別の USB-C ケーブルまたは電源アダプターを試してください。
9. 仕様
| 特徴 | 詳細 |
|---|---|
| モデル番号 | PEアップグレード |
| ASIN | B0F93RPT5H |
| メーカー | マチェニケ |
| アイテム重量 | 0.529オンス |
| パッケージ寸法 | 6.93 x 6.46 x 3.23インチ |
| バッテリー | 1 リチウムポリマー電池 (付属) |
| 接続性 | Bluetooth、2.4Gワイヤレス、有線(USB-C) |
| ポーリングレート | 1000Hz |
| ジョイスティック | Hall Effect, Adjustable Tension (40-80gf) |
| トリガー | Hall Effect, 255 Levels, Millimeter Precision |
| プログラム可能なボタン | 2 Back Buttons (M1, M2) |
| 振動 | 4段階のネイティブ振動フィードバック |
10. 保証とサポート
Machenike products are designed for durability and performance. For warranty information, technical support, or service inquiries, please refer to the official Machenike web公式サイトをご覧いただくか、カスタマーサービスに直接お問い合わせください。保証請求のために購入時のレシートを保管してください。
オンラインリソースとFAQは、 AmazonのMachenikeストア.


