1. 安全情報
このマルチメーターを操作する前に、すべての安全情報をお読みになり、理解してください。これらの指示に従わない場合、感電、火災、またはメーターの損傷につながる可能性があります。
- Always ensure the multimeter is in good working condition and that the test leads are not damaged.
- 定格容量を超えて塗布しないでくださいtage, as marked on the meter, between the terminals or between any terminal and earth ground. The maximum voltage between measurement end and ground is 1000V DC or 750V AC.
- vol を扱うときは細心の注意を払ってくださいtages above 60V DC or 30V AC RMS, as these present a shock hazard.
- 機能や範囲を変更する前に、必ずテストリード線を回路から外してください。
- Do not operate the meter if the battery cover is open or not properly secured.
- 正確な測定を行うために、電池残量低下インジケーターが表示されたらすぐに電池を交換してください。
- Adhere to the specified pollution grade (Grade 2) and operating environment conditions.
2.製品オーバーview
The Irfora T58D is a 60000 counts digital multimeter designed for accurate measurement of various electrical parameters. It features a large LCD display with backlight, flashlight, NCV (Non-Contact Voltage) detection, and automatic shutdown.

図2.1: 前面 view of the T58D Multimeter with labeled components.
主要コンポーネント:
- LEDディスプレイ: 60000 counts display for readings.
- 照明: 暗い環境用の懐中電灯。
- NCV検知エリア: 非接触ボリューム用tage検出。
- NCV and Buzzer Indicator Light: Visual alerts for NCV and continuity.
- MAX MIN ボタン: For maximum and minimum value switching.
- ピークボタン: For peak to peak measurement.
- レンジボタン: For manual range switching.
- FUNCボタン: For function switching within a rotary switch position.
- Lighting/Backlight Button: ディスプレイのバックライトと懐中電灯を有効にします。
- AREL HOLD Button: For data hold and relative value measurement.
- ギアロータリースイッチ: 主な測定機能を選択します。
- 入力ソケット: μA mA L, 10A, VΩHz°C, and COM for test lead connections.

Figure 2.2: Physical dimensions of the T58D Multimeter.
3. セットアップ
3.1 バッテリーの取り付け
The T58D multimeter requires three (3) 1.5V AAA batteries (not included) for operation. Ensure the batteries are installed correctly according to polarity markings.
- マルチメーターの背面にある電池ボックスを見つけます。
- 電池カバーを開きます。
- Insert three 1.5V AAA batteries, observing the correct polarity (+ and -).
- 電池カバーをしっかりと閉じてください。
3.2 テストリードの接続
正確で安全な測定には、テスト リードの適切な接続が不可欠です。
- 常に黒色のテストリードを コム (共通)入力ジャック。
- ほとんどのボリュームtage, resistance, frequency, capacitance, and temperature measurements, connect the red test lead to the VΩHz°C 入力ジャック。
- 600mAまでの電流測定には、赤いテストリードを μA mA L 入力ジャック。
- For current measurements up to 10A, connect the red test lead to the 10A 入力ジャック。

Figure 3.1: Multimeter with support stand and test lead storage.
4. 操作手順
ロータリースイッチを希望の機能に回して測定を開始します。
4.1 AC/DC ボリュームtag測定
- 赤いテストリードをに接続します VΩHz°C ジャックと黒いテストリードは コム ジャック。
- スイッチをに回します V~ (AC巻tage) または V- (DC ボリュームtage) 位置。
- テストプローブを回路のポイントに接触させて、tage を測定する必要があります。
- 巻を読むtagディスプレイ上のe値。
4.2 AC/DC電流測定
To measure current, the multimeter must be connected in series with the circuit. Ensure the circuit is de-energized before connecting the meter.
- 黒のテストリードをに接続します コム ジャック。
- For current up to 600mA, connect the red test lead to the μA mA L jack. For current up to 10A, connect the red test lead to the 10A ジャック。
- スイッチをに回します μA mA~ (交流電流) μA mA- (直流電流) A~ (交流電流)、または A- (DC Current) position, matching the input jack used.
- 電流を測定する回路を開き、テストプローブを直列に接続します。
- 回路に再度通電し、電流値を読み取ります。
4.3抵抗測定
- 赤いテストリードをに接続します VΩHz°C ジャックと黒いテストリードは コム ジャック。
- スイッチをに回します Ω 位置。
- 抵抗を測定する前に、回路またはコンポーネントの電源がオフになっていることを確認してください。
- 測定するコンポーネント全体にテストプローブを接触させます。
- ディスプレイの抵抗値を読み取ります。
4.4静電容量の測定
- 赤いテストリードをに接続します VΩHz°C ジャックと黒いテストリードは コム ジャック。
- スイッチをに回します キャパシタンス position (often shared with Ω or Hz). Use the FUNC button if necessary to select capacitance.
- メーターの損傷を防ぐため、測定前にコンデンサが完全に放電されていることを確認してください。
- テストプローブをコンデンサの端子に触れさせます。
- ディスプレイの静電容量値を読み取ります。
4.5 周波数測定
- 赤いテストリードをに接続します VΩHz°C ジャックと黒いテストリードは コム ジャック。
- スイッチをに回します Hz% 位置。
- Touch the test probes to the circuit points where frequency is to be measured.
- ディスプレイ上の周波数値を読み取ります。
4.6温度測定
- 熱電対を VΩHz°C そして コム ジャック、極性を観察します。
- スイッチをに回します °C /°F 位置。
- 熱電対の先端を、温度を測定する物体の上または近くに置きます。
- ディスプレイ上の温度値を読み取ります。
4.7ダイオードテスト
- 赤いテストリードをに接続します VΩHz°C ジャックと黒いテストリードは コム ジャック。
- スイッチをに回します ダイオード position (often shared with continuity). Use the FUNC 必要に応じてボタンを押します。
- 赤いプローブをダイオードのアノードに、黒いプローブをカソードに接触させます。順方向電圧はtagドロップが表示されます。
- Reverse the probes. An open circuit (OL) should be displayed for a good diode.
4.8 ブザー(導通)テスト
- 赤いテストリードをに接続します VΩHz°C ジャックと黒いテストリードは コム ジャック。
- スイッチをに回します ブザー position (often shared with diode). Use the FUNC 必要に応じてボタンを押します。
- Touch the test probes to the component or circuit path.
- 抵抗が特定のしきい値(通常は 50Ω)を下回ると、ブザーが鳴り、導通を示します。
4.9 NCV(非接触ボリュームtage)テスト
NCV機能によりAC電圧の検出が可能tag直接接触することなく。
- ロータリースイッチを回して 非定常 位置。
- Place the top of the meter (NCV sensing area) close to the conductor.
- ACvolの場合tage is detected, the corresponding signal strength indicator (low-yellow, high-red) will light up, and the buzzer will emit alarms of varying frequency.

図4.1: NCVボリュームtage Measurement in progress.
4.10 バックライトとフラッシュライト
を押す Lighting/Backlight button to activate the display backlight for improved visibility in low-light conditions. Press it again to activate the flashlight located at the top of the meter for illuminating the work area.
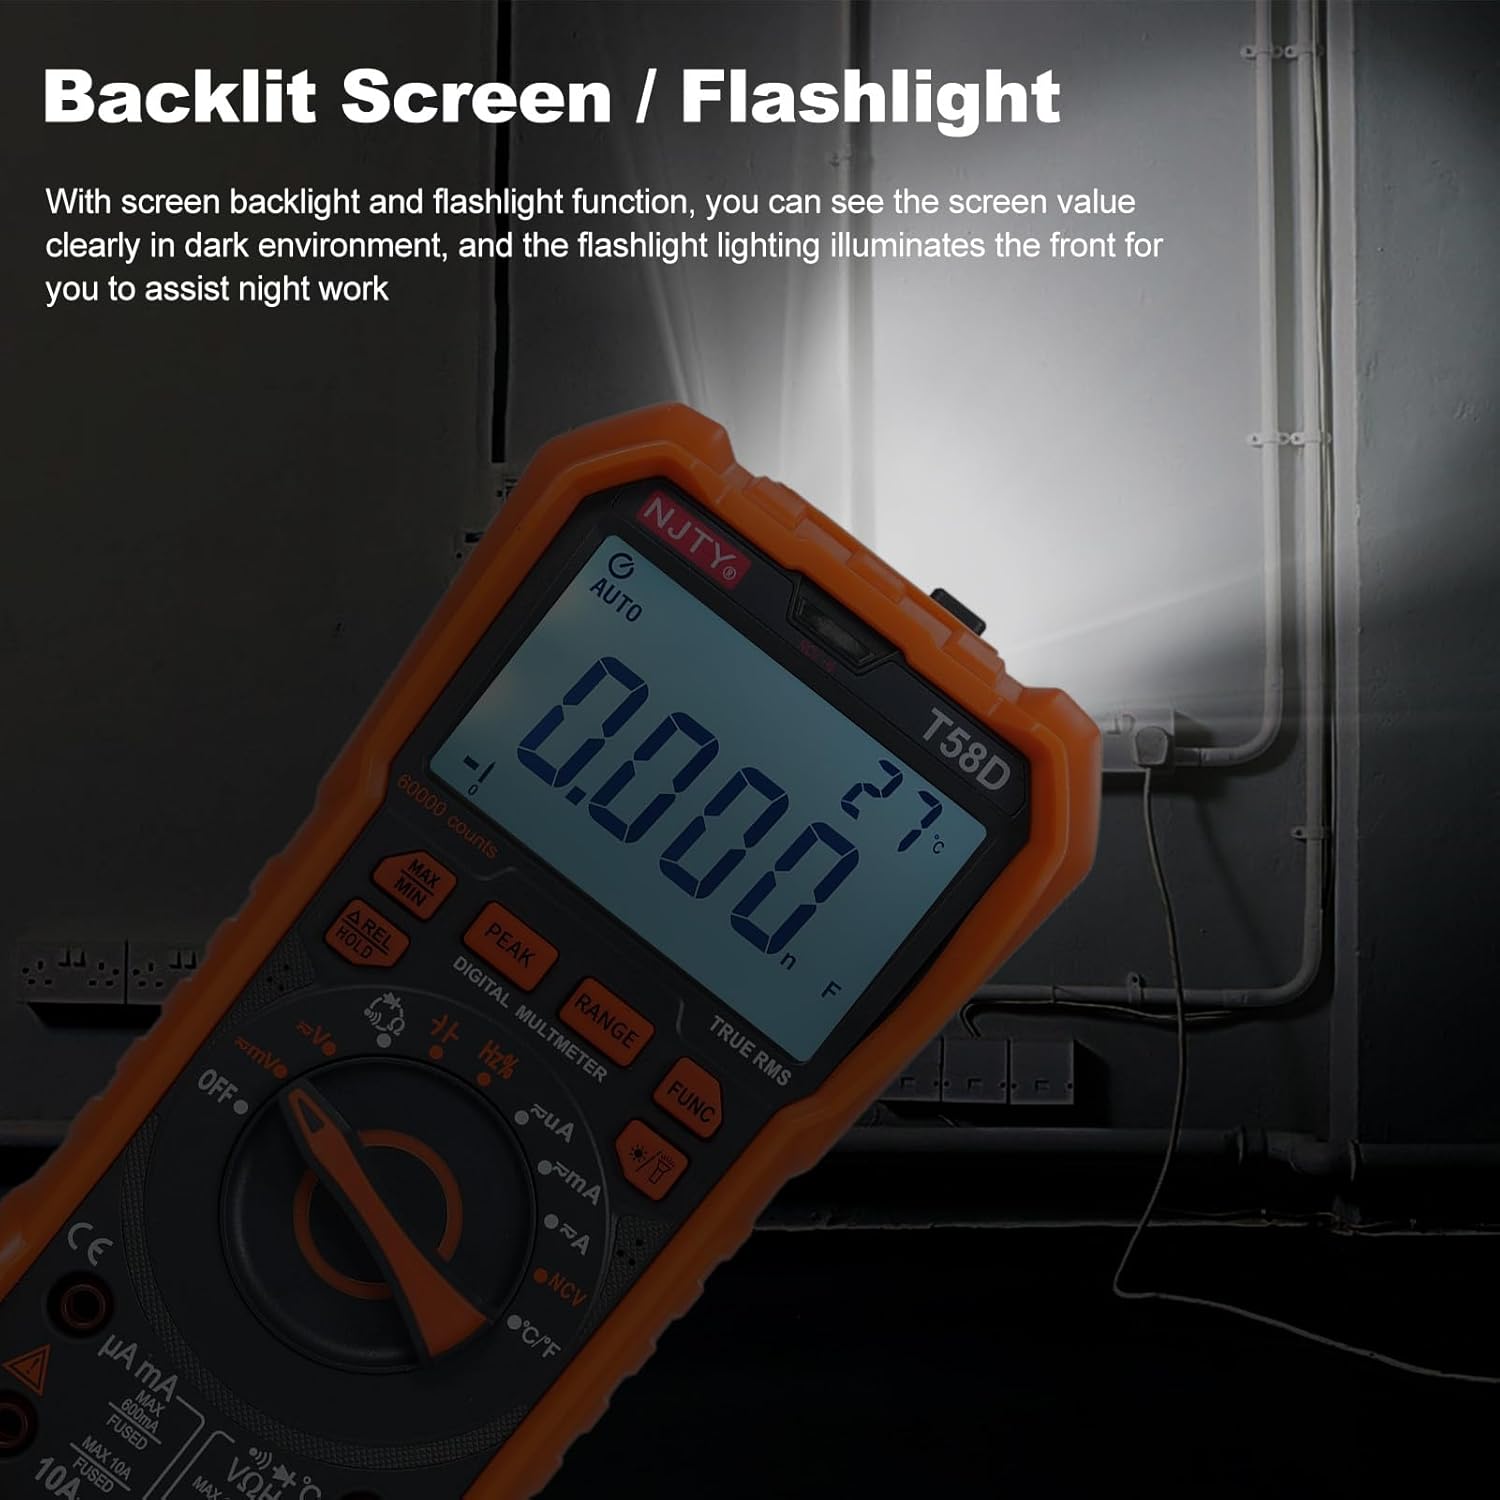
Figure 4.2: Backlit screen and flashlight in use.
4.11自動シャットダウン
To conserve battery life, the multimeter features an automatic shutdown function. If there is no operation for approximately 15 minutes after power-on, the instrument will emit audible prompts and then automatically power off, entering hibernation mode. Any button press will restart the meter.

Figure 4.3: Automatic shutdown after 15 minutes of inactivity.
5. メンテナンス
5.1 クリーニング
広告でメーターを拭くamp 布と中性洗剤。 研磨剤や溶剤は使用しないでください。
5.2 電池の交換
When the low battery indicator appears on the display, replace the batteries promptly to ensure accurate readings and proper operation. Refer to Section 3.1 for battery installation steps.
5.3 ヒューズの交換
If the current measurement function fails, the fuse may need replacement. Always use fuses of the specified type and rating.
- For mA current measurements, use a fuse rated F 600mA / 250V.
- For 10A current measurements, use a fuse rated ヘ 10A/250V.
Fuse replacement should only be performed by qualified personnel. Disconnect all test leads and power before opening the meter casing.
6。 トラブルシューティング
If the multimeter does not function correctly, check the following common issues:
- 何も表示されない、または暗い表示: 電池残量を確認し、必要に応じて交換してください。電池の極性が正しいことを確認してください。
- 誤った読み方: Verify that the correct function and range are selected. Ensure test leads are properly connected and not damaged. Check for blown fuses if measuring current.
- 「OL」が表示されました: This indicates an overload or out-of-range measurement. Select a higher range or ensure the measured value is within the meter's capabilities.
- 導通ビープ音なし: Ensure the continuity function is selected and the circuit resistance is below the threshold.
問題が解決しない場合は、カスタマー サポートまたは資格のある技術者にお問い合わせください。
7. 仕様
The following table details the technical specifications of the Irfora T58D Digital Multimeter.

Figure 7.1: T58D Parameters Table.
| パラメータ | 範囲/値 |
|---|---|
| DCVol。tage | 100mV、600mV、1V、60V、600V、1000V |
| ACVol。tage | 100mV、600mV、1V、60V、600V、750V |
| 直流電流 | 600μA、6mA、60mA、600mA、6A、10A |
| AC電流 | 600μA、6mA、60mA、600mA、6A、10A |
| 頻度 | 100Hz、1KHz、10KHz、100KHz、1MHz、10MHz、25MHz |
| 抵抗 | 600Ω、6kΩ、60kΩ、600kΩ、6MΩ、60MΩ |
| キャパシタンス | 6nF、60nF、600nF、6μF、60μF、600μF、6mF、60mF |
| 温度 | -50℃〜1000℃/ -58℉〜1832℉ |
| ダイオード試験 | はい |
| ブザー(導通) | はい |
| 電源 | 1.5V AAA電池3本(別売) |
| 画面 | 60000カウントLEDディスプレイ |
| 過負荷表示 | 「OL」が表示されました |
| コンバージョン率 | About 3 readings/second |
| 安全性評価 | 600V CAT III and 1000V CAT II |
| 汚染度 | 2 |
| 動作高度 | 2000m未満 |
| 動作温度 | 0~40℃(80%RH未満、10℃未満は考慮されない) |
| 保管温度 | -10~60℃ (<80%RH, remove battery) |
| 商品サイズ | 187 * 95 * 55mm / 7.36 * 3.74 * 2.16インチ |
| アイテム重量 | 331g / 11.67オンス |