1. 安全情報
Before installing or operating the trimmer head, please read and understand all safety instructions. Failure to follow these instructions may result in serious injury.
- Always wear appropriate personal protective equipment (PPE), including safety glasses, gloves, long pants, and sturdy footwear, when working with string trimmers.
- Ensure the string trimmer's engine is off and the spark plug wire is disconnected before performing any installation, maintenance, or inspection.
- Keep hands, feet, and clothing away from the rotating trimmer head.
- 使用する前に、トリマーヘッドに損傷がないか確認してください。損傷がある場合は使用しないでください。
- Use only the recommended trimmer line size and type for your string trimmer and this head.
- Keep bystanders, especially children and pets, at a safe distance (at least 50 feet/15 meters) from the operating area.
2.製品オーバーview
This INGQI Trimmer Head is designed as a replacement part for various string trimmer models, offering reliable performance for your lawn and garden maintenance tasks.
2.1 パッケージ内容
- 1 x Trimmer Head (includes 1 x Roller, 1 x Hinge Pin, 1 x E-Ring Clip)
2.2 互換性
This trimmer head is compatible with a wide range of string trimmers. Please verify your specific model number against the list below:
- For Homelite String Trimmers: BCH20, BCH24, BCH32, BCH33, BCH40, BCH48, HBC20, HBC24, HBC32C, HBC33, HBC30, HBC38, HK15, HK18 (after 1/1/86), HK28, HK24 (after 1/1/86), HK25, HK30 (up to 1/86), HK33 (after 1/1/86), HK38, PBC3600, PBC3800, PBC4000, PLT3400, ST100, ST120, ST155, ST200, ST360, ST80, ST285, ST155, ST175, ST385, ST485, FK514, NBA524, PMB522, ST100, ST200, ST400, SXD20, RK521, TK518.
- For ECHO String Trimmers: GT200, GT225, GT225i, GT225L, GT225SF, GT230, GT251, GT100, GT140, GT160, GT1000, GT1100, GT2000, GT2100, GT2101, GT2102, GT2103, GT2200, GT2301, GT2400, PAS210, PAS211, PAS225, PAS225VP, PAS225VPB, PAS230, PAS231, PAS260, PAS261, PAS265, PAS266, PAS280, PAS2100, PAS2400, PAS2601, SRM 210, SRM 225, SRM 200, SRM 230, SRM 250, SRM 265, SRM 266, SRM 280, SRM 2100, SRM 2400, SRM140, SRM200, SRM202, SRM210, SRM230, SRM250, SRM251, SRM260, SRM261, SRM265, SRM266, SRM266S, SRM266T, SRM266U.
- For RedMax String Trimmers: BC220DL, BC221DL, BC300DL, BC2300DL, BK235FL, BK345FL, BK435FL, BK530DL, BC17, BC23.
- For Shiandaiwa String Trimmers: T195S, T220, T222, T230, T230s, T231, T242, T242X, T2510, T2510X, 22T, C230, C242, C2510.

図1:側面 view of the INGQI Trimmer Head Replacement with pre-installed trimmer line.
3. インストール手順
Follow these steps to replace your old trimmer head with the new INGQI Trimmer Head. Always refer to your string trimmer's original manual for specific instructions if available.
3.1 必要なツール
- Wrench (size may vary depending on your trimmer's shaft bolt)
- 手袋
3.2 ステップバイステップのインストール
- トリマーを準備します。 Ensure the string trimmer is turned off, the engine is cool, and the spark plug wire is disconnected to prevent accidental starting.
- 古いトリマーヘッドを取り外す: Locate the bolt or nut securing the old trimmer head to the trimmer shaft. Use a wrench to loosen and remove it. Some trimmers may have a locking pin to hold the shaft still while loosening. Turn the bolt/nut in the direction indicated by your trimmer's manual (often reverse thread).
- クリーンシャフト: Clean any debris or grass buildup from the trimmer shaft threads.
- Install New Trimmer Head: Align the new INGQI Trimmer Head with the trimmer shaft. The head typically screws onto the shaft. Ensure it is seated correctly.
- Secure the Head: Tighten the bolt or nut firmly. Do not overtighten, as this can damage the threads.
- インストールの確認: Gently tug on the trimmer head to ensure it is securely attached and does not wobble. Reconnect the spark plug wire.

図2: トップダウン view of the trimmer head, showing the central mounting point.
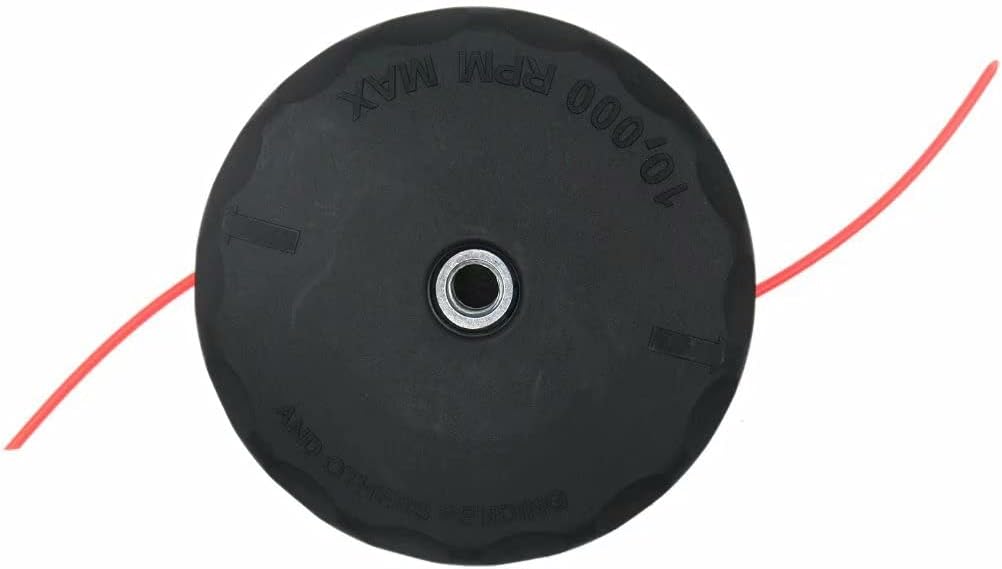
図3: 斜め上面 view of the trimmer head, illustrating its compact design.
4. 操作手順
Once the trimmer head is securely installed, you can operate your string trimmer as usual. Always follow your trimmer's manufacturer guidelines for safe operation.
4.1 一般的な操作
- Start the trimmer engine according to its instructions.
- トリマーを両手でしっかりと持ちます。
- Maintain a balanced stance and keep the trimmer head away from your body.
- Cut grass by swinging the trimmer head from side to side, using the tip of the line.
4.2 Line Feeding
This trimmer head typically uses a bump-feed mechanism. To advance the trimmer line:
- While the trimmer engine is running at full throttle, lightly tap the bottom of the trimmer head on a firm, flat surface (e.g., the ground).
- The impact will release a small amount of line. The trimmer's line-cutting blade (if equipped) will trim the line to the correct length.
- Repeat as necessary when the line becomes too short.

Figure 4: The trimmer head in use on a string trimmer, demonstrating its function during grass trimming.
5. メンテナンス
定期的なメンテナンスにより、トリマー ヘッドの寿命が長くなり、最適なパフォーマンスが確保されます。
5.1 トリマーラインの交換
When the trimmer line runs out, it needs to be replaced. This head is designed for easy line reloading.
- Turn Off Trimmer: トリマーがオフになっており、スパークプラグワイヤーが取り外されていることを確認します。
- Remove Old Line (if any): If there are short pieces of line remaining, pull them out.
- Align Head: Look for arrows or indicators on the trimmer head and align them. This typically aligns the internal spool with the line exit holes.
- Insert New Line: Take a length of new trimmer line (refer to your trimmer's manual for recommended diameter and length). Push one end of the line through one of the line exit holes and continue pushing it through the head until it comes out the opposite exit hole.
- Equalize Line: Pull the line through until an equal length extends from both sides of the trimmer head.
- 風線: Rotate the bump knob or the top of the trimmer head in the direction indicated by an arrow (usually clockwise) to wind the line into the spool. Keep winding until only about 6-8 inches of line extend from each side.
- 確認する: Ensure the line is securely wound and both ends are extended.

図 5: 拡大図 view of the trimmer head's side, highlighting the line exit points and the internal mechanism for line feeding.
5.2 清掃と保管
- After each use, clean the trimmer head to remove grass clippings, dirt, and debris. This prevents buildup that can hinder performance.
- Use a stiff brush or cloth. Avoid using harsh chemicals that could damage the plastic.
- トリマーヘッドは、直射日光や極端な温度を避け、清潔で乾燥した場所に保管してください。
6。 トラブルシューティング
トリマー ヘッドに問題が発生した場合は、次の一般的な問題と解決策を参照してください。
- ラインが送られない:
- Check if the line is tangled or jammed inside the spool.
- Ensure the line is not fused together due to heat. Rewind the line if necessary.
- Verify that the line is of the correct diameter and type for the head.
- Trimmer Head Not Spinning:
- Ensure the trimmer head is securely attached to the shaft.
- Check for any obstructions (e.g., thick grass, debris) preventing rotation.
- Inspect the trimmer's drive shaft and clutch for issues (refer to your trimmer's manual).
- 過度の振動:
- Ensure the trimmer line is evenly distributed and cut to equal lengths on both sides.
- Check if the trimmer head is properly balanced and securely mounted.
7. 仕様
- 交換される部品番号: 99944200907, 99944200902, 78890-30000, 78890-11000, 78890-18001
- 材料: 耐久性のあるプラスチックと金属コンポーネント
- タイプ: Bump-feed trimmer head
8. 保証とサポート
This product is manufactured to high-quality standards. If you encounter any issues or have questions regarding the installation, operation, or compatibility of your INGQI Trimmer Head Replacement, please contact the seller directly through your purchase platform. Provide your order details for prompt assistance. All parts are tested and quality controlled prior to shipment.


