1. はじめに
This manual provides comprehensive instructions for the Makeid L1 Label Maker Machine. The Makeid L1 is a portable and rechargeable label maker designed for organizing office, home, and school environments. It is compatible with 9mm, 12mm, and 16mm waterproof tapes and utilizes Bluetooth connectivity for easy operation via a mobile application.

Figure 1: Makeid L1 Label Maker Machine and included label tapes. The compact, light green device is shown alongside four rolls of white and green label tape.
2. 仕様
| 特徴 | 詳細 |
|---|---|
| ブランド | マケイド |
| モデル名 | L1 |
| 製品寸法 | 2 x 2 x 1インチ(約5.08 x 5.08 x 2.54 cm) |
| 接続技術 | ブルートゥース |
| 印刷技術 | サーマル |
| プリンタ出力 | モノクロ |
| 最大印刷速度 | 20 Pages per second (Monochrome) |
| 特集 | ポータブル |
| 対応テープ幅 | 9mm、12mm、16mm |
| DPI Resolutions | 203 DPI, 300 DPI (selectable via app) |
3. セットアップ
3.1. 開梱と初期充電
Upon unboxing your Makeid L1 Label Maker, ensure all components are present: the label maker unit, and included label tapes. It is recommended to fully charge the device before first use. Connect the provided charging cable to the label maker and a suitable USB power source. The charging indicator light will confirm charging status.
3.2. ラベルテープを取り付ける
- Open the tape compartment cover on the Makeid L1 device.
- Insert a Makeid compatible label tape roll into the compartment, ensuring the tape feeds correctly through the output slot.
- テープ収納部のカバーをしっかり閉めてください。
3.3. アプリのインストールとBluetooth接続
Makeid L1 は専用のモバイル アプリケーションを介して操作します。
- アプリをダウンロード: 検索する "Makeid" in your device's app store (compatible with Android and iOS).
- Bluetoothをオンにします: Ensure Bluetooth is enabled on your mobile device. If prompted by the app, allow Bluetooth access.
- モデルを選択: Open the Makeid app. In the app interface, select "L1" as your label maker model.
- 接続を確認: The app will search for available devices. Select your Makeid L1 (e.g., "L1S22H01804") from the list and confirm the connection. A successful connection will be indicated in the app.

Figure 2: Step-by-step guide for Bluetooth connection. This image illustrates the process within the Makeid app: turning on Bluetooth, selecting the L1 model, and confirming the device connection.
4. 操作手順
4.1. Designing Labels
The Makeid app provides extensive customization options for your labels.
- テキスト入力: 希望するテキストを入力してください。
- フォントの選択: Choose from multiple font styles available in the app.
- Symbols & Emojis: Add numbers, symbols, and emojis to enhance your labels.
- Icons & Graphics: Incorporate various icons and graphics for specific purposes (e.g., kitchen, office, personal items).
- ラベルの種類: The app supports both continuous labels and die-cut labels, allowing for versatile classification.
- 解像度の選択: You can select between 203 DPI and 300 DPI printing resolutions within the app for desired print quality.

Figure 3: Versatile printing options within the Makeid app. The image displays the mobile app interface with various font selections, icons, and examples of customized labels for different uses.

Figure 4: Dual printing capabilities for continuous and die-cut labels. This image shows examples of labels printed in different sizes and formats, including continuous labels for files and die-cut labels for containers.
4.2. ラベルの印刷
Once your label design is complete in the app, initiate the printing process.
- Review アプリ画面でラベルのデザインを確認できます。
- Press the "Print" button within the app.
- The label maker will print the label using thermal technology, ensuring clear and precise output.
- After the label emerges, use the built-in cutter by pressing the designated button to cleanly cut the tape.
4.3. Applying Labels
Makeid labels feature an easy-peel-and-stick design.
- Carefully peel the backing from the printed label.
- Apply the label to a clean, dry surface.
- The labels are waterproof, fade-resistant, and designed to leave no sticky residue upon removal.

Figure 5: Easy-to-use backing removal. This image shows a hand peeling the protective backing from a printed label, highlighting the ease of application.

Figure 6: Efficient labeling for various applications. This image displays several practical uses for the labels, including personal item identification, business product pricing, kitchen organization, and cautionary notes.

Figure 7: Organizing with Makeid labels. This image illustrates how the labels can be used to manage household items, inspire crafts, organize food storage, and label files, reducing clutter.
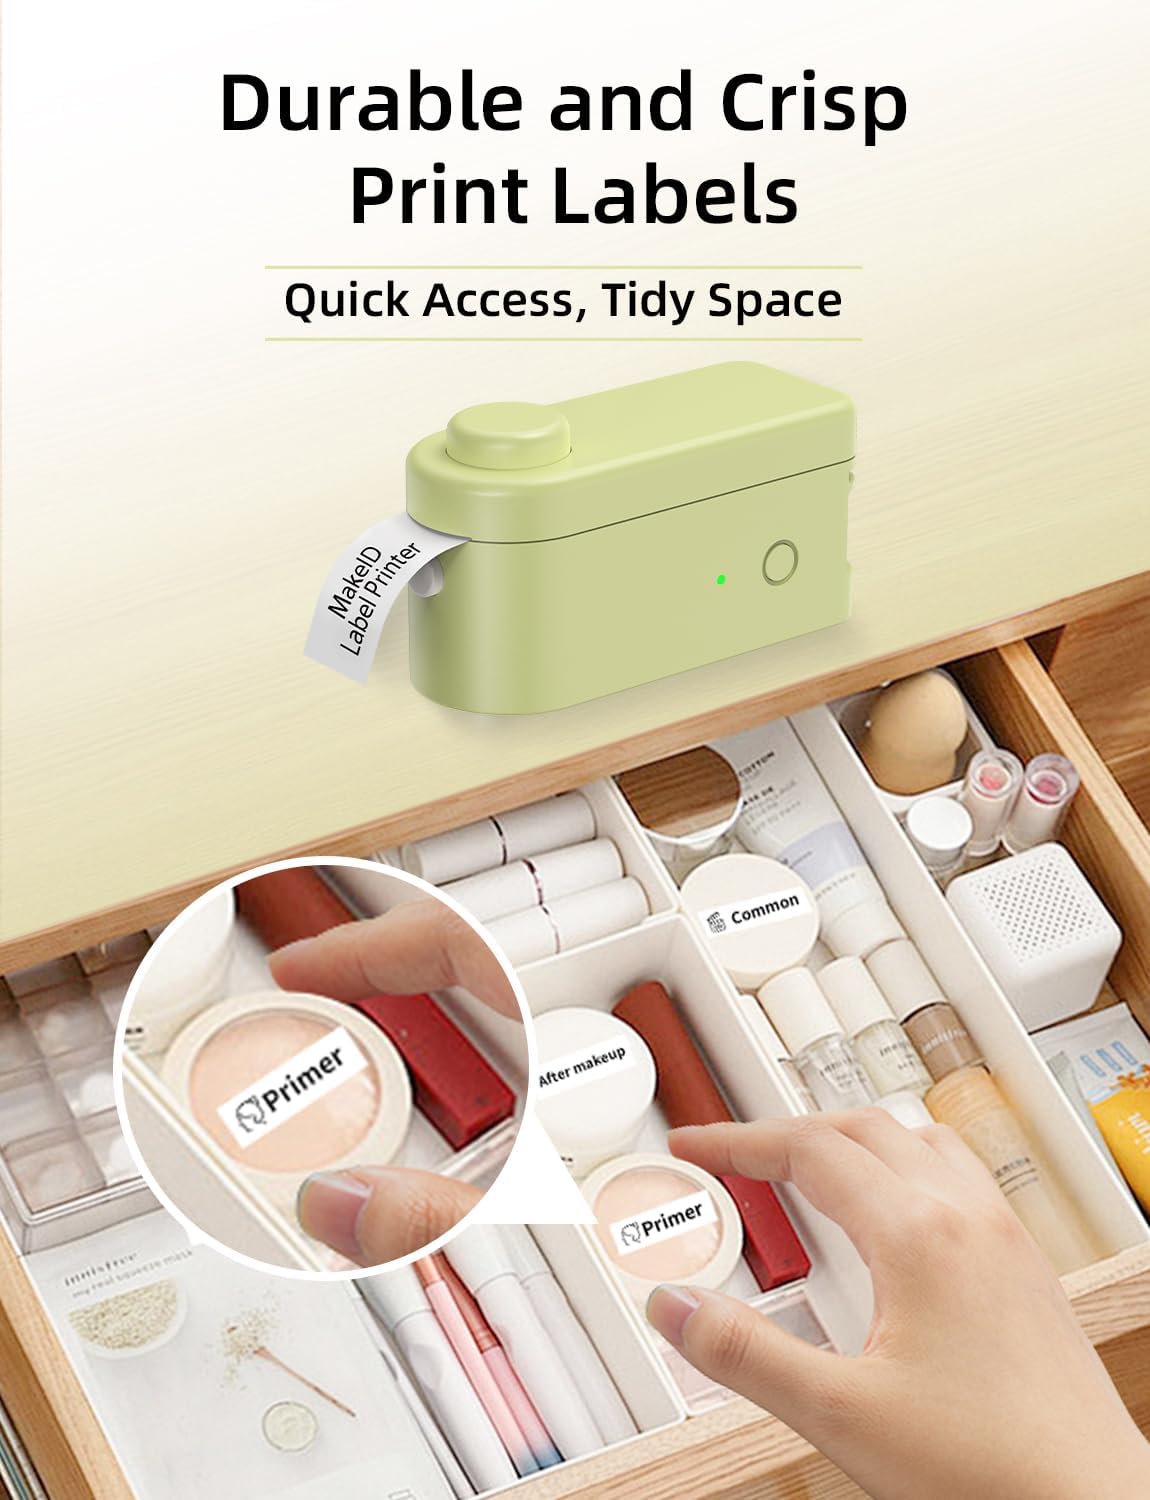
Figure 8: Durable and crisp print labels for organization. This image shows the label maker in action, printing a label that is then applied to an item within a drawer organizer, demonstrating clear and lasting print quality.
5. メンテナンス
5.1. プリントヘッドのクリーニング
最適な印刷品質を確保するには、サーマルプリントヘッドを定期的にクリーニングしてください。
- Turn off the label maker and disconnect it from any power source.
- テープコンパートメントを開きます。
- プリントヘッドを柔らかく糸くずの出ない布で優しく拭いてください。ampened with isopropyl alcohol. Do not use abrasive materials or harsh chemicals.
- コンパートメントを閉じて使用を再開する前に、プリントヘッドが完全に乾くまでお待ちください。
5.2. Tape Care and Storage
Store label tapes in a cool, dry place away from direct sunlight and extreme temperatures to preserve their quality and adhesive properties.

Figure 9: Properties of Makeid 6-layer laminated tape. This diagram illustrates the layered structure of the tape and highlights its key features: waterproof, scratch-resistant, anti-fading, and oil-proof, ensuring durability.
6。 トラブルシューティング
| 問題 | 考えられる原因 | 解決 |
|---|---|---|
| Bluetooth経由で接続されていないデバイス | Bluetooth is off on mobile device; App permissions not granted; Device not selected in app. | Ensure Bluetooth is on. Grant necessary app permissions. Re-select the L1 model in the app and confirm connection. |
| 印刷品質が悪い / 色あせた印刷 | Low battery; Dirty print head; Incorrect tape installation; Expired tape. | Charge the device. Clean the print head (refer to Maintenance section). Reinstall tape correctly. Replace with new tape if old. |
| テープが送られない、または詰まる | Tape incorrectly installed; Obstruction in tape path. | Open compartment and re-install tape, ensuring it's properly seated. Check for any debris and remove carefully. |
| Label not cutting cleanly | カッターの刃が鈍っているか、詰まっている。 | Ensure the label has fully exited the printer before pressing the cut button. If issues persist, contact customer support. |
7. 保証情報
Please refer to the warranty card included with your product packaging for specific warranty terms and conditions. Typically, Makeid products come with a limited warranty covering manufacturing defects from the date of purchase. Keep your proof of purchase for warranty claims.
8. カスタマーサポート
For further assistance, technical support, or inquiries regarding your Makeid L1 Label Maker, please visit the official Makeid website or contact their customer service department. You can often find FAQs and troubleshooting guides on the manufacturer's support page.
メーカー: マケイド
オンラインストア: AmazonのMakeidストア


