1. はじめに
This manual provides detailed instructions for the setup, operation, and maintenance of your Tera Model 9200 Omnidirectional Barcode Scanner. Please read this manual thoroughly before using the product to ensure proper functionality and to extend its lifespan.
2 製品の特徴
- Omnidirectional 360° Scanning: Enables quick and efficient scanning from any angle.
- 1D and 2D Code Compatibility: Supports a wide range of barcode types, including UPC, EAN8, EAN13, Code128, Code39, Codabar (NW-7), Interleaved 2 of 5, and QR Codes.
- LCD Screen Code Support: Capable of reading barcodes directly from digital displays such as smartphone screens.
- Automatic Detection Function: The scanner automatically initiates scanning when a barcode is presented within its field of view, eliminating the need for manual triggers.
- 高速読み取り: Designed for ultra-fast barcode acquisition, improving operational efficiency.
- プラグアンドプレイUSB接続: Easy setup with no driver installation required for most operating systems.
- Durable Acrylic Screen: The scanning window is made of high-transparency, durable acrylic, offering resistance against drops and impacts. A protective film is applied to new products to prevent scratches during transit; please remove it before use.
3. パッケージ内容
商品をお受け取りになりましたら、パッケージの内容をご確認ください。不足品や破損品がございましたら、カスタマーサポートまでご連絡ください。
- Tera Model 9200 Omnidirectional Barcode Scanner
- USBケーブル
- ユーザーマニュアル(このドキュメント)
- Configuration QR Code Sheet
4. セットアップ
- 開梱: スキャナーをパッケージから慎重に取り出します。
- 保護フィルムを剥がします: Peel off the protective film from the scanner's acrylic window. This film is for transit protection and may have minor scratches. Removing it will reveal the clear, durable scanning surface.
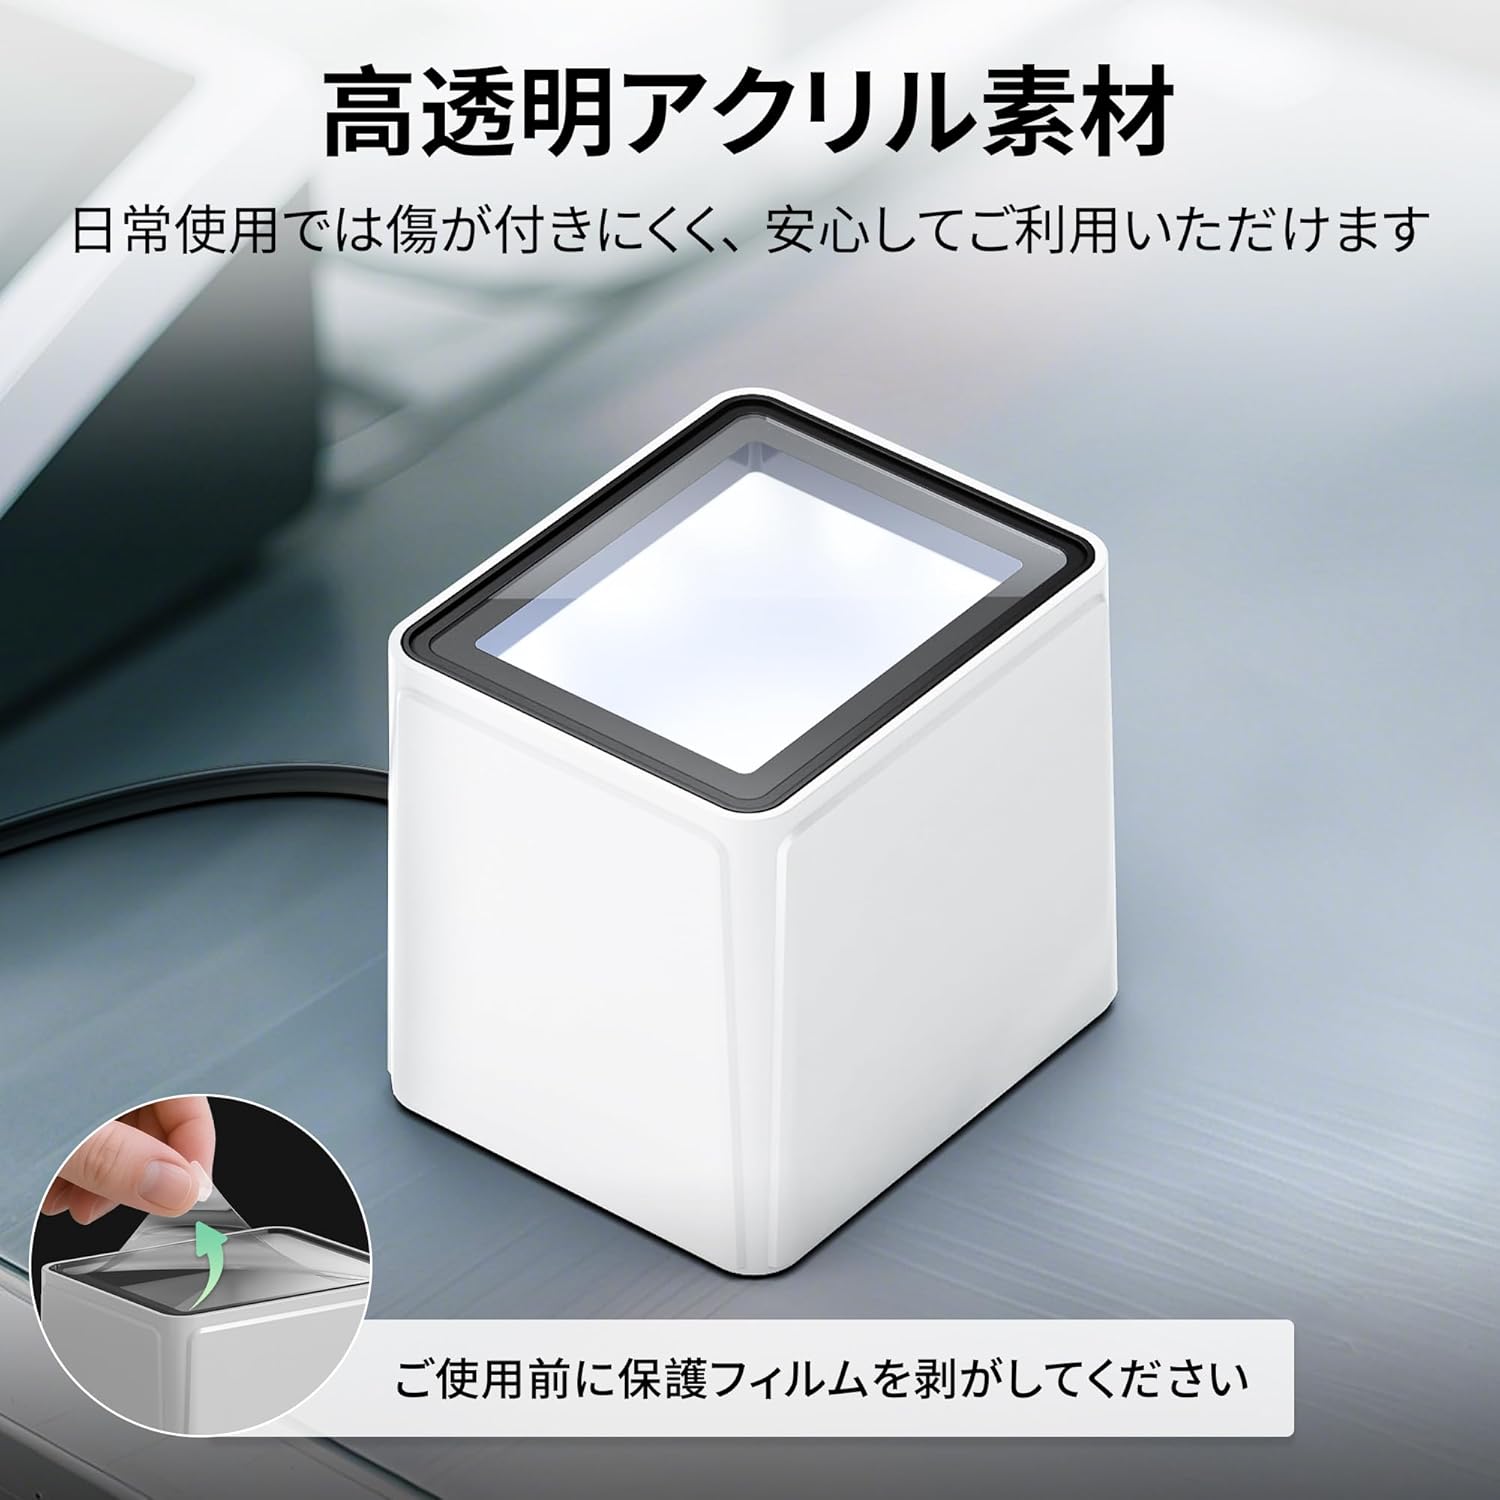
Image: The Tera Model 9200 barcode scanner, showing a protective film being removed from its top scanning surface. This film should be removed before first use.
- USBケーブルを接続します: Insert the USB cable into the scanner's port and connect the other end to an available USB port on your computer (PC, Laptop, POS system).
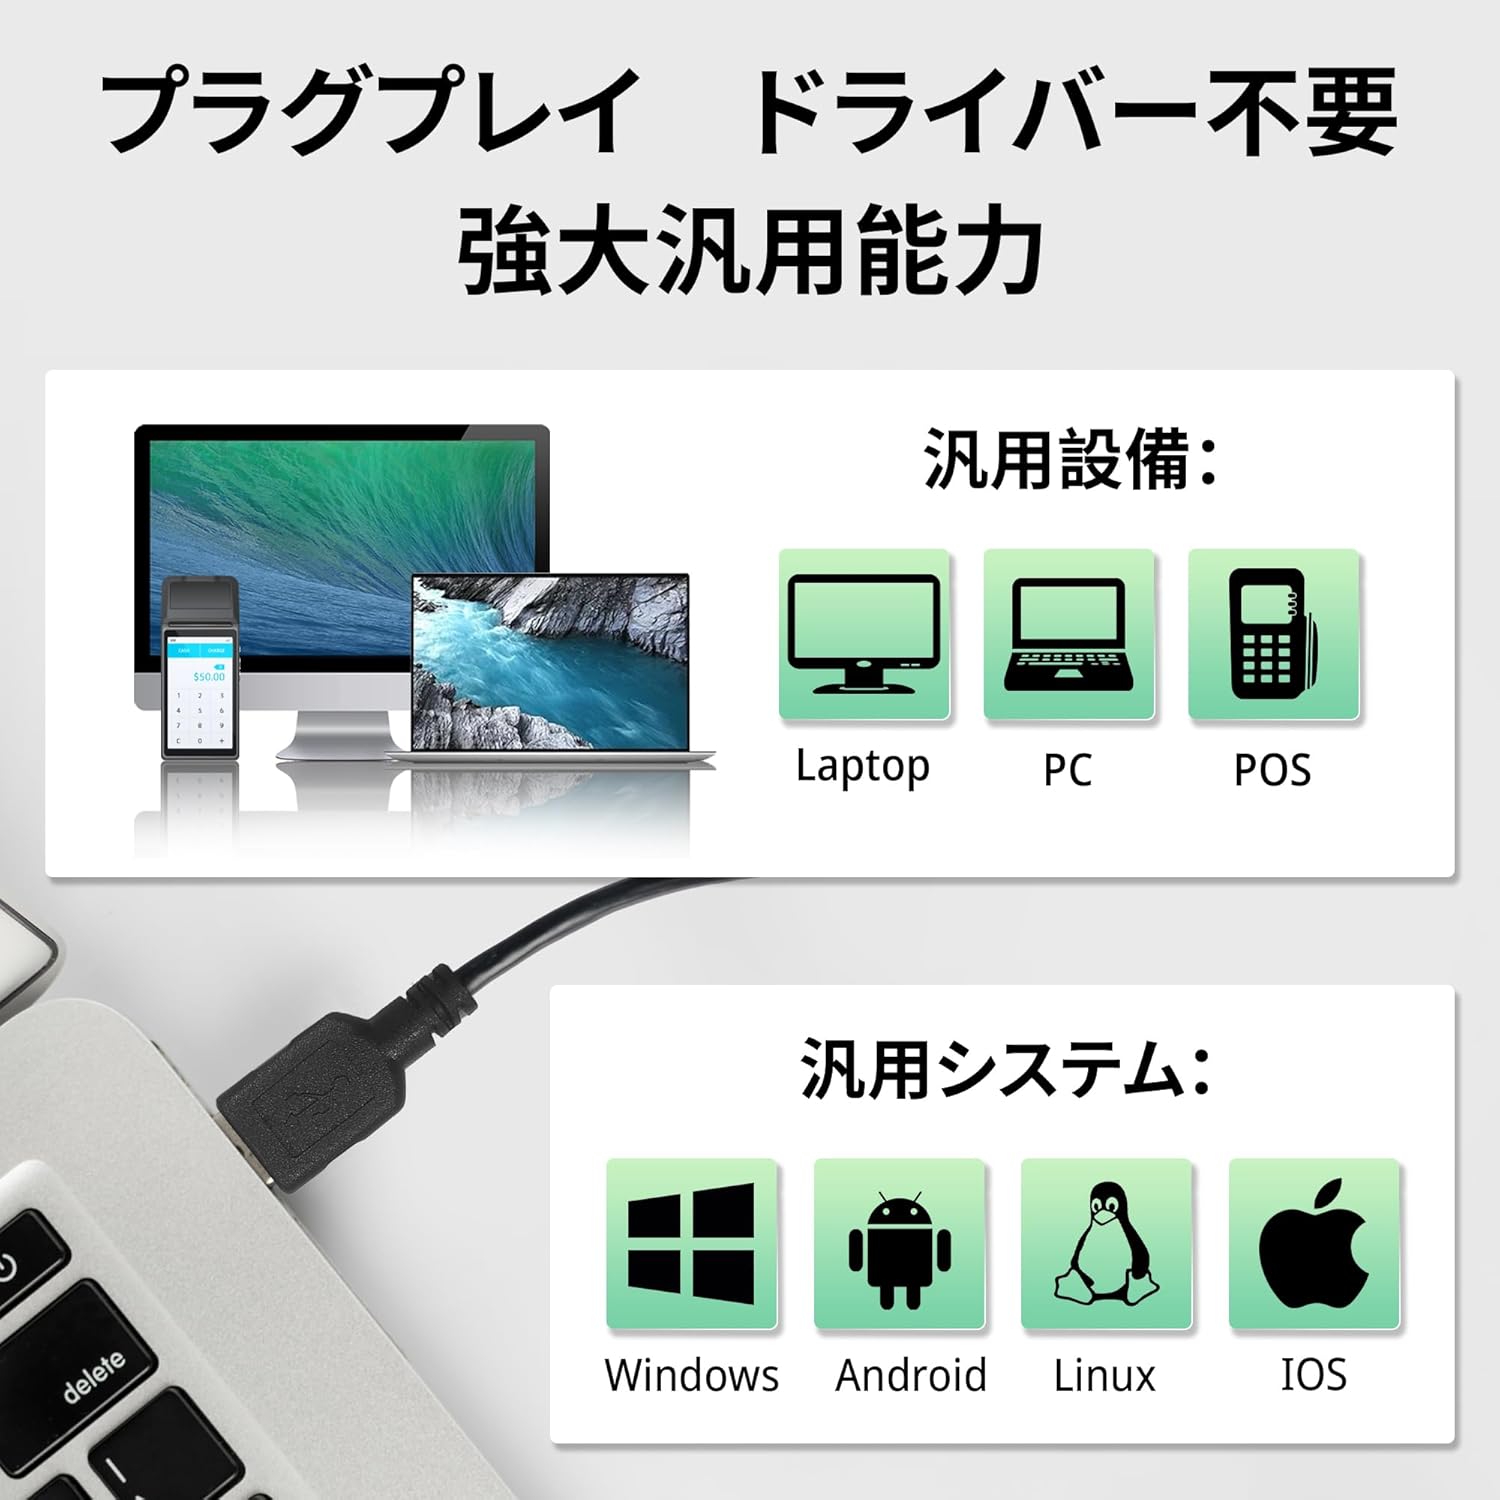
Image: The Tera Model 9200 barcode scanner connected to a laptop via a USB cable. The image also illustrates compatibility with various devices (Laptops, PCs, POS systems) and operating systems (Windows, Android, Linux, iOS).
- システム認識: The scanner is plug-and-play. Your operating system (Windows, Android, Linux, iOS) should automatically recognize the device without requiring additional driver installation.
5. 操作手順
The Tera Model 9200 scanner offers three primary scanning modes to suit different operational needs.
5.1つのスキャンモード

Image: Illustration of the three scanning modes: Single Read Mode (scans once per barcode), Continuous Scan Mode (constantly scanning for rapid input), and Automatic Detection Scan Mode (scans when a barcode is presented).
- 単一読み取りモード: In this mode, the scanner reads each barcode only once. This is suitable for applications where duplicate scans are undesirable.
- 連続スキャンモード: The scanner remains in a constant scanning state, rapidly reacting to and capturing barcodes as they pass through its field. Ideal for high-volume scanning environments.
- Automatic Detection Scan Mode: The scanner automatically detects changes in its surroundings (e.g., a barcode being presented) and triggers a scan. This mode conserves power and provides hands-free operation.
To switch between these modes, refer to the provided Configuration QR Code Sheet and scan the appropriate QR code.
5.2 バーコードのスキャン
- スキャナーがコンピューターに接続され、電源がオンになっていることを確認します。
- Open the application where you want the scanned data to appear (e.g., a word processor, spreadsheet, or POS software).
- Present the barcode to the scanner's window. The omnidirectional design allows for scanning from various angles.

Image: A visual representation of the Tera Model 9200 barcode scanner's 360-degree omnidirectional scanning capability, showing barcodes being read from multiple orientations.
- The scanner will emit a beep (if not muted) and an LED flash to indicate a successful scan. The barcode data will then be transmitted to your computer.
- The scanner supports reading both printed barcodes and barcodes displayed on LCD screens.
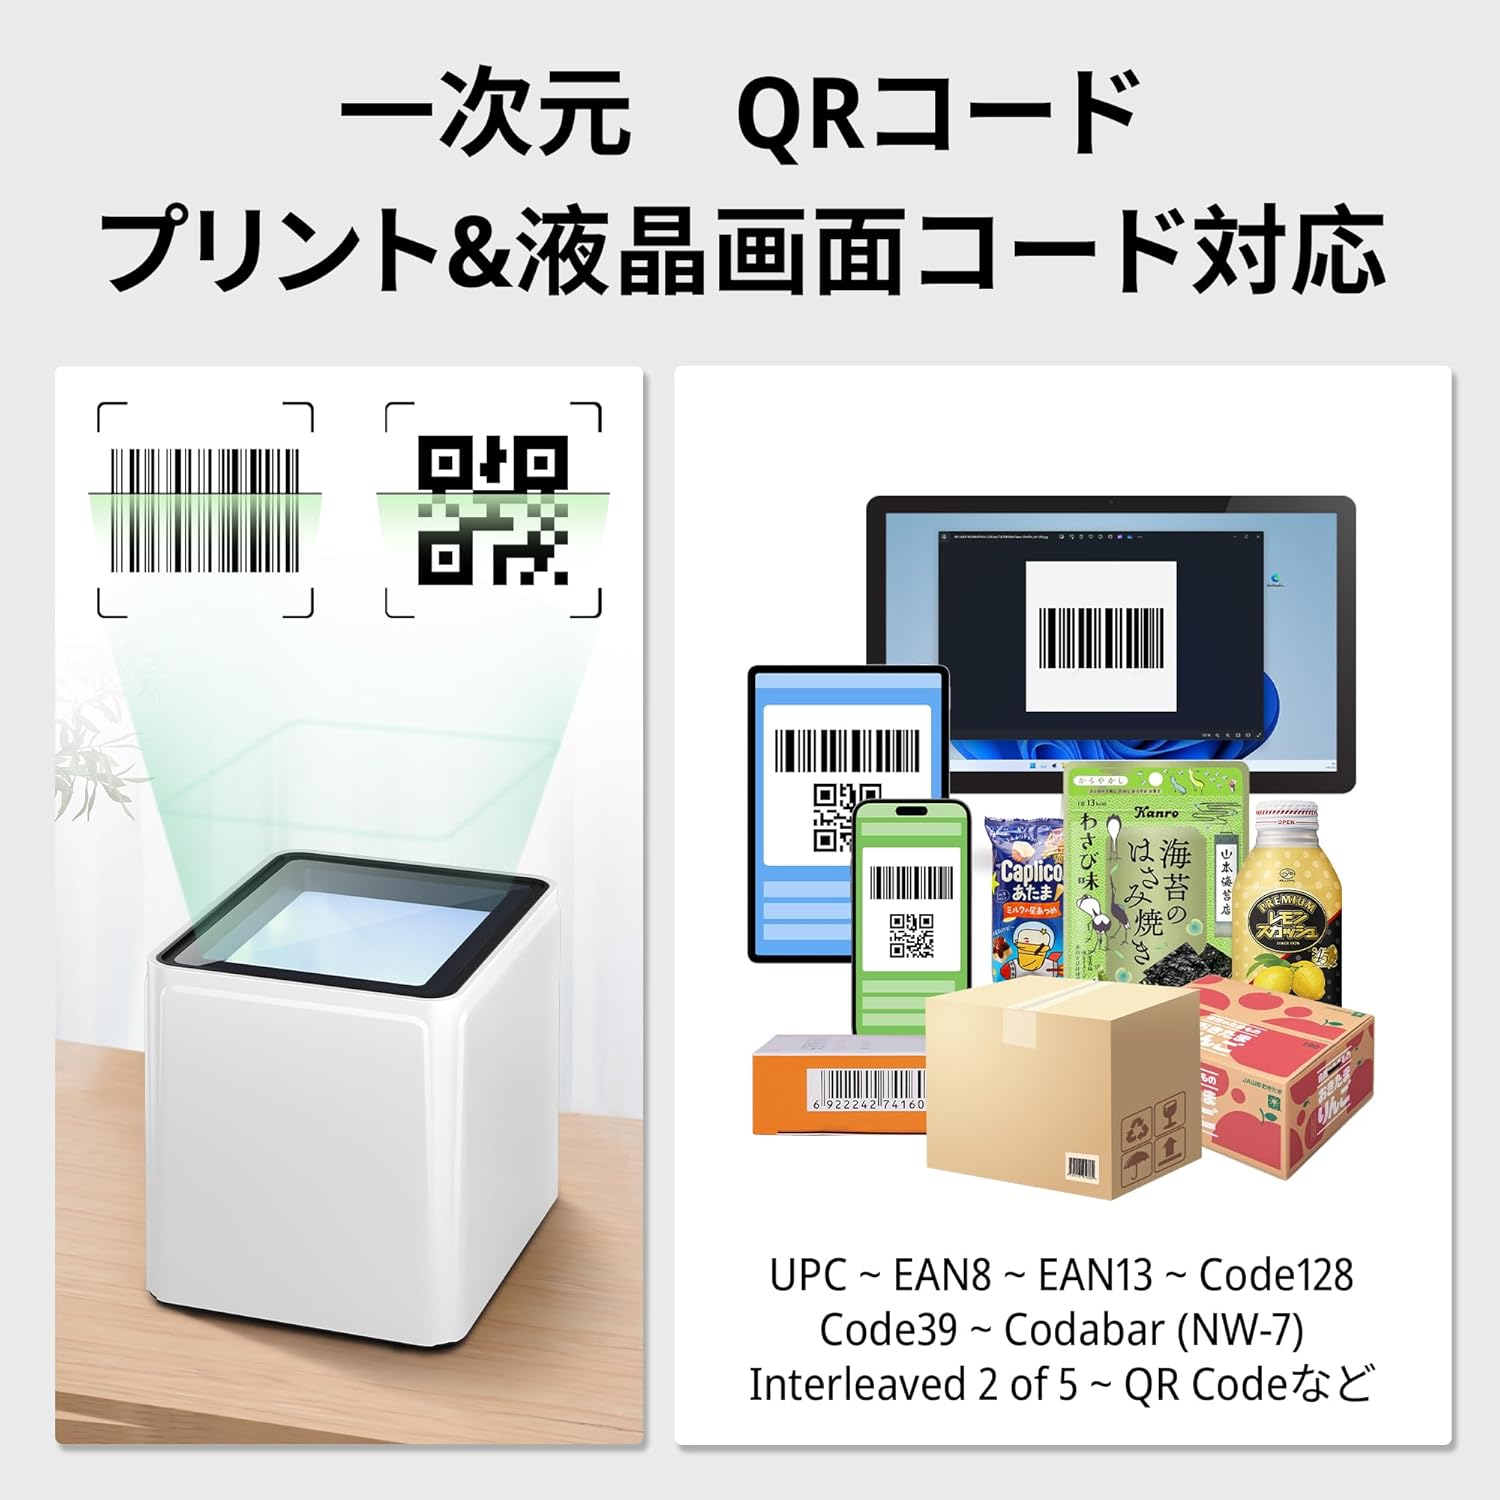
Image: The Tera Model 9200 barcode scanner demonstrating its ability to read both traditional printed 1D barcodes and 2D QR codes from a smartphone's LCD screen.
6. 設定
The Tera Model 9200 can be configured using the special QR codes provided on the Configuration QR Code Sheet. Scan these codes to change settings such as terminator characters, volume, and keyboard layout.
6.1 Terminator Settings
Terminator characters are added to the end of scanned data. Common options include Carriage Return (CR), Tab, or Carriage Return + Line Feed (CR+LF). You can also choose no terminator.
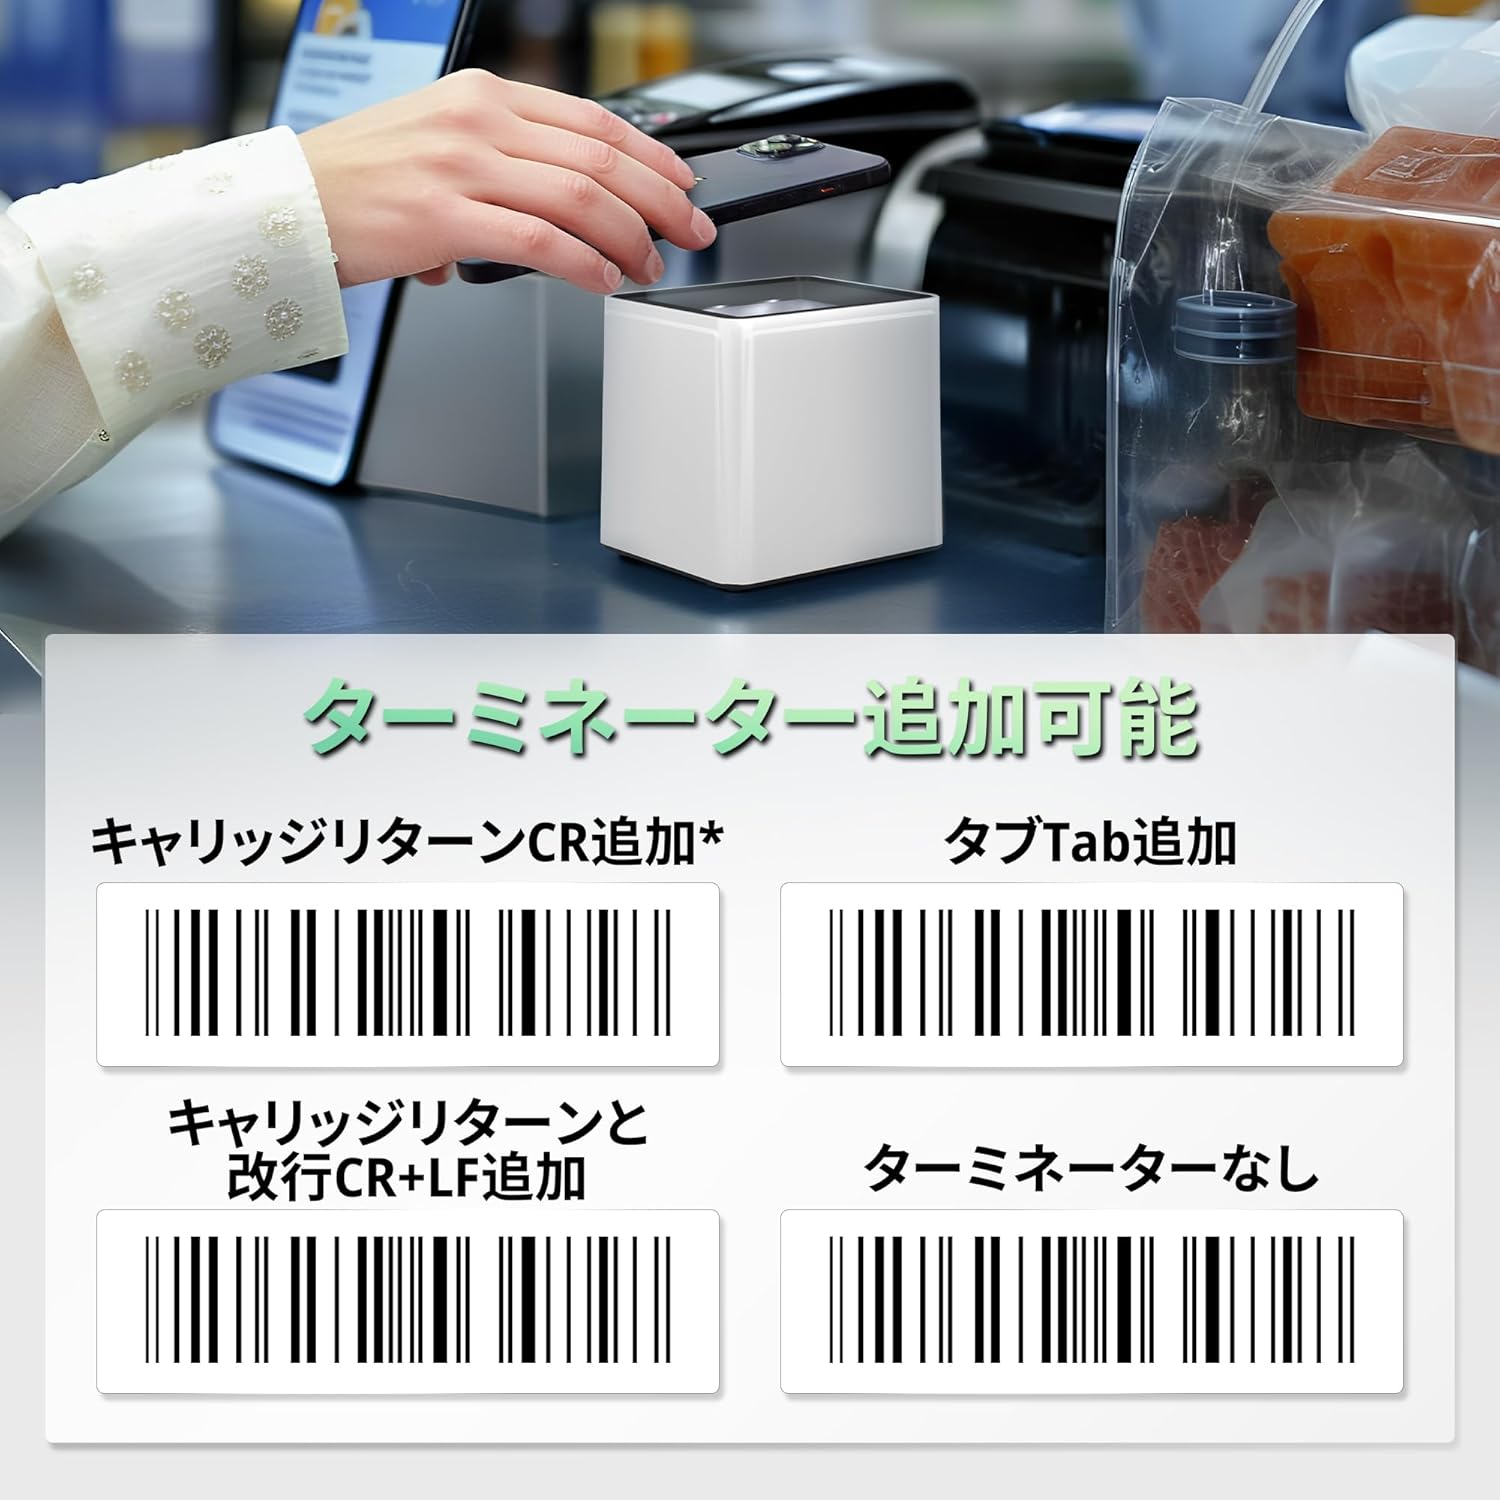
Image: A sheet displaying QR codes for various terminator settings: "Add Carriage Return (CR)", "Add Tab", "Add Carriage Return + Line Feed (CR+LF)", and "No Terminator". Scan the desired QR code to apply the setting.
6.2 音量調整
The scanner's beep volume can be adjusted or turned off. Refer to the Configuration QR Code Sheet for specific volume level QR codes (Off, Level 1-5).

Image: A graphic illustrating the volume adjustment options for the scanner, ranging from "Off" to "Level 5".
6.3 Keyboard Layout and Other Settings
The Configuration QR Code Sheet also contains QR codes for other advanced settings, such as keyboard layout (e.g., US, UK, Japanese) and data encoding formats (e.g., GBC, UTF-8, Unicode). Always keep this sheet in a safe place for future reference.
7. メンテナンス
- クリーニング: スキャナの外側は、柔らかく乾いた布で拭いてください。スキャナの窓は、柔らかく糸くずの出ない布で軽く拭いてください。ampened with water or a mild, non-abrasive cleaner. Avoid harsh chemicals or abrasive materials that could scratch the acrylic surface.
- ストレージ: スキャナーは、直射日光や極端な温度を避け、涼しく乾燥した場所に保管してください。
- 保護フィルム: While the acrylic screen is durable, consider applying a screen protector if the scanner is used in an environment prone to heavy wear or scratches.
8。 トラブルシューティング
| 問題 | 考えられる原因 | 解決 |
|---|---|---|
| スキャナーの電源が入らない、または応答しません。 | USB ケーブルが正しく接続されていないか、電源に問題があります。 | USBケーブルがスキャナーとコンピュータの両方にしっかりと接続されていることを確認してください。別のUSBポートまたはコンピュータでお試しください。 |
| バーコードがスキャンされません。 | Barcode damaged, poor print quality, incorrect scan mode, or scanner window is dirty. |
|
| スキャンしたデータが正しくないか文字化けしています。 | Incorrect keyboard layout or data encoding settings. | Refer to the Configuration QR Code Sheet to set the correct keyboard layout (e.g., US, UK, Japanese) and data encoding format for your system. |
| スキャナーはビープ音を鳴らしますが、データは表示されません。 | Application not in focus or incorrect input method. | Ensure the cursor is active in the target application. The scanner acts as a keyboard input device; ensure no other input methods are interfering. |
If the problem persists after trying these solutions, please contact Tera customer support.
9. 仕様
| 特徴 | 詳細 |
|---|---|
| ブランド | テラ |
| モデル番号 | 9200 |
| 接続技術 | USBケーブル |
| スキャン角度 | 360 degrees (Omnidirectional) |
| サポートされているバーコードの種類 | 1D (e.g., UPC, EAN, Code128, Code39) and 2D (e.g., QR Code) |
| 自動検出 | はい |
| 画面の互換性 | Reads barcodes from LCD screens |
| パッケージ寸法 | 16.2 x 10.6 x 10.1 cm |
| アイテム重量 | 310グラム |
| 電池が必要 | いいえ |
10. 保証とサポート
For warranty information, technical support, or service inquiries, please refer to the contact details provided with your purchase documentation or visit the official Tera webサイトでご確認ください。保証請求の際は購入証明として領収書を保管してください。
Tera Official Store: Visit Tera Store on Amazon.co.jp


