導入
Thank you for choosing the RESTMO Sprinkler Timer with Brass Inlet. This programmable water timer is designed to simplify your garden watering tasks, providing automatic control for garden hoses, outdoor faucets, drip irrigation systems, and lawn watering. Please read this manual carefully before use to ensure proper installation, operation, and maintenance.
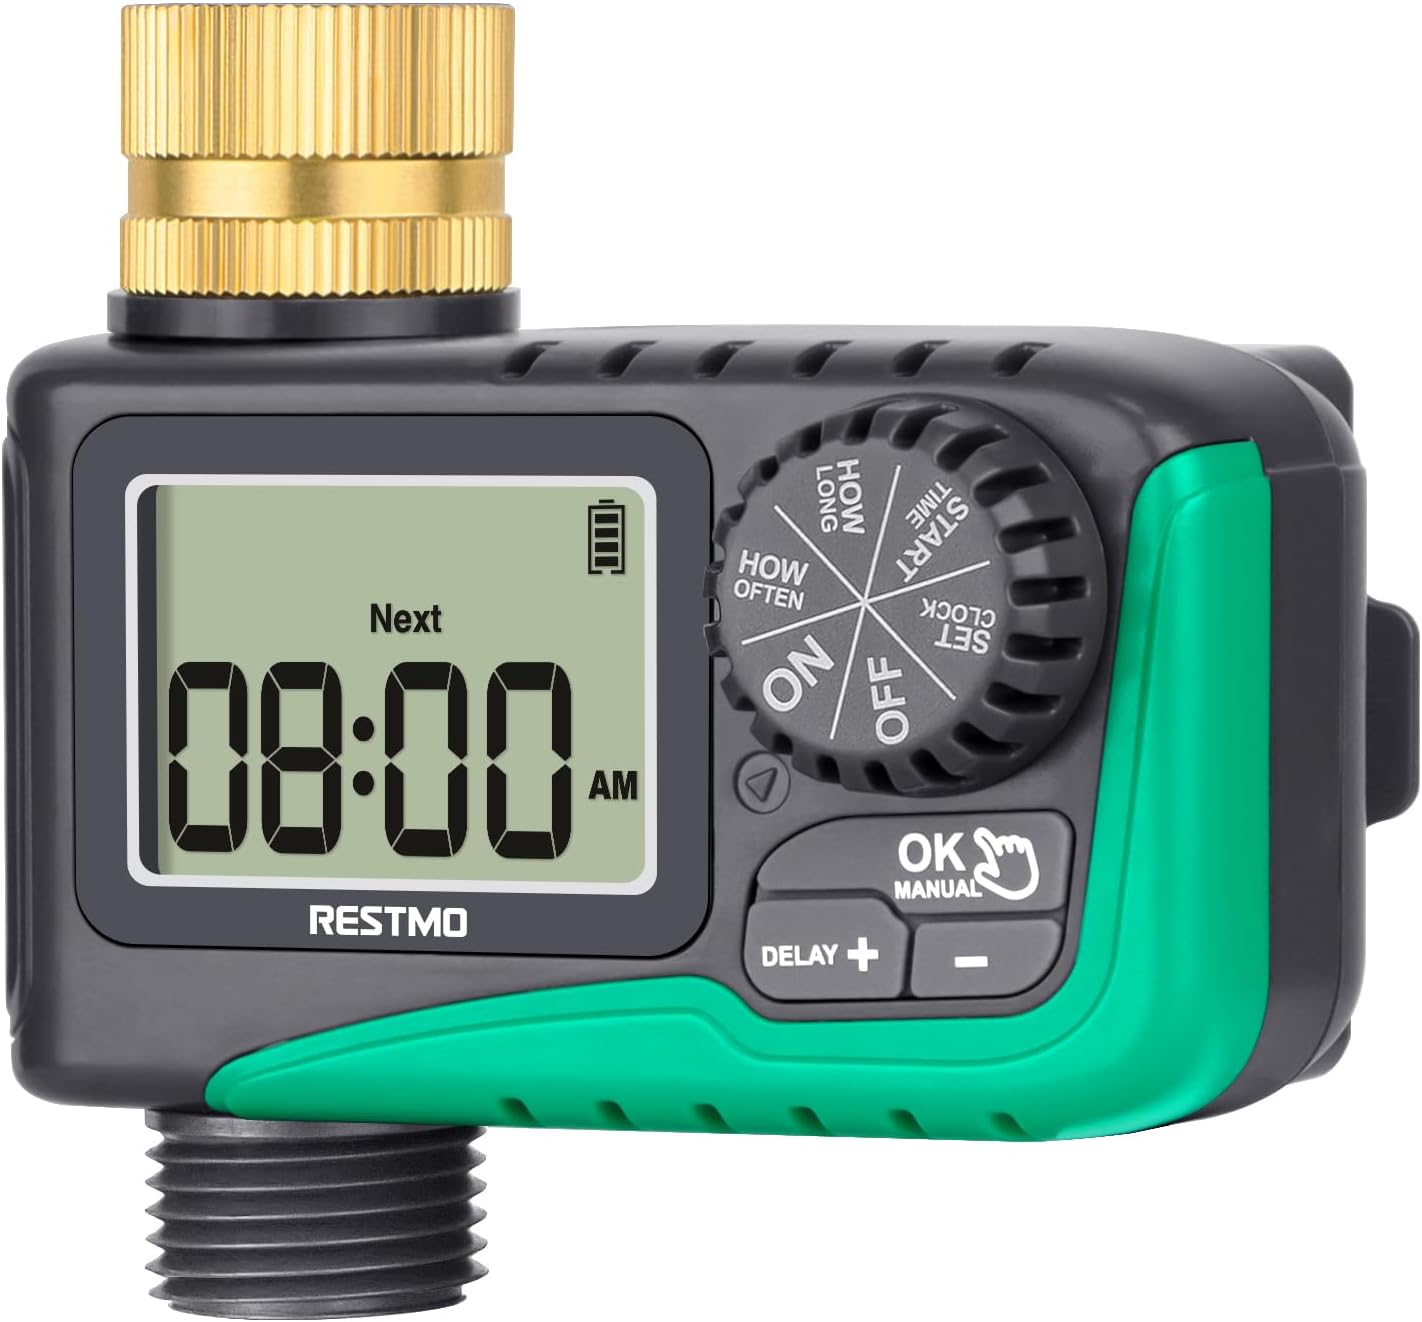
画像: 正面 view of the RESTMO Sprinkler Timer, showing the digital display and control dial.
安全情報
- Do not immerse the timer in water. It is IP54 waterproof, meaning it is protected against dust and splashing water, but not full immersion.
- Use only 2 x AAA 1.5V alkaline batteries (not included). Do not mix old and new batteries or different types of batteries.
- タイマーを長期間使用しない場合は、液漏れを防ぐため電池を取り外してください。
- Protect the timer from freezing temperatures. Disconnect and store indoors during winter.
- Ensure all connections are tight to prevent leaks. Teflon tape is recommended for a secure seal.
製品終了view
The RESTMO Sprinkler Timer features a user-friendly design with a large LCD screen and intuitive controls.
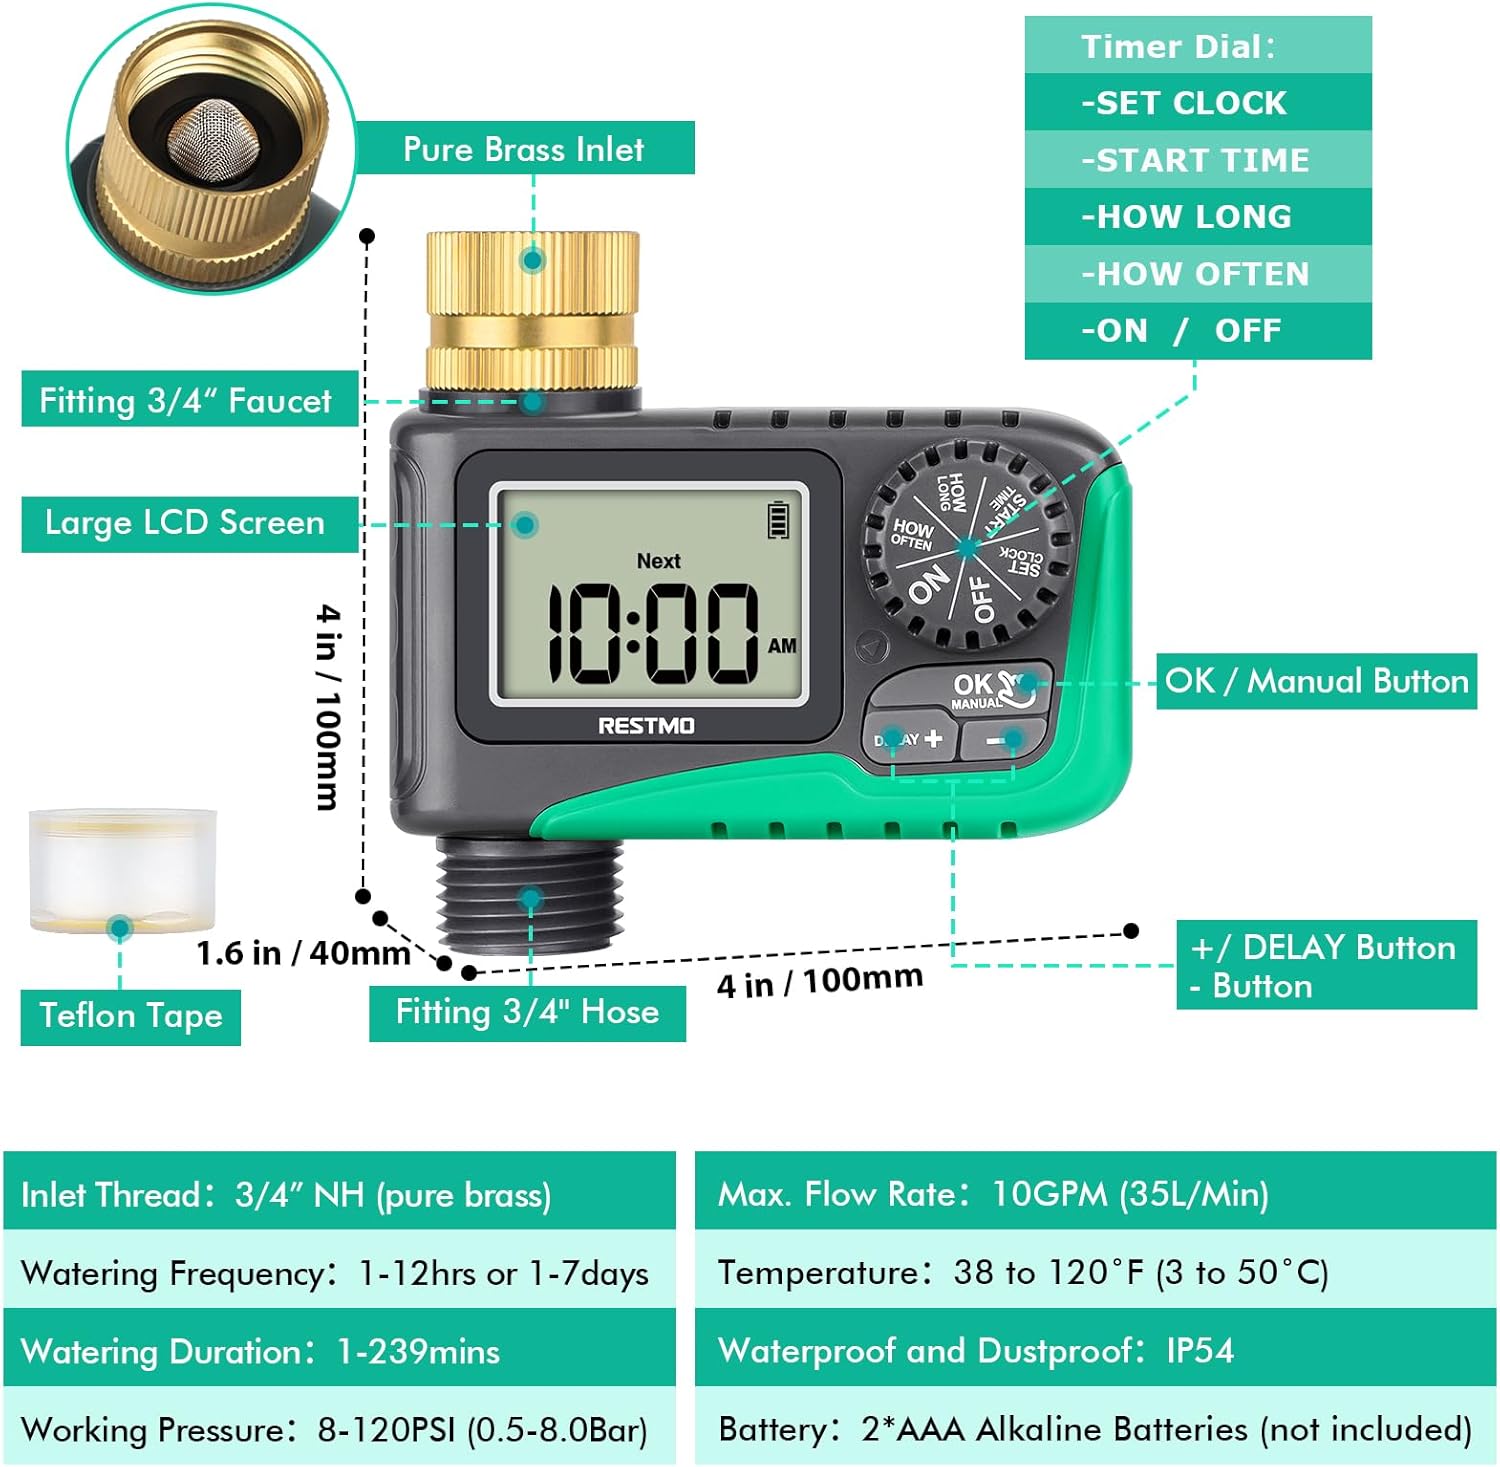
Image: Diagram illustrating the various components of the sprinkler timer, including the brass inlet, LCD screen, control dial, and buttons.
主要コンポーネント:
- Pure Brass Inlet Thread: 360-degree rotatable for easy installation, with a built-in metal filter washer to prevent debris.
- 大型液晶画面: Displays current time, next watering time, and battery status.
- タイマーダイヤル: Used to select different settings (SET CLOCK, START TIME, HOW LONG, HOW OFTEN, ON, OFF).
- OK/手動ボタン: Confirms settings and activates manual watering.
- +/- ボタン: Adjust values and activate rain delay.
- Waterproof Battery Compartment: Houses 2 x AAA batteries.

画像: クローズアップ view of the 360-degree swivel pure brass inlet, highlighting its design and durability.
セットアップとインストール
Follow these steps to install your RESTMO Sprinkler Timer:
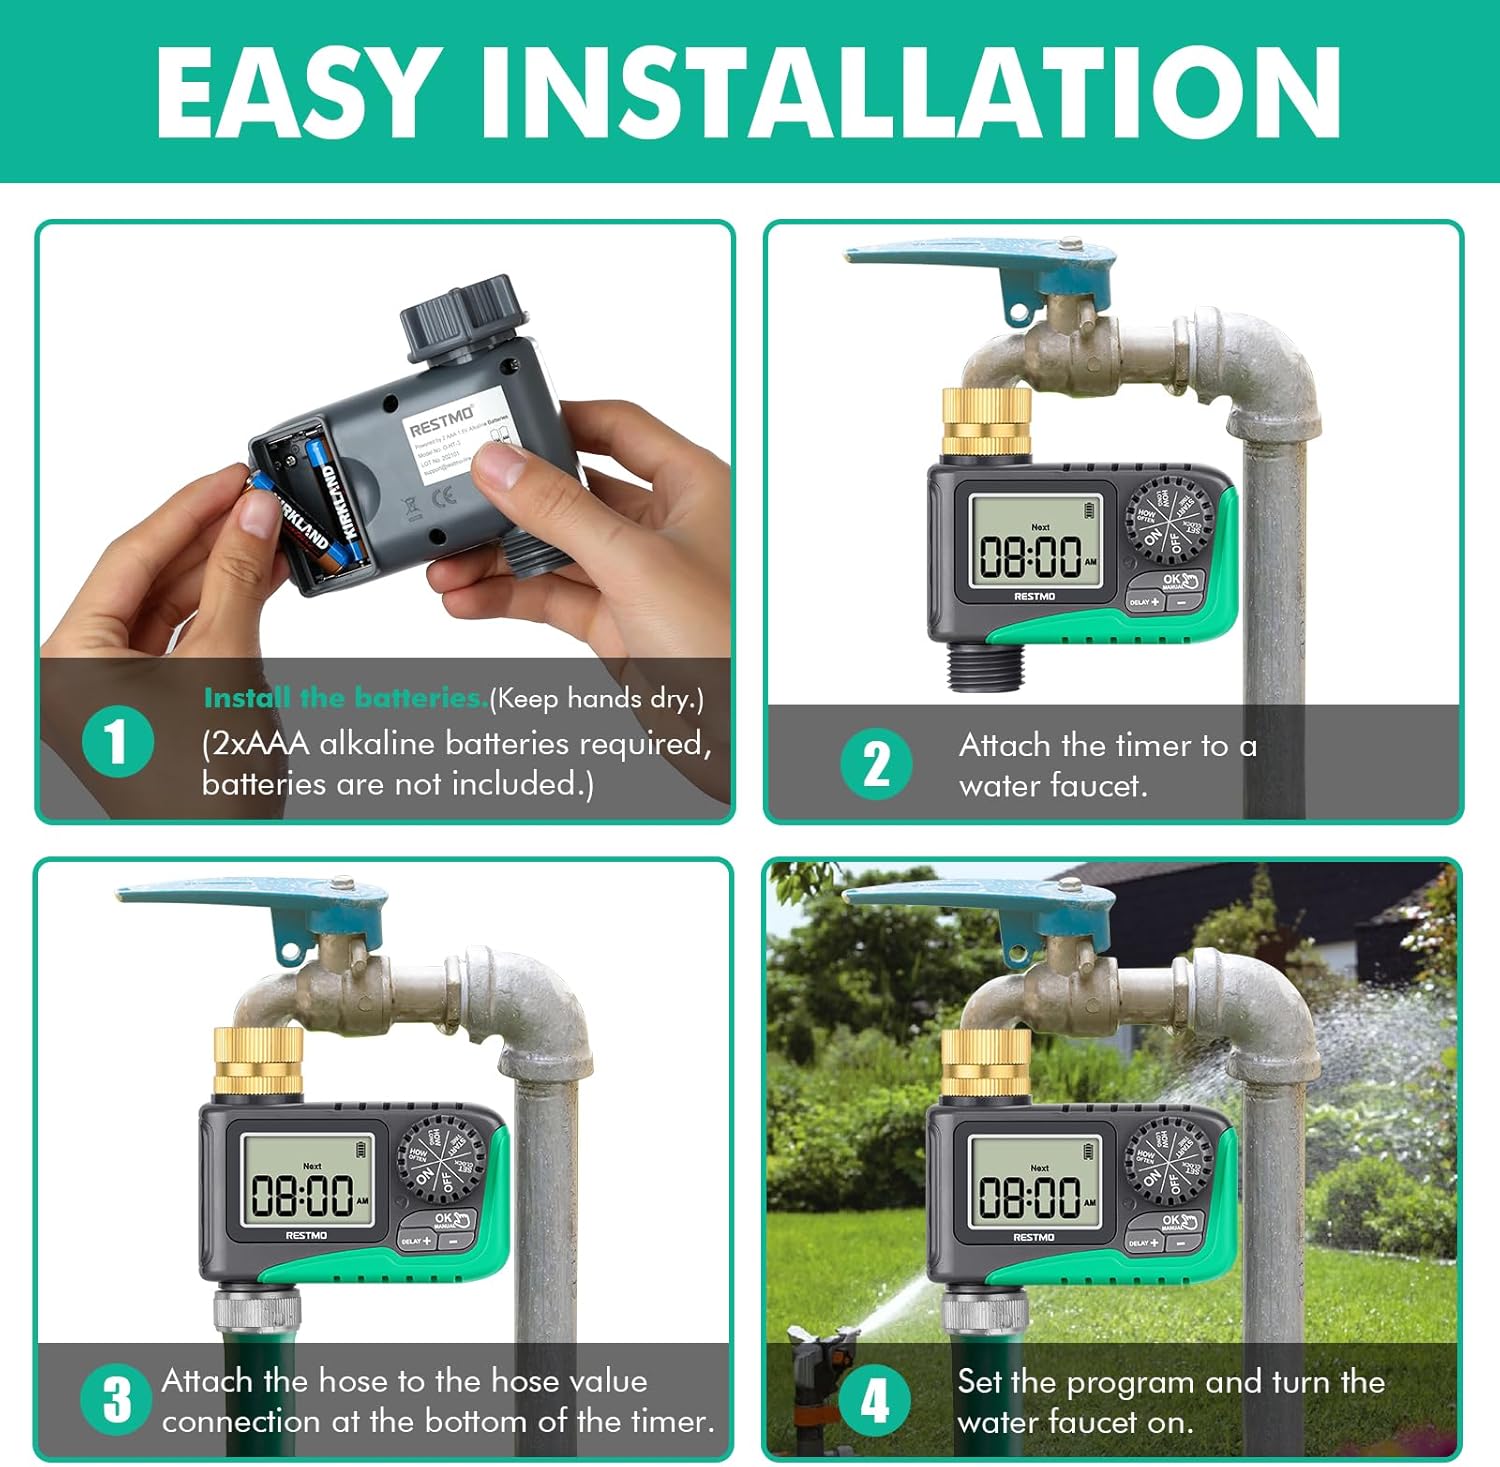
Image: Four-panel diagram showing the installation process: installing batteries, attaching to faucet, attaching hose, and setting the program.
- バッテリーの取り付け: Open the waterproof battery compartment. Insert 2 x AAA 1.5V alkaline batteries (not included), ensuring correct polarity. Close the compartment securely. Keep your hands dry during this process.
- 蛇口に取り付ける: Screw the timer's brass inlet onto your 3/4" outdoor faucet. Hand-tighten firmly. For a leak-proof connection, wrap Teflon tape around the faucet threads before attaching the timer.
- ホースを取り付ける: Connect your garden hose to the 3/4" hose connection at the bottom of the timer. Ensure it is tightly secured.
- Turn on Faucet: Open your faucet fully. The timer is designed to operate under water pressure.
操作手順
1.時計を合わせる
This step sets the current time on the timer.
- ダイヤルを回して 時計を設定する.
- を押す +/- 現在の時間と分を設定するボタン。
- を押す OK button to switch between hour and minute setup.
- Turn the dial to any other position to save changes.
2. Set Start Time
This sets when your automatic watering program will begin.
- ダイヤルを回して 開始時間.
- を押す +/- 希望の開始時間を設定するボタン。
- を押す OK button to switch between hour and minute setup.
- Turn the dial to any other position to save changes.
3. Set Watering Duration (How Long)
This sets how long the watering will last for each cycle.
- ダイヤルを回して どのぐらいの間.
- を押す +/- buttons to set the watering duration from 1 minute to 239 minutes.
- を押す OK button to switch between hour and minute setup.
- Turn the dial to any other position to save changes.
4. Set Watering Frequency (How Often)
This sets how often the watering cycles will repeat.
- ダイヤルを回して どのくらいの頻度で.
- を押す +/- buttons to set the watering frequency: from 1 hour to 12 hours, or from 1 day to 7 days.
- を押す OK button to switch between hour and day/hour setup.
- Turn the dial to any other position to save changes.
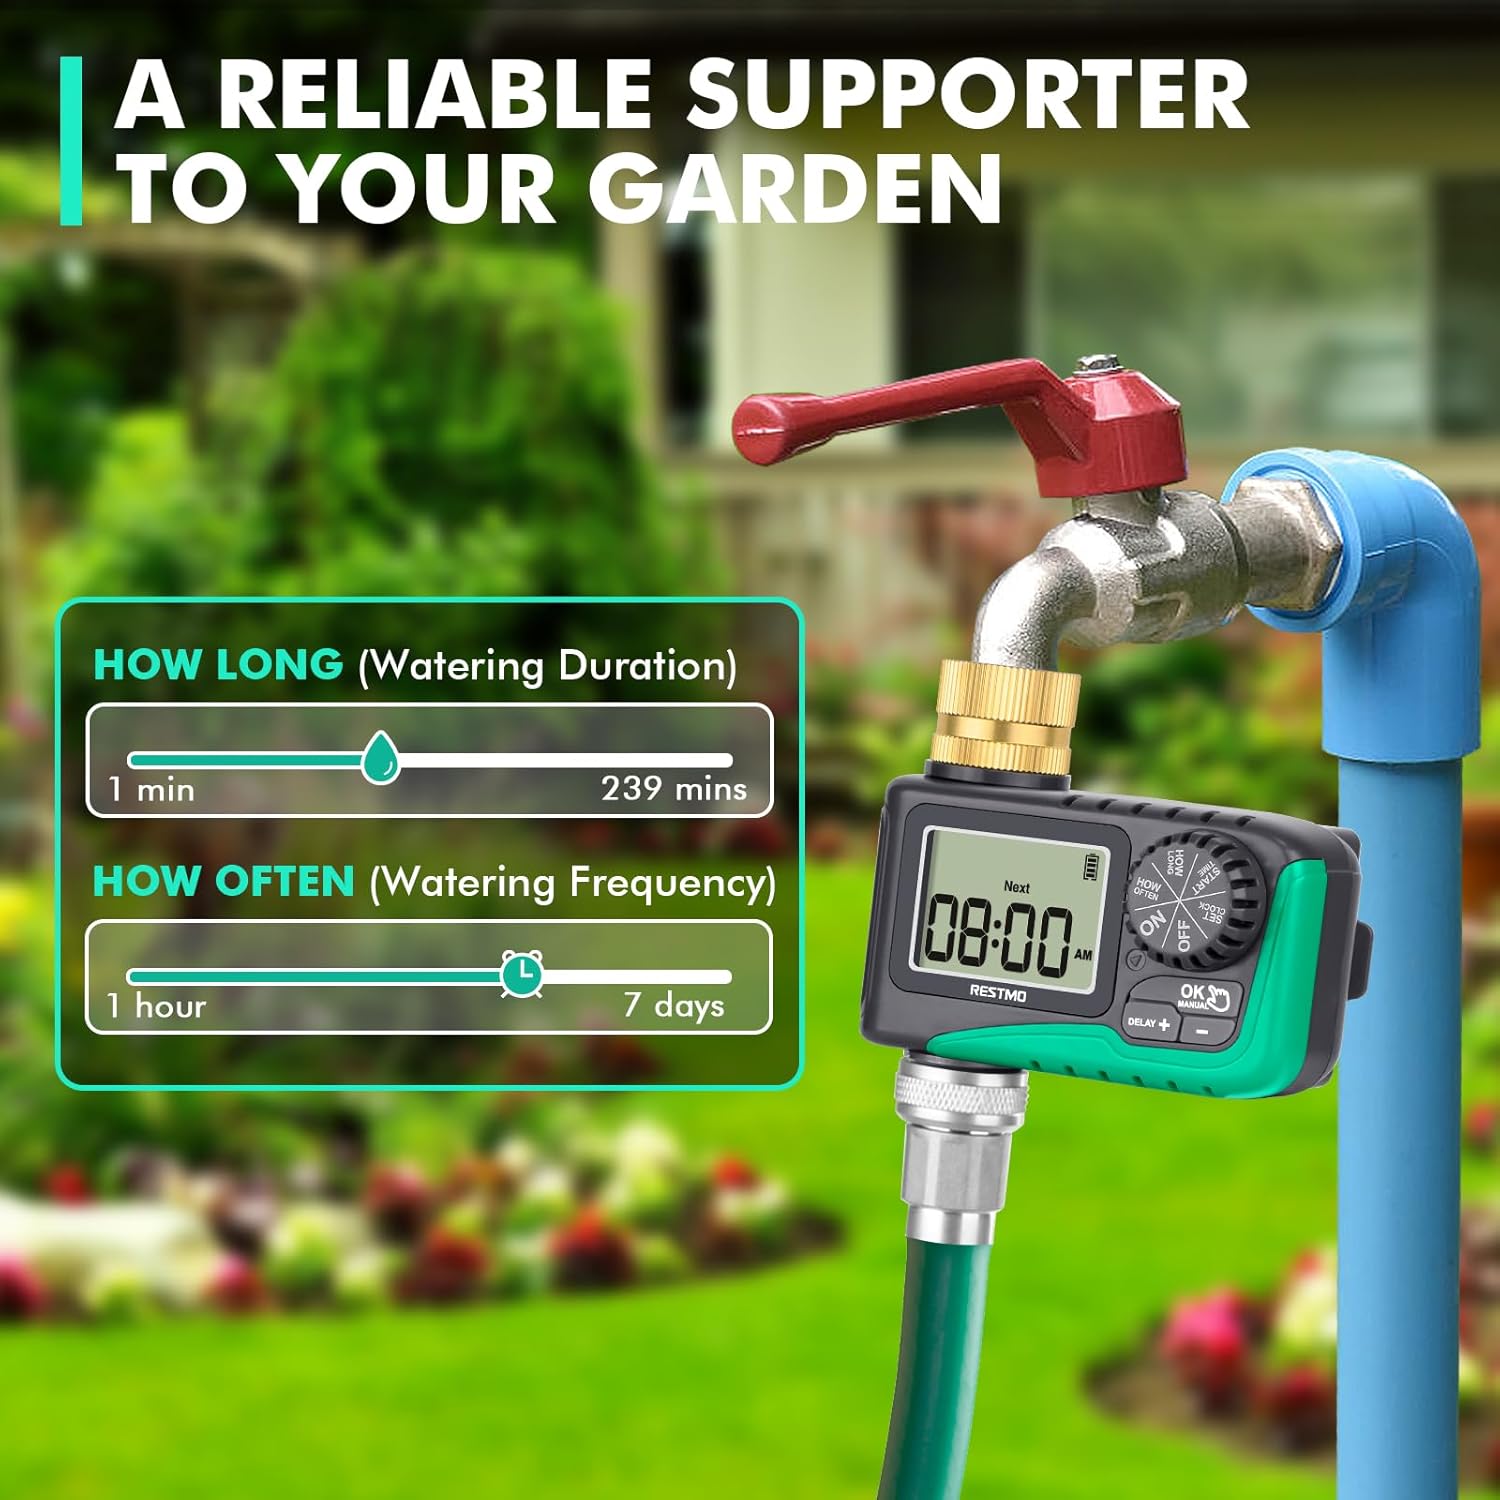
Image: Visual guide showing the range for 'How Long' (1-239 mins) and 'How Often' (1hr-7 days) settings.
5. Automatic Watering
Once programmed, turn the dial to ON to activate the automatic watering schedule. The LCD screen will display the remaining time of the current watering program when watering is active. When watering is off, the screen will flash between the next watering start time and the current time.

Image: Depicts the timer set to 'ON' for automatic watering, with a visual representation of the watering duration and frequency settings.
6. 手動散水
プログラムされたスケジュールに影響を与えずに手動で散水するには:
- With the dial at ON、長押し OK/手動 ボタンを3秒間押し続けます。
- を押す +/- buttons to select the desired manual watering duration (1 to 239 minutes).
- プレス OK to switch between hour and minute. The setup flashes 3 times and manual watering will automatically start.
- To cancel manual watering, turn the dial to オフ そしてまた ON.

Image: Shows how to activate manual watering and adjust its duration, with a visual of water flowing from the hose.
7. 雨天延期
雨やその他の理由で散水スケジュールを一時的に停止するには:
- With the dial at ON、長押し DELAY + ボタンを3秒間押し続けます。
- を押す +/- buttons to select a delay of 12, 24, 48, or 72 hours.
- プレス OK or wait for 3 seconds to start the rain delay.
- To cancel rain delay, turn the dial to オフ そしてまた ON.

Image: Illustrates the rain delay function with options for 12, 24, 48, and 72-hour delays.
8. Stop Watering
To completely stop all watering programs:
- ダイヤルを回して オフ. The timer will keep off until the dial is turned to ON また。

Image: Shows the timer dial set to 'OFF', indicating that watering has stopped.
メンテナンス
- クリーニング: Periodically check the brass inlet filter washer for debris and clean it to ensure optimal water flow.
- バッテリー交換: When the battery indicator on the LCD screen shows low power, replace the batteries promptly to avoid interruption of watering schedules.
- 冬季: Before the first frost, disconnect the timer from the faucet and hose. Remove the batteries and store the timer indoors in a dry, protected area to prevent damage from freezing.
トラブルシューティング
ここでは、いくつかの一般的な問題とその解決策を示します。
| 問題 | 考えられる原因 | 解決 |
|---|---|---|
| タイマーがオンにならない/LCDが表示されない | 電池が切れているか、正しく取り付けられていない。 | Replace batteries with new 2 x AAA alkaline batteries, ensuring correct polarity. |
| Water not flowing/Timer not watering | Faucet is off; low water pressure; clogged filter; incorrect program settings; valve stuck. | Ensure faucet is fully open. Check water pressure (10-120 psi required). Clean the inlet filter. Verify program settings (start time, duration, frequency). Reset the valves (see video below). |
| 接続部からの水漏れ | Loose connections; missing/damaged washer; insufficient Teflon tape. | Tighten all connections. Check for and replace any missing or damaged rubber washers. Apply more Teflon tape to faucet threads. |
| Timer not following schedule | Incorrect clock setting; program not activated (dial not on ON); rain delay active. | Re-set the current time. Ensure the dial is set to ON. Check if rain delay is active and cancel if necessary. |
How to Reset the Valves:
If the timer's internal valves are not functioning correctly, you may need to reset them. This process involves cycling water through the timer manually to clear any obstructions or reset the mechanism.
Video: A step-by-step guide on how to reset the internal valves of the RESTMO Sprinkler Timer to ensure proper water flow.
仕様
- モデル: O-HT
- 材料: 真鍮、金属
- 入口スレッド: 3/4" NH (Pure Brass)
- Hose Fitting: 3/4インチ
- 水やり時間: 1~239分
- 水やり頻度: 1-12 hours or 1-7 days
- 雨天延期オプション: 12/24/48/72時間
- マックス。 流量: 10 GPM(35 L/分)
- 作動圧力: 10 ~ 120 PSI (0.5 ~ 8.0 バール)
- 温度範囲: 38~120°F(3~50°C)
- 防水等級: IP54
- 電源: 単4アルカリ電池2本(別売)
- 製品寸法: 奥行き3.94インチ x 幅3.94インチ x 高さ1.57インチ
- 商品の重量: 5オンス
保証とサポート
RESTMO products are designed for durability and performance. For warranty information or technical support, please refer to the contact details provided with your product packaging or visit the official Restmo web当サイトでは、ご質問やご不明な点がございましたら、カスタマーサービスチームがお手伝いいたします。


