1. はじめに
This manual provides essential instructions for the safe and efficient operation, setup, maintenance, and troubleshooting of your OMTech 50W Fiber Laser Engraver with LightBurn and Rotary Axis. Please read this manual thoroughly before operating the machine.

Figure 1: OMTech 50W Fiber Laser Engraver with LightBurn and Rotary Axis.
2. 安全情報
WARNING: This is a Class 4 Laser product. Direct exposure to the laser beam can cause severe eye and skin damage. Always wear appropriate laser safety goggles during operation. Never look directly into the laser beam or its reflections.
- 彫刻中に発生する蒸気や煙を拡散させるために、作業エリアの換気が十分であることを確認してください。
- 可燃性物質をレーザー彫刻機から遠ざけてください。
- 無人で機械を操作しないでください。
- 緊急停止ボタンとその場所をよく理解しておいてください。
- 機械の接地が適切であることを確認してください。

Figure 2: Safety controls including Emergency Stop, Scan Head key, and Fiber Laser button.
3. パッケージ内容
Upon receiving your OMTech 50W Fiber Laser Engraver, carefully unpack and verify all components against the following list:
- Main Tower (Laser Source and Control Unit)
- Laser Arm (Galvanometer Scanning Head)
- 作業台
- 回転軸
- 電源ケーブル
- USBケーブル
- フットペダルスイッチ
- 安全ゴーグル
- Steel Ruler
- 六角レンチ
- Keys for Scan Head
- USB Flash Drive (containing software and drivers)
- 取扱説明書
ビデオ1: 開封と終了view of components for a similar OMTech Fiber Laser Engraver.
4. セットアップ
4.1 組み立て
- パッケージからすべてのコンポーネントを慎重に取り出します。
- Place the main tower and work table on a stable, level surface.
- Attach the laser arm to the support column using the provided bolts and hex wrenches. Ensure the lens is positioned above the work area.
- Connect the cable from the laser arm to the main tower.
- Connect the USB cable from the main tower to your computer.
- Connect the foot pedal switch to the main tower.
- Connect the power cord to the main tower and a standard 110V power outlet.
Video 2: Detailed steps on how to set up your OMTech fiber laser engraver.
4.2 初回電源投入とソフトウェアのインストール
- Turn on the machine's emergency stop switch (red button) by rotating it clockwise.
- Insert the key into the "Scan Head" switch and turn it to the ON position.
- Insert the provided USB flash drive into your computer. Copy the software and drivers to your computer's hard drive.
- Open your computer's Device Manager, locate the unrecognized machine (e.g., USB LMCV4), and install the drivers from the copied files.
- Open the EZCad software. Set the machine parameters as indicated in the provided parameter screenshots on the USB drive.
Video 3: Instructions on connecting your machine with LightBurn software.
4.3 レーザーの焦点合わせ
Accurate focusing is crucial for optimal engraving results. The machine features dual red dot locators for precise focusing.
- Place your material on the work table.
- Use the provided steel ruler to measure the distance from the surface of the material to the lower edge of the red stripe on the galvanometer scanning head. This distance should match the focal length marked on the nameplate (e.g., 175mm, 361mm).
- Turn the adjustment wheel on the support column to raise or lower the laser arm until the measured distance is correct.
- When correctly focused, the two red dots projected onto the material will converge into a single, sharp red dot.

Figure 3: Red dot guidance system for easy focusing and clear preview of the engraving area.
5. 操作手順
5.1 基本的な彫刻工程
- Ensure the machine is properly set up and focused.
- Open the EZCad or LightBurn software on your computer.
- Import your design diagram into the software.
- Adjust the engraving parameters (power, speed, frequency) according to your material and desired effect.
- Use the "Frame" function in the software to preview the actual size and position of your design on the material using the red dot pointers. Adjust as necessary.
- Wear your laser safety goggles.
- Press the "Fiber Laser" button on the main tower to activate the laser.
- ソフトウェアから彫刻プロセスを開始します。
- Once engraving is complete, press the "Fiber Laser" button again to stop the laser. Turn the key on the "Scan Head" switch to OFF and press the emergency stop button.

Figure 4: LightBurn software interface for design and control.
5.2 回転軸の使用
The included rotary axis allows for engraving on curved or cylindrical surfaces.
- Connect the rotary axis to the designated port on the main tower.
- Secure your cylindrical object (e.g., ring, tumbler) onto the rotary axis chuck.
- Adjust the laser focus for the curved surface.
- In the software, enable and configure the rotary axis settings according to the object's dimensions.
- Proceed with engraving as per the basic operating instructions.

Figure 5: Rotary axis for expanding engraving capabilities to curved surfaces.
Video 4: Demonstration of engraving with the rotary axis.
6. Engraving Exampレ
The OMTech 50W Fiber Laser Engraver is capable of marking and etching a wide variety of materials, including metals like steel, gold, and jewelry, as well as certain plastics.

Figure 6: Customizing a smartphone with laser engraving.

Figure 7: Detailed dog portrait engraved on metal.

図8:例amples of engraved jewelry, tags, and other items.

図9: 追加の例amples including circuit boards, pendants, and wooden boxes.
Video 5: Laser engraving a design onto shoes.
Video 6: Laser engraving a design onto cards.
Video 7: OMTech fiber laser engraver in operation.
Video 8: Demonstration of ultra-high engraving speed.
Video 9: DIY cell phone engraving with OMTech fiber laser engraver.
7. メンテナンス
定期的なメンテナンスにより、レーザー彫刻機の寿命が長くなり、最適なパフォーマンスが確保されます。
- レンズクリーニング: Periodically clean the laser lens with a soft, lint-free cloth and lens cleaning solution to prevent dust and debris buildup, which can affect laser performance.
- Work Area Cleanup: Keep the work table and surrounding area clean from engraved material residue.
- 換気システム: Ensure the ventilation system is clear and functioning properly to remove smoke and fumes.
- ケーブル検査: すべてのケーブルに摩耗や損傷の兆候がないか定期的に点検してください。
8。 トラブルシューティング
このセクションでは、発生する可能性のある一般的な問題について説明します。
- レーザー出力なし: Check if the "Fiber Laser" button is pressed and illuminated. Ensure the "Scan Head" key is turned ON and the emergency stop button is disengaged. Verify all cables are securely connected.
- 彫刻品質が悪い: Re-check the laser focus. Ensure engraving parameters (power, speed, frequency) are appropriate for your material. Clean the laser lens if necessary.
- ソフトウェア接続の問題: Verify the USB cable connection. Reinstall the drivers if the device is not recognized in Device Manager. Ensure the correct laser is selected in LightBurn/EZCad.
- Red Dots Not Converging: Adjust the height of the galvanometer using the adjustment wheel until the two red dots merge into one.
9. 仕様
| 特徴 | 仕様 |
|---|---|
| レーザーパワー | 50W Fiber Laser |
| 彫刻エリア | 7.9インチ x 7.9インチ (200x200 mm) |
| 彫刻精度 | 0.1mm |
| 彫刻速度 | 最大275.6ips(7000 mm / s) |
| レーザークラス | Class 2 (0.874 mW Output Power) |
| ソフトウェアの互換性 | ライトバーン、EZCAD2 |
| 製品寸法 | 30.5 x 17.7 x 31.1インチ |
| アイテム重量 | 120ポンド |
| モデル番号 | RYGEL-FMM5RRABURYGELAMZ1 |

Figure 10: High precision and speed capabilities of the laser engraver.

Figure 11: F-Theta scanning lens with 5-layer protective and antireflective coating.
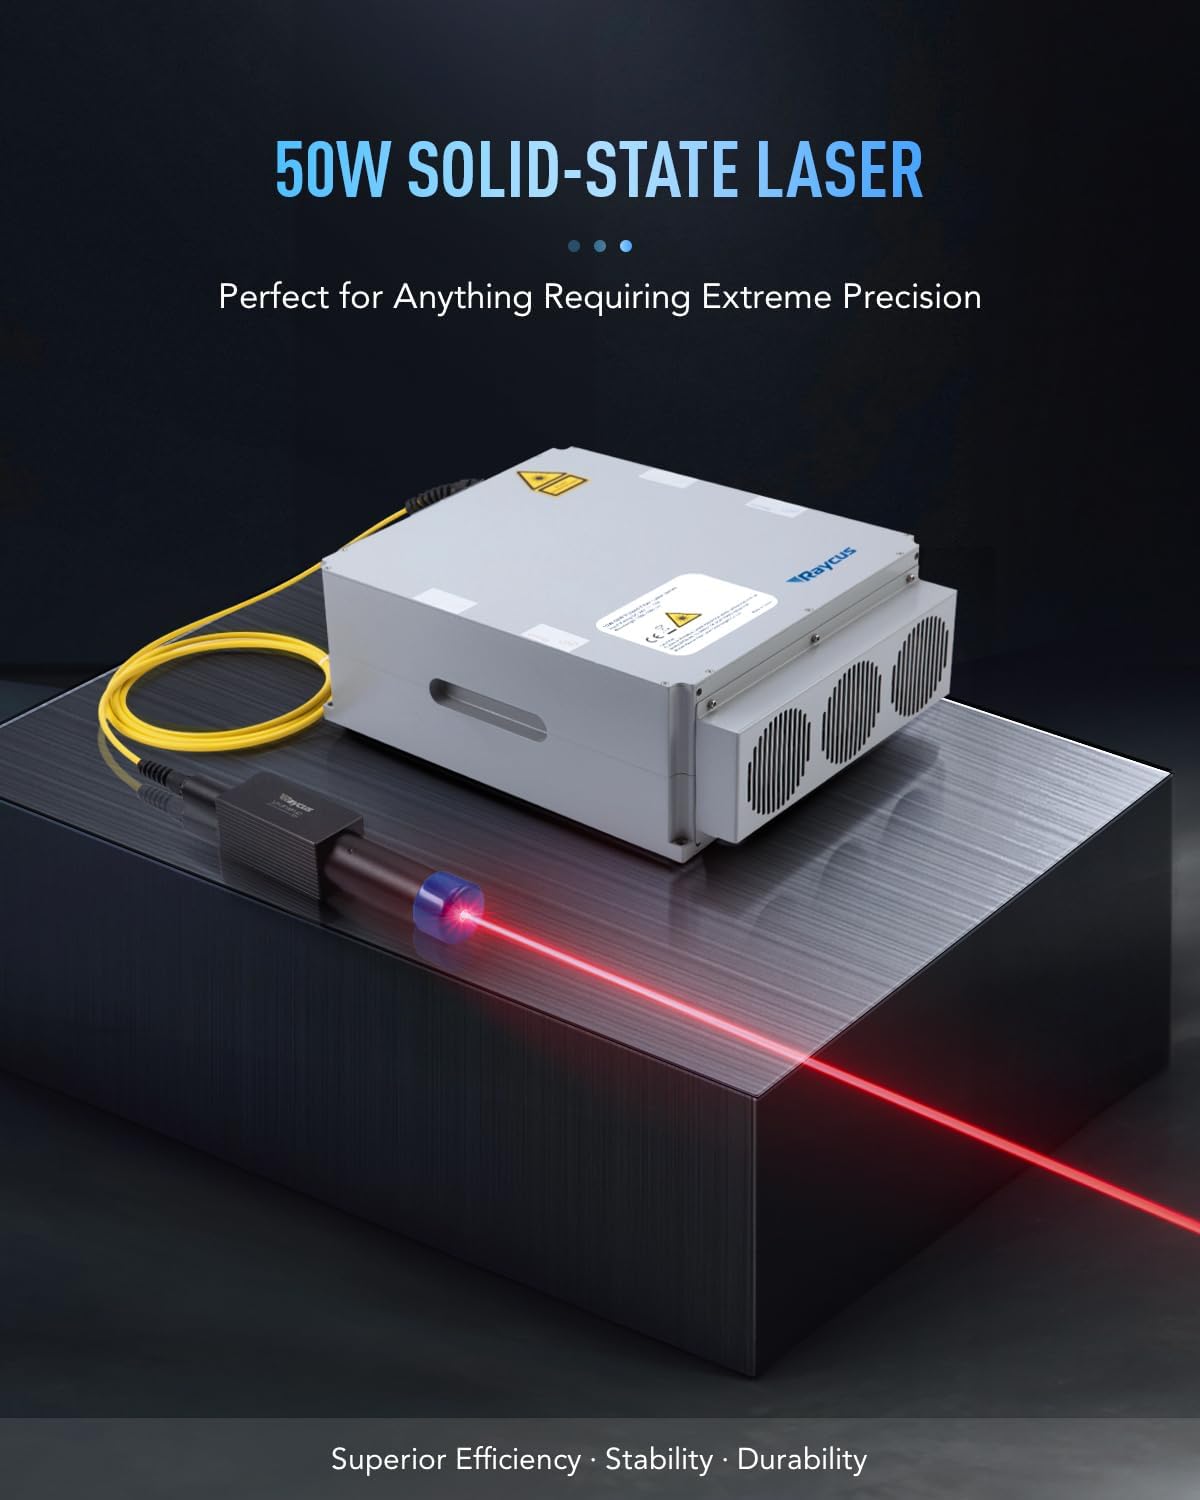
Figure 12: The 50W solid-state laser source, designed for extreme precision.

Figure 13: Expansive 7.9" x 7.9" work area with 44.1 lb material capacity.

Figure 14: Speed comparison highlighting the efficiency of the OMTech 50W Fiber Laser.
10. 保証とサポート
OMTech provides comprehensive support for its products:
- 返品規則: Returnable until January 31, 2026.
- カスタマーサポート: U.S.-based technical support, 24/7 online customer service, and two-year support.
For further assistance, please refer to the contact information provided with your product or visit the official OMTech webサイト。


