製品終了view
The Artillery Sidewinder X3 Plus is a high-performance 3D printer designed for both hobbyists and professionals, offering a large build volume and advanced features for efficient and precise 3D printing.

図1: フロント view of the Artillery Sidewinder X3 Plus 3D Printer, showcasing its robust frame and integrated control panel.
主な特徴
- Large Build Size: 300mm × 300mm × 400mm (11.8in × 11.8in × 15.7in) for greater creative freedom.
- Ultra-Quiet High-Speed Printing: Achieves speeds up to 300 mm/s with 0.1 mm precision.
- Upgraded 300°C High-Temperature Nozzle: Supports various filaments including PLA, TPU, PETG, ABS, and Nylon, with automatic nozzle cleaning.
- 49-Point Auto Bed Leveling: Ensures quick and accurate leveling of the build platform.
- Dual-Gear Direct Extruder: Provides powerful extrusion and smoother filament feeding for improved print quality.
- 再開印刷機能: Detects filament runout/breakage or power loss and resumes printing after recovery.
- Dual Z-axes & Dual Motors: Ensures stability and higher printing accuracy through coordinated movement.

図2: Illustration demonstrating the large print volume of the Sidewinder X3 Plus, capable of accommodating substantial models.
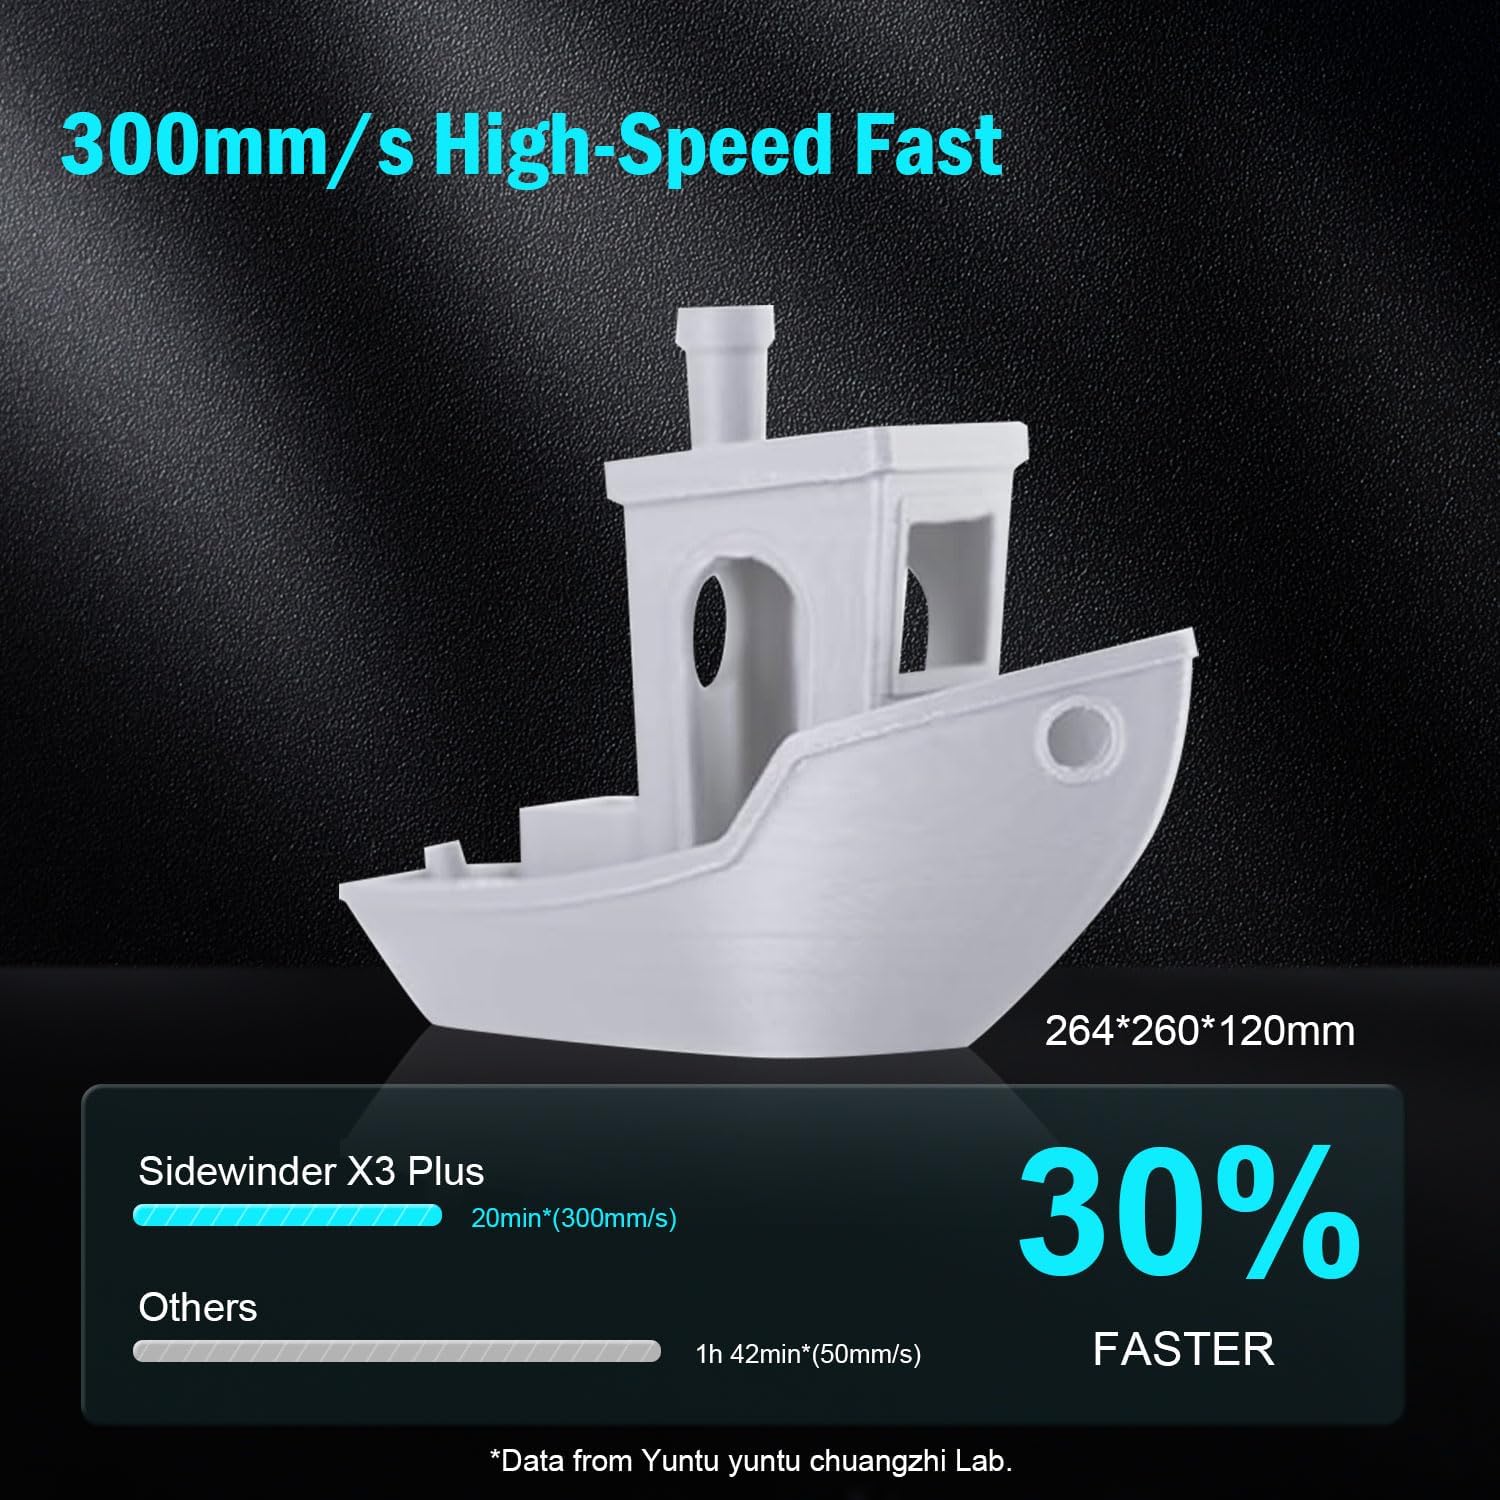
図3: Visual representation of the Sidewinder X3 Plus's high-speed printing capability, showing a printed boat model.

図4: 閉じる view of the all-metal hotend and automatic cleaning nozzle, highlighting its high-temperature capabilities.

図5: Diagram illustrating the 49-point smart auto-leveling system on the print bed, simplifying the leveling process.
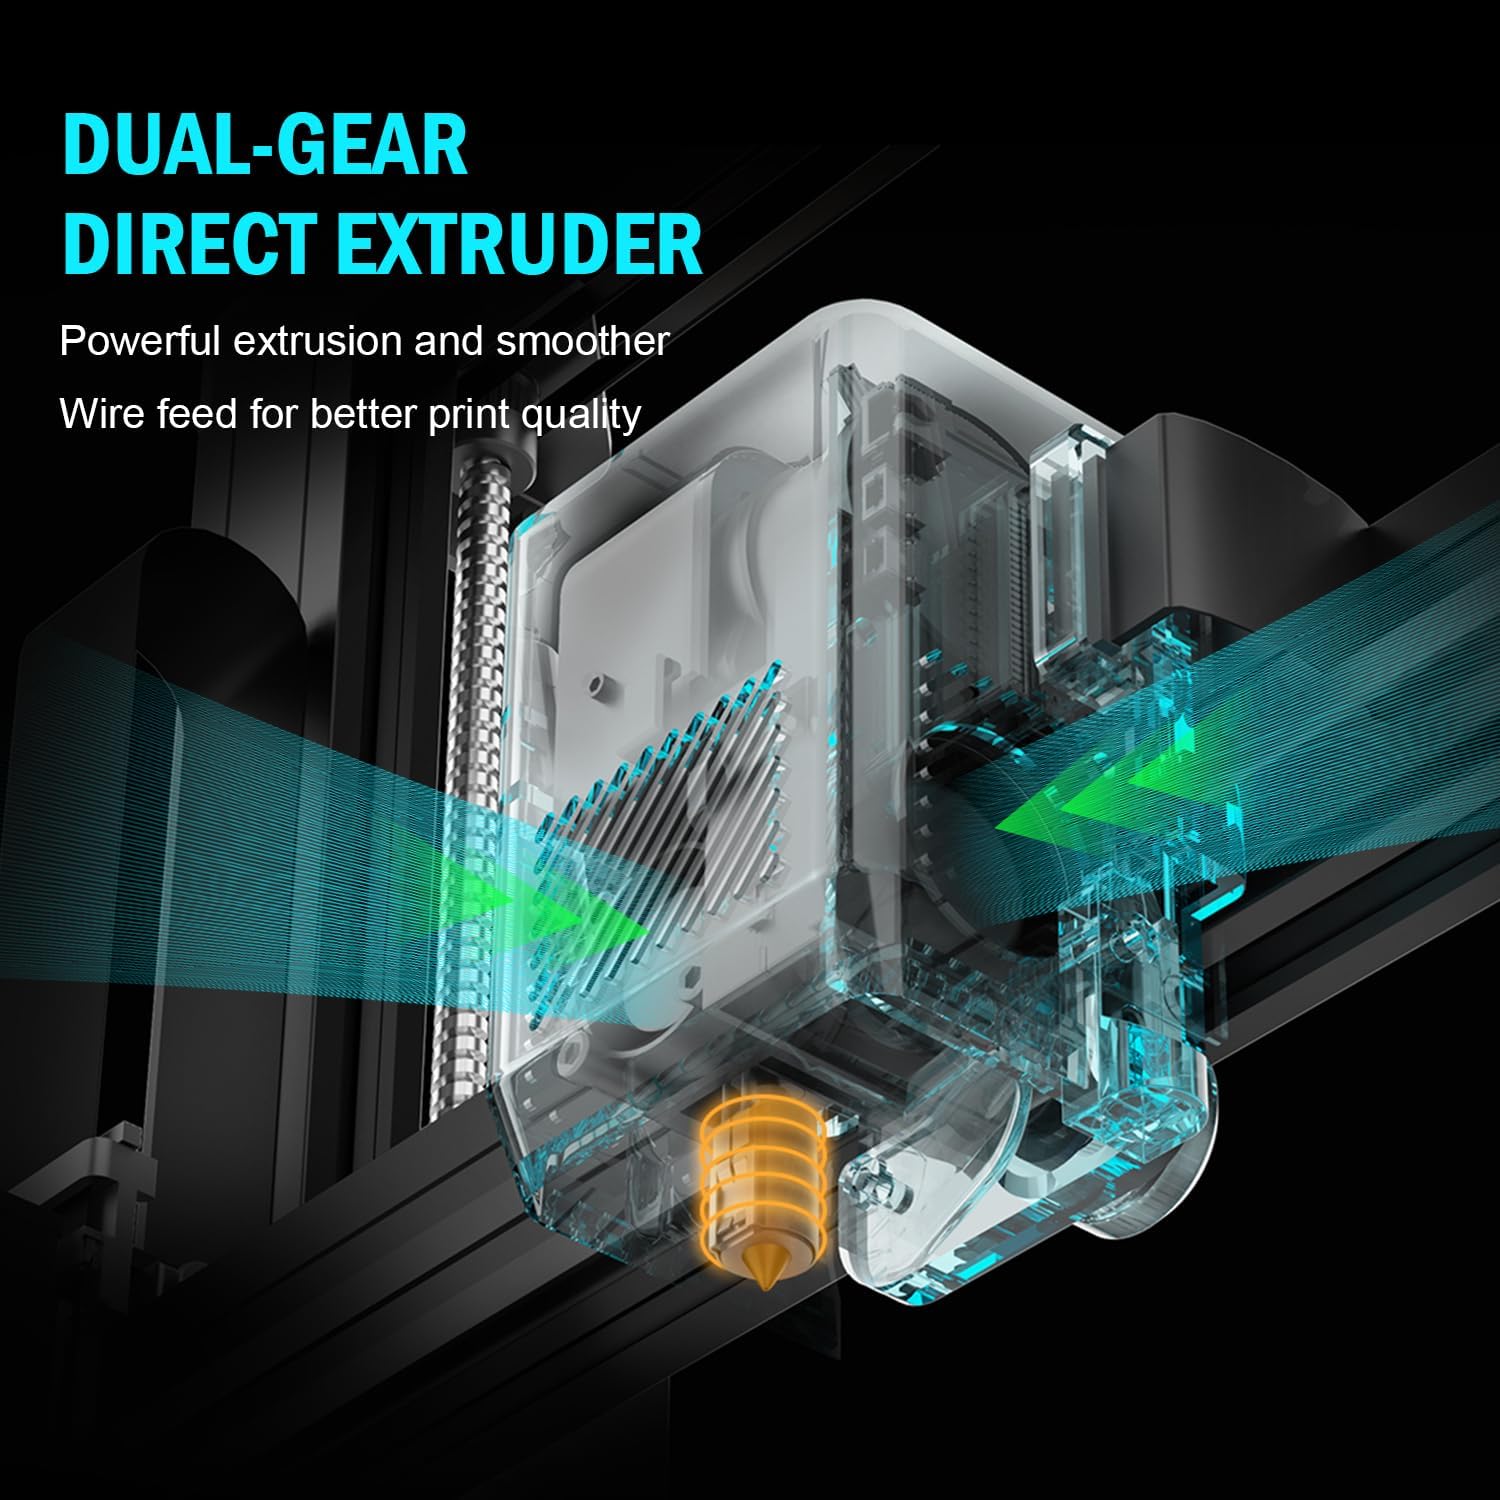
図6: 内部 view of the dual-gear direct extruder, showing the gears that ensure consistent filament flow.

図7: Depiction of the dual Z-axes and dual motors system, highlighting their role in enhancing print stability and precision.
セットアップガイド
The Artillery Sidewinder X3 Plus is designed for quick assembly. Follow these general steps for initial setup:
- 開梱: Carefully remove all components from the packaging. Verify all parts listed in the packing list are present.
- ベースアセンブリ: Place the printer base on a stable, level surface.
- Gantry Installation: Attach the gantry (Z-axis frame) to the base. Ensure all screws are securely fastened.
- 配線接続: Connect all necessary cables, including power, motor, and sensor cables, according to the labels.
- フィラメントホルダー: Mount the filament holder.
- 初回電源オン: 電源コードを接続し、プリンターの電源を入れます。
- 自動レベル調整: Perform the 49-point auto bed leveling procedure as prompted by the printer's interface. This is crucial for successful first prints.

図8: Visual guide showing the four main steps for assembling the Artillery Sidewinder X3 Plus, indicating a straightforward setup process.
操作手順
フィラメントのロード
- Ensure the hotend is preheated to the appropriate temperature for your filament type (e.g., 200°C for PLA).
- Insert the filament into the extruder's input hole.
- Push the filament until it is gripped by the extruder gears and begins to feed through the hotend.
- Confirm filament is extruding smoothly from the nozzle.
印刷を開始する
- Prepare your 3D model using slicing software (e.g., Cura, PrusaSlicer) and save it as a G-code file to a USB drive or SD card.
- Insert the USB drive/SD card into the printer's designated slot.
- Navigate the printer's touchscreen interface to select the desired G-code file.
- Confirm print settings and initiate the print. The printer will automatically preheat and begin printing.

図9: Image showing the 4.3-inch touchscreen interface of the Sidewinder X3 Plus, demonstrating user interaction for print control.
Removing a Print
- Allow the print bed to cool down completely after the print finishes.
- Gently flex the PEI magnetic print platform to detach the printed object. Avoid using excessive force or sharp tools to prevent damage to the print surface.
メンテナンス
Regular maintenance ensures optimal performance and longevity of your Artillery Sidewinder X3 Plus.
- プリントベッドをクリーニングする: 各印刷の後に、イソプロピルアルコールで印刷面を清掃して残留物を除去し、今後の印刷時に良好な接着性を確保します。
- ノズルのクリーニング: The printer features an automatic cleaning nozzle. However, inspect the nozzle periodically for clogs or wear. If necessary, perform a cold pull or replace the nozzle.
- Lubricate Z-axis Lead Screws: Apply a small amount of lithium grease or similar lubricant to the Z-axis lead screws every few weeks, depending on usage, to ensure smooth vertical movement.
- ベルトとプーリーの点検: Periodically inspect the X and Y axis belts for proper tension and wear. Ensure pulleys are clean and move freely.
- ファームウェアの更新: 公式砲兵をチェック web利用可能なファームウェア アップデートについては、サイトを参照して、プリンターに最新の機能とバグ修正が適用されていることを確認してください。
一般的な問題のトラブルシューティング
| 問題 | 考えられる原因 | 解決 |
|---|---|---|
| フィラメントが押し出されない | ノズルが詰まっている、フィラメントが絡まっている、温度が正しくない。 | Clean the nozzle, check filament path, verify hotend temperature. |
| ベッドの接着不良 | ベッドが水平でない、印刷面が汚れている、ベッドの温度が正しくない。 | 自動レベリングを実行し、イソプロピルアルコールでプリントベッドを清掃し、ベッド温度を調整します。 |
| レイヤーシフト | Loose belts, motor issues, print speed too high. | Check and tighten X/Y axis belts, inspect motor connections, reduce print speed. |
| Printer is excessively loud | Loose components, fan noise, worn bearings. | Inspect for loose screws, check fan operation, lubricate moving parts. |
| "Thermal runaway detected" error | Faulty thermistor, loose wiring to hotend/bed, heater cartridge issue. | Immediately power off the printer. Check all wiring connections to the hotend and heated bed. Contact support if issue persists. |
| "Error: home Y failed" or similar homing errors | Obstructed endstop switch, loose motor cable, faulty sensor. | Check for obstructions, ensure all motor and endstop cables are securely connected. Restart printer. |
技術仕様
| 特徴 | 詳細 |
|---|---|
| 製品寸法 | 20 x 19.4 x 25.6 インチ (508 x 493 x 650 mm) |
| アイテム重量 | 36.6ポンド(16.6kg) |
| ボリュームを構築する | 300 x 300 x 400 mm (11.8 x 11.8 x 15.7 インチ) |
| 印刷速度 | 最大300mm/s |
| ノズル温度 | 最高300℃ |
| ベッドレベリング | 49ポイント自動ベッドレベリング |
| 押出機タイプ | Dual-Gear Direct Extruder |
| サポートされているフィラメント | PLA、TPU、PETG、ABS、ナイロン |
| 接続性 | USB、SDカード |
| 材料 | 金属 |
| 色 | 黒 |
保証とサポート
For warranty information and technical support, please refer to the official Artillery web公式サイトをご覧いただくか、カスタマーサービスに直接お問い合わせください。保証請求の際は、購入証明としてレシートを保管してください。
メーカー: 砲兵
正式 Webサイト: www.artillery3d.com (注: これはプレースホルダーです URL実際のメーカーの webサポートサイト。)


