1. はじめに
Thank you for choosing the MOUNTUP Freestanding Monitor Stand. This manual provides detailed instructions for the assembly, operation, and maintenance of your new monitor stand. Designed for ergonomic viewing and space-saving, this stand is compatible with 13-32 inch flat or curved screens weighing up to 17.6 lbs, supporting VESA patterns 75x75 mm and 100x100 mm.

Figure 1: MOUNTUP Freestanding Monitor Stand (Model MU1003)
This image shows the complete MOUNTUP Freestanding Monitor Stand, featuring a black VESA mounting plate attached to a vertical black pole, which is securely mounted on a rectangular black tempered glass base.
2 製品の特徴
- 画面の互換性: Supports one 13-32 inch flat or curved screen up to 17.6 lbs. Compatible with VESA patterns 75x75 mm and 100x100 mm.
- 人間工学に基づいた調整:
- 最適な+30°/-30° view角度を変える。
- スイベル: +25°/-25° for flexible screen positioning.
- 回転: 360° for easy switching between landscape and portrait modes.
- 高さ調整: Up to 6.89 inches to fit various sitting positions.
- 自立型デザイン: No drilling or clamping required, providing convenience and protecting your desk surface. Features a heavy tempered glass base for stability and an elegant look.
- ケーブル管理 Integrated cable clips keep wires organized for a clean and clutter-free workspace.
- 頑丈な構造: Made from durable metal and tempered glass for long-lasting use.

Figure 2: Product Dimensions and VESA Compatibility
This image illustrates the key dimensions of the monitor stand, including a total height of 17.3 inches, a base width of 7.9 inches, and a base depth of 11.8 inches. It also highlights the maximum monitor size of 32 inches, a weight capacity of 17.6 lbs, and VESA compatibility for 75x75 mm and 100x100 mm patterns.
3. パッケージ内容
Please verify that all components are present and in good condition before beginning assembly. If any parts are missing or damaged, please contact customer support.
- Monitor Stand Base (Tempered Glass)
- Vertical Support Pole
- VESAマウントプレート
- 取り付けハードウェアキット(ネジ、ワッシャー、スペーサー)
- 組み立て工具(例:六角レンチ)
- 取扱説明書(本書)
4. セットアップとインストール
The MOUNTUP monitor stand is designed for quick and easy assembly, typically within 5 minutes. Follow these steps for a secure setup:
- Attach the Support Pole to the Base: Secure the vertical support pole to the tempered glass base using the provided screws and tools. Ensure it is firmly tightened for stability.
- VESA プレートをモニターに取り付けます。 Align the VESA mounting plate with the VESA holes on the back of your monitor. Use the appropriate screws, washers, and spacers from the hardware kit to securely attach the plate to your monitor. Ensure the screws are tightened sufficiently but do not overtighten.
- Mount Monitor to Stand: Carefully slide the VESA plate with the attached monitor onto the vertical support pole. Ensure the monitor is properly seated and secured by the safety lock mechanism.
For detailed visual instructions, please refer to the included quick start guide or the official product assembly video if available.
5. 操作手順
The MOUNTUP monitor stand offers various adjustments to achieve your ideal ergonomic viewing の位置。
5.1 高さ調整
To adjust the monitor's height, loosen the knob on the back of the vertical pole, slide the monitor up or down to the desired level, and then re-tighten the knob to secure it. The stand offers multiple height levels for precise positioning.

図3: 6段階の高さ調整
This image displays the monitor stand with a monitor attached, illustrating the six distinct height levels available for adjustment, ranging from 7.3 inches to 14.3 inches from the desk surface to the center of the VESA plate.
5.2 傾き調整
The monitor can be tilted +30°/-30° to reduce glare and optimize viewing comfort. Use the provided Allen wrench to loosen the bolt on the VESA plate mechanism, adjust the tilt angle, and then firmly tighten the bolt to secure the monitor in place.
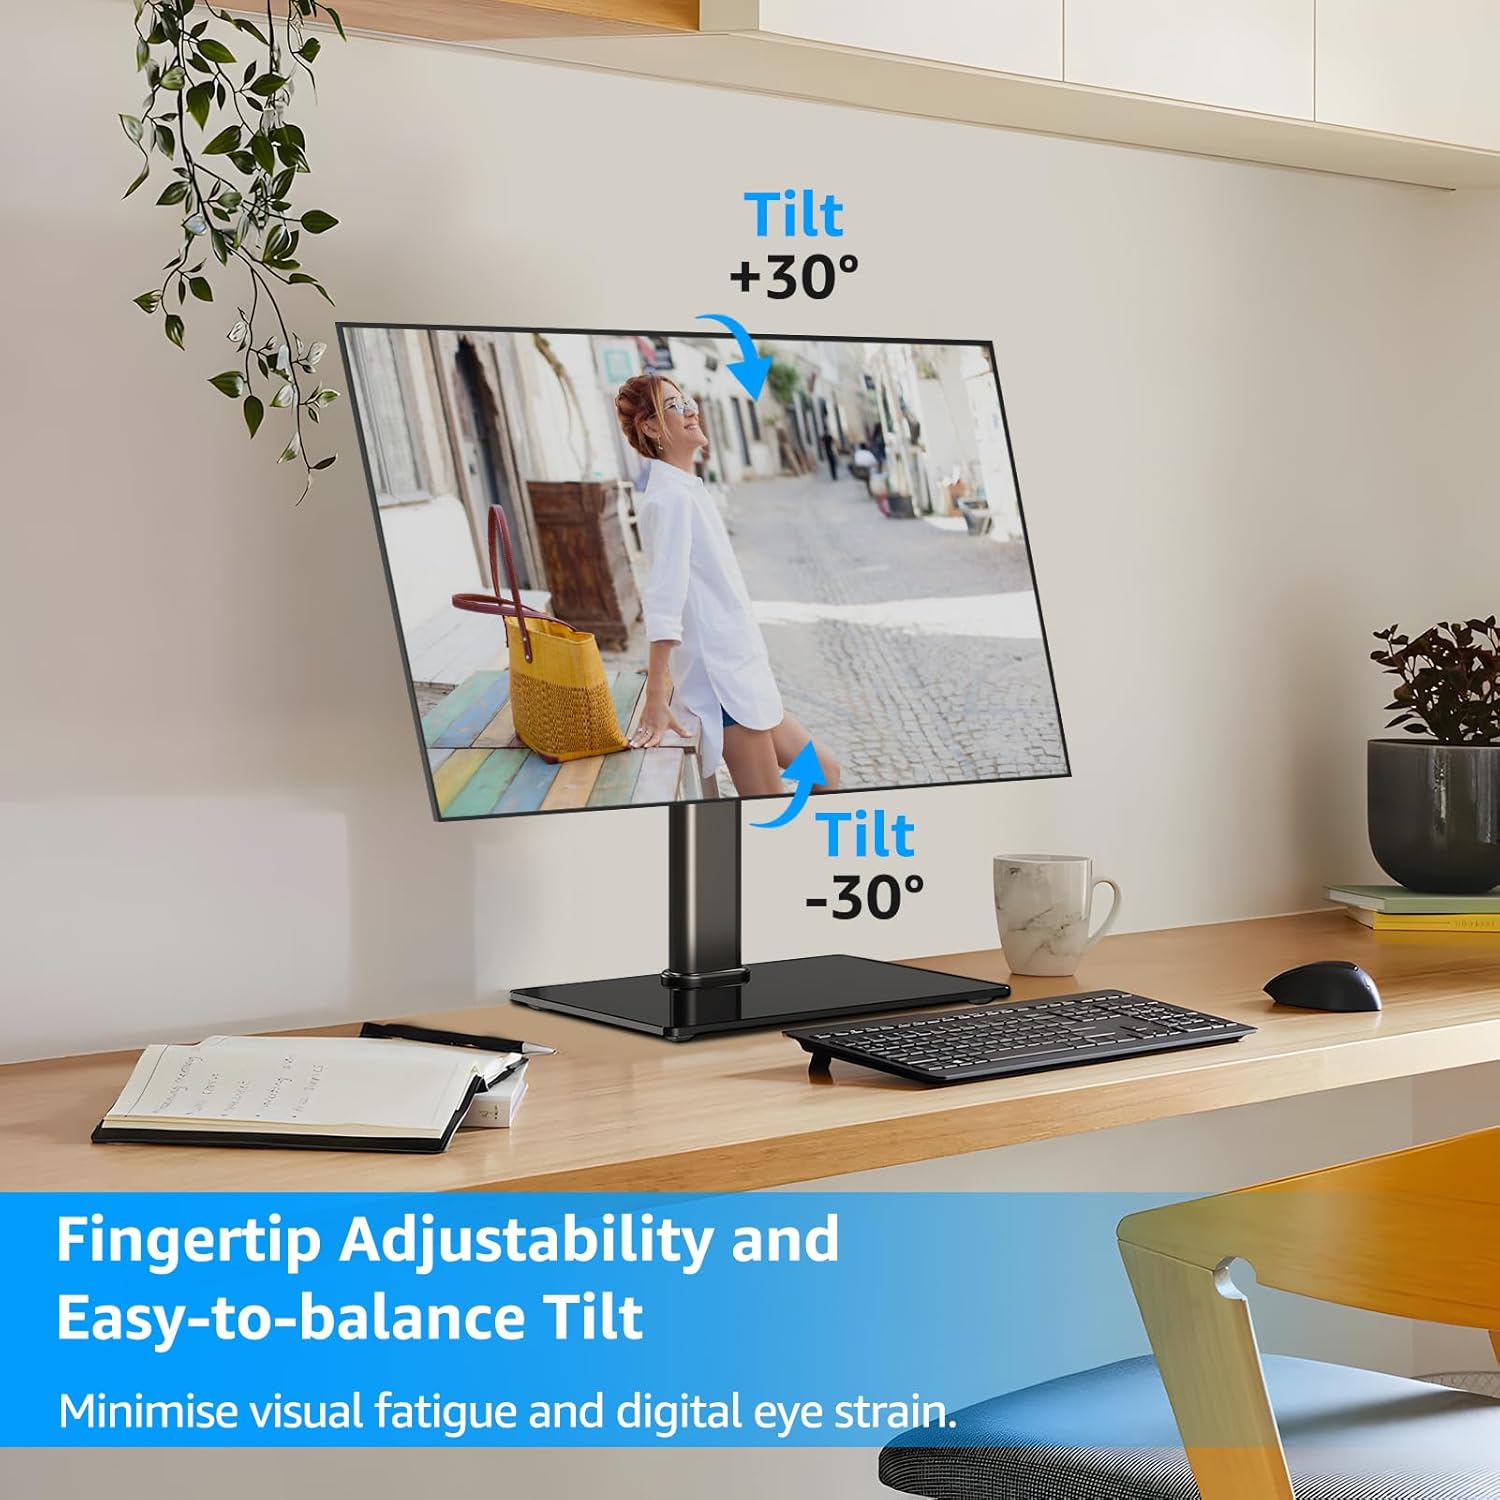
図4: 傾斜調整範囲
This image shows a monitor on the stand, demonstrating the ability to tilt the screen both upwards (+30°) and downwards (-30°) to achieve an ergonomic viewing angle and minimize eye strain.
5.3 スイベル調整
Swivel the monitor +25°/-25° left or right to share your screen or adjust your viewスタンド全体を動かさずに角度を調整できます。

Figure 5: Swivel Adjustment Range
This image illustrates the monitor stand's swivel capability, allowing the screen to rotate +25° to the right and -25° to the left, enabling flexible screen positioning on a desk.
5.4 回転調整
Rotate the monitor 360° to easily switch between landscape and portrait orientations, ideal for different tasks like coding or document viewing。
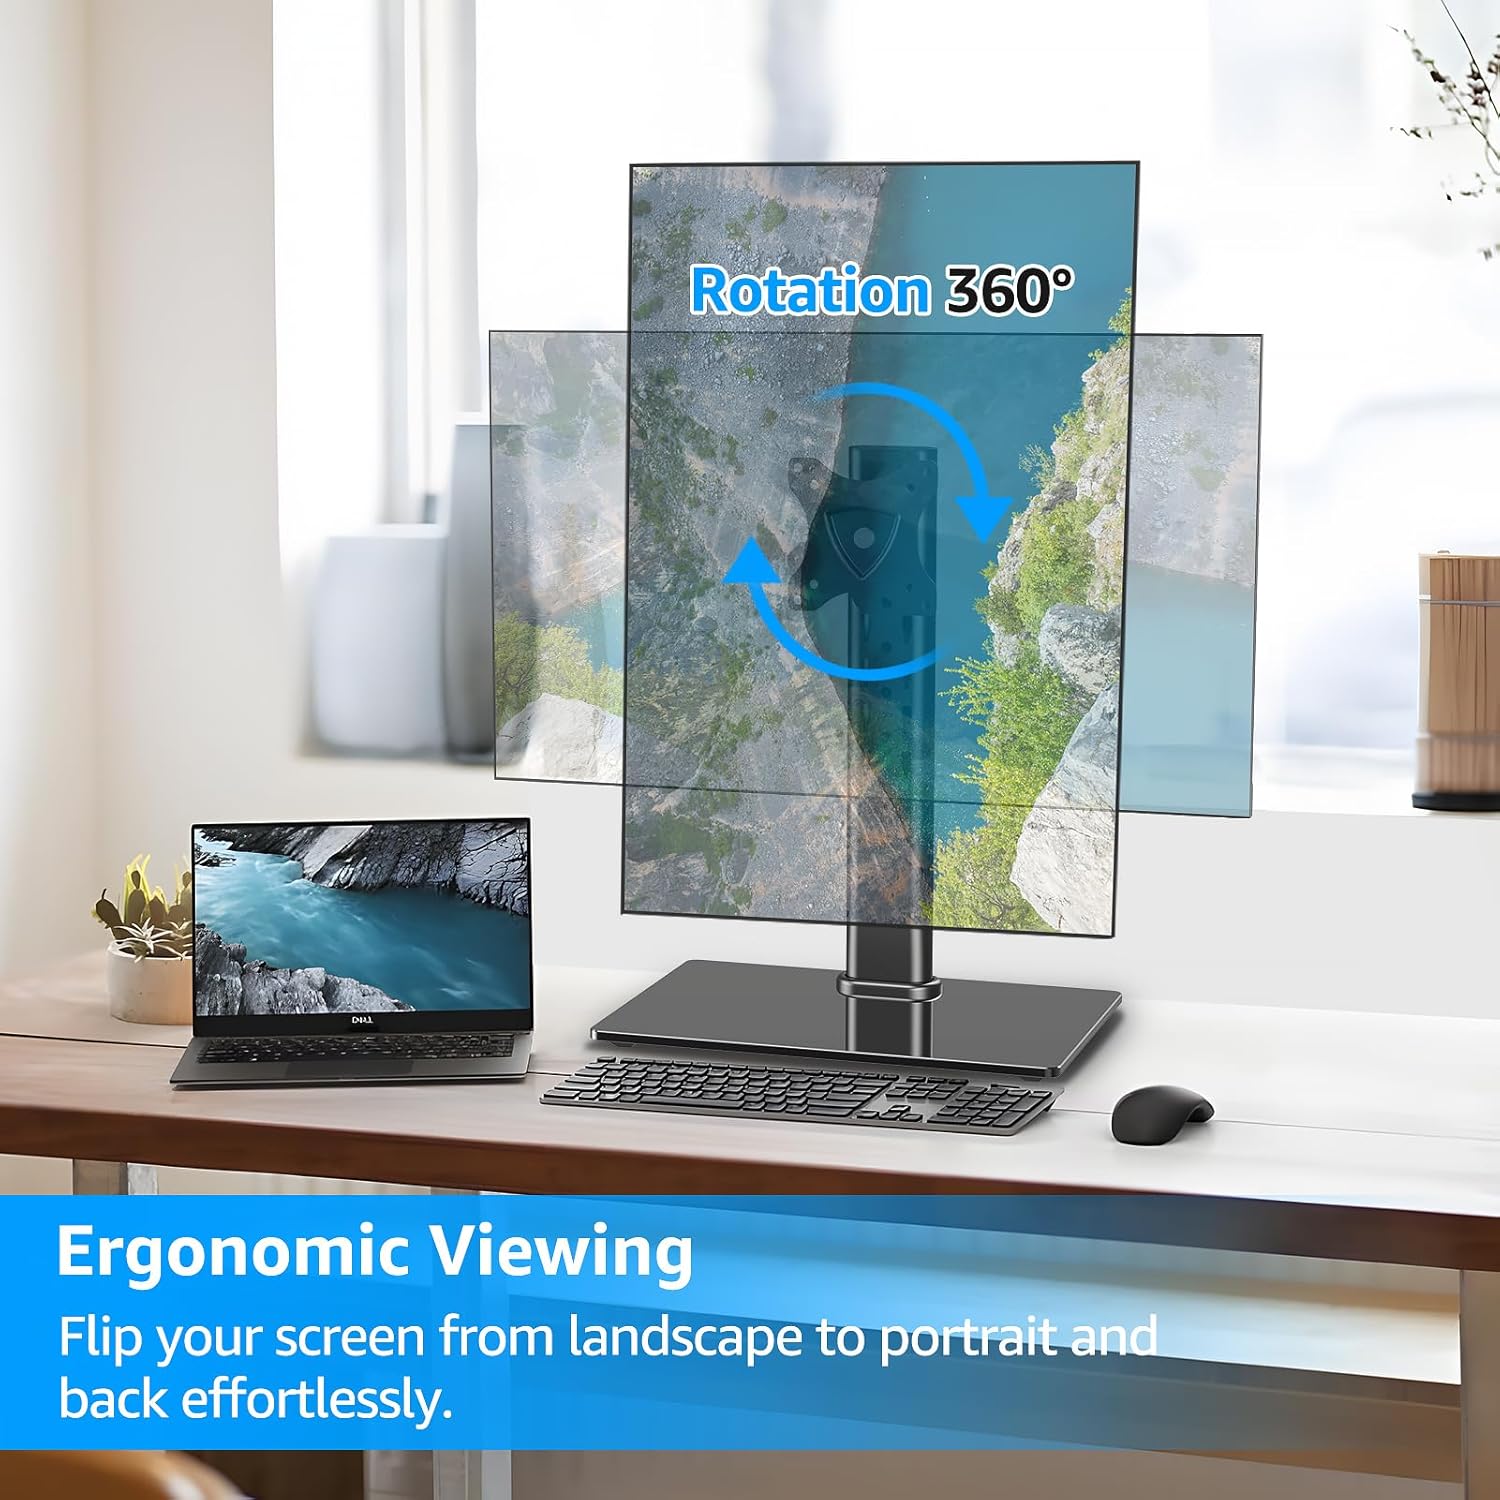
Figure 6: 360° Rotation Capability
This image demonstrates the monitor stand's full 360° rotation feature, allowing the user to effortlessly switch the monitor between landscape and portrait orientations for various viewニーズを満たす。
5.5 ケーブル管理
Utilize the integrated cable clips on the vertical pole to route and organize your monitor cables, maintaining a tidy and professional workspace.

Figure 7: Cable Management and Anti-Slip Feet
This image highlights the cable management feature on the back of the monitor stand's pole, showing cables neatly routed. It also shows the rubber anti-slip feet on the base for added stability.
5.6 操作ビデオガイド
For a visual demonstration of the stand's functions and adjustments, please watch the official product video below:
Video 1: MOUNTUP Monitor Stand Functionality
This video demonstrates the various ergonomic adjustments of the MOUNTUP monitor stand, including swivel, rotation, tilt, and height adjustment, showcasing 最適な達成方法 viewing comfort and a clutter-free setup.
6. メンテナンス
To ensure the longevity and optimal performance of your MOUNTUP monitor stand, follow these simple maintenance guidelines:
- クリーニング: Wipe the stand and base with a soft, damp cloth. Avoid using abrasive cleaners or solvents that could damage the finish or tempered glass.
- 定期点検: すべてのネジと接続部がしっかりと締まっているか定期的に確認してください。安定性を維持するために、必要に応じて締め直してください。
- 潤滑: No lubrication is typically required for the adjustment mechanisms. If any movement becomes stiff, ensure no debris is obstructing the mechanism.
7。 トラブルシューティング
| 問題 | 考えられる原因 | 解決 |
|---|---|---|
| Monitor is not stable or wobbles. | Loose connections; uneven surface; monitor too heavy. | Ensure all screws are securely tightened. Place the stand on a flat, stable surface. Verify monitor weight is within the 17.6 lbs limit. |
| 傾きの調整が難しい。 | Tilt bolt not sufficiently loosened or tightened. | Use the provided Allen wrench to loosen the tilt bolt on the VESA plate mechanism. Adjust the monitor to the desired angle, then firmly tighten the bolt. For stubborn adjustments, ensure the wrench is fully engaged and apply adequate force. |
| Monitor slides down after height adjustment. | Height adjustment knob not tightened enough. | Ensure the height adjustment knob on the vertical pole is fully tightened after setting the desired height. |
| VESA プレートがモニターに適合しません。 | Incorrect VESA pattern or monitor size. | Verify your monitor's VESA pattern is either 75x75 mm or 100x100 mm. Confirm your monitor size is between 13-32 inches. |
8. 仕様
| 特徴 | 詳細 |
|---|---|
| ブランド | マウントアップ |
| モデル番号 | MU1003 |
| 対応画面サイズ | 13~32インチ |
| 重量容量 | 最大17.6ポンド |
| VESA互換性 | 75x75 mm、100x100 mm |
| 傾斜角度 | +30° / -30° |
| スイベル角度 | +25° / -25° |
| 回転 | 360° |
| 高さ調整 | 最大6.89インチ |
| 材料 | 金属、強化ガラス |
| 色 | 黒 |
| 取り付けタイプ | 卓上マウント(自立型) |
9. 保証とサポート
MOUNTUP provides a 3年間のメーカーサポート for this product. If you encounter any issues or have questions regarding your monitor stand, please do not hesitate to contact our friendly technical support team.
For support, please visit the official MOUNTUP webサイトをご覧いただくか、購入書類に記載されている連絡先情報を参照してください。