1. はじめに
This manual provides detailed instructions for the installation, operation, and maintenance of your OOYCYOO MPPT 60A Solar Charge Controller. This device is designed to efficiently manage power flow from your solar panels to your battery bank, ensuring optimal charging and system protection. It supports automatic 12V/24V system voltage identification and is compatible with various battery types.
Key features include a backlit LCD display, a 4-stage battery charging algorithm, and comprehensive protection functions.
2. 安全に関する注意事項
- 必ず最初にバッテリー、次にソーラーパネル、最後に負荷を接続してください。取り外しは逆の順序で行ってください。
- Ensure all wiring is correctly polarized to prevent damage.
- Do not connect inverters or inductive loads directly to the controller's load terminals.
- コントローラーは、可燃物から離れた、換気の良い場所に設置してください。
- The controller generates heat during operation; ensure adequate airflow. The integrated cooling fan activates when the temperature exceeds 45°C and turns off below 40°C.
- すべての接続に適切な回路ブレーカーとヒューズを使用してください。
- This device is for indoor use only. Protect it from water and moisture.
3.製品オーバーview
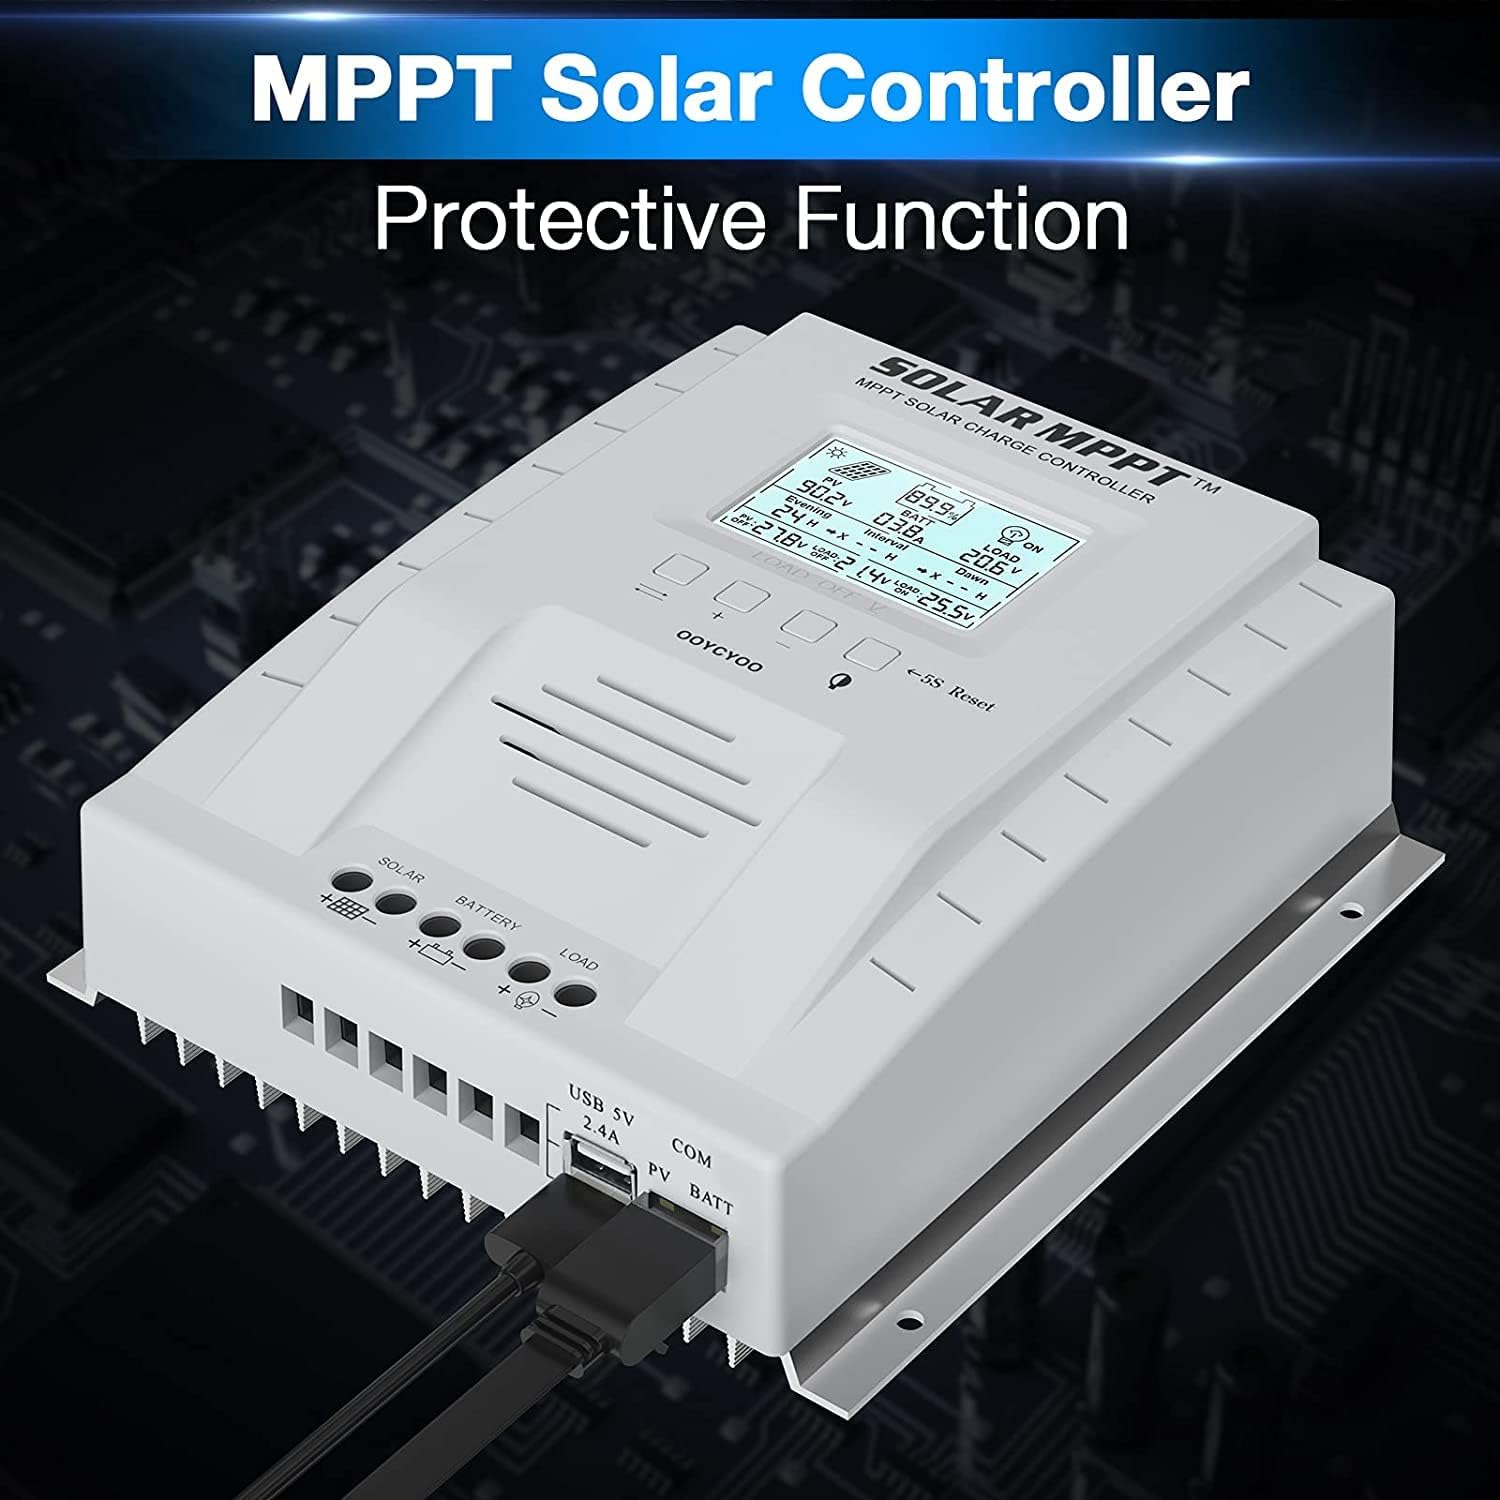
The OOYCYOO MPPT 60A Solar Charge Controller is designed for efficient solar power management. It features an LCD display for real-time data, multiple protection functions, and support for various battery types.
3.1 パッケージ内容
- 1 x OOYCYOO MPPT 60A Solar Charge Controller
- 1 x温度センサー
- ユーザーマニュアル(英語)1冊
3.2 コンポーネントの識別

The controller features a clear LCD display on the front for monitoring system status. Below the display are control buttons for navigation and settings. Connection terminals for solar panels, battery, and load are located at the bottom. USB ports and an RS485 communication port are on the side.
4. セットアップとインストール
ソーラー充電コントローラーを安全かつ効率的に動作させるには、適切な設置が不可欠です。以下の手順を慎重に実行してください。
4.1コントローラーの取り付け
- Choose a dry, well-ventilated location, protected from direct sunlight, high temperatures, and water.
- コントローラーの周囲に放熱のための十分なスペースがあることを確認してください。
- Mount the controller vertically on a wall or stable surface using the provided mounting holes.
4.2配線接続
Follow the connection order precisely to avoid damage to the controller or other components.
- バッテリーを接続します。 バッテリーのプラスとマイナスの端子をコントローラーの対応するバッテリー端子に接続します。極性が正しいことを確認してください。コントローラーはシステム電圧を自動的に検出します。tage(12Vまたは24V)。
- ソーラーパネルを接続する: Connect the positive and negative leads from your solar panel array to the corresponding PV terminals on the controller. Ensure correct polarity. Do not exceed the maximum PV input voltag100VDCのe。
- 負荷を接続する(オプション): Connect your DC loads to the load terminals on the controller. Note that the load output is for DC loads only. Do not connect inverters or inductive loads directly to these terminals.
- Connect the Remote Temperature Sensor: Plug the temperature sensor into its dedicated port. This sensor helps the controller optimize charging based on battery temperature.

重要な注意: Always connect the battery first and disconnect the solar panel last. Incorrect connection order can damage the controller.
5. 操作手順
Once installed, the controller will begin operation automatically. The LCD display provides real-time system information.
5.1 LCDディスプレイとボタン

The backlit LCD displays critical system parameters such as PV voltage、バッテリーvoltage, charging current, load current, and accumulated energy (KWH). The four buttons below the display are used for navigation and settings adjustment:
- トグルキー: Used to cycle through display screens or confirm selections.
- '+' (Plus) Key: Increases values or moves forward in menus.
- '-' (Minus) Key: Decreases values or moves backward in menus.
- Manual Switch Load Key: Toggles the load output on/off manually.
- 5S Reset: 5秒間押し続けると工場出荷時の設定に戻ります。
5.2 Battery Charging Algorithm
コントローラーは4秒tagバッテリー寿命とパフォーマンスを最適化する充電アルゴリズム:
- バルクチャージ: Charges the battery at maximum current until the voltagブーストボリュームに到達tage.
- ブーストチャージ: 一定量の充電tag完全に充電されるように、一定期間充電してください。
- フロートチャージ: バッテリーを低い電圧に維持するtage to prevent self-discharge and overcharging.
- Equalization (for specific battery types): 定期的にバッテリーを過充電してセルの容量バランスをとるtagesと硫酸化を防ぎます。
5.3 サポートされているバッテリーの種類
The controller is compatible with various battery types, including:
- Lead-Acid (Sealed, Gel, Flooded)
- リチウム(LFP)
- User-defined parameters for other battery types.
Pre-set charging parameters are available for Sealed, Gel, Flooded, and LI (LFP) batteries. Users can customize parameters for other battery types as needed.
6. 保護機能
The OOYCYOO MPPT 60A Solar Charge Controller incorporates multiple protection mechanisms to ensure system safety and longevity:
- PV Overcurrent/Overpower Protection
- PV短絡保護
- PV 逆極性保護
- Reverse Charging at Night Protection
- バッテリー逆極性保護
- バッテリーオーバーボリュームtag保護
- Battery Over-discharge Protection
- Battery Overtemperature Protection
- Controller Overtemperature Protection
- リチウム電池低温保護
- 負荷短絡保護
- 負荷過負荷保護
- TVS ハイボリュームtage一時的な保護
7. メンテナンス
定期的なメンテナンスにより、最適なパフォーマンスが確保され、ソーラー充電コントローラーの寿命が延びます。
- 接続を確認してください: すべての配線接続部の締め付け具合と腐食を定期的に点検してください。緩んだ接続部があれば締め直してください。
- コントローラーをクリーニングします。 Keep the controller clean and free of dust. Use a dry cloth to wipe the exterior. Ensure ventilation openings are not obstructed.
- 損傷の検査: Check for any signs of physical damage, overheating, or unusual odors.
- バッテリーの検査: 特定のバッテリータイプについては、製造元のメンテナンスガイドラインに従ってください。
8。 トラブルシューティング
このセクションでは、ソーラー充電コントローラーで発生する可能性のある一般的な問題について説明します。
| 問題 | 考えられる原因 | 解決 |
|---|---|---|
| Controller not powering on / LCD blank | バッテリーが接続されていないか、バッテリーの容量が不足していますtag電圧が低すぎます。極性が逆です。 | バッテリーが接続され、十分な容量があることを確認してくださいtage. 電池の極性を確認してください。 |
| ソーラーパネルからの充電は不可 | Solar panels not connected or reverse polarity. Insufficient sunlight. PV voltage低すぎるまたは高すぎる。 | ソーラーパネルの接続と極性を確認してください。十分な日光を確保してください。PVボリュームを確認してください。tage is within operating range (e.g., 18V-96V for 12V system, 36V-96V for 24V system). |
| ロードが機能しない | Load output disabled. Load short circuit or overload. Battery voltag低すぎます。 | Check load output status on LCD. Disconnect load and check for short circuit. Ensure battery is sufficiently charged. |
| コントローラーの過熱 | Poor ventilation. Excessive load or charging current. | Ensure adequate airflow around the controller. Reduce load or charging current if possible. |
| 不正確なボリュームtageリーディング | Loose connections. Faulty temperature sensor. | Check all wiring connections. Ensure temperature sensor is properly connected. |
9. 仕様
Technical specifications for the OOYCYOO MPPT 60A Solar Charge Controller.
| パラメータ | 価値 |
|---|---|
| 定格充電電流 | 60A |
| システム巻tage | 12V/24V Auto Identification |
| 最大。 PV開回路Voltage | 100V直流 |
| 最大PV入力電力(12Vシステム) | 750W |
| 最大PV入力電力(24Vシステム) | 1500W |
| DC/DC Transfer Efficiency | 最大98.7% |
| 動作温度 | -20℃~+55℃ |
| 端子サイズ | 10AWG |
| 寸法(長さ×幅×高さ) | 8.3 x 8.4 x 3.4 インチ (21.2 x 20.8 x 8.4 cm) |
| 重さ | 3ポンド(1.28kg) |
| 表示タイプ | LCDバックライト |
| 欧州連合 | 768461886785 |
| モデル番号 | P 60A |


10. 保証とサポート
For warranty information or technical support, please contact your retailer or the manufacturer directly. Refer to the product packaging or purchase documentation for specific contact details.


