1. はじめに
Welcome to your Rointe CT.0 TSMTIB0 Digital Thermostat. This device is engineered to provide intelligent control for Rointe underfloor heating systems. It features an adaptive start mode and three pre-installed programs, designed for efficient energy management and enhanced comfort in your home.
This manual provides essential information for the safe and effective installation, operation, and maintenance of your thermostat. Please read it thoroughly before use and retain it for future reference. Ensure all installation procedures are performed by a qualified professional.
2.製品オーバーview
The Rointe CT.0 TSMTIB0 thermostat features a modern design with a backlit display and intuitive button controls for easy interaction.
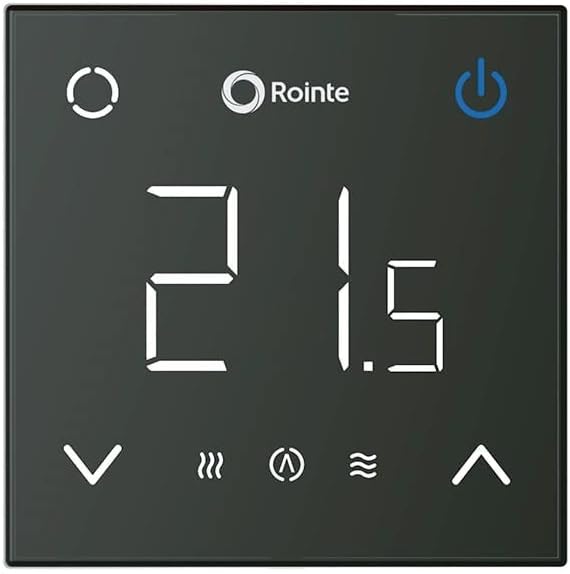
画像1: フロント view of the Rointe CT.0 TSMTIB0 digital thermostat. It features a black square face with a large white digital display showing '21.5'. Above the display are the Rointe logo and a power button. Below the display are temperature adjustment arrows (down and up), and icons for heating mode, adaptive start, and a wave symbol, likely indicating comfort or eco mode.

画像2: 角度付き view of the Rointe CT.0 TSMTIB0 digital thermostat, showcasing スリムプロfile. The display and controls are identical to the front view, providing a clear perspective of the device's physical form.
3. インストールとセットアップ
3.1 安全情報
- 設置は、地域の配線規則に従って資格のある電気技師が行う必要があります。
- Always disconnect the main power supply before commencing any installation or maintenance work.
- Ensure the thermostat is installed in a dry location, away from direct sunlight or heat sources.
- デバイスを湿気や極端な温度にさらさないでください。
3.2 サーモスタットの取り付け
- Choose an appropriate wall location, typically 1.5 meters (5 feet) from the floor, away from drafts or heat-emitting appliances.
- サーモスタットcを慎重に開けるasin配線端子にアクセスするにはgを使用します。
- Connect the electrical wiring according to the provided wiring diagram (refer to the separate installation guide for detailed diagrams).
- Secure the thermostat base to the wall using appropriate screws.
- Reattach the front cover of the thermostat, ensuring it clicks securely into place.
3.3 初期電源投入
After installation, restore power to the circuit. The thermostat display will illuminate. Follow the on-screen prompts to set the initial date, time, and language if applicable. The device may perform a self-test upon first power-up.
4. 操作
4.1 基本的な制御
- 電源ボタン: Located at the top right of the display, press to turn the heating system ON or OFF.
- 温度調整ボタン: Located at the bottom of the display (up and down arrows), use these to increase or decrease the target temperature.
- モードボタン: (Circular icon, top left) Press to cycle through different operating modes (e.g., Manual, Programmed, Frost Protection).
4.2温度の設定
In Manual mode, press the up or down arrow buttons to adjust the desired room temperature. The new target temperature will be displayed and the system will adjust accordingly.
4.3 プログラミングモード
The Rointe CT.0 TSMTIB0 includes an adaptive start mode and three pre-installed programs to optimize energy consumption and comfort.
- Adaptive Start Mode: This intelligent feature learns the heating characteristics of your room and activates the heating system in advance to reach your desired temperature at the programmed time, rather than starting at the programmed time.
- プリインストールされたプログラム: The thermostat comes with three factory-set programs. These can be selected via the Mode button or within the settings menu. Refer to the detailed programming section in the full user guide for customization options.
- カスタムプログラム: You can create and save your own weekly heating schedules to match your lifestyle. Access the programming menu through the thermostat's interface to set specific temperatures for different times of the day and days of the week.
4.4 表示インジケータ
The backlit display provides clear information about the current status of your heating system:
- 現在の気温: Large digits in the center of the display.
- Heating On Indicator: A flame or wave icon typically indicates when the heating element is active.
- Adaptive Start Indicator: An icon (e.g., a clock with an arrow) may appear when adaptive start is active.
- プログラムインジケーター: Shows which program (e.g., P1, P2, P3) is currently active.
5. メンテナンス
The Rointe CT.0 TSMTIB0 thermostat requires minimal maintenance to ensure optimal performance.
- クリーニング: ディスプレイを軽く拭いて、asing 柔らかく、乾燥しているか、わずかにdamp cloth. Do not use abrasive cleaners, solvents, or chemical sprays, as these can damage the surface and internal components.
- ユーザーが修理可能な部品はありません: The thermostat contains no user-serviceable parts. Do not attempt to open or repair the device yourself. Unauthorized repairs will void the warranty and may pose a safety risk.
- バッテリー交換: If your model includes backup batteries for settings retention during power outages, refer to the full installation guide for instructions on safe replacement.
6。 トラブルシューティング
If you encounter issues with your Rointe CT.0 TSMTIB0 thermostat, please consult the following common problems and solutions before contacting support.
- ディスプレイなし/電源なし:
- Check the main power supply to the thermostat and the circuit breaker.
- すべての配線接続が安全であることを確認します (資格のある電気技師が確認する必要があります)。
- 温度の読み取りが不正確:
- サーモスタットが、センサーに影響を及ぼす可能性のある直射日光、風、熱源にさらされていないことを確認してください。
- Verify that the temperature sensor (if external) is correctly installed and connected.
- 加熱が作動しない:
- Check if the thermostat is in the ON position and not in Frost Protection or OFF mode.
- Ensure the target temperature is set higher than the current room temperature.
- Verify that the heating system itself (e.g., boiler, underfloor heating manifold) is operational.
- プログラミングエラー:
- Review the programming instructions in the full user guide to ensure schedules are set correctly.
- Consider resetting the thermostat to factory settings and reprogramming if issues persist (refer to the full user guide for reset procedures).
If these steps do not resolve the issue, please contact Rointe customer support or a qualified technician.
7. 仕様
| ブランド | ロインテ |
| モデル番号 | TSMTIB0 |
| コントロールタイプ | ボタンコントロール |
| スタイル | モダンな |
| バックライト | はい |
| メーカー | ロインテ |
| 品番 | 8435556137160 |
| ASIN | B0BDBZXFTT |
8. 保証とサポート
8.1 保証情報
The Rointe CT.0 TSMTIB0 thermostat is covered by a manufacturer's warranty. Specific warranty terms and conditions, including duration and coverage details, are provided at the time of purchase or can be obtained directly from Rointe or your authorized dealer. Please retain your proof of purchase for warranty claims.
8.2 カスタマーサポート
For technical assistance, troubleshooting beyond the scope of this manual, or warranty inquiries, please contact Rointe customer support through their official website or the retailer from whom you purchased the product. Have your model number (TSMTIB0) and proof of purchase ready when contacting support.


