1. はじめに
The Renogy RMS-DCDC-JP is a high-precision monitor specifically designed for Renogy MPPT charge controllers. It provides a clean and professional interface for monitoring your charging system. This monitor can be flush-mounted and features a backlit LCD display. With its four intuitive buttons, users can easily view critical system information, including charging parameters and error codes. It offers real-time feedback for two battery systems, ensuring you have the most current status of your power setup.
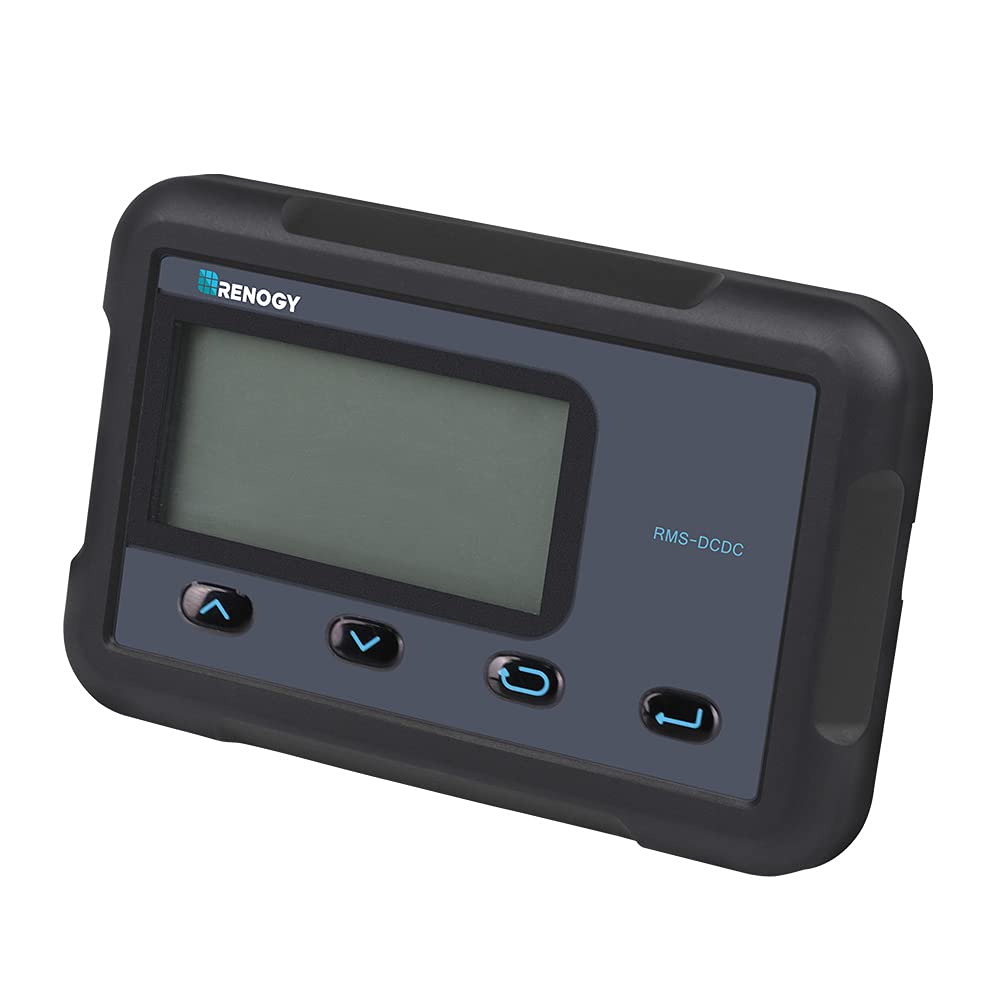
Image: The Renogy RMS-DCDC-JP monitor displaying system information, shown with and without its backlight activated.
2. 主な特徴
- Two Battery System Monitoring: Continuously track the charging status of both main and sub-batteries, providing a comprehensive overview of your solar system's health.
- 調整可能なパラメータ: Modify charging voltage, charging current, and other settings directly through the monitor interface.
- 簡単な接続: Connects directly to the DCC charge controller via an RJ45 cable for immediate use.
- 正確な測定: Provides real-time charging information from both solar panels and the alternator with high accuracy.
- 互換性: Designed for use with DCC Charge Controllers 12V 30A MPPT (RBC30D1S-JP) and DCC Charge Controllers 12V 50A MPPT (RBC50D1S-JP).
3. パッケージ内容
Verify that all items listed below are included in your package. If any items are missing or damaged, please contact Renogy customer support.
- LCD Monitor (x1)
- English Instruction Manual (x1)
- Communication Cable (CAT5, 5m) (x1)
- Mounting Screws (M2.9x13) (x4)
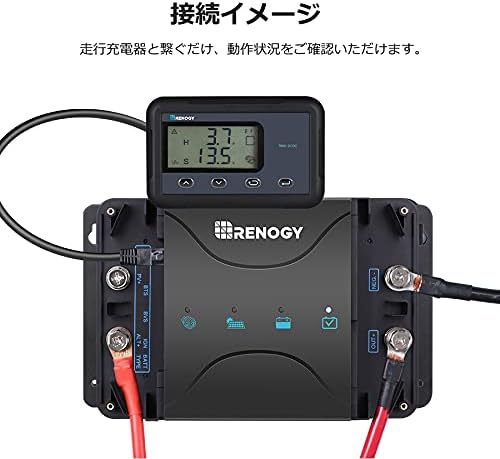
Image: All components included in the RMS-DCDC-JP product package.
4. セットアップとインストール
4.1物理的な設置
The RMS-DCDC-JP monitor is designed for flush mounting. Ensure you have adequate space behind the mounting surface for the monitor's body and cable connections. Use the provided mounting screws to secure the monitor in place.

Image: Exploded diagram illustrating the monitor's components, including the PVC board, ABS resin covers, and high-resolution display.
4.2 電気接続
Connect the monitor to your Renogy DCC charge controller using the supplied RJ45 communication cable. Simply plug one end of the RJ45 cable into the monitor's port and the other end into the corresponding port on the DCC charge controller. The monitor will power on automatically once connected.
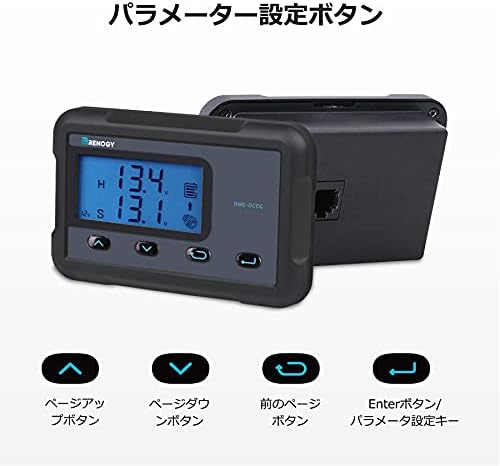
Image: The RMS-DCDC-JP monitor connected to a Renogy DCC charge controller, showing the RJ45 cable connection.
4.3 インストールビデオガイド
Video: A detailed guide on how to install and connect the Renogy RMS-DCDC-JP monitor to your charge controller.
5. 操作手順
5.1ディスプレイオーバーview
The LCD display provides real-time information about your battery and charging system. The displayed items may vary based on your system's configuration.

Image: Detailed breakdown of the monitor's display, indicating icons for solar charging, sub-battery, system error, parameter units, alternator, main battery, and charging status.
- Solar Charge Icon: Indicates active solar charging.
- Sub-Battery Icon: Represents the secondary battery's status.
- システムエラー: 障害が検出された場合はエラー コードを表示します。
- Parameter Unit: Shows units for displayed values (e.g., V, A, W, kWh).
- Alternator Icon: Indicates charging from the alternator.
- Main Battery Icon: Represents the primary battery's status.
- 充電ステータス: Shows the current charging phase (MPPT, Boost, Float, Equalization).
- システム巻tage: 現在のシステムボリュームを表示しますtage.
- バッテリーパラメータ: Shows various battery-related data.
- Sub-Battery State of Charge (SOC): Indicates the charge level of the sub-battery.
5.2 ボタンの機能
The monitor features four buttons for navigation and parameter adjustment.

Image: The four control buttons on the monitor: Page Up, Page Down, Previous Page, and Enter/Parameter Setting Key.
- Up Arrow (Page Up) Button: Navigates up through menu options or increases a value.
- Down Arrow (Page Down) Button: Navigates down through menu options or decreases a value.
- Left Arrow (Previous Page) Button: 前の画面またはメニューに戻ります。
- Right Arrow (Enter/Parameter Setting Key) Button: Confirms selections or enters parameter adjustment mode.
5.3 パラメータ調整
You can adjust charging current limits for the sub-battery directly from the monitor. This feature allows you to optimize charging based on your battery's specifications and system requirements.

Image: Current limit settings for DCC30S and DCC50S models, adjustable via the monitor.
パラメータを調整するには:
- を押す 入力 button to access the parameter setting menu.
- 使用 Up そして 下 arrow buttons to navigate through the available parameters (e.g., charging voltage, charging current limit).
- プレス 入力 もう一度押して調整するパラメータを選択します。
- 使用 Up そして 下 矢印ボタンを使用して値を変更します。
- プレス 入力 新しい値を確認します。
- を押す 前のページ ボタンを押して設定メニューを終了します。
5.4操作オーバーview ビデオ
ビデオ: オーバーview of the monitor's display and basic operation, including how to navigate through information screens.
6. 仕様
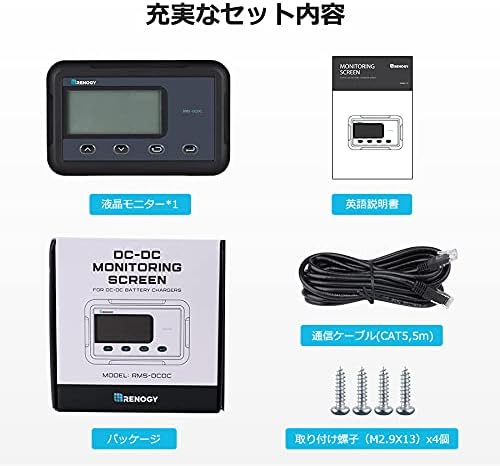
Image: Technical specifications and dimensions of the RMS-DCDC-JP monitor.
| パラメータ | 価値 |
|---|---|
| 電気仕様 | 5VDC |
| 供給電流 | 30mA |
| 自家消費 | <1W |
| 動作温度範囲 | -20°C ~ 45°C |
| 巻tag精度 | ±0.1V |
| 現在の精度 | ±0.1A |
| 寸法(長さ×幅×高さ) | 70 x 110 x 31.5 mm (2.76 x 4.33 x 1.24 インチ) |
| 重さ | 62g(0.14ポンド) |
| 出力巻tage | 12ボルト |
7. 互換性
The Renogy RMS-DCDC-JP monitor is compatible with the following Renogy DCC Charge Controllers:
- DCC Charge Controller 12V 30A MPPT (Model: RBC30D1S-JP)
- DCC Charge Controller 12V 50A MPPT (Model: RBC50D1S-JP)
8。 トラブルシューティング
If you encounter issues with your Renogy RMS-DCDC-JP monitor, please refer to the following common troubleshooting steps:
- モニターの電源が入らない:
- Ensure the RJ45 communication cable is securely connected to both the monitor and the DCC charge controller.
- Verify that the DCC charge controller is powered on and functioning correctly.
- 間違った読み方:
- すべてのケーブル接続に緩みや損傷がないか確認してください。
- Confirm that the monitor is compatible with your specific DCC charge controller model.
- Refer to the main DCC charge controller manual for calibration procedures if available.
- エラーコードの表示:
- Note the specific error code displayed on the monitor.
- Consult the DCC charge controller's instruction manual for a detailed explanation of error codes and their corresponding troubleshooting steps.
- ボタンが反応しない:
- Ensure the monitor is not in a locked mode (if applicable, refer to the main manual).
- Gently press the buttons to ensure proper contact.
For persistent issues or advanced troubleshooting, please contact Renogy customer support.
9. メンテナンス
The Renogy RMS-DCDC-JP monitor requires minimal maintenance to ensure optimal performance and longevity.
- クリーニング: Regularly wipe the display screen and casing with a soft, dry cloth. Avoid using abrasive cleaners, solvents, or harsh chemicals, as these can damage the surface.
- 接続: すべてのケーブル接続が安全で腐食がないことを定期的に確認してください。
- 環境: Ensure the monitor is installed in a location that adheres to the specified operating temperature range and is protected from direct moisture and extreme environmental conditions.
10. 保証とサポート
The Renogy RMS-DCDC-JP monitor comes with a 1年間のメーカー保証この保証は、通常の使用における材料および製造上の欠陥をカバーします。
For warranty claims, technical assistance, or any product-related inquiries, please contact Renogy customer support through their official website or the retailer where the product was purchased. Please have your product model number (RMS-DCDC-JP) and proof of purchase ready when contacting support.
10.1 Additional Support Videos
ビデオ: 将軍view of Renogy products and their features, which may provide additional context for your system.
Video: Another informational video from Renogy, potentially covering system integration or advanced tips.