Weiser SmartCode 5 Lever Electronic Lock
モデル: 9GED14550-005
1. はじめに
This manual provides comprehensive instructions for the Weiser 9GED14550-005 SmartCode 5 Lever Electronic Lock with Z-Wave technology. This electronic lever lock offers keyless entry, enhanced security, and smart home integration capabilities. Please read this guide thoroughly before installation and operation to ensure proper function and longevity of your lock.
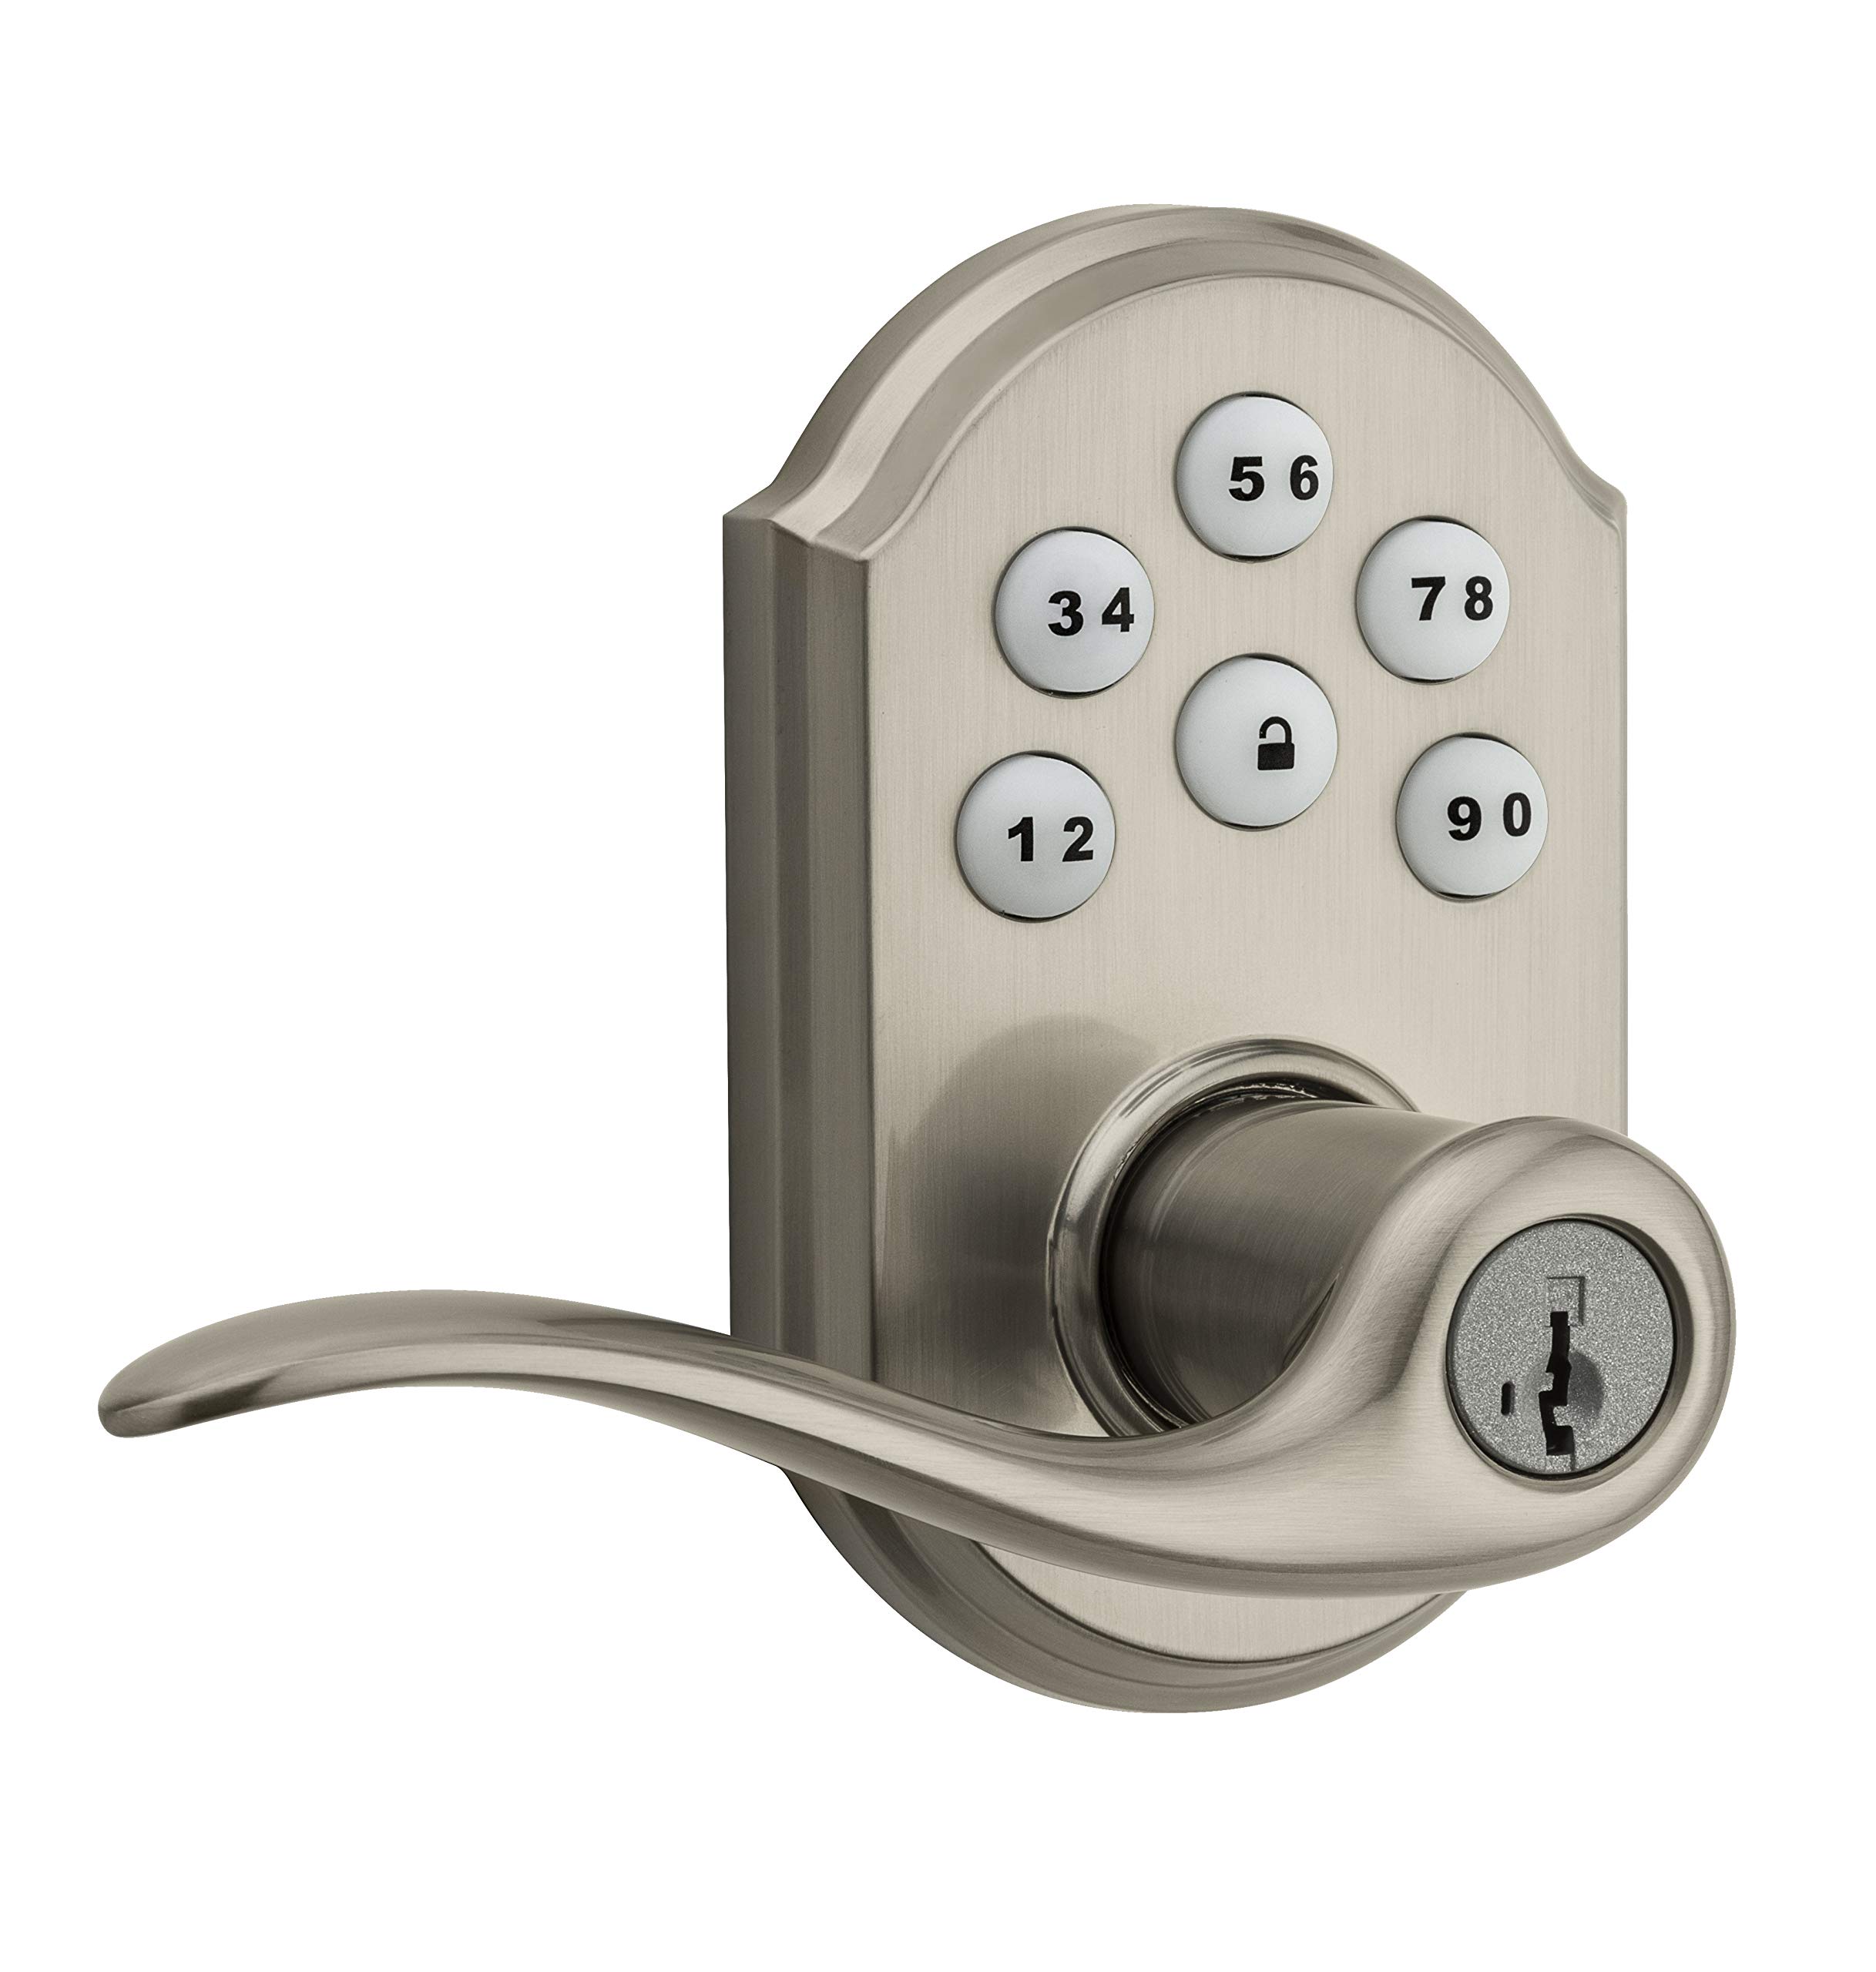
Image 1: Weiser SmartCode 5 Lever Electronic Lock in Satin Nickel finish. This image displays the complete lock assembly, including the exterior keypad and interior lever components.
2 製品の特徴
- キーレスエントリー: Backlit keypad for convenient code access.
- Z-Wave 500 Home Connect Technology: Enables wireless communication with other smart home devices.
- リモート アクセス: Remotely check lock status, lock/unlock, and receive notifications via web-enabled devices.
- スマートホーム互換性: Works with Z-Wave certified controllers, including Samsung SmartThings and Wink for Amazon Alexa integration.
- SmartKey キー再生成テクノロジー: Allows re-keying the lock to a new key in seconds.
- ワンタッチロック: Motorized locking with a single touch.
- 自動ロック: Customizable automatic re-locking after 30 seconds for added security.
- ユーザーコード: Supports up to 30 unique user access codes and 1 master code.
- 耐久性: ANSI/BHMA Grade 2 certified.
- 簡単なインストール: Designed to fit most standard residential door preparations (1-3/8" to 1-3/4" door thickness, adjustable 2-3/8" or 2-3/4" backset, 2-1/8" cross bore).
- 安全: Full 128-bit encryption.
3. パッケージ内容
Before beginning installation, verify that all components are present. The package typically includes:
- 外部キーパッドアセンブリ
- 内部レバーアセンブリ
- ラッチ
- ストライクプレート
- 取り付け金具
- 取り付けガイド/穴あけテンプレート
Note: 4 AA alkaline batteries are required and sold separately.
4.インストールガイド
Installation of the SmartCode 5 Lever lock is designed to be straightforward, typically requiring only a Phillips head screwdriver. Ensure your door meets the following specifications:
- ドアの厚さ: 1-3/8インチ~1-3/4インチ(35 mm~44 mm)
- クロスボア: 2-1/8インチ(54 mm)
- Latch Backset: Adjustable 2-3/8" or 2-3/4" (60 mm or 70 mm)
- ドアの取り扱い: Universal (can be installed on left or right-handed doors)
インストール手順:
- ドアの準備: If necessary, use the provided template to drill holes. Ensure the door is properly aligned and the existing latch bore is clear.
- ラッチを取り付けます。 Insert the latch into the door edge and secure it with screws. Ensure the latch bolt faces the door frame.
- 外部キーパッドアセンブリの取り付け: Route the cable through the cross bore and position the exterior keypad assembly on the door.
- 内部アセンブリを取り付けます: 外装アセンブリからのケーブルを内装アセンブリに接続します。付属の取り付けネジを使用して、内装アセンブリをドアに固定します。
- レバーの取り付け: Attach the interior and exterior levers according to the instructions, ensuring they operate smoothly.
- バッテリーの取り付け: Insert 4 new AA alkaline batteries into the battery pack.
- ドアハンドリングプロセスを実行します。 This step is crucial for the lock to learn the orientation of your door. Follow the specific instructions in your physical installation guide to ensure correct operation.
5. Initial Setup & Programming
After installation, the lock requires initial setup, including setting the Master Code and User Codes.
マスターコード:
The Master Code is a critical security feature. It is used to add, delete, and modify User Codes and other lock settings. It does not unlock the door. It is highly recommended to create a Master Code immediately after installation.
ユーザーコード:
The lock supports up to 30 unique 4-8 digit User Codes for family members, guests, or service personnel.
プログラミング手順(一般):
- マスターコードを設定します: Refer to your specific programming guide for the sequence to establish your Master Code.
- ユーザーコードを追加:
- マスターコードを入力してください。
- Press the Program button (usually located on the interior assembly).
- 新しい 4 ~ 8 桁のユーザー コードを入力します。
- ロックボタンを押します。
- Test the new User Code to ensure it unlocks the door.
- ユーザーコードの削除: Follow the specific instructions in your programming guide, typically involving the Master Code and the User Code to be deleted.
6. Z-Wave Integration
The SmartCode 5 Lever lock features Z-Wave 500 Home Connect Technology, allowing it to integrate with compatible smart home systems.
Enrollment (Adding to Z-Wave Network):
To add the lock to your Z-Wave network, initiate the 'Add Device' or 'Inclusion' process on your Z-Wave controller/hub. Then, follow the lock's specific instructions to put it into inclusion mode (often by pressing the Program button once). The lock will communicate with the controller to join the network.
Exclusion (Removing from Z-Wave Network):
To remove the lock from a Z-Wave network, initiate the 'Remove Device' or 'Exclusion' process on your Z-Wave controller/hub. Then, follow the lock's specific instructions to put it into exclusion mode.
Functionality with Z-Wave:
- Remotely lock and unlock the door.
- Check the current lock status (locked/unlocked).
- Receive notifications for lock activity (e.g., door locked/unlocked, low battery).
The lock is compatible with Z-Wave certified controllers, including those that support Amazon Alexa integration via Samsung SmartThings and Wink.
7. 操作
Operating your SmartCode 5 Lever lock is simple and intuitive.
ドアをロックする:
- 外観から: Press the Lock button on the keypad. The motorized deadbolt will extend.
- 内部から: Rotate the interior thumb turn to the locked position.
ドアのロック解除:
- 外観から: Enter a valid 4-8 digit User Code on the keypad. The motorized deadbolt will retract.
- 内部から: Rotate the interior thumb turn to the unlocked position.
自動ロック:
If enabled, the lock will automatically re-lock approximately 30 seconds after being unlocked from the exterior. This feature provides peace of mind, ensuring your door is always secured.
8. メンテナンス
Proper maintenance ensures the longevity and reliable operation of your electronic lock.
バッテリー交換:
The lock requires 4 AA alkaline batteries. When the batteries are low, the lock will typically provide an audible and/or visual low battery warning. Replace all four batteries simultaneously with new, high-quality alkaline batteries. Avoid using rechargeable batteries, as they may not provide sufficient voltage.
クリーニング:
キーパッドとロック本体を柔らかくて清潔な布で拭いてください。amp 布で拭いてください。研磨剤入りの洗剤、溶剤、化学スプレーの使用は避けてください。仕上げや電子部品に損傷を与える可能性があります。
SmartKey の再キー化:
If you need to re-key your lock to a new key, follow the specific instructions provided with your SmartKey tool. This process allows you to re-key the lock yourself in seconds without removing it from the door.
9。 トラブルシューティング
If you encounter issues with your lock, refer to the following common troubleshooting steps:
- ロックが応答しません: Check that the batteries are correctly installed and fully charged. Replace batteries if necessary. Ensure all cables are securely connected inside the interior assembly.
- コードが機能しない: Verify that the Master Code is set. Ensure User Codes are entered correctly and are active. Try deleting and re-adding the User Code.
- Z-Wave 接続の問題: Ensure your Z-Wave controller/hub is powered on and within range of the lock. Try performing a Z-Wave exclusion and then re-inclusion process.
- Grinding Noise / Latch Not Extending: This can indicate door misalignment or an obstruction. Check that the door frame and strike plate are properly aligned with the latch. Ensure the latch operates freely without resistance.
- キーパッドが点灯しない: Check battery power. If batteries are new, ensure they are inserted with correct polarity.
For more detailed troubleshooting, consult the full product manual or contact Weiser customer support.
10. 仕様
| モデル番号 | 9GED14550-005 |
| ブランド | ワイザー |
| 材料 | ニッケル |
| 仕上げる | 磨き上げられた |
| 色 | サテンニッケル |
| スタイル | モダンな |
| ロックタイプ | キーパッド |
| 特集 | キーレス |
| ドアの厚さ | 1-3/8インチ~1-3/4インチ(35 mm~44 mm) |
| ラッチバックセット | Adjustable 2-3/8" or 2-3/4" (60 mm or 70 mm) |
| クロスボア | 2-1/8インチ(54 mm) |
| 電源 | 単4形アルカリ電池XNUMX本(別売り) |
| 認定資格 | ANSI / BHMAグレード2 |
| アイテム重量 | 1.51キロ |
| Approximate Dimensions (Parcel) | 25.3 x 14.1 x 9.2 cm |
| コントローラの互換性 | Amazon Alexa, SmartThings, Wink (via Z-Wave hub) |
11.保証とサポート
Weiser stands behind the quality of its products.
保証情報:
- Mechanical & Finish Warranty: 一生
- 電子機器の保証: 1年
These warranties apply to the original residential user of the product. Please retain your proof of purchase for warranty claims.
カスタマーサポート:
For detailed warranty terms, technical assistance, or further support, please visit the official Weiser website or contact their customer service department. Contact information can typically be found on the Weiser webサイト内または梱包材に記載されています。


