1. はじめに
This manual provides detailed instructions for the installation, operation, and maintenance of your Xilence LQ240 All-in-One (AiO) Water Cooling System. The LQ240 is designed to offer efficient and quiet cooling for both AMD and Intel CPUs, supporting a Thermal Design Power (TDP) of up to 300W. Its maintenance-free design and flexible installation options make it suitable for various PC builds.
Please read this manual thoroughly before proceeding with installation to ensure correct setup and optimal performance.

画像1.1: 以上view of the Xilence LQ240 AiO Water Cooling System, featuring a 240mm radiator, two 120mm PWM fans with red blades, and the pump/cold plate unit.
2. 安全情報
This product is intended for internal use within a computer system. For external use only refers to the thermal paste included, which should not be ingested or applied to skin unnecessarily. Always handle components with care to avoid damage. Ensure your computer is powered off and unplugged from the wall outlet before installation or maintenance. Consult a qualified technician if you are unsure about any installation steps.
3. パッケージ内容
以下にリストされているすべてのコンポーネントがパッケージに含まれていることを確認してください。
- 1 x LQ240 Multi-Socket Water Cooling Unit (Radiator, Pump, Hoses)
- 2 x 120mm PWMファン
- 1 x PWM Fan Splitter Cable
- 1 x Intel Brackets Set
- 1 x AMD Brackets Set
- 1 x Backplate (Universal)
- 4 x Long Screws (for mounting pump)
- 8 x Radiator Mounting Screws
- 4 x Knurled Threaded Nuts
- 8 x Fan Mounting Screws
- 4 x Threaded Nuts
- ワッシャー x 4
- 4 x LGA 2011 / 2066 Knurledネジ
- 4 x TR4 Knurled Screws (Note: TR4 support is not explicitly listed in compatible sockets, but screws are included)
- 1 x Tube of Thermal Paste
- 1 x Installation Instructions (Printed)
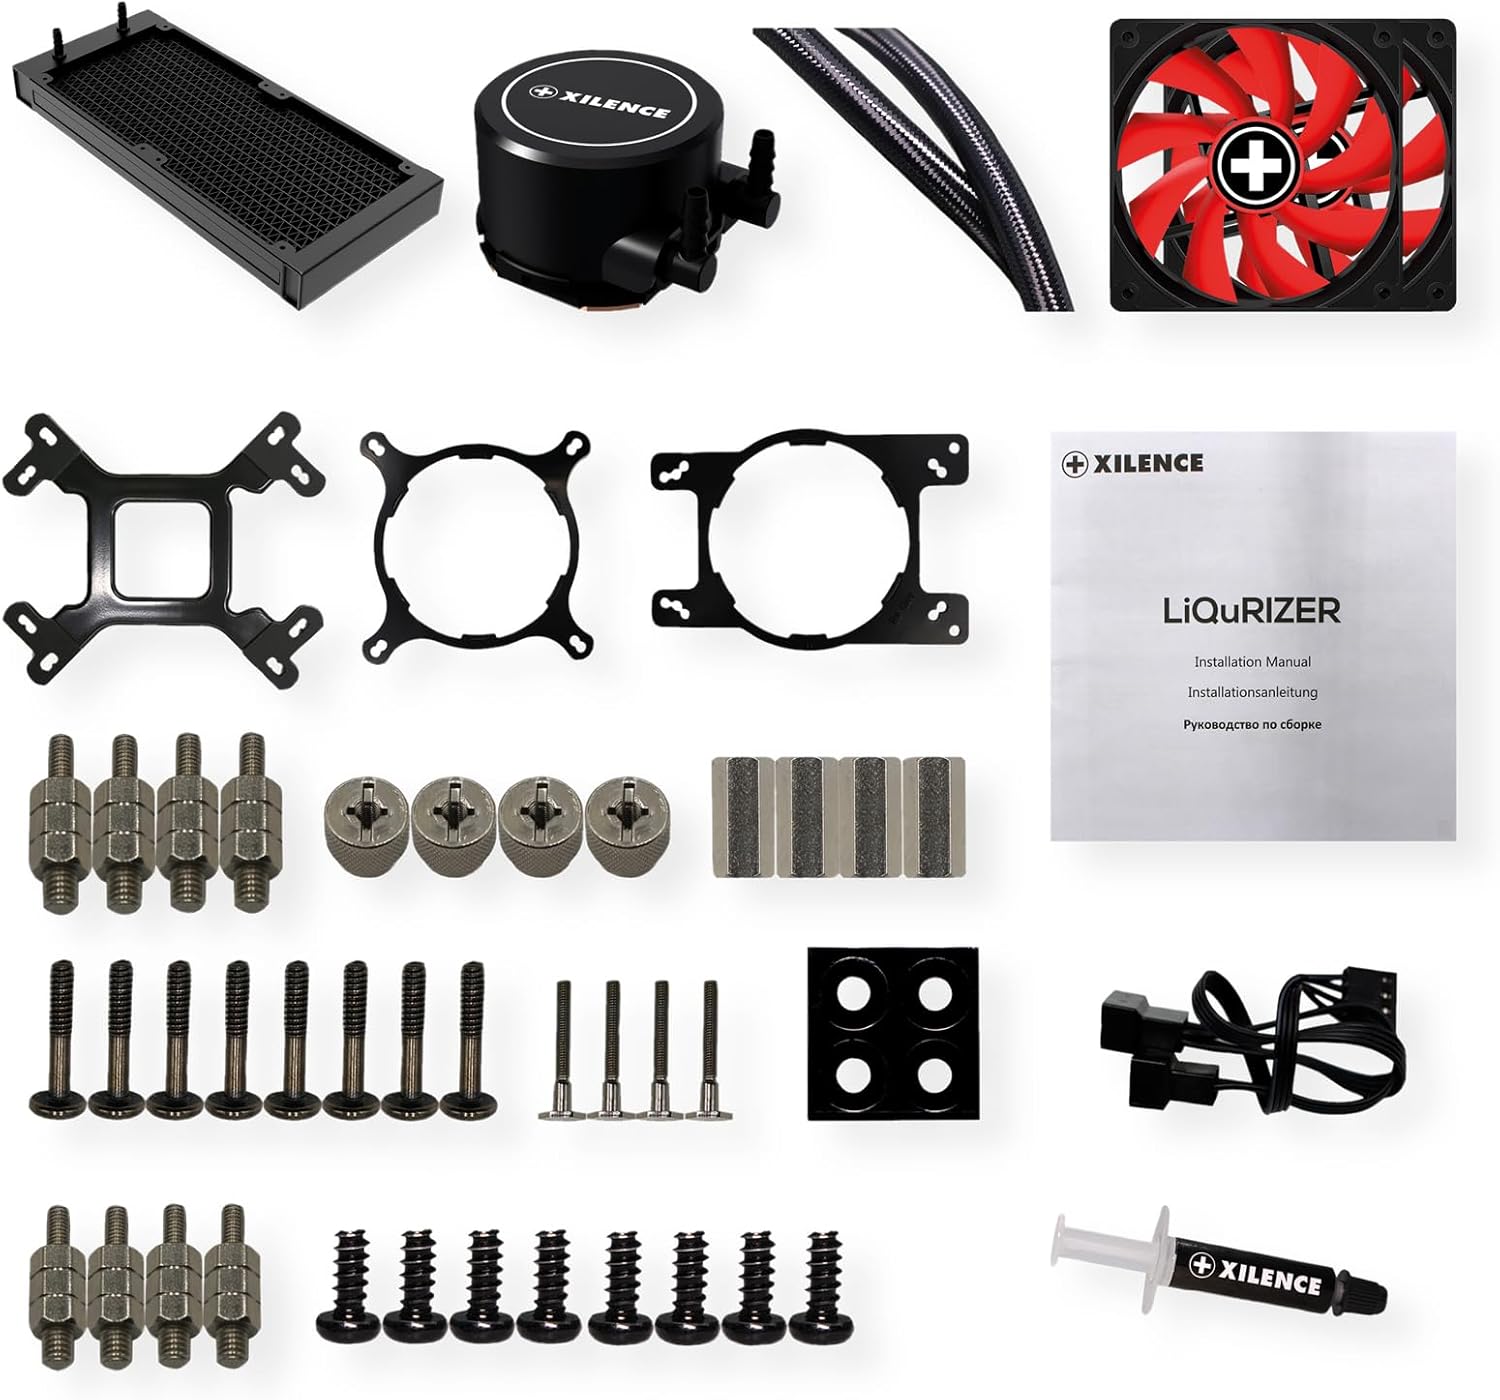
Image 3.1: All included components for the Xilence LQ240, including the radiator, pump, fans, various mounting brackets, screws, and thermal paste.
4. セットアップとインストール
The Xilence LQ240 features a quick mount system for easy installation on various AMD and Intel sockets. Follow these general steps for installation:
4.1. Prepare CPU Socket
- Identify your CPU socket type (e.g., AM4, LGA 1700, LGA 1200).
- Select the appropriate mounting brackets from the Intel or AMD sets provided.
- For Intel sockets (LGA 115x/1200/1700), install the universal backplate behind your motherboard. For LGA 2011/2066, use the specific knurled screws directly. For AMD sockets (AM4/AM5), utilize the motherboard's existing backplate.
4.2. Mount Standoffs and Pump Bracket
- Screw the correct standoffs into the backplate or directly into the motherboard (for LGA 2011/2066).
- Attach the selected CPU pump bracket to the pump unit.

Image 4.1: The pump block with its integrated hoses, ready for bracket attachment and installation.
4.3. サーマルペーストを塗る
- Clean the CPU surface and the copper cold plate of the pump unit with isopropyl alcohol.
- Apply a small amount of the included thermal paste to the center of your CPU. A pea-sized dot is generally sufficient. Do not spread it manually; the pressure from the cold plate will distribute it evenly.

Image 4.2: The copper cold plate on the underside of the pump block, which makes direct contact with the CPU.
4.4. ポンプ/コールドプレートを取り付ける
- Carefully place the pump unit onto the CPU, aligning the holes in the pump bracket with the standoffs.
- Secure the pump unit using the long screws and knurled nuts, tightening them in a diagonal pattern until snug. Do not overtighten.
4.5. ラジエーターとファンの取り付け
- Attach the two 120mm PWM fans to the radiator using the fan mounting screws. Ensure the fan orientation (intake or exhaust) matches your case's airflow design.
- Mount the assembled radiator and fan unit to an available 240mm mounting location in your PC case (e.g., top, front, or rear) using the radiator mounting screws. The flexible hoses allow for versatile placement.

Image 4.3: The 240mm radiator with both 120mm PWM fans securely attached.

画像4.4: クローズアップ view of the durable, braided hoses, designed for flexibility and easy routing within a PC case.
4.6.ケーブルを接続します
- Connect the pump's 3-pin power cable to an available CPU_FAN or AIO_PUMP header on your motherboard. Ensure it receives constant 12V power.
- Connect both 120mm PWM fans to the included PWM fan splitter cable.
- Connect the PWM fan splitter cable to a CPU_FAN or SYS_FAN header on your motherboard. This allows for fan speed control based on CPU temperature.
5. 操作手順
Once installed, the Xilence LQ240 operates automatically, adjusting fan and pump speeds based on CPU temperature via PWM control. For optimal performance and longevity, consider the following:
- BIOS/UEFI設定: Access your motherboard's BIOS/UEFI to ensure the CPU_FAN header (or equivalent) is set to PWM mode and configured for optimal fan curve control. This allows the fans to spin up or down based on CPU temperature, balancing cooling performance with noise levels.
- 監視: Use system monitoring software to keep an eye on your CPU temperatures, especially during demanding tasks. Typical operating temperatures vary by CPU model and load.
- 初期起動: During the first few minutes of operation, you might hear some gurgling sounds as air bubbles in the loop settle. This is normal and should subside.
6. メンテナンス
The Xilence LQ240 is designed as a maintenance-free All-in-One liquid cooling system. The coolant is sealed within the loop and does not require refilling or replacement under normal operating conditions. However, regular cleaning can help maintain optimal performance:
- ほこりの除去: Periodically inspect the radiator fins and fan blades for dust accumulation. Use compressed air or a soft brush to gently remove dust. Ensure the fans are held stationary while cleaning with compressed air to prevent over-spinning and potential damage.
- ケーブル管理 すべてのケーブルがきちんと配線され、ケース内の空気の流れを妨げないことを確認します。
7。 トラブルシューティング
If you encounter issues with your Xilence LQ240, refer to the following common problems and solutions:
| 問題 | 考えられる原因 | 解決 |
|---|---|---|
| 高いCPU温度 | Improper thermal paste application; pump not running; fans not spinning; radiator obstructed. | Verify thermal paste contact; check pump power connection; ensure fans are connected and spinning; clean radiator fins. |
| Pump Not Running / No Flow | Pump power cable disconnected or connected to incorrect header; pump failure. | Ensure pump is connected to a constant 12V header (e.g., CPU_FAN or AIO_PUMP) and not set to a variable fan curve that might turn it off. Check BIOS settings. |
| Fans Not Spinning / Incorrect Speed | Fan cables disconnected; incorrect BIOS settings; fan failure. | Check fan connections to splitter and motherboard. Verify BIOS fan curve settings for the connected header. |
| ファンの騒音が大きすぎる | Fans running at high RPM; dust accumulation; fan defect. | Adjust fan curve in BIOS to reduce RPM at lower temperatures. Clean fans. If noise persists, inspect fans for damage. |
| Gurgling Sound from Pump/Radiator | ループ内に気泡があります。 | This is often normal during initial startup and should subside. Gently tilt your PC case to help dislodge air bubbles. Ensure the pump is not the highest point in the loop if possible. |
8. 技術仕様
Detailed specifications for the Xilence LQ240 AiO Water Cooling System:
| 一般的な | |
|---|---|
| モデル番号 | XC975 |
| Max. CPU TDP | 300ワット |
| 総重量 | 1.345 kg(約3.3ポンド) |
| 互換性のあるAMDソケット | AM5、AM4 |
| 互換性のあるIntelソケット | LGA 2066, LGA 2011, LGA 1700, LGA 1200, LGA 1151, LGA 1150, LGA 1155, LGA 1156 |
| ラジエーター | |
| 寸法 | 274 x 120 x 27 ミリメートル |
| 材料 | アルミニウム |
| ホース長さ | 400ミリメートル |
| ポンプ | |
| 寸法 | 72 x 72 x 47.3 ミリメートル |
| スピード | 2100±10%RPM |
| 騒音レベル | 25dB(A) |
| 定格電流 | 0.36A |
| Bearing Technology | セラミックベアリング |
| Cooling Plate Material | 銅 |
| Fans (2x 120mm PWM) | |
| 寸法 | 120 x 120 x 25 ミリメートル |
| コネクタ | 4ピンPWM |
| スピード | 700~1600 ± 10% 回転数 |
| Bearing Technology | 油圧ベアリング |
| 気流 | 70 CFM |
| 騒音レベル | 18.0 - 32.5 dB(A) |
| 気圧 | 2.09 mm H²O |
| 定格電流 | 0.15A |
9. 保証とサポート
For information regarding the warranty period and terms for your Xilence LQ240 AiO Water Cooling System, please refer to the warranty card included with your product or visit the official Xilence webサイト。保証は通常、製造上の欠陥を対象としています。
For technical support, troubleshooting assistance beyond this manual, or to inquire about replacement parts, please contact Xilence customer service through their official website or the retailer from whom you purchased the product. Have your product model (LQ240 or XC975) and proof of purchase ready when contacting support.
Xilence Official Webサイト: www.xilence.de/en/


