1. はじめに
This manual provides detailed instructions for the installation, setup, and operation of your LoraTap WiFi Smart Relay Switch (Model RR400W). Please read this manual thoroughly before use to ensure proper functionality and safety.
パッケージ内容:
- LoraTap WiFi Smart Relay Switch (RR400W)
- ユーザーマニュアル
- Mounting accessories (screws, anchors, mini screwdriver, electrical wires)

Image 1.1: LoraTap WiFi Smart Relay Switch (Model RR400W) and its mobile application interface.
2. 安全情報
- 警告: Electrical installation should only be performed by a qualified electrician or in accordance with local electrical codes.
- デバイスの設置または保守を行う前に、必ず回路ブレーカーで電源を切ってください。
- このデバイスは屋内専用に設計されています。
- 最大負荷定格10A/2500Wを超えないでください。
- Ensure the device is installed in a location with a neutral wire for correct electrical supply.
- お子様の手の届かない場所に保管してください。
3. 製品仕様
| 特徴 | 仕様 |
|---|---|
| モデル番号 | RR400W |
| 入力ボリュームtage | 100-250V AC、50/60Hz |
| 最大荷重 | 10A/2500W |
| ワイヤレスプロトコル | Wi-Fi 2.4GHz(IEEE 802.11 b/g/n) |
| 寸法(長さ×幅×高さ) | 4.8 x 4.2 x 2.3 cm(1.89 x 1.65 x 0.91インチ) |
| 制御方法 | Remote (App), Voice |
| 互換性 | Amazon Alexa, Google Assistant, Smart Life App, Tuya App |
| 認定資格 | CE、RoHS、FCC |
4.インストールガイド
The LoraTap WiFi Smart Relay Switch is designed for easy integration into existing electrical systems. It requires a neutral wire for operation.
配線図:
- 電源を切る: Before starting, turn off the power at the main circuit breaker to avoid electrical shock.
- ワイヤーを識別する: Locate the Live (L) and Neutral (N) input wires from your power source, and the Live (L) and Neutral (N) load wires going to your appliance (e.g., lamp).
- 接続入力: Connect the Live input wire to the 'L in' terminal and the Neutral input wire to the 'N in' terminal on the LoraTap switch.
- 出力を接続: Connect the Live load wire to the 'L out' terminal and the Neutral load wire to the 'N out' terminal on the LoraTap switch.
- 安全な接続: Ensure all wire connections are secure. The device supports 26-16AWG wires.
- マウントデバイス: The compact size allows installation in narrow spaces, such as behind a socket or in a ceiling rose. Use the provided mounting accessories if needed.
- 電力を回復する: Once all connections are secure and the device is properly mounted, restore power at the circuit breaker.

Image 4.1: Simplified wiring diagram for the LoraTap Smart Relay Switch. Ensure a neutral wire is present for installation.
5. アプリのセットアップとペアリング
To control your LoraTap Smart Relay Switch, you need to download the Smart Life or Tuya app and pair the device.
要件:
- A smartphone (Android or iOS).
- A 2.4GHz Wi-Fi network. 5GHz networks are not supported.
- The Smart Life or Tuya app installed on your smartphone.
ペアリング手順:
- アプリをダウンロードする: 検索する "Smart Life" or "Tuya Smart" in your smartphone's app store (App Store for iOS, Google Play for Android) and install it.
- 登録/ログイン: アプリを開いて、新しいアカウントを登録するか、既存のアカウントでログインします。
- デバイスを追加: Tap the "+" icon in the top right corner of the app to add a new device. Select "Electrical Switch" or "Switch (Wi-Fi)".
- ペアリングモードに入る: Power on the LoraTap switch. If the indicator light is not blinking rapidly, press and hold the button on the switch for approximately 5 seconds until it blinks rapidly. This indicates pairing mode.
- Wi-Fiに接続します: In the app, confirm the indicator is blinking rapidly. Enter your 2.4GHz Wi-Fi network name and password.
- ペアリング完了: The app will search for and connect to the device. Once connected, you can rename the device for easier control.

Image 5.1: Easy pairing process with the Smart Life/Tuya app. Ensure your Wi-Fi network is 2.4GHz.
6. 操作
The LoraTap Smart Relay Switch offers multiple control options for convenience.
6.1.アプリ制御
Once paired, you can control your device from anywhere using the Smart Life or Tuya app on your smartphone.
- オン/オフ制御: Tap the switch icon in the app to turn your connected appliance on or off.
- リアルタイムステータス: The app displays the current status of your appliance, allowing you to verify if it's on or off remotely.
- グループコントロール: You can group multiple LoraTap switches together in the app to control them simultaneously.
- デバイスの共有: アプリを通じてデバイスの制御を家族と共有します。

Image 6.1: Remote control via the Smart Life app.
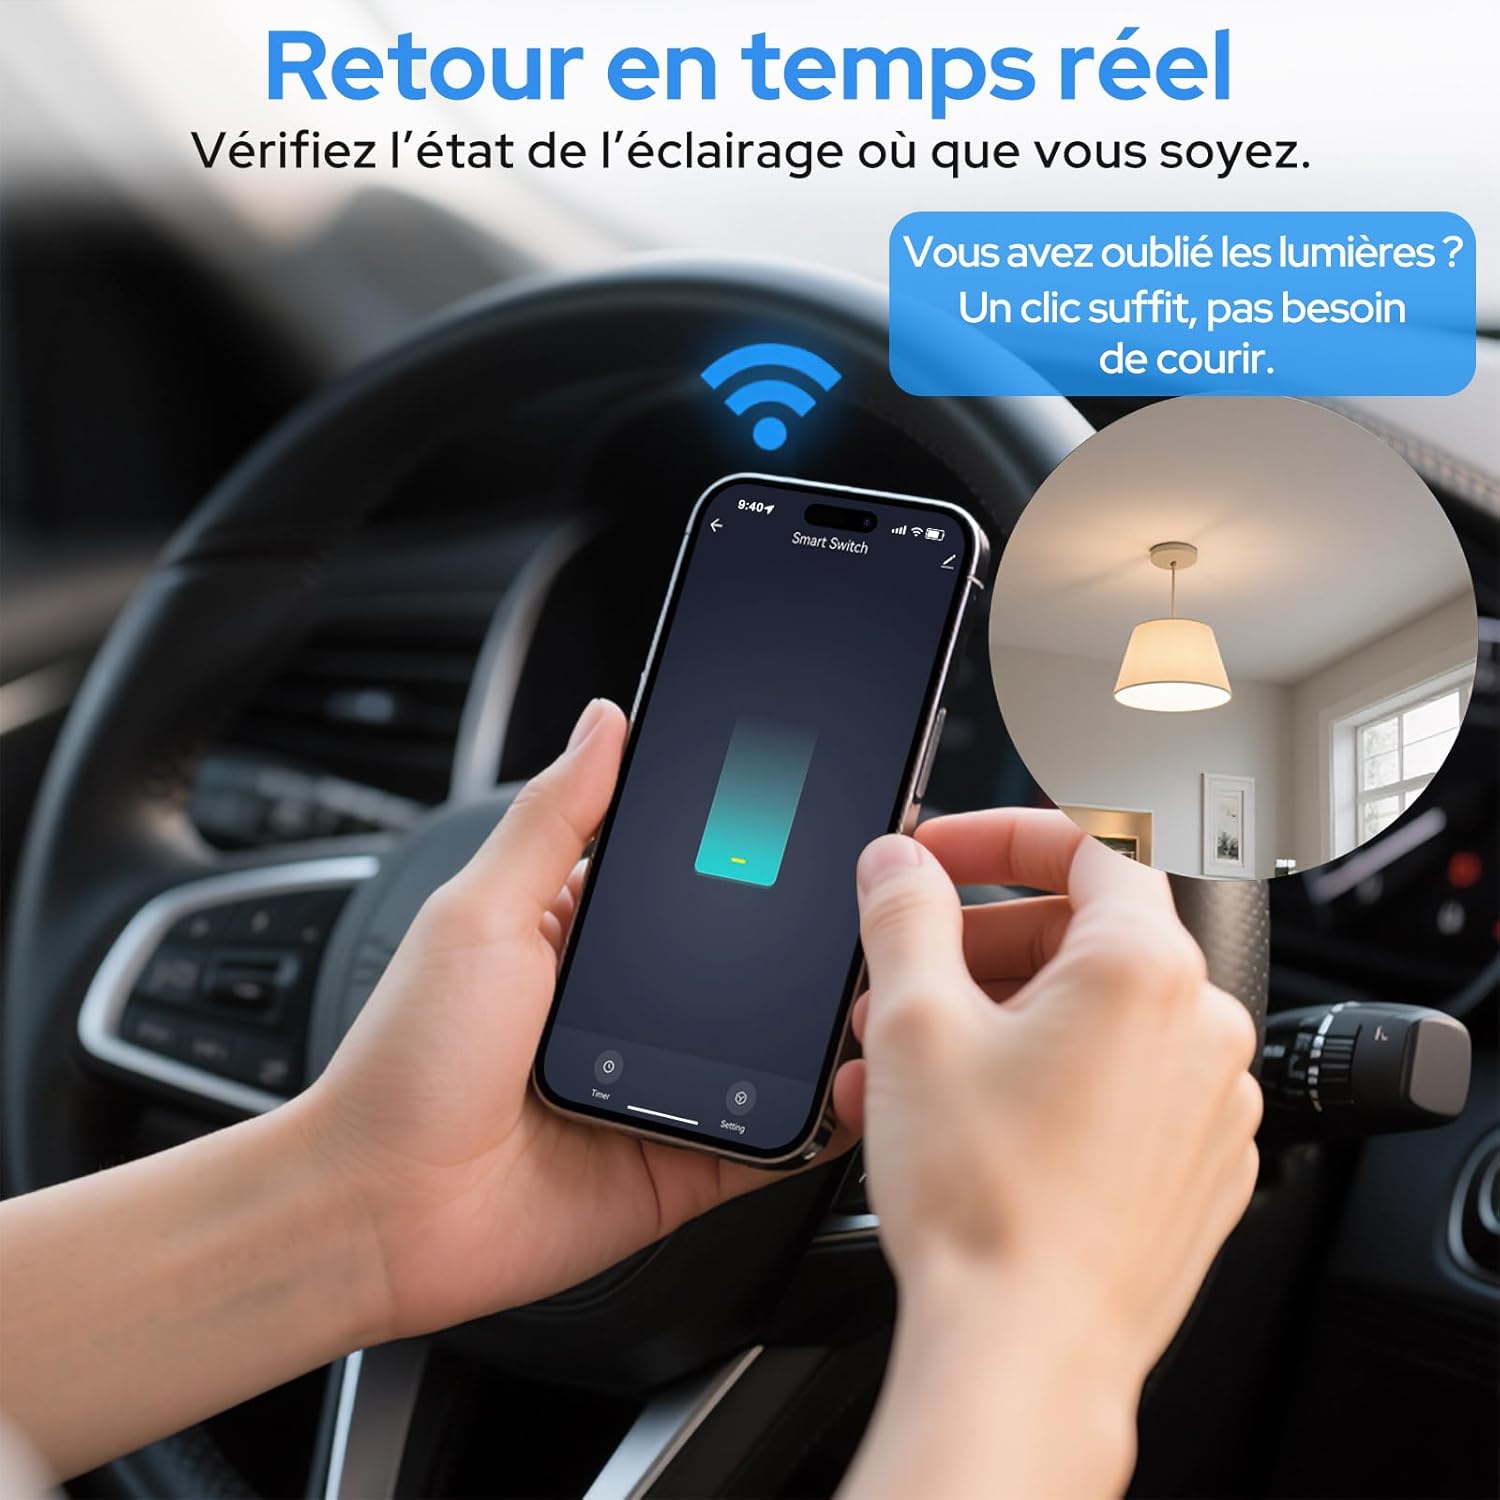
Image 6.2: Real-time status monitoring from anywhere.

Image 6.3: Device sharing feature for family members.
6.2. 音声コントロール
The LoraTap Smart Relay Switch is compatible with Amazon Alexa and Google Assistant for convenient voice control.
- アカウントをリンク: In the Alexa or Google Home app, link your Smart Life/Tuya account.
- デバイスの検出: Alexa または Google アシスタントに新しいデバイスを見つけるように依頼します。
- 音声コマンド: 「Alexa、[デバイス名] をオンにして」や「Hey Google、[デバイス名] をオフにして」などのコマンドを使用します。

画像 6.4: Amazon Alexa および Google Assistant との音声制御統合。

Image 6.5: Family using voice commands for smart home control.
6.3. スケジュールとタイマー
Automate your appliances by setting schedules and timers within the Smart Life/Tuya app.
- タイマー機能: Set a countdown timer for the switch to turn on or off automatically after a specified duration.
- スケジュール: Create daily or weekly schedules for your appliance to turn on or off at specific times (e.g., turn on lights at sunset, turn off at bedtime).
- 繰り返し機能: Configure schedules to repeat on selected days of the week.

Image 6.6: Automate lighting with countdown timers.

Image 6.7: Program your lights with custom schedules.
6.4. Restart Status Settings
Configure the power-on state of your smart switch after a power outage.
- OFF: 電源が回復した後もデバイスはオフのままになります。
- に: The device will turn on automatically after power is restored.
- 最後のステータスを記憶: The device will return to its last known state (on or off) before the power outage.

Image 6.8: Configure the device's restart status after a power interruption.
7. メンテナンス
- 柔らかく乾いた布でデバイスを拭いてください。刺激の強い化学薬品や研磨剤入りの洗剤は使用しないでください。
- Ensure the device is kept in a dry environment and away from direct sunlight or extreme temperatures.
- 最適なパフォーマンスとセキュリティを確保するために、Smart Life/Tuya アプリでファームウェアのアップデートを定期的に確認してください。
8。 トラブルシューティング
| 問題 | 考えられる原因 / 解決策 |
|---|---|
| Device not pairing / Indicator not blinking rapidly. |
|
| Device offline in app. |
|
| 音声制御が機能しません。 |
|
| Device not responding to manual switch. |
|
9. 保証とサポート
LoraTap offers a 3-year warranty for this product. For technical support or warranty claims, please contact LoraTap customer service through their official web製品を購入したサイトまたは小売店にお問い合わせください。
連絡先: Please refer to the packaging or LoraTap's official web最新のサポート連絡先の詳細については、サイトをご覧ください。


