1. 安全情報
Always observe basic safety precautions when using power tools to reduce the risk of personal injury. Read and understand all instructions before operating this tool.
- 目の保護: 必ず ANSI 認定の安全ゴーグルまたはサイドシールド付きの安全メガネを着用してください。
- 手の保護: Wear appropriate work gloves to protect hands from sharp edges and pinch points.
- 作業エリア: Keep the work area clean, well-lit, and free of clutter. Ensure proper ventilation.
- 安全なワークピース: Always secure the material being riveted to prevent movement during operation.
- ツールの状態: Inspect the tool before each use. Do not use if damaged.
- 適切な使用方法: Use the tool only for its intended purpose. Do not modify the tool.
- 子供と傍観者: 子供や傍観者を作業エリアに近づけないでください。
2.製品オーバーview
The WORKPRO 5-in-1 Rivet Gun Set is a heavy-duty hand riveter designed for efficient and reliable fastening. It features an innovative design that maximizes leverage, reducing the effort required for riveting tasks. The tool comes with multiple interchangeable nosepieces and a supply of rivets to suit various applications.
主な特徴:
- High Efficiency & Labor-Saving: Designed with an infinite transmission system, this rivet gun maximizes its transfer ratio up to 40 times, significantly reducing the effort needed for setting large diameter blind rivets. Its robust construction allows for quick riveting and efficient cutting of the rivet stem without repetitive, strenuous handle operation.
- 耐久性のある構造: Features a 2mm (5/64 inch) thickened heat-treated carbon steel body for extended durability and a longer service life. The internal three-jaw steel chuck structure ensures secure fastening and holding of the rivet.
- Versatile Nosepieces: Includes 5 popular nosepiece sizes: 2.4mm (3/32 inch), 3.2mm (5/32 inch), 4.0mm (3/16 inch), and 6.4mm (1/4 inch). Four of these are conveniently stored on the tool's grip for easy access. The knurled design allows for tool-free, quick manual nosepiece changes.
- Comprehensive Rivet Supply: 100 rivets in 5 different sizes are provided to accommodate a variety of riveting tasks for both outdoor and home projects.
- 人間工学に基づいたデザイン: Ergonomic curved handles with a non-slip design ensure comfortable and easy operation. The compact 25 cm body simplifies work in tight or hard-to-reach spaces, such as gutters, furniture, drawers, and small cases. Its portable size makes it convenient to carry.
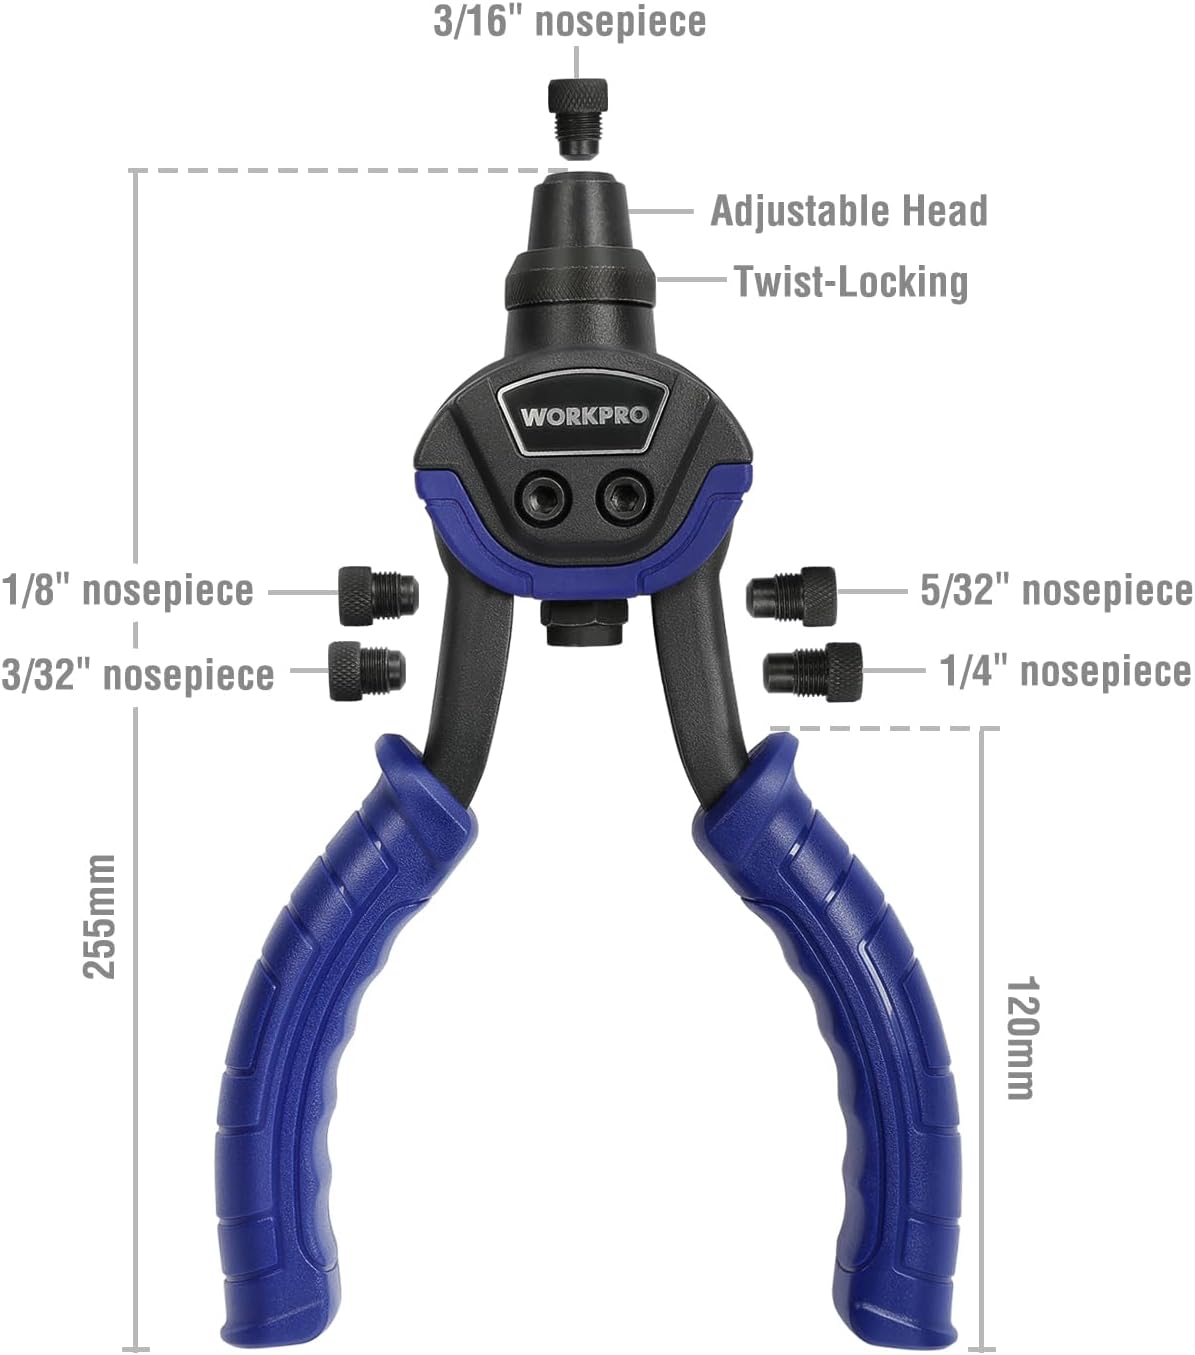
Image 2.1: WORKPRO 5-in-1 Rivet Gun showing overall dimensions and various nosepiece sizes.
3. セットアップ
3.1 Selecting and Changing Nosepieces
The rivet gun comes with five interchangeable nosepieces to accommodate different rivet diameters. Four of these are stored directly on the tool's handles for convenience.
- Identify Rivet Size: Determine the diameter of the rivet you intend to use.
- Select Nosepiece: Choose the nosepiece that matches the rivet diameter. The nosepiece is adjustable to match various rivet sizes.
- Remove Current Nosepiece: Unscrew the currently installed nosepiece by hand. The knurled design allows for tool-free removal.
- Install New Nosepiece: Screw the selected nosepiece firmly into the head of the rivet gun by hand until it is secure.
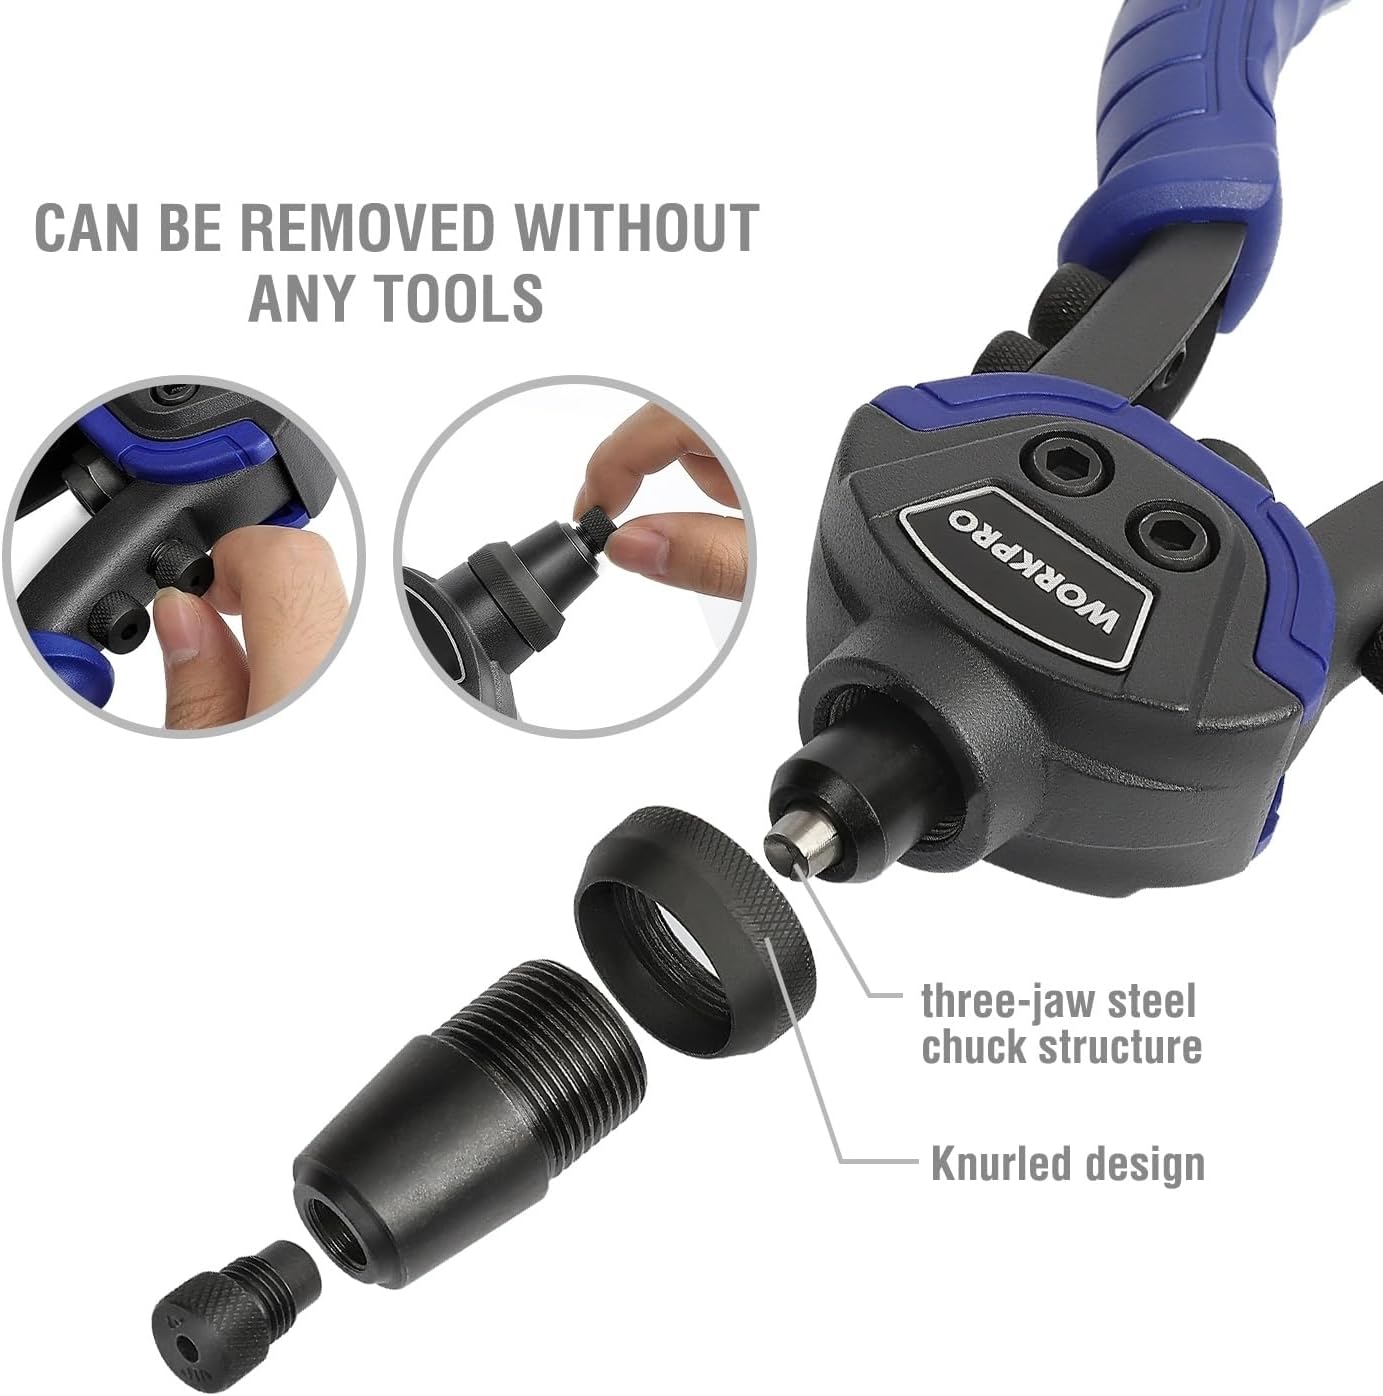
Image 3.1: Illustration of the tool-free nosepiece removal and the internal three-jaw steel chuck structure.
4. 操作手順
Follow these steps for proper and safe operation of your WORKPRO Rivet Gun.
- ワークピースの準備: Drill a hole through the materials to be joined. The hole diameter should be slightly larger than the rivet body, allowing the rivet to pass through easily but without excessive play.
- リベットを挿入: Insert the rivet's stem into the selected nosepiece of the rivet gun. Ensure the rivet head is flush against the nosepiece.
- リベットの位置: Place the rivet body through the prepared hole in the workpiece. Ensure the rivet head is flat against the surface of the material.
- Operate Tool: Firmly squeeze the handles of the rivet gun together. You will feel resistance as the tool pulls the rivet stem, causing the rivet body to expand and form a secure joint. Continue squeezing until the rivet stem snaps off.
- 削除ツール: Release the handles and pull the rivet gun away from the newly set rivet. The broken rivet stem should fall out of the tool. If it remains stuck, refer to the troubleshooting section.

Image 4.1: Four-step process for setting a rivet: 1. Insert rivet into nosepiece, 2. Insert rivet into hole, 3. Press the handle, 4. Draw back the rivet tool.

Image 4.2: Rivet gun being used to fasten components.
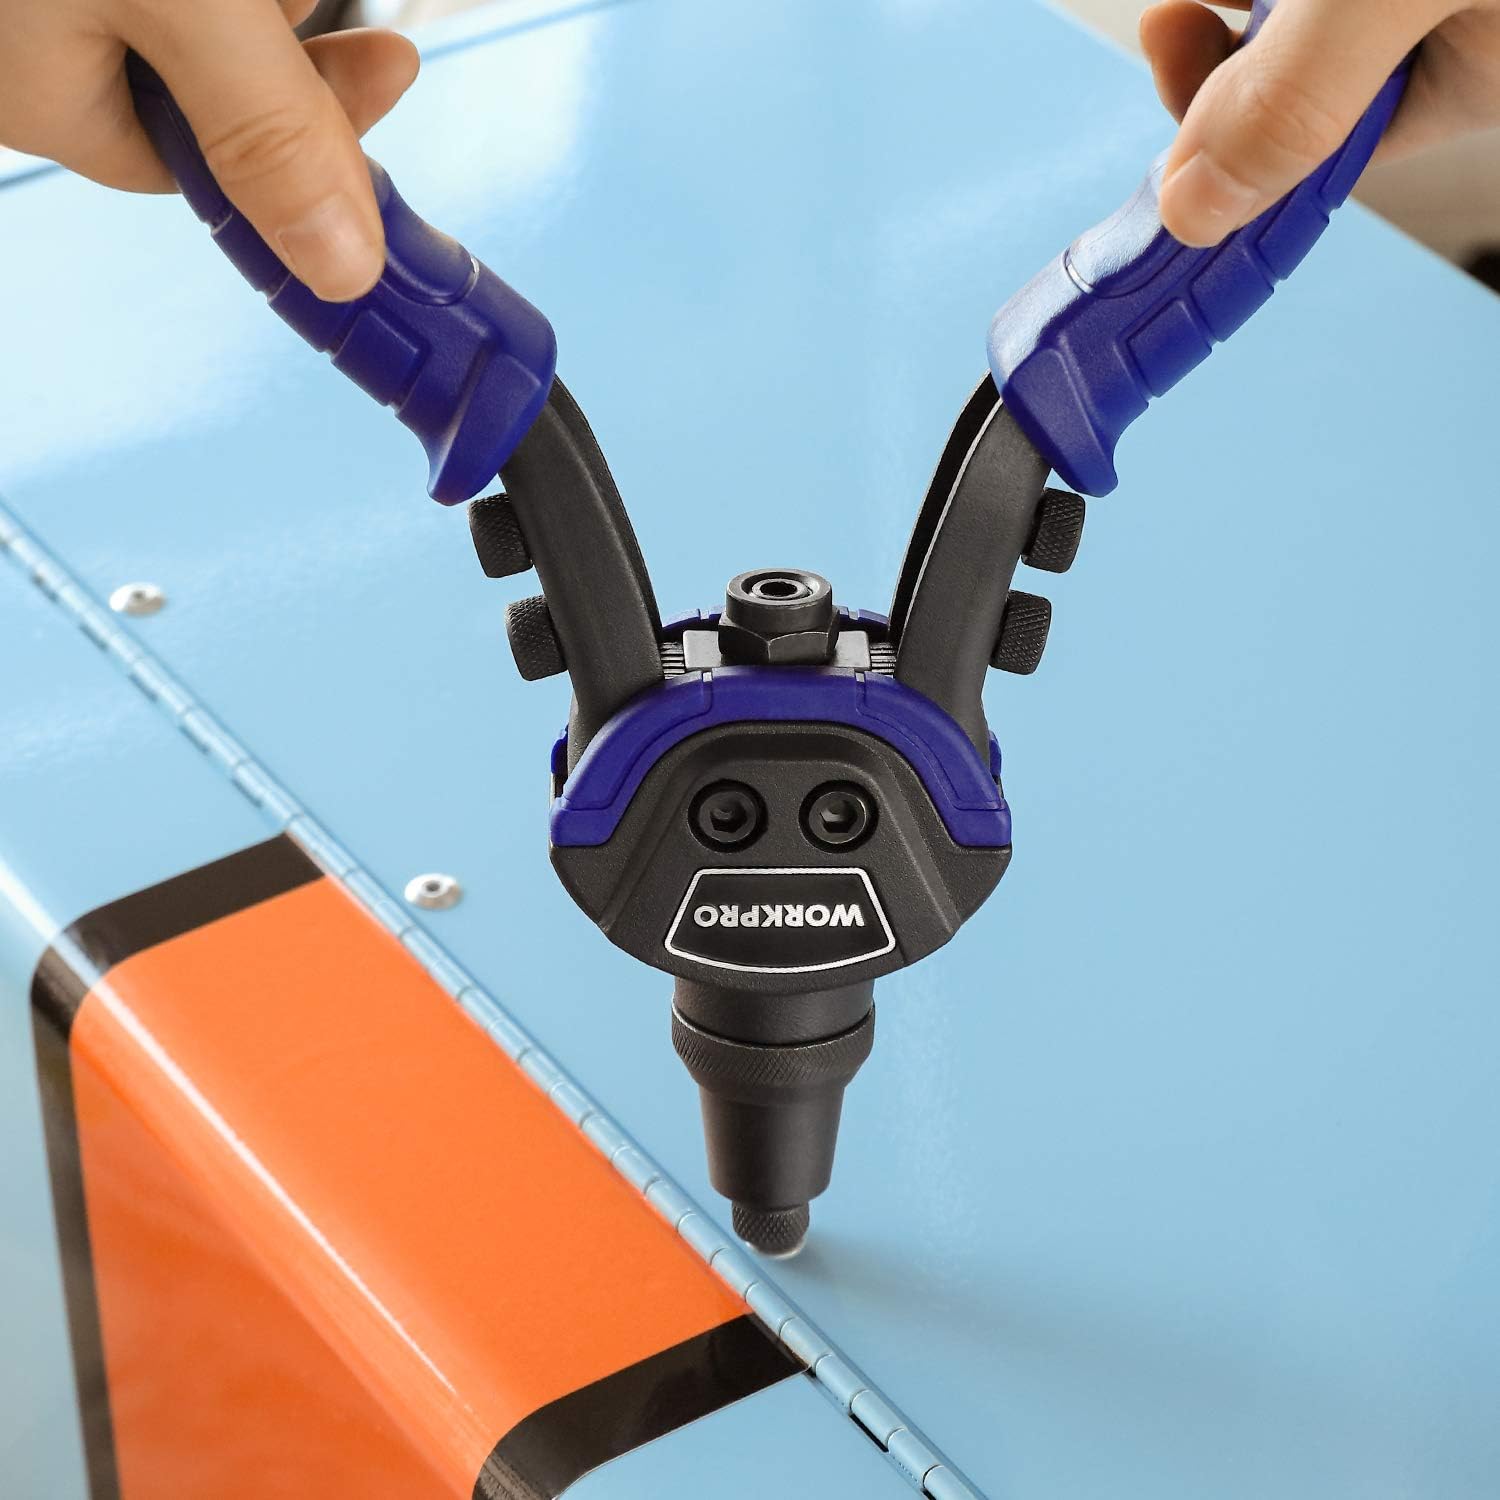
画像4.3: 上 view of the rivet gun in operation.

Image 4.4: Rivet gun being used in a tight corner, demonstrating its compact design.
5. メンテナンス
Regular maintenance ensures the longevity and optimal performance of your rivet gun.
- クリーニング: 使用後は毎回、清潔で乾いた布でツールを拭いて、ほこり、ごみ、金属の削りくずを取り除いてください。
- 顎の検査: Periodically inspect the internal three-jaw steel chuck structure for wear or damage. Worn jaws can lead to rivets not setting properly or stems getting stuck. Replace jaws if necessary.
- 潤滑: Apply a small amount of light machine oil to the pivot points and the internal jaw mechanism occasionally to ensure smooth operation.
- ストレージ: Store the rivet gun in a dry, clean place, away from moisture and extreme temperatures. Keep all nosepieces and rivets organized to prevent loss.
6。 トラブルシューティング
ここでは、いくつかの一般的な問題とその解決策を示します。
- Rivet Stem Stuck: If the rivet stem (pin) gets stuck and refuses to eject, especially with smaller rivet sizes, try the following:
- Remove the current nosepiece.
- Mount the largest size nosepiece onto the tool.
- Open and close the rivet tool handles. The stuck pin should now fall out.
- リベットが正しく固定されない:
- Ensure the correct nosepiece size is used for the rivet.
- Verify that the hole drilled in the workpiece is the correct size for the rivet.
- Apply sufficient force when squeezing the handles.
- Inspect the internal jaws for wear; replace if necessary.
- Handles Stiff or Squeaky: Apply a small amount of light machine oil to the pivot points of the handles.
7. 仕様
| メーカー | 杭州グレートスター工業株式会社 |
| 商品番号 | W023022 |
| 製品寸法 | 26.5 x 14.5 x 4 cm |
| 重さ | 760グラム |
| サイズ | 10インチ |
| 色 | 青 |
| 材料 | Carbon steel, TPR/PVC |
| Number of Item Packages | 1 |
| ハンドル数 | 2 |
| 含まれるコンポーネント | 10" Rivet Gun |
| 電池付属 | いいえ |
| 電池が必要 | いいえ |
8. 保証情報
Specific warranty details for this product are not provided in the available information. For warranty claims or inquiries, please retain your proof of purchase and contact the manufacturer or your retailer directly. General warranty terms typically cover defects in materials and workmanship for a specified period from the date of purchase.
9. サポート
For further assistance, technical support, or to inquire about replacement parts, please contact WORKPRO customer service or visit their official web連絡先は通常、製品のパッケージまたはメーカーの webサイト。


