1. はじめに
This manual provides detailed instructions for the safe and efficient use of your DROK DC-DC Buck Converter. This module is designed to step down a higher DC input voltagより低い調整可能なDC出力電圧tage, featuring an LCD display for real-time monitoring of voltage、電流、および電力。
2 製品の特徴
- ワイド入力ボリュームtage範囲: DC6.5V~36V。
- 調整可能な出力ボリュームtage: DC 1.2V to 32V. Factory default output is 5V.
- 高出力電流: Stable operation at 3.5A for extended periods, capable of reaching 4.5A with adequate heat dissipation. Adjustable current limit is approximately 4.2A-4.5A.
- LCDディスプレイ: 入力ボリュームを表示tage、出力ボリュームtage、出力電流、および出力電力。
- 高いディスプレイ解像度: 巻tage resolution of 0.05V, current resolution of 0.005A.
- 表示精度: 巻tage display accuracy of ±0.1V, current display accuracy of ±0.05A.
- ボタンコントロール: Easy adjustment of output voltage and control of output ON/OFF state without a screwdriver.
- 入力逆接続保護: Protects the module from damage due to incorrect input polarity.
- 保護Casing: Includes a transparent acrylic case to prevent physical damage to the module.
3. 安全上の注意
- 正しい入力音量を確認してくださいtage polarity. The module has input reverse connection protection, but always verify connections.
- がある no reverse current protection on the output terminals. Do not connect a battery or other power source to the output without an external diode to prevent reverse current flow, as this can damage the module.
- Do not short-circuit the Input IN- terminal to the Output OUT- terminal. This will disable the constant current function.
- Ensure proper ventilation, especially when operating at higher currents (above 3.5A) to allow for adequate heat dissipation.
- Always verify the output voltage setting before connecting any load to prevent damage to your devices.
- Handle the module with care, especially during assembly of the acrylic case, to avoid damage to components.
4. 仕様
| パラメータ | 価値 |
|---|---|
| 入力ボリュームtage範囲 | DC 6.5V - 36V |
| 出力巻tage範囲 | DC 1.2V - 32V(調整可能) |
| Output Current (Stable) | 3.5A |
| Output Current (Max with Heat Dissipation) | 4.5A |
| 出力電力 | 75W |
| 巻tage 表示解像度 | 0.05V |
| 現在のディスプレイ解像度 | 0.005A |
| 巻tage 表示精度 | ±0.1V |
| 現在の表示精度 | ±0.05A |
| 寸法 | 14.7 x 8 x 5.2 cm |
| 重さ | 70グラム |
5. セットアップ
5.1 コンポーネントの識別
Familiarize yourself with the components of the buck converter module:

Figure 1: Component layout of the DROK buck converter. Labels indicate input/output terminals, LCD display, control buttons, and the voltage 調整ポテンショメータ。
5.2 Acrylic Case Assembly
The module comes with a transparent acrylic case for protection. Assembly is straightforward:
- Identify the top and bottom acrylic plates, standoffs, and screws.
- Carefully align the bottom acrylic plate with the mounting holes on the PCB.
- Insert the brass standoffs through the bottom plate and into the PCB.
- Place the top acrylic plate over the standoffs, ensuring all cutouts align with the module's components (terminals, buttons, screen).
- Secure the top plate with the remaining screws. Do not overtighten.

Figure 2: Disassembled module with acrylic case components.

Figure 3: Assembled module with protective case.
5.3配線接続
Connect your power source and load to the module using the screw terminals:
- 入力(IN+ / IN-): Connect your DC power source (6.5V-36V) to these terminals. Ensure correct polarity: IN+ for positive, IN- for negative.
- 出力(OUT+ / OUT-): Connect your load to these terminals. Ensure correct polarity: OUT+ for positive, OUT- for negative.
Note: Always double-check wiring before applying power.
6. 操作手順
6.1 電源オン/オフ
- After connecting the input power, the LCD will light up.
- を押す オン/オフ button (usually on the left side) to toggle the output power.
- To set the default power-on state (output ON or OFF), press and hold the オン/オフ button. The module will remember this setting for subsequent power cycles.
6.2 出力ボリュームの調整tage
出力ボリュームtage is adjusted using the two buttons on the right side of the module:
- を押す '+' button to increase the output voltage.
- を押す 「-」 button to decrease the output voltage.
- The LCD will display the current output voltage during adjustment.
6.3 LCD Display Modes
The module features an LCD that can display various parameters. Use the button on the left (often labeled 'IN/OUT' or similar) to cycle through display modes:
- 出力巻tage (OUT V): 現在の出力ボリュームを表示しますtage.
- 入力ボリュームtage (IN V): 現在の入力音量を表示しますtage.
- 入出力ボリュームtage (IN/OUT V): Alternates between input and output voltageディスプレイ。
- Output Current (OUT A): Displays the current flowing through the output.
- Output Power (OUT W): 計算された出力電力を表示します。
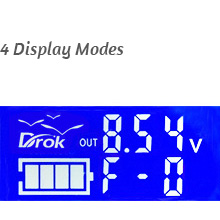
図 4: 出力ボリュームtageディスプレイ
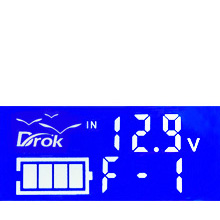
図5: 入力ボリュームtageディスプレイ
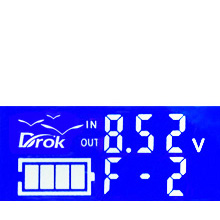
Figure 6: Input/Output Voltageディスプレイ

Figure 7: USB Output Voltage Display (if applicable)
6.4 Constant Current (CC) Adjustment
The module supports constant current output. The current limit can be adjusted using the small potentiometer (ADJ-I) on the board. Turn clockwise to increase the current limit. This is typically set to approximately 4.2A-4.5A at the factory.
7. メンテナンス
- モジュールを清潔に保ち、ほこりやゴミを取り除いてください。清掃には柔らかく乾いた布を使用してください。
- Ensure adequate airflow around the module, especially when operating at higher loads, to prevent overheating.
- 配線接続部の締め付け具合や摩耗、腐食の兆候がないか定期的に確認してください。
- モジュールを湿気、極端な温度、腐食性の環境にさらさないでください。
8。 トラブルシューティング
| 問題 | 考えられる原因 | 解決 |
|---|---|---|
| No display/No output | No input power; Incorrect input polarity; Output turned off. | Check input power connections; Verify input polarity; Press the ON/OFF button to enable output. |
| 出力ボリュームtageは調整できません | Potentiometer at its limit; Faulty potentiometer. | Ensure the adjustment buttons are being pressed correctly; If still unresponsive, contact support. |
| Constant current function not working | Input IN- short-circuited to Output OUT-. | Check wiring to ensure IN- and OUT- are not connected. |
| モジュールの過熱 | Excessive load current; Insufficient ventilation. | Reduce load current; Ensure adequate airflow around the module; Consider adding a fan for continuous high-current operation. |
9. 製品ビデオ
Watch these official videos for additional guidance on using your DROK Buck Converter:
Video 1: Demonstration of the buck converter's features and operation.
Video 2: Detailed guide on setting up and adjusting the output voltage.
ビデオ3: ショートオーバーview of the module's display functions.
Video 4: Comprehensive tutorial on advanced usage and applications.
10. 保証とサポート
保証情報またはテクニカルサポートについては、製品パッケージをご参照いただくか、販売店にお問い合わせください。保証請求の際は、ご購入時のレシートを保管してください。