導入
This user manual provides comprehensive instructions for the assembly, operation, and maintenance of your Amazon Basics Single Computer Monitor Stand. This desk-mounted arm is designed to enhance your workspace ergonomics and free up valuable desk space by securely holding a single computer monitor.
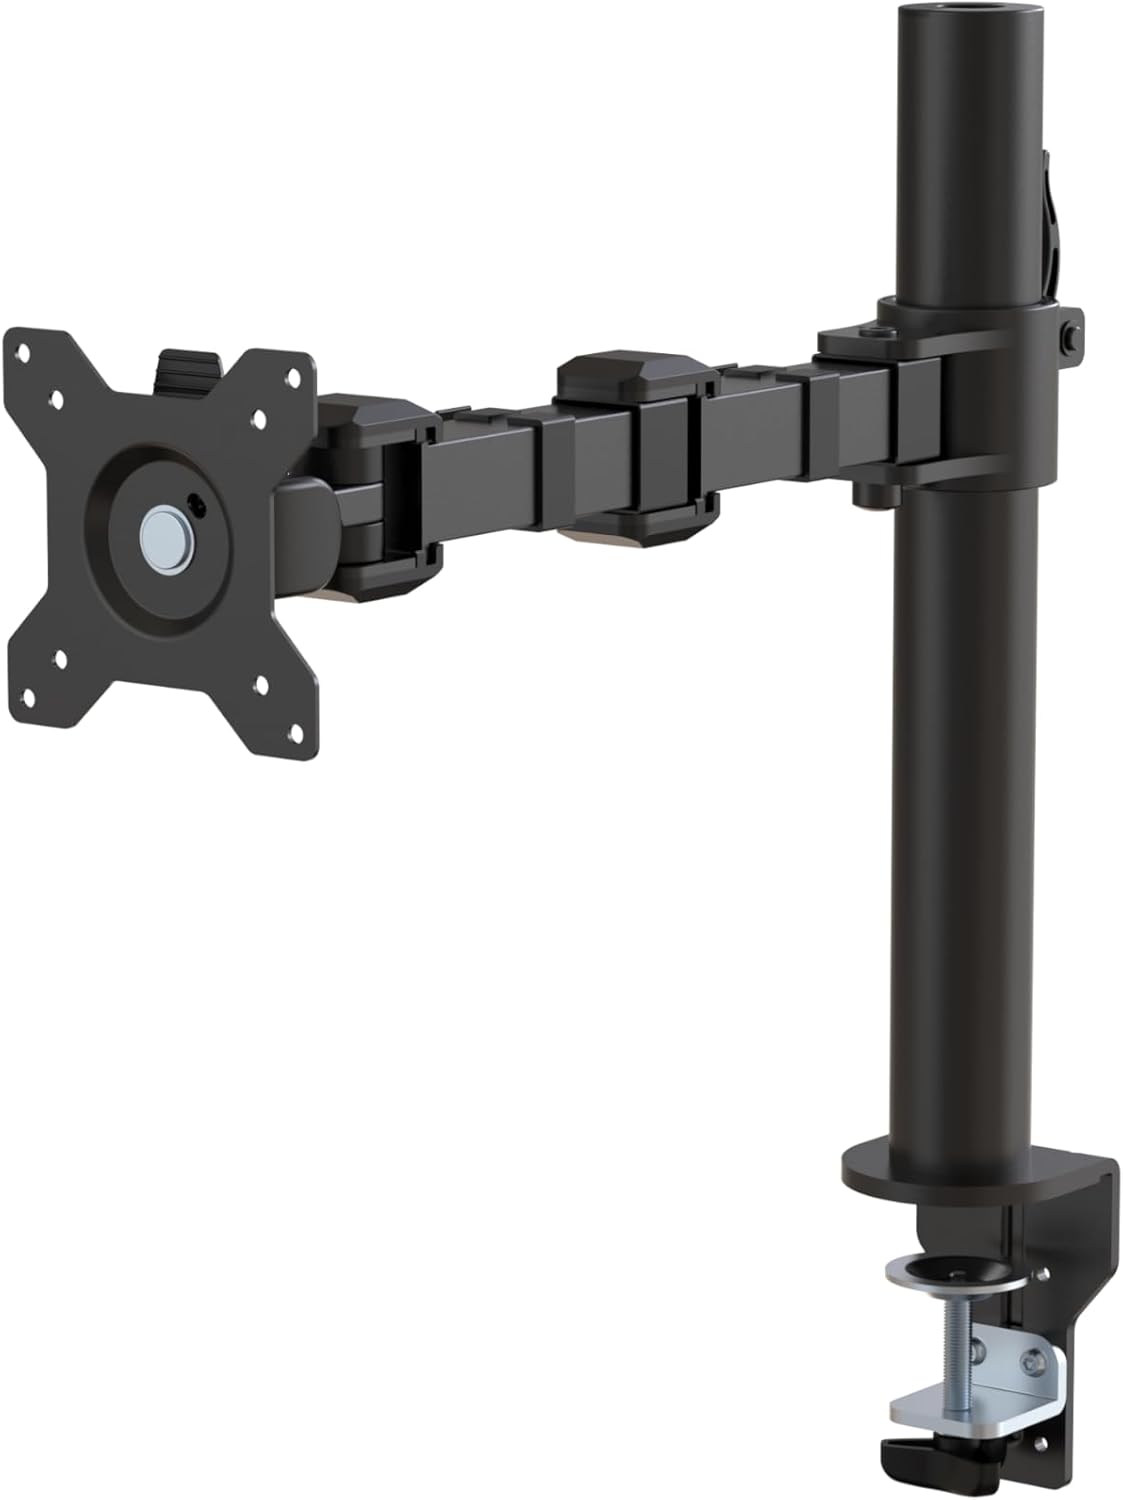
図1:以上view of the Amazon Basics Single Computer Monitor Stand.
重要な安全情報
- 組み立てて使用する前に、すべての説明書をよくお読みください。
- 最大重量容量 22 ポンド (10 kg) を超えないようにしてください。
- Ensure your desk surface is stable and can support the combined weight of the monitor arm and your monitor.
- Verify that the desk thickness is between 0.8 to 3.9 inches (2 cm to 10 cm) for proper clamp インストール。
- 付属のハードウェアのみを使用してください。部品が不足または破損している場合は、カスタマーサポートにお問い合わせください。
- 組み立て中は子供やペットを近づけないでください。
- すべてのネジと接続部がしっかりと固定されているか定期的に確認してください。
パッケージ内容
組み立てを始める前に、すべてのコンポーネントが揃っていることを確認してください。
- Monitor Arm Assembly (Pre-assembled arm and VESA plate)
- デスクClamp ベース
- 取り付けポール
- Hardware Kit (Screws for VESA mounting, Allen keys)
- ケーブル管理クリップ
- ユーザーマニュアル
セットアップ手順
ステップ1:デスクClを取り付けるamp ベース
デスクの位置を調整しますamp base on your desk edge. Ensure the desk thickness is compatible (0.8 to 3.9 inches). Tighten the clamp screw securely until the base is firmly attached to the desk. Do not overtighten.

Figure 2: Securely attaching the desk clamp base to your desk.
Step 2: Install Mounting Pole
Insert the mounting pole into the hole on the desk clamp base. Secure it by tightening the set screw on the side of the clamp base using the provided Allen key.
ステップ3:モニターアームをポールに取り付ける
Slide the monitor arm assembly onto the mounting pole. Adjust the height to your desired position and tighten the height adjustment screw on the arm collar to secure it.
ステップ4:VESAプレートをモニターに取り付ける
The monitor arm features a detachable VESA plate. Remove the VESA plate from the arm by lifting it up. Align the VESA plate with the mounting holes on the back of your monitor (compatible with 100x100mm and 75x75mm VESA patterns). Use the appropriate screws from the hardware kit to secure the plate to your monitor. Ensure the screws are tightened firmly but do not overtighten.

Figure 3: The detachable VESA plate for easy monitor attachment.
ステップ5:モニターをアームに取り付ける
Carefully slide the monitor (with the attached VESA plate) onto the monitor arm. Ensure it clicks securely into place. You may need to adjust the tension screws on the arm joints to support the monitor's weight and allow for smooth movement.

Figure 4: Monitor securely mounted on the arm, view正面から見たところ。

Figure 5: Top-down perspective of the monitor mounted, showcasing desk space optimization.
ステップ6: ケーブル管理
Utilize the integrated cable management system to route your monitor cables (power, video, etc.) along the arm and down the pole. This helps maintain a tidy workspace and prevents cable clutter.
操作手順
The monitor arm offers a full range of motion to customize your view経験:
- 高さ調整: The horizontal arm can be adjusted from 7.9 to 14.2 inches high along the pole. Loosen the height adjustment screw on the arm collar, slide the arm to the desired height, and re-tighten.
- Adjust the screen tilt from -15 to +85 degrees to reduce glare and optimize view角度を変える。
- スイベル: Swivel the monitor left or right up to 180 degrees at various joints for collaborative viewing or screen sharing.
- 回転: Rotate the monitor 360 degrees to switch between landscape and portrait modes without removing the monitor.

Figure 6: Visual representation of the flexible screen adjustment capabilities: Tilt (-85/+15 degrees), Swivel (±180 degrees), and Rotation (360 degrees).
人間工学に基づいたポジショニング
Proper monitor positioning is crucial for ergonomic comfort and reducing strain. Adjust the monitor arm so that the top of your monitor screen is at or slightly below eye level when you are sitting upright. Your eyes should be approximately an arm's length away from the screen. Ensure your wrists are straight and your forearms are parallel to the floor when typing.

Figure 7: Comparison of correct and incorrect sitting postures, highlighting the importance of proper monitor height.
メンテナンス
- クリーニング: モニターアームを柔らかくて乾いた布で拭きますamp 布で拭いてください。仕上げを傷める可能性のある研磨剤入りの洗剤や溶剤は使用しないでください。
- 気密性チェック: 定期的にすべてのネジと接続部、特にデスククランプを点検してください。amp and VESA plate screws, to ensure they are tight and secure. Re-tighten if necessary.
- 潤滑: 可動部分には潤滑は必要ありません。
トラブルシューティング
| 問題 | 考えられる原因 | 解決 |
|---|---|---|
| モニターアームがたわんだり、位置が保持されなかったりします。 | Tension screws are too loose. | Tighten the tension screws on the arm joints using the provided Allen key until the arm holds the monitor's weight. |
| モニターがアーム上でぐらつきます。 | VESA plate screws are loose or desk clamp is not secure. | Ensure the VESA plate screws attaching the monitor are tight. Re-tighten the desk clamp スクリュー。 |
| モニターの高さを調整できません。 | 高さ調整ネジがきつすぎます。 | Loosen the height adjustment screw on the arm collar, adjust height, then re-tighten. |
仕様
| 特徴 | 詳細 |
|---|---|
| モデル番号 | DLB111-US290 |
| 製品寸法 | 20 x 18.13 x 4.5インチ |
| アイテム重量 | 5.59ポンド |
| 材料 | 合金鋼 |
| 色 | 黒 |
| 取り付けタイプ | テーブルトップClamp マウント |
| 対応画面サイズ | 13~30インチ |
| 最大重量容量 | 22ポンド(10kg) |
| デスクの厚さの互換性 | 0.8~3.9インチ |
| VESA互換性 | 75x75mm、100x100mm |
| 高さ調整範囲 | 7.9 to 14.2 inches (horizontal arm) |
| 傾斜角度 | -15〜+ 85度 |
| 回転 | 360度 |
保証とサポート
This product is backed by an Amazon Basics limited 1-year warranty.
For detailed warranty information or technical support, please refer to the official documentation or contact Amazon Basics customer service.
- ユーザーマニュアル(PDF): ユーザーマニュアルをダウンロード
- 保証書(PDF): 保証情報をダウンロード


