1. はじめに
This manual provides essential information for the proper installation, operation, and maintenance of your Gladiator Premium 12V 140A Alternator. This alternator is designed to meet or exceed OEM specifications for various John Deere Marine engines and Ag-Chem Sprayer models.
互換性のあるアプリケーション:
- John Deere Marine Engines: 6081AFM01 (8.1L), 6081AFM75 (8.1L), 6125AFM01 (12.5L), 6125AFM75 (12.5L), 6125SFM75 (12.5L)
- Ag-Chem Sprayer 6103 TERRAGATOR (1998-2004)
- John Deere 3510 (8.1L, 1998-2000)
2. 安全情報
Always prioritize safety when working with electrical components and machinery. Failure to follow these safety guidelines may result in personal injury or damage to equipment.
- バッテリーを外します: Before beginning any work, always disconnect the negative (-) battery cable first, followed by the positive (+) cable.
- 保護具を着用する: 安全メガネや手袋などの適切な個人用保護具を使用してください。
- ショートを避ける: Ensure no tools or metal objects come into contact with battery terminals or electrical connections simultaneously.
- 専門家による設置: いずれかの手順について不明な点がある場合は、資格のある技術者にご相談ください。
- 換気: Ensure adequate ventilation when working with batteries, as they can produce explosive gases.
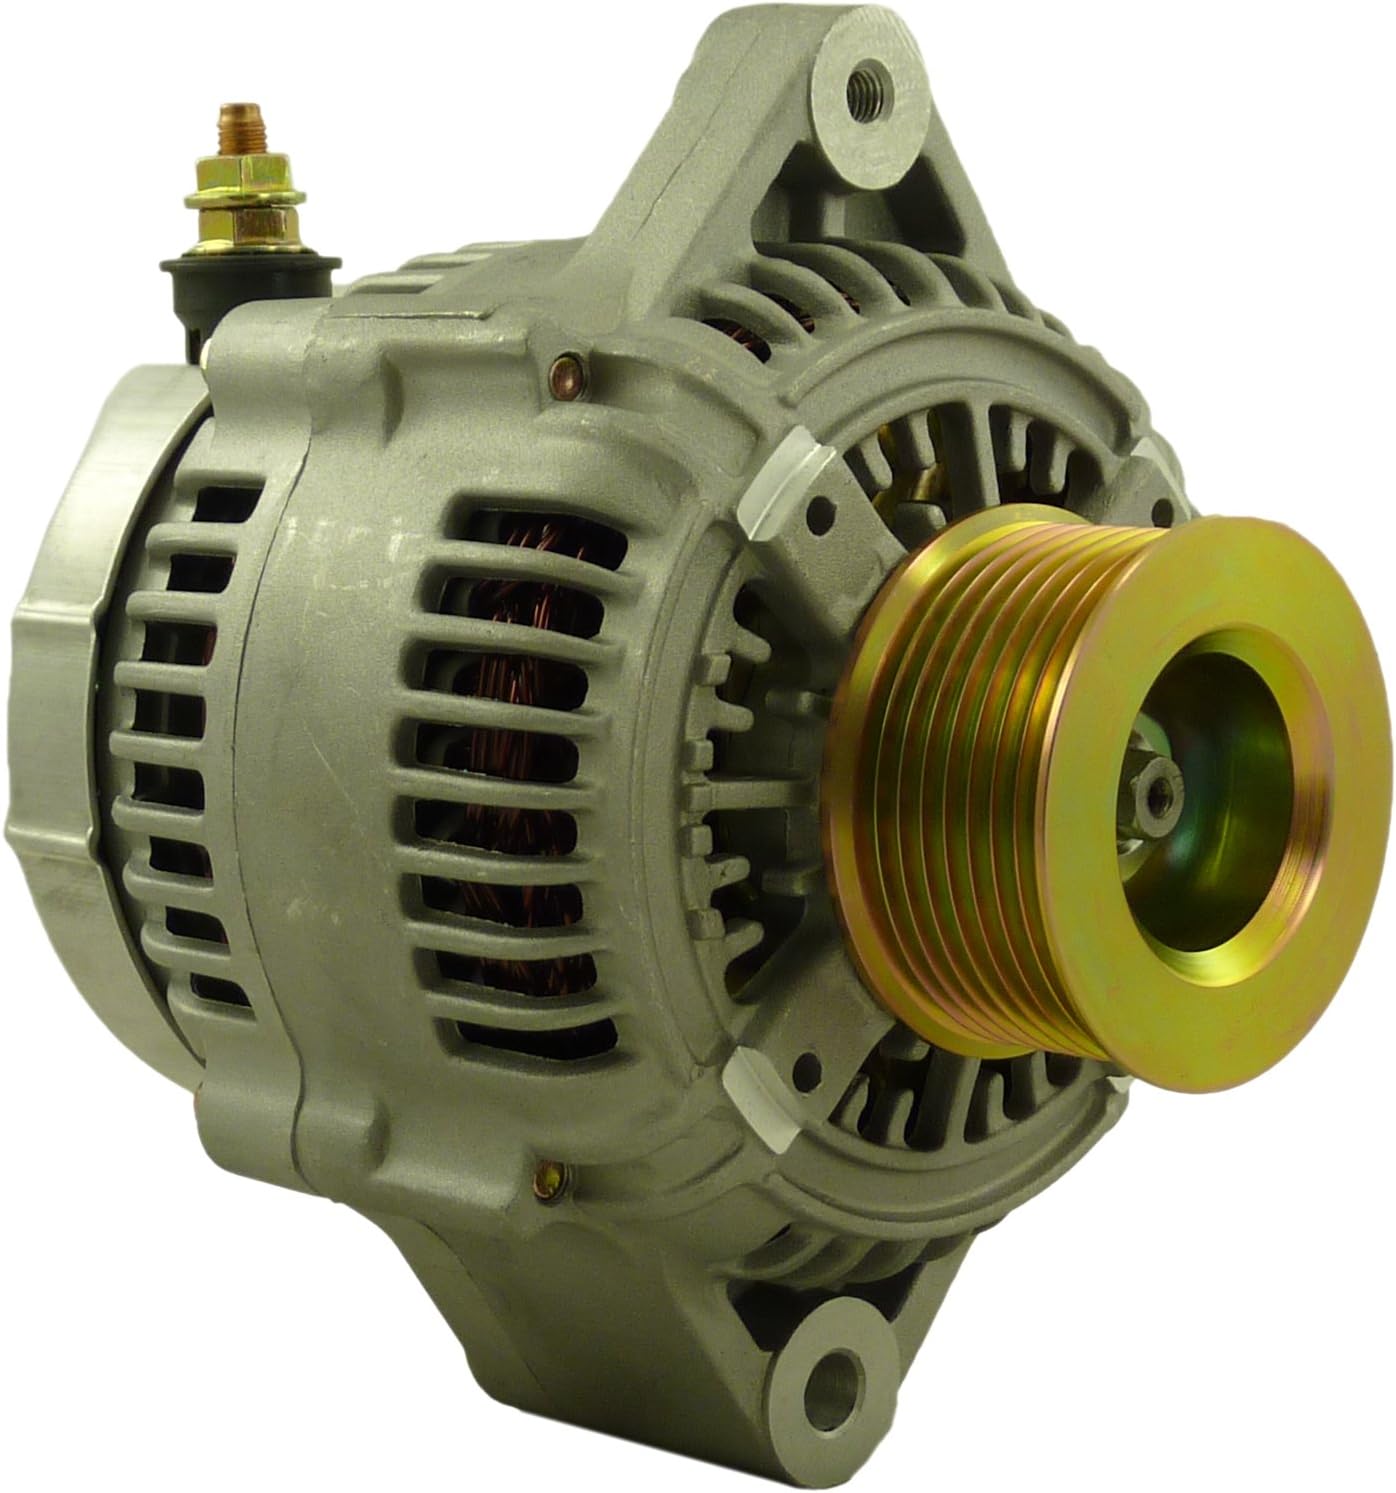
3.製品オーバーview
The Gladiator Premium Alternator is a high-quality replacement unit designed for reliable performance. It features an internal regulator and internal fan for efficient operation, and comes with an 8-groove pulley.
主な特徴:
- 12ボルト、140 Amp 出力
- Internal Regulator and Internal Fan
- Clockwise (CW) Rotation
- Equipped with an 8-Groove Pulley
- Meets or exceeds OEM specifications
製品画像:


4. セットアップとインストール
Proper installation is crucial for the alternator's performance and longevity. Refer to your vehicle's specific service manual for detailed instructions, as procedures may vary.
インストール前のチェック:
- Ensure the new alternator matches the specifications and mounting configuration of the original unit.
- Inspect the drive belt for wear or damage. Replace if necessary.
- Check battery condition. A weak or faulty battery can stress a new alternator.
- Clean all electrical connections and mounting surfaces.
インストール手順(一般):
- バッテリーを外します: Disconnect the negative (-) battery cable first, then the positive (+) cable.
- ドライブベルトを取り外す: Loosen the tensioner and remove the serpentine or V-belt from the alternator pulley.
- 配線を外す: Carefully disconnect all electrical connections from the old alternator (main output wire, regulator wires). Note their positions for reinstallation.
- 古いオルタネーターを取り外す: Unbolt the old alternator from its mounting brackets and remove it from the engine compartment.
- 新しいオルタネーターをインストールします: Position the new Gladiator alternator into the mounting brackets. Install and tighten the mounting bolts to the manufacturer's specified torque.
- 配線を接続: Reconnect all electrical wires to the new alternator. Ensure connections are clean and secure.
- ドライブベルトの取り付け: Route the drive belt correctly around all pulleys. Adjust the tensioner to achieve the proper belt tension according to your vehicle's specifications.
- バッテリーを再接続します: 最初にプラス (+) バッテリー ケーブルを接続し、次にマイナス (-) ケーブルを接続します。
5. 操作手順
After installation, perform the following checks before operating the vehicle:
- 初期起動: Start the engine and observe the dashboard warning lights. The battery or charging system warning light should turn off shortly after the engine starts.
- 巻tageチェック: With the engine running, use a voltmeter to check the battery voltage. It should typically read between 13.8V and 14.8V, indicating proper charging.
- ノイズに耳を傾ける: Listen for any unusual noises (e.g., squealing, grinding) that might indicate an issue with the belt or alternator.
During normal operation, the alternator continuously charges the battery and powers the vehicle's electrical systems. If the charging system warning light illuminates during operation, refer to the troubleshooting section.
6. メンテナンス
Regular maintenance helps ensure the longevity and optimal performance of your alternator.
- ベルトの検査: Periodically inspect the drive belt for cracks, fraying, or excessive wear. Ensure it has the correct tension. A loose belt can cause insufficient charging, while an overly tight belt can damage alternator bearings.
- 配線接続: Check all electrical connections to the alternator for corrosion or looseness. Clean and tighten as needed.
- 清潔さ: オルタネーターに過度の汚れ、油、ゴミが付着しないようにしてください。これらは冷却を妨げ、パフォーマンスに影響を及ぼす可能性があります。
- バッテリーの状態: Ensure your battery is in good condition. A failing battery can overwork the alternator.
7。 トラブルシューティング
If you experience issues with your charging system, consider the following common problems and solutions:
| 症状 | 考えられる原因 | 解決 |
|---|---|---|
| バッテリー/充電警告灯点灯 | Loose or worn drive belt, faulty wiring connection, failing alternator, faulty battery. | Check belt tension and condition. Inspect all wiring. Test alternator output and battery health. |
| 低バッテリー容量tage / Slow Cranking | Alternator not charging, excessive electrical load, faulty battery. | Check alternator output. Reduce electrical load. Test and charge/replace battery. |
| Unusual Noise (Squealing, Grinding) | Loose or worn drive belt, worn alternator bearings. | Inspect and adjust/replace drive belt. If noise persists, alternator may require replacement. |
| 過充電(高電圧tage) | Faulty internal voltageレギュレーター。 | Alternator requires replacement. |
If troubleshooting steps do not resolve the issue, it is recommended to have the charging system professionally diagnosed.
8. 仕様
| 仕様 | 価値 |
|---|---|
| 巻tage | 12V |
| Amp怒る | 140A |
| レギュレータータイプ | 内部 |
| ファンタイプ | 内部 |
| Pulley Type | 8-Groove |
| 回転 | 時計回り(CW) |
| 製品寸法 | 7.3 x 8 x 6インチ |
| アイテム重量 | 13ポンド |
| メーカー | グラディエーター |
| ASIN | B078MNDGZF |
9. 保証情報
This Gladiator Premium Alternator comes with a 1年間の保証 from the date of purchase. This warranty covers defects in materials and workmanship under normal use. Please retain your proof of purchase for warranty claims. The warranty does not cover damage due to improper installation, misuse, neglect, accident, or unauthorized modifications.
10. サポート
For technical assistance, warranty claims, or further inquiries, please contact your retailer or the manufacturer directly. When contacting support, please have your product model numbers and purchase information readily available.


