1. はじめに
ご購入ありがとうございますasing the Project Source 2-Pack 13-inch Bronze Flush Mount Light fixtures. These fixtures are designed to provide ambient lighting with a traditional aesthetic, featuring a durable bronze finish and an elegant alabaster glass shade. They are suitable for various indoor spaces, including bathrooms, bedrooms, kitchens, dining rooms, and living rooms, enhancing the decor while providing reliable illumination.
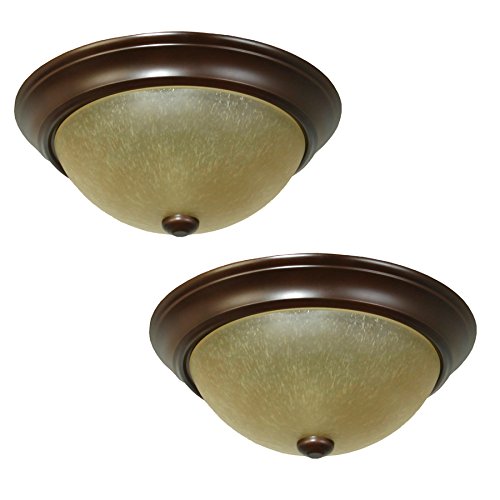
図1: Two Project Source 13-inch Bronze Flush Mount Light fixtures. Each fixture features a round bronze base and a dome-shaped alabaster glass shade, secured by a small finial at the bottom center of the shade.
2. 重要な安全情報
警告:感電の危険があります。設置または修理を行う前に、ヒューズボックスまたは回路ブレーカーの電源を切ってください。
- インストールを開始する前に、すべての指示をよくお読みください。
- すべての電気接続は、地域の法令、条例、または米国電気工事規程(NEC)に従って行う必要があります。適切な電気配線接続についてご不明な点がある場合は、資格のある電気技師にご相談ください。
- Use only UL-listed wire connectors for the electrical connections.
- 最大ワット数を超えないでくださいtage specified for this fixture (14 Watts per bulb).
- 取り付け中は安全メガネと適切な保護具を着用してください。
- 器具が適切に接地されていることを確認してください。
3. パッケージ内容
インストールを開始する前に、すべてのコンポーネントが揃っていることを確認してください。
- 2 x 13-inch Bronze Flush Mount Light Fixtures (with alabaster glass shades)
- Mounting Hardware (screws, wire nuts, mounting bracket)
- Note: Light bulbs are NOT included.
4. 仕様
| 特徴 | 詳細 |
|---|---|
| ブランド | プロジェクトソース |
| モデル番号 | 40804 |
| 寸法(幅×高さ) | 13インチ×5.36インチ |
| 仕上げる | ブロンズ |
| シェード素材 | アラバスターグラス |
| ライトの数 | 2 per fixture |
| 電球口金タイプ | Medium base (E-26) |
| 推奨電球形状 | A15 |
| 最大電球ワットtage | 14 Watts (per bulb) |
| 安全リスト | UL 認定 |
| 部屋の互換性 | Bathroom, Bedroom, Kitchen, Dining Room, Living Room |
| インストールタイプ | フラッシュマウント |
| 商品重量(パッケージ) | 7.04ポンド |
5. セットアップとインストール
必要なツール: Phillips head screwdriver, flathead screwdriver, wire strippers, electrical tape, safety glasses.
インストール前の手順:
- 電源をオフにします。 Locate the circuit breaker or fuse box that supplies power to the light fixture location. Turn off the power completely before proceeding.
- エリアを準備します。 Clear the work area and ensure you have stable footing if using a ladder.
- 開梱: Carefully remove the fixture and all components from the packaging.
インストール手順:
- 取り付けブラケットを取り付ける: Secure the mounting bracket (included) to the electrical junction box in the ceiling using the provided screws. Ensure it is firmly attached.
- 電気配線を接続する:
- 接続する 黒 (hot) wire from the ceiling to the 黒 wire of the fixture using a wire nut.
- 接続する 白 (neutral) wire from the ceiling to the 白 wire of the fixture using a wire nut.
- 接続する 地面 wire (bare copper or green) from the ceiling to the 地面 wire of the fixture (or the ground screw on the mounting bracket) using a wire nut or by wrapping it securely around the screw.
- Secure Fixture to Mounting Bracket: Carefully push the wired fixture up towards the ceiling, aligning the holes in the fixture base with the screws on the mounting bracket. Secure the fixture in place with the decorative nuts or screws provided.
- 電球を取り付ける: Insert the recommended A15 shape, E-26 medium base light bulbs (not included) into the sockets. Do not exceed 14 Watts per bulb.
- ガラスシェードを取り付ける: Carefully place the alabaster glass shade onto the fixture. Secure it in place using the finial or retaining ring provided, tightening it gently until snug. Do not overtighten.
- 電力を回復する: インストールが完了し、すべての接続が安全になったら、回路ブレーカーで電源を復元します。
6. 操作手順
Once the Project Source Flush Mount Light fixtures are correctly installed and power is restored, they can be operated using the standard wall switch connected to the circuit. Simply toggle the wall switch to turn the lights on or off.
7. お手入れとメンテナンス
Regular cleaning will help maintain the appearance and performance of your light fixtures.
- Cleaning the Fixture: Dust the bronze finish regularly with a soft, dry cloth. For more thorough cleaning, wipe the bronze finish with a damp cloth and a mild, non-abrasive soap solution, then dry immediately with a clean, soft cloth to prevent water spots.
- Cleaning the Glass Shade: The alabaster glass shade can be removed for cleaning. Wash it with mild soap and water, then rinse thoroughly and dry completely before reattaching to the fixture.
- 電球の交換: Always ensure the power is turned off at the circuit breaker and the bulbs have cooled down before attempting to replace them. Use only bulbs that meet the specified wattageとベースタイプ。
- Do not use abrasive cleaners, solvents, or polishes on any part of the fixture, as they may damage the finish or glass.
8。 トラブルシューティング
照明器具に問題が発生した場合は、次の一般的な問題と解決策を参照してください。
- ライトが点灯しない:
- Check that the power supply is on at the circuit breaker.
- Ensure the light bulbs are correctly installed and are not burnt out. Try replacing with a known working bulb.
- Verify that all wire connections (black to black, white to white, ground) are secure and properly connected.
- 光のちらつき:
- Ensure the light bulbs are fully tightened in their sockets.
- Check for any loose wire connections within the fixture or junction box.
- Confirm that the bulbs used are compatible with the fixture and are not exceeding the maximum wattage.
- Glass shade is loose or wobbles:
- Gently tighten the finial or retaining ring that secures the glass shade. Do not overtighten.
If the problem persists after attempting these solutions, please consult a qualified electrician or contact customer support.
9. 保証と顧客サポート
For detailed warranty information regarding your Project Source 2-Pack 13-in W Bronze Flush Mount Light, please refer to the documentation included with your original purchase. Warranty terms typically cover defects in materials and workmanship for a specified period.
If you require technical assistance, have questions about installation, or need to report a defect, please contact Project Source customer service directly through their official website or the contact information provided in your product packaging. Please have your model number (40804) and purchase details ready when contacting support.


