導入
This manual provides detailed instructions for the safe installation, operation, and maintenance of your Progress Lighting Verdae Collection 3-Light Clear Seeded Glass New Traditional Outdoor Large Wall Lantern Light. This fixture features a traditional design with clear seeded glass and an Antique Bronze finish, suitable for various exterior settings. The open bottom design facilitates easy lamp 交換。
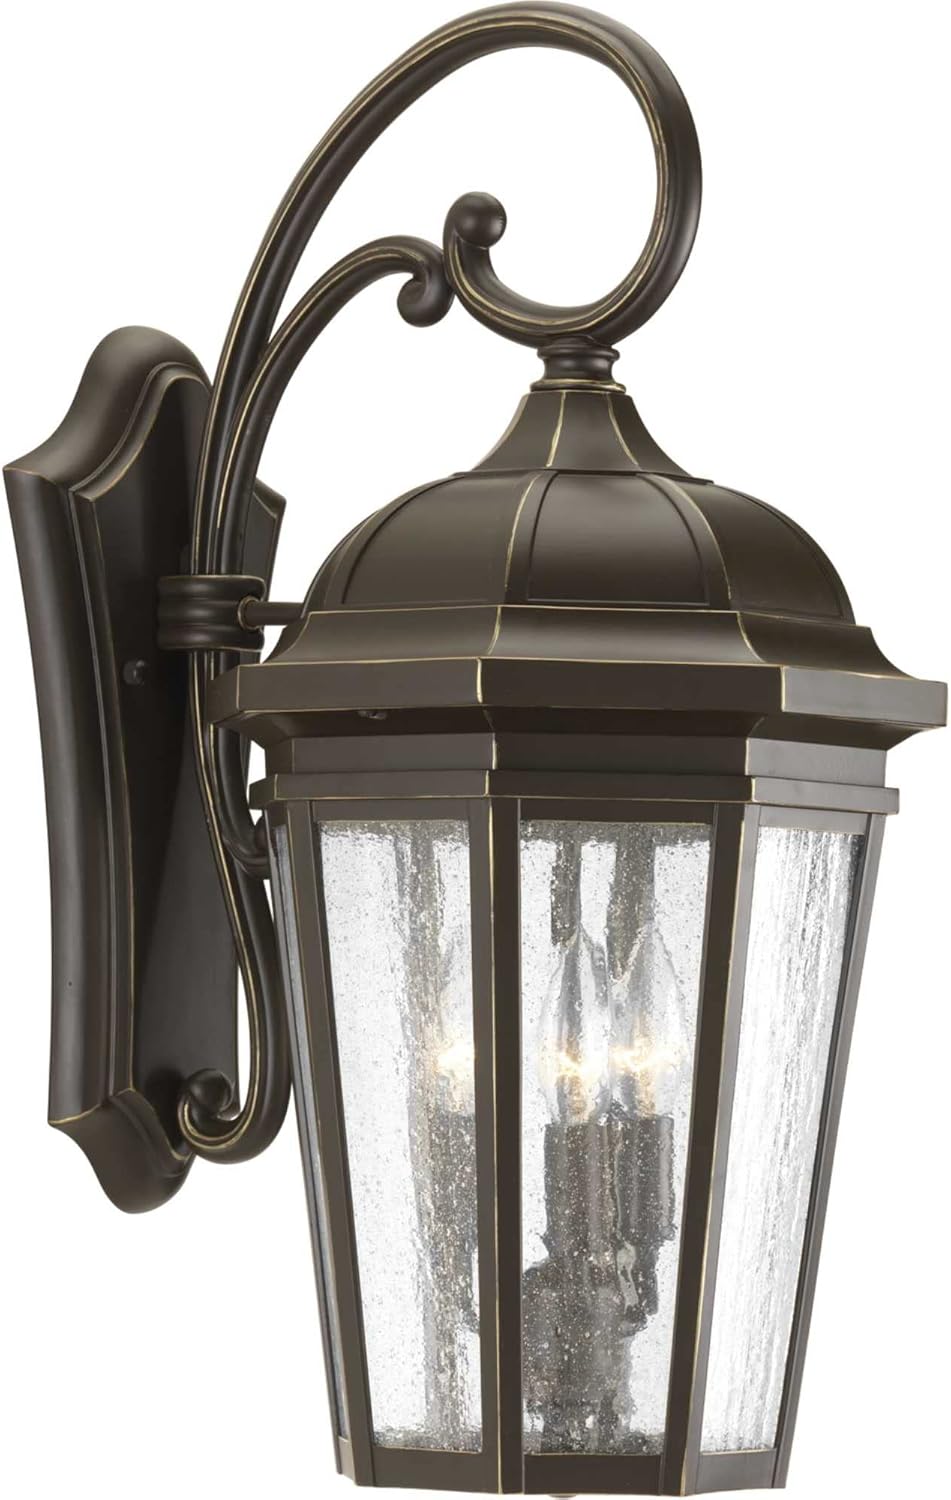
Image 1: The Verdae Collection Outdoor Wall Lantern, showcasing its Antique Bronze finish and clear seeded glass panels.
安全情報
警告: 感電の危険があります。設置やメンテナンスを行う前に、ヒューズボックスまたは回路ブレーカーの電源を切ってください。
- すべての電気接続は、地域の規則、条例、または国家電気規則 (NEC) に準拠する必要があります。
- 電気配線に詳しくない場合は、資格のある電気技師に相談してください。
- 取り付け中は安全メガネと適切な保護具を着用してください。
- 破損を防ぐため、ガラス部品を慎重に取り扱ってください。
- 器具が構造要素にしっかりと取り付けられていることを確認します。
- 最大ワット数を超えないでくださいtag電球に指定されています。
パッケージ内容
インストールを開始する前に、すべてのコンポーネントが揃っていることを確認してください。
- 屋外用壁掛けランタン(1)
- 取り付けハードウェアキット (1)
- Installation Sheet (1)
注記: 電球は付属しておりませんので別途ご購入ください。
仕様
| 特徴 | 詳細 |
|---|---|
| モデル番号 | P560016-020 |
| ブランド | プログレスライティング |
| 材料 | アルミニウム、ガラス |
| 仕上げる | アンティークブロンズ |
| シェード素材 | クリアシードガラス |
| ライトの数 | 3 |
| 電球ベース | E12(燭台) |
| 最大ワットtage 電球あたり | 60ワット |
| 巻tage | 120ボルト |
| 屋内/屋外での使用 | 屋外 |
| インストールタイプ | ハードウェアマウント |
| 耐水性レベル | 耐水性 |
| アイテム重量 | 6.3 ポンド |

Image 2: Dimensional drawing of the Verdae Outdoor Wall Lantern, indicating a height of 21-3/4 inches and a width of 10-3/8 inches.
セットアップとインストール
Follow these general steps for installation. Refer to the included installation sheet for detailed, model-specific instructions.
- インストールの準備: 回路ブレーカーまたはヒューズボックスで電源をオフにしてください。作業を進める前に、電源が完全に切断されていることを確認してください。
- 取り付けブラケットの取り付け: Attach the mounting bracket to the electrical junction box using the provided screws. Ensure it is securely fastened.
- 電気接続: Connect the fixture's wires to the house wiring according to standard electrical codes (black to black, white to white, ground to ground). Use approved wire connectors and ensure all connections are secure.
- 固定具の取り付け: Carefully align the fixture with the mounting bracket and secure it in place using the provided hardware. Ensure the fixture is flush against the wall and stable.
- 電球を取り付けます: Insert three E12 base bulbs (max 60W each, not included) into the sockets. The open bottom design allows for easy access.
- 電力を回復する: インストールが完了し、すべてのコンポーネントが固定されたら、回路ブレーカーで電源を復元します。
画像3: クローズアップ view of the lantern's base, illustrating the open bottom design for convenient bulb replacement.
操作手順
This outdoor wall lantern operates via a standard wall switch or a remote-compatible switch (if installed). Once the fixture is properly installed and power is restored:
- Flip the wall switch to the 'ON' position to illuminate the fixture.
- Flip the wall switch to the 'OFF' position to turn off the fixture.
- If a remote-controlled switch is used, refer to the instructions provided with your specific remote control system.
メンテナンス
- クリーニング: To clean the fixture, ensure power is off. Wipe with a soft, dry cloth. Do not use abrasive cleaners or solvents, as they may damage the finish or glass.
- 電球の交換: Turn off power at the circuit breaker. Allow bulbs to cool completely. Unscrew old bulbs and replace with new E12 base bulbs (max 60W each). The open bottom design provides easy access for this task.
- 検査: 定期的に器具を点検し、摩耗、損傷、接続の緩みなどがないか確認してください。問題があれば速やかに対処してください。

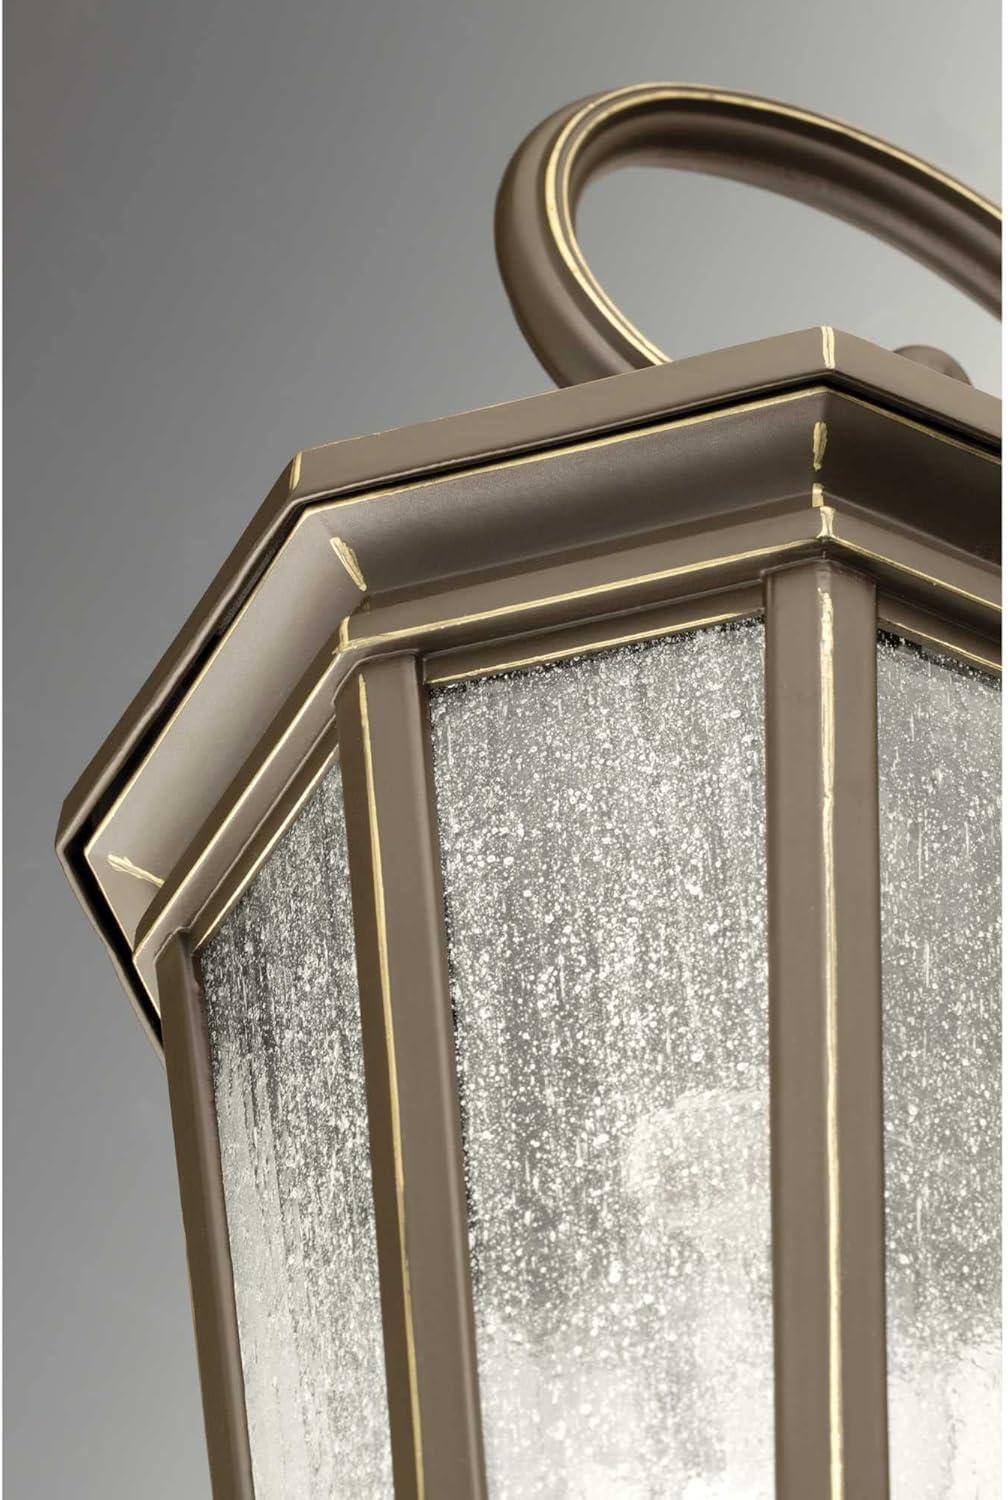
画像4: 詳細な view of the clear seeded glass, which provides a traditional aesthetic and diffuses light.
トラブルシューティング
If you encounter issues with your outdoor wall lantern, refer to the following common problems and solutions:
| 問題 | 考えられる原因 | 解決 |
|---|---|---|
| ライトが点灯しない | フィクスチャに電力が供給されていません 配線接続が緩んでいる 電球不良 | 回路ブレーカー/ヒューズを確認する すべての配線接続が安全であることを確認します(電源をオフにします) 電球を交換してください |
| 光がちらつく | ゆるんだ電球 ワイヤー接続が緩んでいる 電球の種類/ワット数が間違っているtage | バルブを締める 配線接続を確認してください(電源オフ) Ensure bulbs meet specifications |
| Glass is broken or cracked | 衝撃による損傷 | 交換部品についてはカスタマーサポートにお問い合わせください |
If the problem persists after attempting these solutions, contact a qualified electrician or Progress Lighting customer support.
保証とサポート
このProgress Lighting製品は、 1年間の限定保証 from the date of purchase. This warranty guarantees your complete satisfaction with your purchase and includes professional after-sales customer service support.
The warranty covers defects in materials and workmanship under normal use. It does not cover damage resulting from improper installation, accident, misuse, abuse, or unauthorized modifications.
For warranty claims, technical assistance, or to inquire about replacement parts, please contact Progress Lighting customer service. Refer to the contact information provided on the original packaging or the official Progress Lighting webサイト。


