1. はじめに
This manual provides essential information for the safe and efficient use of your Hitachi CP-EX251N XGA 3LCD Projector. Please read this manual thoroughly before operating the projector and keep it for future reference. The CP-EX251N is designed for clear, bright projections with 2700 lumens brightness and XGA (1024x768) native resolution, featuring 3LCD technology and a long-life lamp.
2. 安全情報
火災、感電、または怪我を防ぐために、次の安全上の注意事項を守ってください。
- 電源: Use only the power supply specified for this unit. Ensure the power cord is securely plugged into an outlet.
- 換気: 通気口を塞がないでください。プロジェクターの周囲に十分なスペースを確保し、適切な空気の流れを確保して過熱を防いでください。
- 熱: プロジェクターlamp 動作中は非常に熱くなります。プロジェクターを取り扱う際やメンテナンスを行う前に、プロジェクターが冷めるまでお待ちください。
- Lamp: プロジェクターレンズを直接見ないでください。amp 明るい光が目を傷める可能性があるので、電源をオンにしてください。
- 水分: 火災や感電を防ぐため、プロジェクターを雨や湿気にさらさないでください。
- サービス: 修理は必ず資格を持ったサービス担当者にご依頼ください。プロジェクターをご自身で開けたり修理したりしないでください。
3. パッケージ内容
パッケージにすべてのアイテムが揃っていることを確認します。
- Hitachi CP-EX251N Projector
- 電源コード
- 電池付きリモコン
- VGAケーブル
- ユーザーマニュアル(このドキュメント)
4.製品オーバーview

図4.1: 角度付き view of the Hitachi CP-EX251N Projector, showing the lens, control panel, and ventilation.
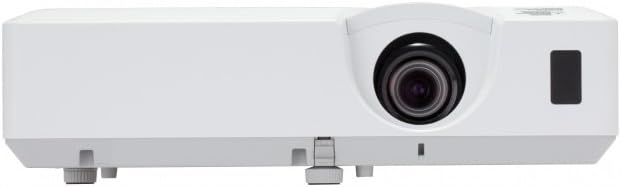
図4.2: 前面 view of the Hitachi CP-EX251N Projector, highlighting the projection lens and front IR receiver.
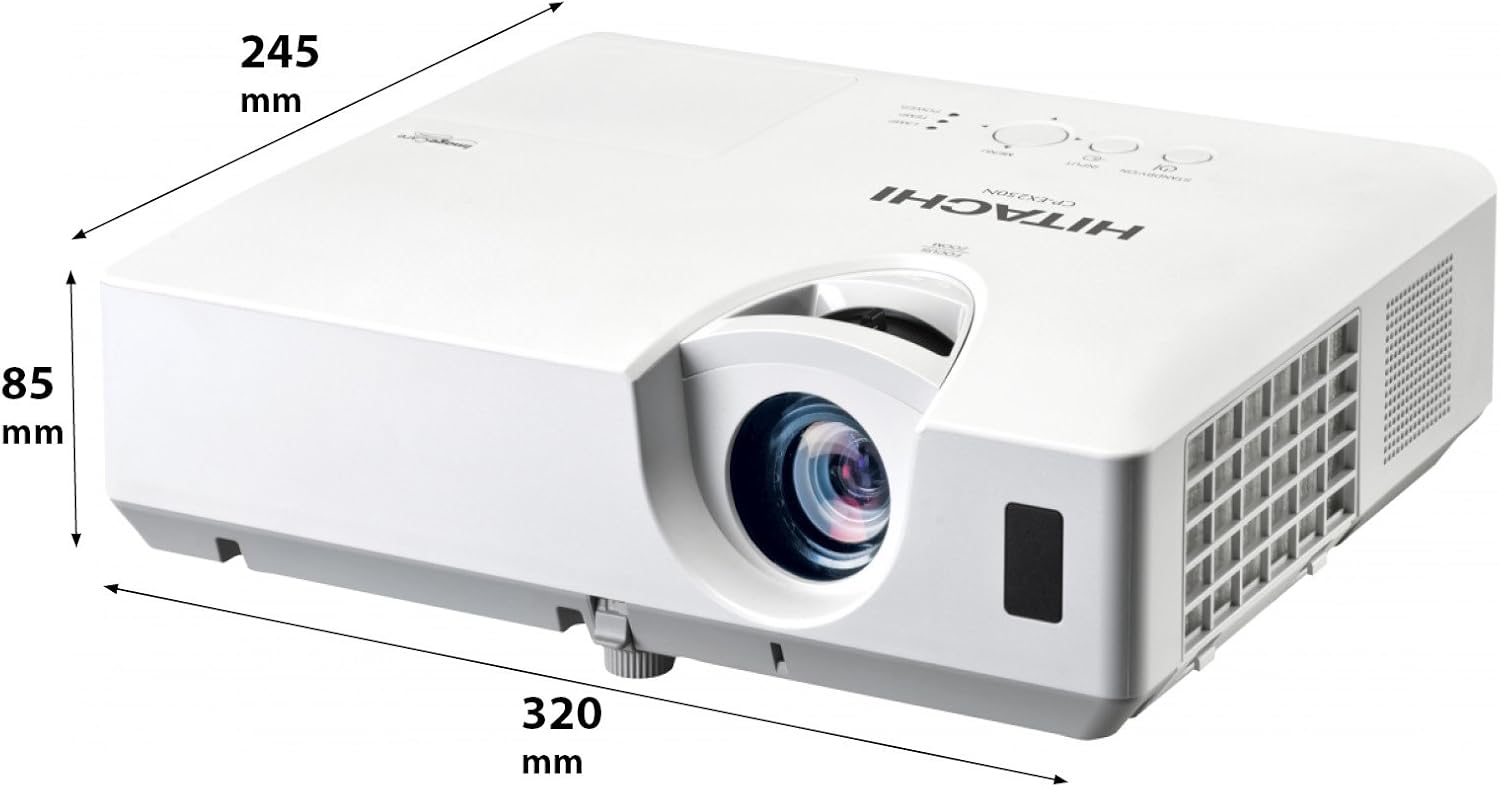
図4.3: 角度付き view of the projector illustrating its approximate dimensions (320mm length, 245mm width, 85mm height).
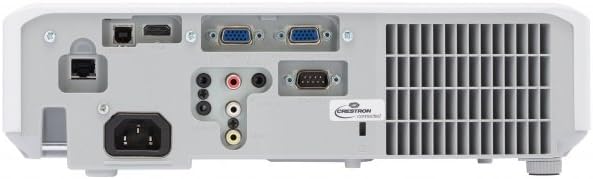
Figure 4.4: Rear panel of the projector, showing various input and output ports including HDMI, VGA, Composite, RS232C, and RJ45.
5. セットアップ
5.1 配置
Position the projector on a stable, flat surface or mount it securely. Ensure the projector is at an appropriate distance from the screen to achieve the desired image size. Maintain clear space around the projector for ventilation.
5.2 電源の接続
- 電源コードをプロジェクターの AC 入力に接続します。
- 電源コードのもう一方の端を接地されたコンセントに差し込みます。
5.3 入力ソースの接続
The CP-EX251N offers multiple connectivity options:
- HDMI: Connect an HDMI cable from your source device (e.g., laptop, Blu-ray player) to the projector's HDMI port.
- VGA: Connect a VGA cable from your computer to one of the projector's VGA ports (VGA1 or VGA2).
- コンポジットビデオ: Use an RCA composite video cable to connect devices like DVD players to the composite video input.
- オーディオ: Connect audio cables to the corresponding audio input jacks if using analog video sources.
- コントロール: For remote control and monitoring, connect an RS232C serial cable or an RJ45 Ethernet cable to a control system.
5.4 初回電源投入と画像調整
- Press the Power button on the projector or remote control. The power indicator will light up.
- 調整する フォーカスリング on the lens until the image is sharp.
- 調整する ズームリング on the lens to achieve the desired image size.
- 画像が台形になる場合は、 キーストーン補正 function (usually found in the projector menu or via dedicated buttons on the remote) to square the image.
6.運用
6.1 電源オン/オフ
- 電源を入れるには: 電源ボタンをXNUMX回押します。
- 電源を切るには: Press the Power button twice. The projector will enter a cooling cycle before shutting down completely. Do not unplug the projector during the cooling cycle.
6.2入力の選択
Press the 'Input' or 'Source' button on the remote control or projector control panel to cycle through available input sources (HDMI, VGA1, VGA2, Composite).
6.3メニューナビゲーション
Use the 'Menu' button to access the on-screen display (OSD) menu. Navigate using the arrow buttons and confirm selections with the 'Enter' button. The menu allows adjustment of picture settings, audio, display options, and system settings.
6.4 画像調整
OSD メニューでは、次の項目を調整できます。
- 輝度: 画像全体の明るさや暗さを調整します。
- 対比: Adjust the difference between the light and dark areas of the image.
- カラーモード: Select from various preset modes (e.g., Standard, Dynamic, Cinema, sRGB) or customize settings.
- アスペクト比: Change the display ratio (e.g., 4:3, 16:9).
6.5エコモード
Activate Eco Mode to reduce lamp brightness, conserve energy, and extend lamp life up to 10,000 hours. This setting can be found in the projector's OSD menu.
7. メンテナンス
7.1 レンズのクリーニング
プロジェクターレンズは、光学面専用の柔らかく糸くずの出ない布で優しく拭いてください。研磨剤入りのクリーナーを使用したり、過度の力で拭いたりしないでください。
7.2エアフィルターの清掃
Regularly clean the air filter to maintain optimal performance and prevent overheating. Refer to the projector's OSD menu for filter usage time. Remove the filter cover and gently clean the filter with a soft brush or vacuum cleaner. Replace the filter if it is damaged or excessively dirty.
7.3リットルamp 交換
プロジェクターlamp has a long lifespan, but will eventually require replacement. When the lamp インジケーターが点灯したり、画像が暗くなったりした場合は、lを交換してください。amp. Always use a genuine Hitachi replacement lamp. Allow the projector to cool completely before attempting lamp replacement. Consult the full service manual for detailed lamp 交換手順。
7.4 ストレージ
When storing the projector for an extended period, ensure it is powered off and cooled down. Store it in a cool, dry place, away from direct sunlight and extreme temperatures.
8。 トラブルシューティング
| 問題 | 考えられる原因 | 解決 |
|---|---|---|
| 電源なし | Power cord disconnected; Power outlet faulty; Projector in standby mode. | Check power cord connection; Try a different outlet; Press the Power button. |
| 画像が表示されない | Input source not selected; Cable not connected properly; Source device not outputting signal. | Select correct input source; Reconnect video cable; Check source device settings. |
| 画像が歪んだりぼやけたりする | Focus/Zoom not adjusted; Keystone not corrected; Projector not perpendicular to screen. | Adjust Focus and Zoom rings; Use Keystone correction; Reposition projector. |
| 音が出ない | Audio cable not connected; Volume too low; Mute function active. | Connect audio cable (if applicable); Increase volume; Deactivate mute. |
| リモコンが動作しない | Batteries depleted; Obstruction between remote and projector; Remote sensor blocked. | Replace batteries; Remove obstructions; Ensure clear line of sight to IR sensor. |
9. 仕様
| 特徴 | 仕様 |
|---|---|
| モデル番号 | CP-EX251N |
| ディスプレイ技術 | 3LCD |
| 輝度 | 2700ルーメン |
| ネイティブ解像度 | XGA(1024×768) |
| Lamp 人生 | 最大10,000時間(エコモード時) |
| 接続性 | HDMI x 1, VGA x 2, Component (Shared) x 2, Composite x 1, RS232C, RJ45 |
| オーディオ出力 | 16Wスピーカー |
| アイテム重量 | 6.83ポンド(約3.1kg) |
| 製品寸法 | 6 x 12 x 14インチ(約15.2 x 30.5 x 35.6 cm) |
| 推奨用途 | ビジネス、教育、ゲーム、ホームシアター |
| 特集 | ポータブル |
10. 保証とサポート
保証情報については、製品に付属の保証書を参照するか、日立の公式ウェブサイトをご覧ください。 website. For technical support, service, or inquiries about replacement parts, please contact Hitachi customer service through their official channels.
オンラインサポート: www.hitachi.com/support (元ample リンクについては、実際の製品ドキュメントを参照してください。 URL)


