1. はじめに
This manual provides essential instructions for the safe and efficient operation of your SINGER Start 1306 Sewing Machine. Please read it thoroughly before using the machine to ensure proper setup, usage, and maintenance. The SINGER Start 1306 is designed for home sewing projects, featuring 6 built-in stitches, easy threading, and a 4-step buttonhole function.

画像1.1:正面 view of the SINGER Start 1306 Sewing Machine.
2. 安全情報
火災、感電、または怪我のリスクを軽減するために、電気製品を使用するときは常に基本的な安全上の注意事項に従ってください。
- 機械を使用する前に、すべての指示をお読みください。
- 本機を水や濡れた表面から遠ざけてください。
- 使用していないとき、保守作業を行うとき、または付属品を交換するときは、本機を電源コンセントから抜いてください。
- コードやプラグが破損している場合、正常に動作していない場合、または機械を落としたり損傷したりした場合は、機械を絶対に操作しないでください。
- すべての可動部品に指を近づけないでください。 ミシンの針の周りには特別な注意が必要です。
- 製造元が推奨するアクセサリのみを使用してください。
- 開口部に物を落としたり挿入したりしないでください。
3. セットアップ
3.1 開梱と内容物
Carefully remove the machine from its packaging. Retain all packaging materials for future transport or storage. Verify that all included components are present:
- 万能フット
- ジッパーフット
- ボタンホール押え
- ダーニングプレート
- 針のパック
- ボビン
- Spool Pin Felts
- ニードルプレートドライバー
- 縫い目リッパー/糸くずブラシ
- Vinyl Dust Cover
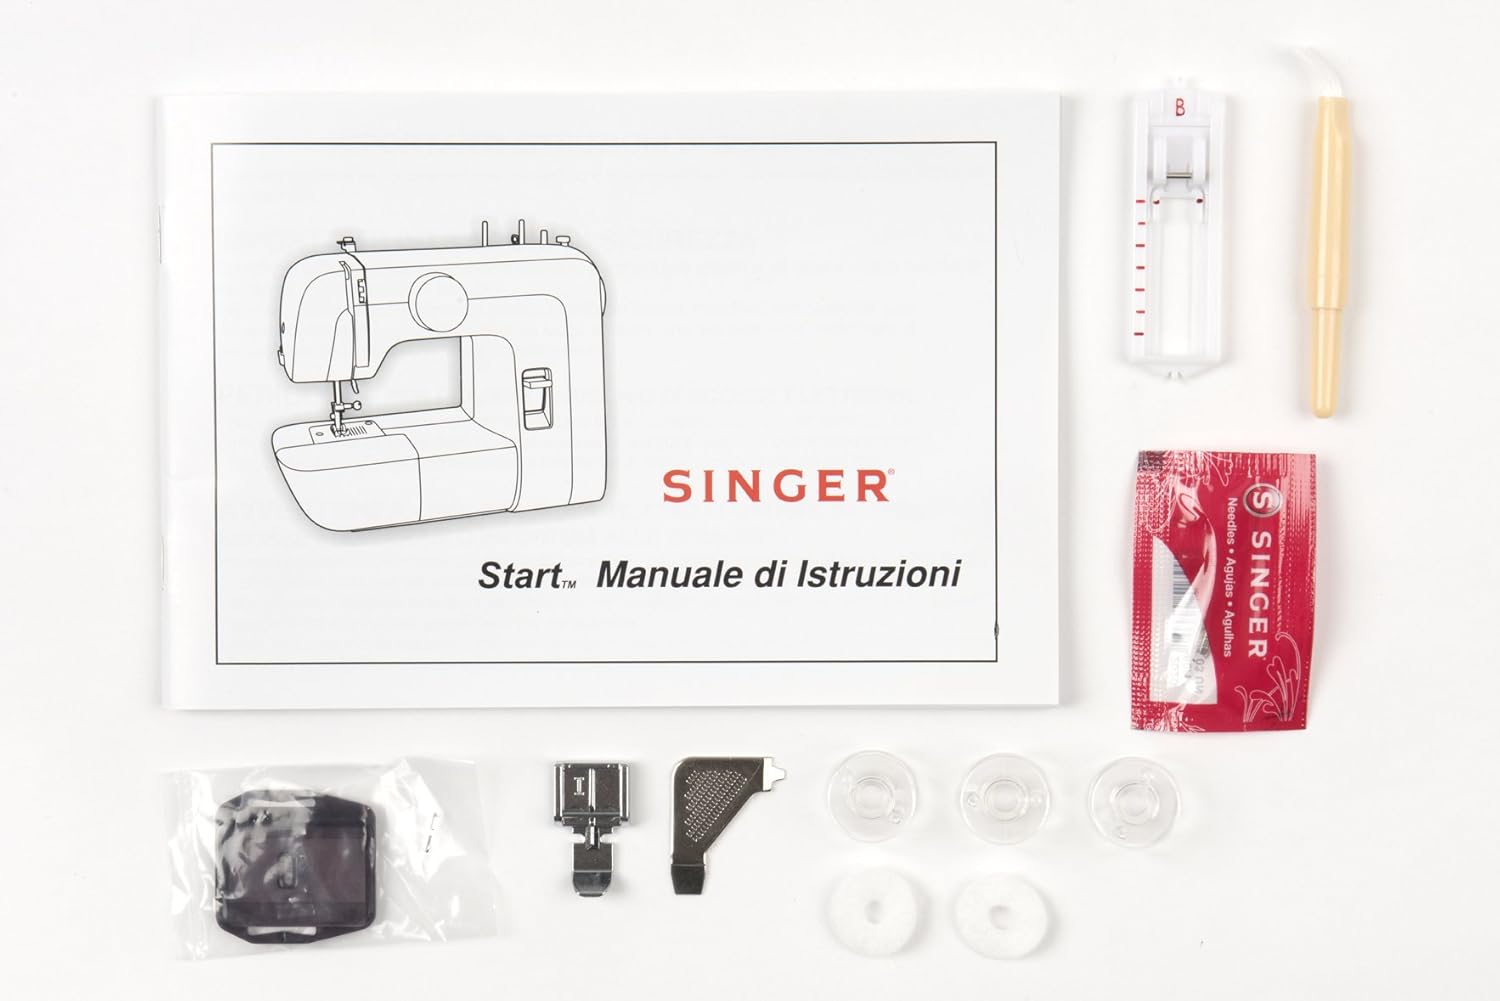
Image 3.1: Included accessories and instruction manual.
3.2電源接続
Connect the power cord to the machine's power input socket and then plug it into a suitable electrical outlet (220V). Ensure the machine is switched off before connecting to power.

画像3.2:リア view showing power input and foot pedal connection.
3.3 機械に糸を通す
Correct threading is crucial for proper stitch formation.
3.3.1 ボビン巻き
- 糸こまを糸立て棒に置きます。
- 糸を上部の糸ガイドに通します。
- Wrap the thread clockwise around the bobbin winding tension disc.
- Insert the thread through the small hole in the bobbin from the inside out.
- Place the bobbin onto the bobbin winder spindle and push the spindle to the right.
- Hold the thread end and press the foot pedal. Wind a few turns, then trim the excess thread.
- Continue winding until the bobbin is full. The winder will stop automatically.
- Push the bobbin winder spindle to the left and remove the bobbin.
3.3.2 ボビンの挿入
- ボビンカバープレートを開きます。
- 糸を反時計回りに巻きながら、ボビンをボビンケースに挿入します。
- Guide the thread into the tension spring slot and pull it firmly until it snaps into place.
- ボビンカバープレートを閉じます。
3.3.3 上糸通し
- ハンドホイールを使用して針を最高位置まで上げます。
- プレッサーフットリフターを上げます。
- 糸こまを糸立て棒に置きます。
- 糸を上部の糸ガイドに通します。
- Bring the thread down through the right channel, then up through the left channel, ensuring it passes through the take-up lever.
- 針を前から後ろへ通します。

Image 3.3: Illustration of the upper threading path.
3.4 針の取り付け
To install or replace a needle:
- ハンドホイールを回して、針を最も高い位置まで上げます。
- 針を緩めるclamp スクリュー。
- 古い針を取り外します。
- Insert the new needle with the flat side facing the back of the machine. Push it up as far as it will go.
- 針を締めるamp しっかりとねじ込みます。

Image 3.4: Close-up of the needle and presser foot area.
4. 操作手順
4.1 ステッチの選択
The SINGER Start 1306 offers 6 built-in stitch patterns. Turn the stitch selector dial to choose your desired stitch. The available stitches include 4 basic, 1 decorative, and 1 buttonhole stitch.

Image 4.1: Stitch selector dial with various stitch patterns.
4.2 縫製の基本
4.2.1 Starting a Seam
- 布地を押さえの下に置き、布端を針板の縫い目ガイドに合わせます。
- 押さえ足を下げます。
- ハンドホイールを回して、開始位置で針を布地に下ろします。
- Press the foot pedal gently to begin sewing.
4.2.2 Finishing a Seam
- Sew to the end of your seam.
- Press the reverse stitch lever to sew a few stitches backward to secure the seam.
- 針を一番高い位置まで上げます。
- 押さえ金を上げます。
- Pull the fabric away from the machine, then cut the threads using the thread cutter on the machine.
4.3 4-Step Buttonhole Function
The machine features a 4-step buttonhole function for creating buttonholes. Refer to the markings on the stitch selector dial for each step (1, 2, 3, 4). Use the buttonhole foot for best results.
4.4 Zipper Insertion
Attach the zipper foot to the machine. This foot allows you to sew close to the zipper teeth, ensuring a neat finish. Follow standard zipper insertion techniques, adjusting the needle position as needed.
4.5 Free Arm Usage
The removable free arm provides access to difficult-to-reach areas such as collars, sleeves, cuffs, and pant hems. To use, slide off the accessory storage compartment to expose the free arm.
5. メンテナンス
5.1 クリーニング
定期的な清掃はマシンの性能維持に役立ちます。清掃の前に必ず電源プラグを抜いてください。
- 糸くずの除去: 付属の糸くずブラシを使用して、ボビンエリアと送り歯から糸くずやほこりを取り除きます。
- 外装清掃: 外装面は柔らかく乾いた布で拭いてください。刺激の強い化学薬品や研磨剤入りの洗剤は使用しないでください。
5.2 針の交換
Replace needles regularly, especially when sewing different fabric types or if the needle becomes bent or dull. A damaged needle can cause skipped stitches or fabric damage. Refer to section 3.4 for needle installation instructions.
6。 トラブルシューティング
このセクションでは、発生する可能性のある一般的な問題について説明します。ここに記載されていない問題については、カスタマーサポートにお問い合わせください。
| 問題 | 考えられる原因 | 解決 |
|---|---|---|
| スキップされたステッチ | 針が間違っている、針が曲がっている、糸通しが不適切。 | 針を交換し、機械に糸を通し直し、生地に合った針の種類を確認します。 |
| スレッドの切断 | Incorrect threading, tension too tight, damaged needle, poor quality thread. | Re-thread, adjust tension, replace needle, use good quality thread. |
| Bobbin Thread Jamming | Improperly wound bobbin, incorrect bobbin insertion, lint in bobbin case. | ボビンを巻き直し、ボビンを正しく再挿入し、ボビンエリアを清掃します。 |
| マシンが起動しない | Power cord not connected, machine switched off, foot pedal not connected. | Check power connections, ensure switch is ON, connect foot pedal. |
7. 仕様
| 特徴 | 詳細 |
|---|---|
| ブランド | 歌手 |
| モデル番号 | スタート1306 |
| アイテム重量 | 4.3キロ |
| 製品寸法(長さx幅x高さ) | 35 x 18 x 29 cm |
| 巻tage | 220V |
| ワットtage | 70ワット |
| 内蔵ステッチ | 6 (4 basic, 1 decorative, 1 buttonhole) |
| ボタンホールタイプ | 4段階オートマチック |
| フレーム素材 | 耐久性の高い金属 |
| 含まれるコンポーネント | All Purpose Foot, Zipper Foot, Buttonhole Foot, Darning Plate, Pack of Needles, Bobbins, Spool Pin Felts, Needle Plate Screwdriver, Seam Ripper / Lint Brush, Vinyl Dust Cover |

Image 7.1: Product dimensions of the SINGER Start 1306 Sewing Machine.
8. 保証とサポート
Your SINGER Start 1306 Sewing Machine comes with a manufacturer's warranty. Please refer to the warranty card included with your product for specific terms, conditions, and duration. For technical assistance, service, or to inquire about replacement parts, please contact SINGER customer support through their official webサイトまたは保証書に記載されている連絡先情報を参照してください。


