1. はじめに
This manual provides detailed instructions for the installation, operation, and maintenance of the Intermatic ET91215CR 30A 120-277V SPDT 365-Day Astronomic Energy Control. This robust device is designed for heavy-duty industrial and commercial applications, offering precise control over electrical circuits with its astronomic time-keeping capabilities and durable Type 3R steel enclosure.
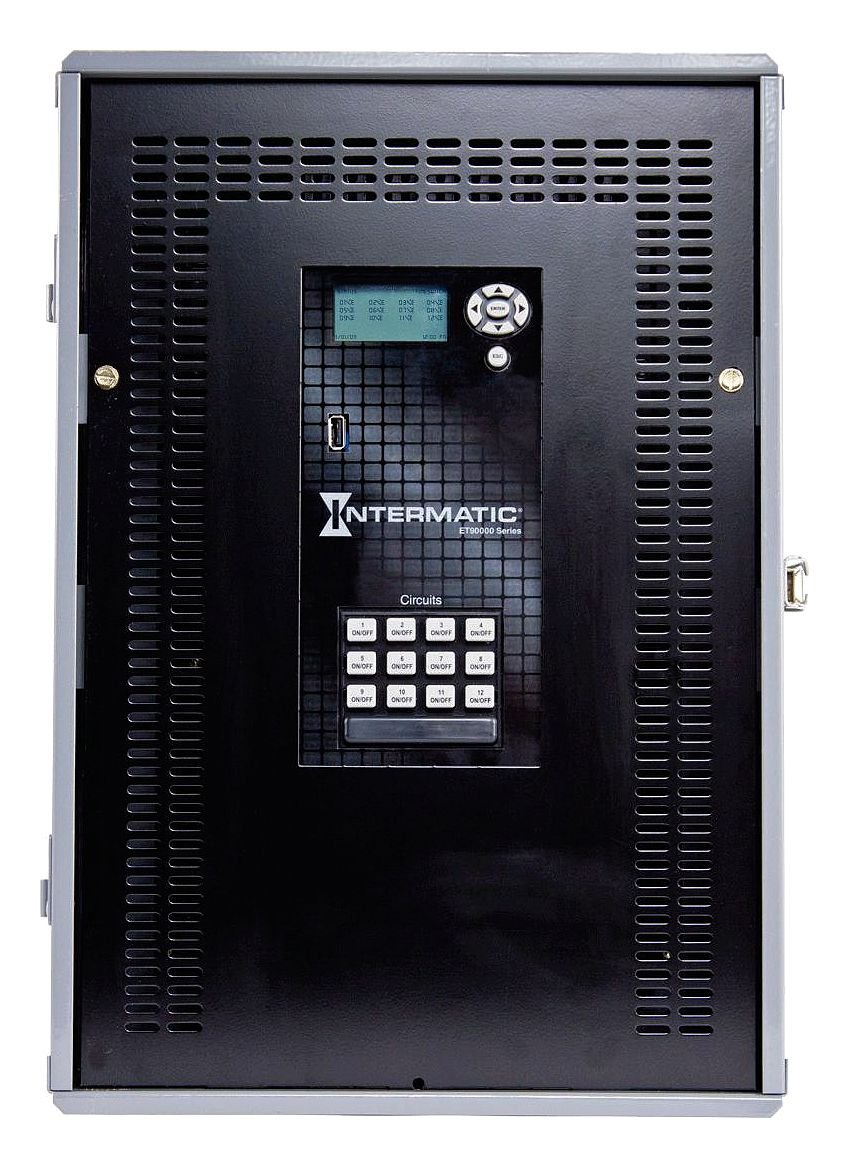
図1: Front panel of the Intermatic ET91215CR Energy Control. The unit features a digital display for programming, navigation buttons, a USB port for data transfer, and twelve individual ON/OFF buttons for circuit control, labeled 1 through 12. The Intermatic logo and 'ET90000 Series' designation are visible below the display.
2. 安全情報
警告: Risk of electric shock. Installation and servicing must be performed by qualified personnel only. Disconnect power at the circuit breaker or fuse before installing or servicing. Follow all local and national electrical codes.
- Always ensure the power supply is disconnected before working on the unit.
- Do not operate the unit with damaged wiring or if the enclosure is compromised.
- This device is intended for permanent installation.
- 電気的危険を防ぐために適切な接地を確保してください。
3. セットアップとインストール
3.1 エンクロージャの取り付け
The ET91215CR features a Type 3R steel enclosure, suitable for outdoor applications, providing protection against rain, sleet, and external ice formation. Mount the enclosure securely to a flat, vertical surface using appropriate hardware (not included). Ensure adequate clearance for wiring and ventilation.
3.2配線手順
This device is rated for 30A and operates on 120-277V. It features a Single Pole Double Throw (SPDT) switch configuration. All wiring must comply with the National Electrical Code (NEC) and local codes. Refer to the wiring diagram provided inside the enclosure door for specific connections.
- Disconnect all power to the installation site at the main circuit breaker.
- エンクロージャーのドアを開きます。
- Connect the incoming power supply wires to the designated terminals.
- Connect the load wires for each controlled circuit to the appropriate output terminals.
- すべての接続がしっかりと固定されていることを確認してください。
- Close the enclosure door and restore power.
注記: For optimal performance and safety, it is highly recommended that a licensed electrician perform the installation and wiring of this energy control unit.
4. 操作手順
4.1 初期電源投入と表示
Upon initial power-up, the digital display will illuminate. The display shows current time, date, and status information. Use the navigation buttons (up, down, left, right, ENTER, ESC) located next to the display to navigate through menus and adjust settings.
4.2 時刻と日付の設定
Access the main menu using the navigation buttons. Select the 'Time/Date' option to set the current time, date, and year. Ensure these settings are accurate for the astronomic feature to function correctly.
4.3 Programming Schedules (Astronomic Feature)
The 365-day astronomic feature automatically adjusts ON/OFF times based on sunrise and sunset for your geographical location. This requires setting your precise latitude and longitude. Consult the detailed programming guide within the unit's internal menu or refer to the full product manual for advanced scheduling options.
- Navigate to the 'Astronomic Settings' menu.
- Enter your geographical coordinates (latitude and longitude).
- Define desired offsets from sunrise/sunset if needed.
- Assign astronomic schedules to specific circuits.
4.4 Manual Circuit Control
The unit features twelve individual ON/OFF buttons for direct control of each circuit. Pressing an 'ON/OFF' button will toggle the corresponding circuit's power state. This manual override can be used independently of programmed schedules.
4.5 USBポートの機能
The integrated USB port allows for easy transfer of programming schedules, event logs, and firmware updates. Refer to the Intermatic software documentation for detailed instructions on using this feature.
5. メンテナンス
The Intermatic ET91215CR is designed for minimal maintenance. Regular inspection is recommended to ensure optimal performance.
- クリーニング: 定期的に、柔らかくて乾いた布で筐体の外側を清掃してください。amp 布で拭いてください。研磨剤や溶剤は使用しないでください。
- 検査: Annually inspect all wiring connections for tightness and signs of wear or corrosion. Check the enclosure for any damage that might compromise its Type 3R rating.
- ファームウェアの更新: Check the Intermatic website periodically for available firmware updates via the USB port to ensure your unit has the latest features and bug fixes.
6。 トラブルシューティング
If you encounter issues with your ET91215CR, refer to the following common troubleshooting steps:
| 問題 | 考えられる原因 | 解決 |
|---|---|---|
| ユニットの電源が入りません。 | 電源が供給されず、回路ブレーカーが落ちました。 | Check power supply at the source. Reset circuit breaker. Verify wiring connections. |
| Schedules not activating. | Incorrect time/date; schedule not enabled; astronomic settings incorrect. | Verify current time and date. Ensure schedules are programmed and enabled for the correct circuits. Check astronomic coordinates. |
| Circuit not responding to manual ON/OFF. | Wiring issue; internal fault. | Check wiring for the specific circuit. If problem persists, contact technical support. |
| ディスプレイが空白または判読不能です。 | 電源の問題、ディスプレイ障害。 | Verify power supply. If power is present and display remains blank, contact technical support. |
If troubleshooting steps do not resolve the issue, contact Intermatic Technical Support for further assistance.
7. 仕様
| 特徴 | 仕様 |
|---|---|
| モデル番号 | ET91215CR |
| 巻tage | 120-277ボルト |
| Amp容量を消去する | 30 Amps |
| スイッチタイプ | SPDT(単極双投) |
| エンクロージャタイプ | Type 3R Steel Enclosure |
| プログラミング | 365-Day Astronomic |
| 製品寸法 | 3.6 x 5.7 x 9.6インチ |
| アイテム重量 | 21ポンド |
| Material (Internal) | アルミニウム、銅 |
| 認定資格 | NOM, UL |
| 含まれるコンポーネント | Intermatic ET91215CR Timer, 30A 120-277V SPDT 365-Day Astronomic Energy Control w/Type 3R Steel Enclosure |
8. 保証とサポート
8.1 限定保証
The Intermatic ET91215CR is covered by a limited warranty. For specific terms and conditions, please refer to the warranty documentation included with your product or visit the official Intermatic webサイト。この保証は通常、通常の使用における材料および製造上の欠陥をカバーします。
8.2 テクニカルサポート
For technical assistance, product inquiries, or warranty claims, please contact Intermatic Customer Service. Have your product model number (ET91215CR) and purchase date available when contacting support.
Intermatic Contact Information:
Please refer to the official Intermatic web最新の連絡先情報については、サイトまたは製品パッケージをご覧ください。