1. はじめに
This manual provides comprehensive instructions for the safe and efficient operation of your JVC DR-MV150 DVD Video Recorder VHS Hi-Fi Stereo. Please read this manual thoroughly before using the unit and retain it for future reference. The DR-MV150 combines a DVD recorder and a VHS VCR into a single unit, offering versatile playback and recording capabilities for various media formats.
2. 安全情報
- 電源: 指定された電源にのみ接続してください。tage はユニットの要件と一致します。
- 換気: 通気口を塞がないでください。過熱を防ぐため、適切な空気の流れを確保するために、ユニットの周囲に十分なスペースを確保してください。
- 水分: 雨、湿気、または過度の湿度にさらさないでください。花瓶など、液体の入った物を本製品の上に置かないでください。
- クリーニング: 清掃する前に電源コードを抜いてください。柔らかく乾いた布を使用してください。液体洗剤やエアゾール洗剤は使用しないでください。
- サービス: 本製品の修理はご自身で行わないでください。修理はすべて資格を持ったサービス担当者にご依頼ください。
- 配置: 安定した水平な場所に設置してください。熱源の近くや直射日光の当たる場所に置かないでください。
3. パッケージ内容
パッケージにすべてのアイテムが揃っていることを確認します。
- JVC DR-MV150 DVD Video Recorder VHS Hi-Fi Stereo Unit
- リモートコントロール
- 電源ケーブル
- HDMIケーブル
- RCA Audio/Video Cables
- 取扱説明書(本書)

This image displays the JVC DR-MV150 DVD Video Recorder, its remote control, power cable, HDMI cable, RCA cables, and the included instruction manual, illustrating the complete package contents.
4. セットアップ
4.1 ユニットの接続
Follow these steps to connect your DR-MV150 to your television and other audio/video equipment.
- 電源接続: Connect the supplied power cable to the AC IN port on the rear of the unit and then to a wall outlet.
- ビデオ接続(HDMI): For the best picture quality, connect an HDMI cable from the HDMI OUTPUT port on the rear of the DR-MV150 to an HDMI input on your television. This connection supports 1080p up-conversion.
- Video Connection (RCA): Alternatively, or for older televisions, connect the yellow video cable from the VIDEO OUT port on the DR-MV150 to the VIDEO IN port on your television. Connect the red and white audio cables from the AUDIO OUT (R/L) ports to the corresponding AUDIO IN (R/L) ports on your television or audio receiver.
- アンテナ/ケーブル接続: Connect your antenna or cable TV line to the ANTENNA IN port on the rear of the unit.
- External Device Connection (Front A/V Input): For connecting external devices like camcorders, use the front panel DV IN or analog audio/video input ports.
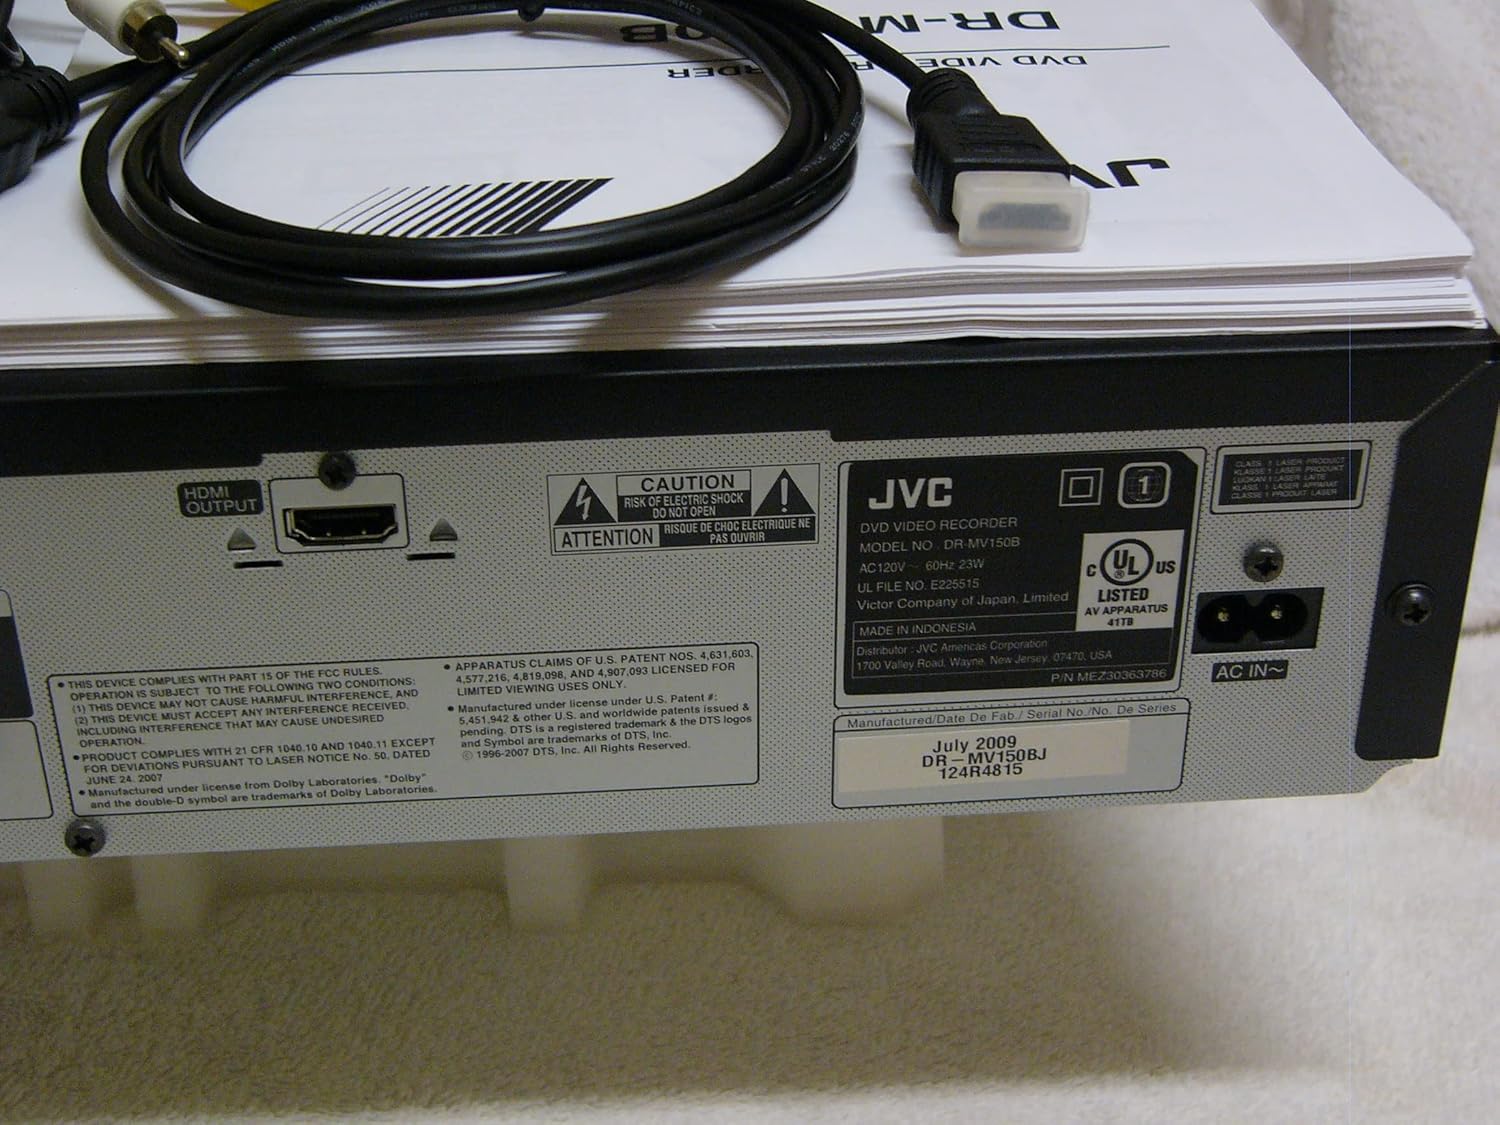
The rear panel of the JVC DR-MV150, displaying the HDMI OUTPUT port for high-definition connection, the AC IN power input, and various regulatory and manufacturing labels.

詳細な view of the front panel of the JVC DR-MV150, highlighting the DV IN port and the analog audio (white, red) and video (yellow) input jacks, typically used for connecting external devices like camcorders.
4.2 リモコン電池の取り付け
Insert two AAA batteries into the remote control, ensuring correct polarity (+/-). The remote control is essential for accessing all functions of the DR-MV150.

This image features the remote control for the JVC DR-MV150, alongside an HDMI cable and a set of RCA audio/video cables, which are essential for connecting and operating the device.
5. 操作手順
5.1 基本的な再生
- DVD再生: Open the DVD tray, place a DVD disc (DVD-R/RW, CD, SVCD, VCD, CD-R/RW) with the label side up, and close the tray. The unit should automatically begin playback or display a menu.
- VHS再生: Insert a VHS tape into the VCR slot. The unit will typically begin playback automatically.

This image focuses on the DVD tray section of the JVC DR-MV150, labeled 'Super MULTI' indicating its multi-format compatibility. Below the tray are various control buttons for DVD operation, along with logos for DivX, DTS, Dolby Digital Recording, and DVD Video.
5.2 録音
The DR-MV150 supports recording to various DVD formats (DVD-RAM, DVD-RW, DVD-R, +RW, +R) and VHS Hi-Fi tapes.
- Recording to DVD: Insert a recordable DVD disc. Select the input source (e.g., TV tuner, external A/V input). Press the RECORD button on the unit or remote.
- Recording to VHS: Insert a VHS tape. Select the input source. Press the RECORD button.
- 同時操作: The unit allows for simultaneous DVD playback while recording to VHS, or vice-versa, depending on the source and destination.
- Finalizing Discs: After recording to a DVD-R, DVD+R, or DVD-RW (VR mode), the disc may need to be finalized to be playable on other DVD players. Refer to the on-screen menu for the finalizing option.
5.3つの高度な機能
- 1080p Up-conversion: When connected via HDMI, the unit can upscale standard definition content to 1080p resolution for improved picture quality on compatible displays.
- プログレッシブスキャン: Provides a smoother, flicker-free image, especially beneficial for fast-moving scenes.
- ATSC Tuner: The integrated ATSC tuner allows reception of over-the-air digital television broadcasts.
6. メンテナンス
6.1 ユニットのクリーニング
- 外観: 外側の表面は柔らかく乾いた布で拭いてください。頑固な汚れには、軽く拭き取ってください。ampen the cloth with water and then wipe dry. Avoid abrasive cleaners or solvents.
- Disc Tray/VCR Slot: Keep the disc tray and VCR slot free of dust and debris. Do not insert foreign objects.
6.2一般的なケア
- ユニットを極端な温度や直射日光にさらさないでください。
- ユニットの上に重いものを置かないでください。
- Handle discs and tapes carefully to prevent scratches or damage.
7。 トラブルシューティング
If you encounter issues with your DR-MV150, refer to the following common troubleshooting steps:
- 電源なし: 電源ケーブルがユニットと機能している壁のコンセントの両方にしっかりと接続されていることを確認します。
- 画像/音声なし: Verify all audio and video cables (HDMI, RCA) are correctly connected to the appropriate input/output ports on both the DR-MV150 and your television/receiver. Ensure the correct input source is selected on your television.
- Disc Not Playing/Recording: Check that the disc is clean, free of scratches, and inserted correctly (label side up). Ensure the disc format is supported by the unit. For recording, ensure the disc is recordable and not full or finalized (if applicable).
- VHS Tape Issues: Ensure the tape is inserted correctly and not damaged.
- リモコンが動作しない: Check the batteries in the remote control and ensure there are no obstructions between the remote and the unit's sensor.
- ユニットが応答しない: Try unplugging the unit from the power outlet for a few minutes, then plug it back in to reset it.
If problems persist after attempting these steps, contact JVC customer support or a qualified service technician.
8. 仕様
| 特徴 | 仕様 |
|---|---|
| モデル名 | DR-MV150 |
| 製品寸法 | 19 x 15 x 7インチ |
| アイテム重量 | 12.4ポンド |
| メディアタイプ | CD、DVD、SVCD、VCD、VHS |
| Recordable Formats | VHS Hi-Fi, DVD-RAM, DVD-RW, DVD-R, +RW, +R |
| 特集 | プログレッシブスキャン |
| 解決 | 1920x1080 (HDMI output with 1080p up-conversion) |
| コネクタタイプ | HDMI, RCA (Audio/Video) |
| 接続技術 | HDMI |
| オーディオ出力モード | ステレオ |
| 統合チューナー | ATSC/QAM Tuner |
| 電池(リモコン) | 単2電池XNUMX本必要 |
| メーカー | JVC |
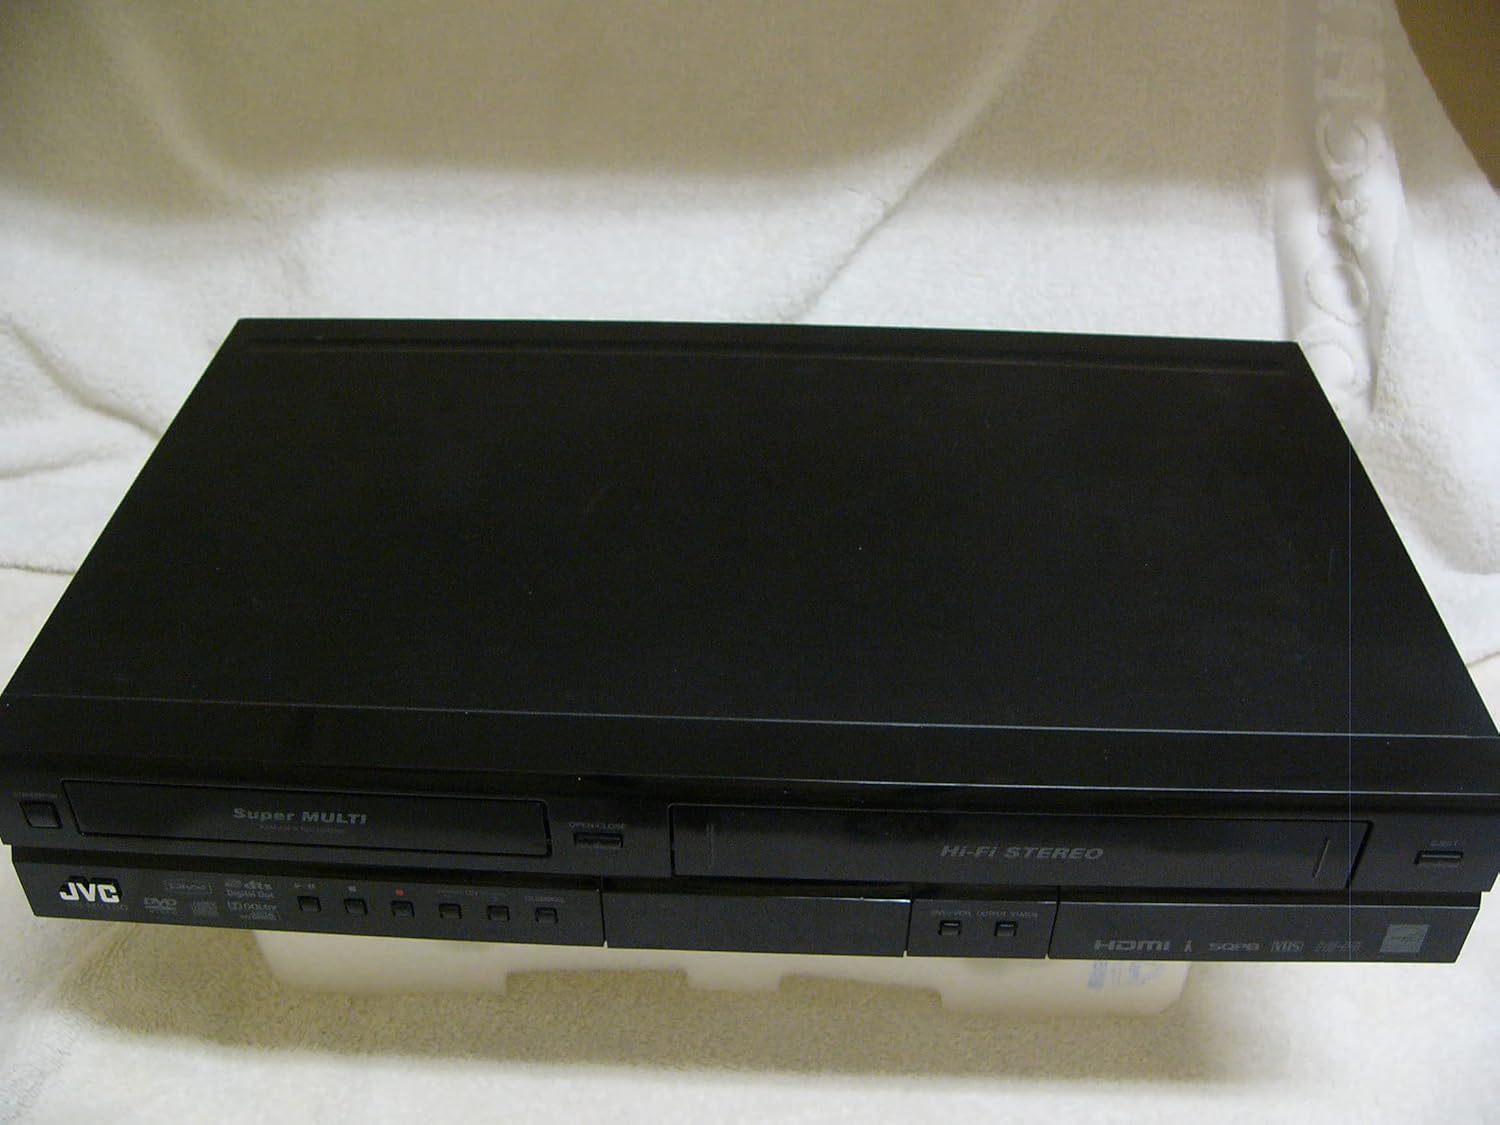
A top-down perspective of the JVC DR-MV150 unit, showcasing its sleek black design and dual-deck configuration for both DVD and VHS media.
9. 保証とサポート
For warranty information, please refer to the documentation included with your purchase or visit the official JVC website. JVC offers various protection plans for extended coverage. For technical support or service inquiries, please contact JVC customer service.
- 2年間の保護プラン: 延長保証をご利用いただけます。
- 3年間の保護プラン: 延長保証をご利用いただけます。
- 完全保護: 対象となる過去および将来の購入を対象とする月額プラン。
Please note that protection plans are separate from the manufacturer's warranty and provide additional coverage options.


