
1. はじめに
Welcome to your new Ankilo Wireless Refrigerator Freezer Thermometer. This device provides real-time temperature and humidity monitoring for your refrigerator and freezer, featuring an alarm function to protect your food from spoilage due to temperature fluctuations. Please read this manual carefully before use to ensure proper operation and longevity of your device.
2. パッケージ内容
- メインディスプレイユニット x 1
- ワイヤレスリモートセンサー2個
- USB電源ケーブル(本体用)×1
- ユーザーマニュアル (本書) x 1
注記: 3x AAA batteries for the main unit and 2x AA batteries for each sensor are not included and must be purchased separately.
3.製品オーバーview
3.1 メインディスプレイユニット
The main unit serves as the central display for all temperature and humidity readings. It features a clear, color-coded screen that shows indoor conditions (temperature and humidity) and the readings from the two wireless remote sensors. Key information such as time, calendar, and MAX/MIN records are also displayed.
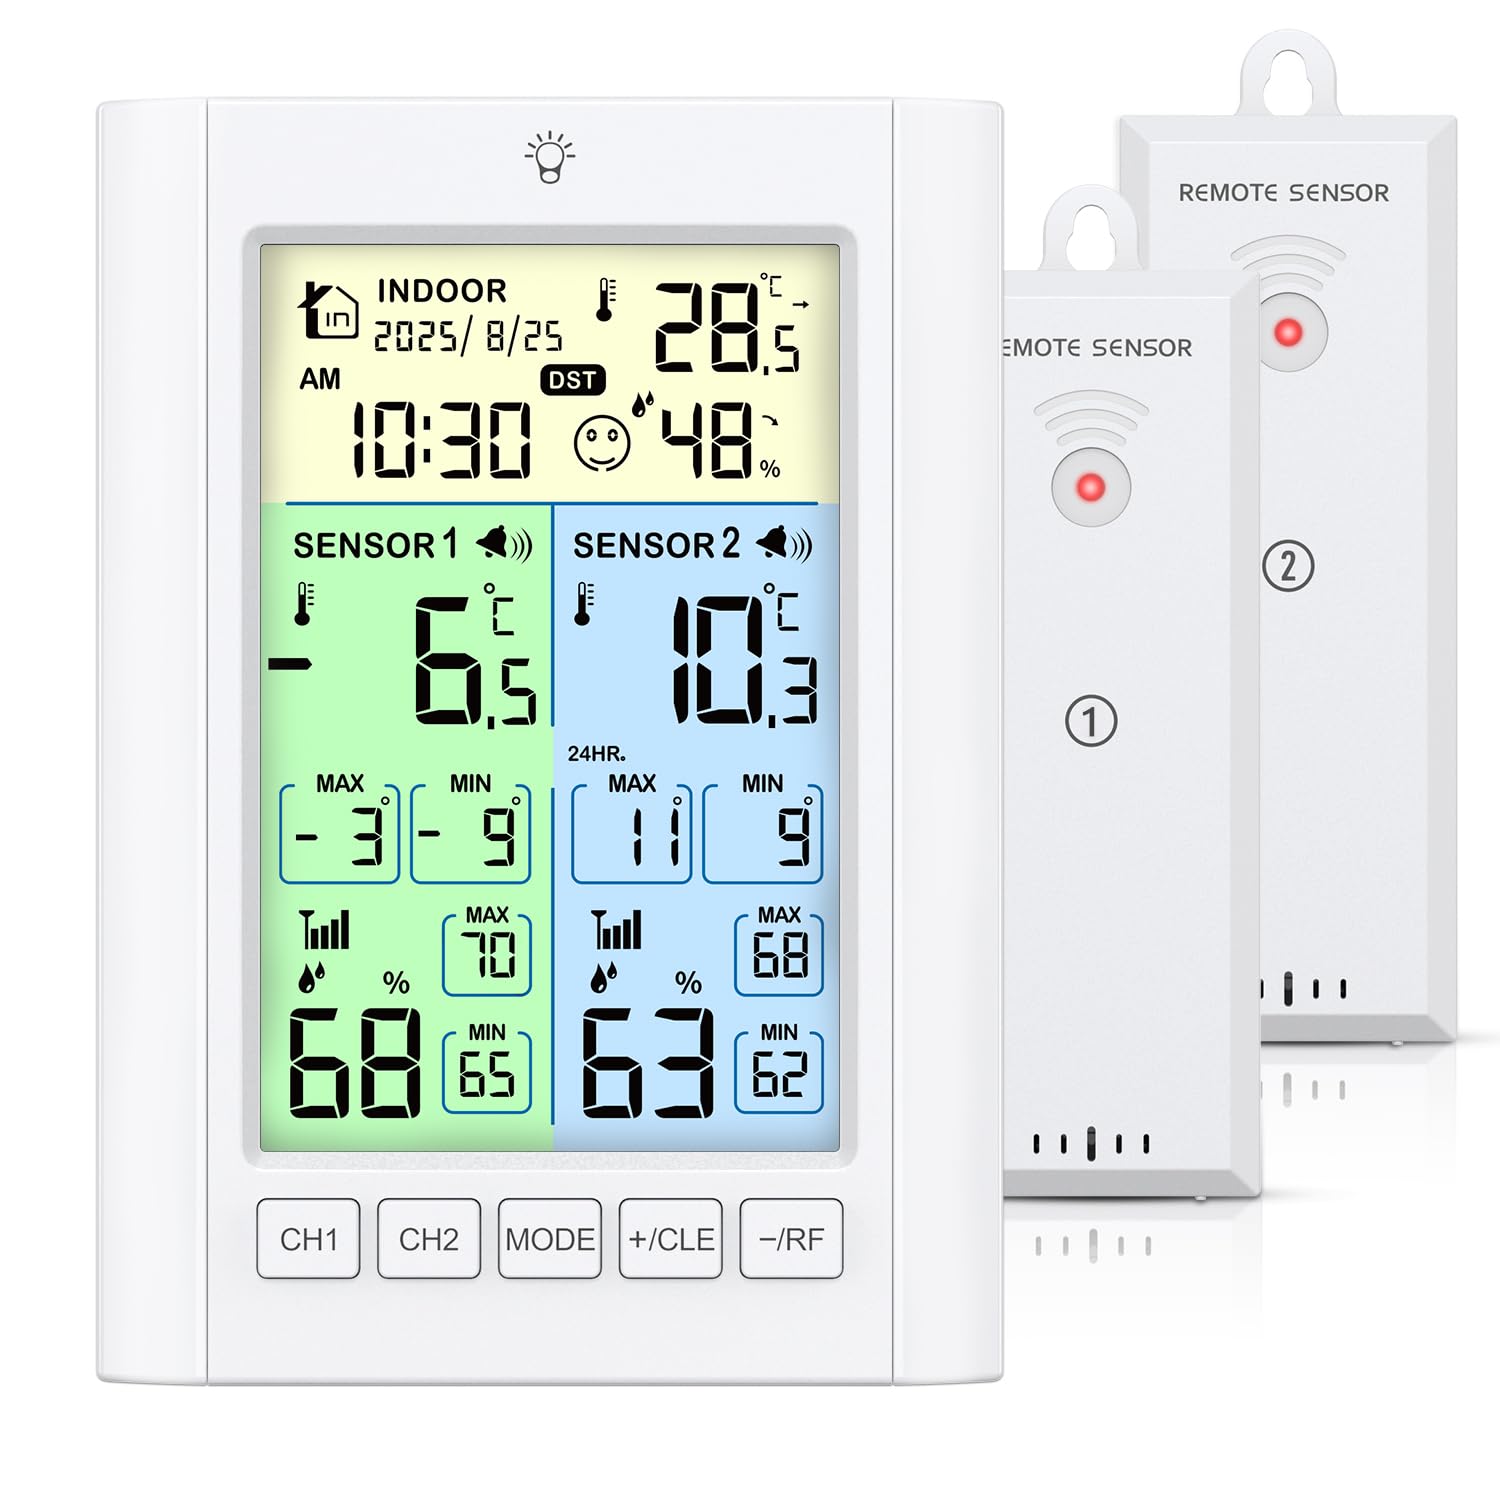
This image illustrates the main display unit with its various indicators: Calendar, Time, Indoor Temperature & Humidity, Sensor 1 Temperature, Sensor 2 Temperature, Max/Min Temperature, Max/Min Humidity, and control buttons (CH1, CH2, MODE, +/CLE, -/RF).
3.2 無線リモートセンサー
Two compact wireless sensors are included to monitor temperatures and humidity in your refrigerator and freezer. These sensors transmit data wirelessly to the main display unit, allowing you to monitor conditions without opening appliance doors.

The image shows the compact wireless sensors positioned inside a refrigerator and a freezer, demonstrating their intended use for remote temperature monitoring.
4. セットアップ
4.1 本体の電源供給
- バッテリーモード: Open the battery compartment on the back of the main unit and insert 3 AAA batteries (not included), observing the correct polarity. In battery mode, the backlight will automatically turn off after 10 seconds to conserve energy.
- USB Powered Mode: Connect the provided USB cable to the power port on the main unit and plug the other end into a USB power adapter (not included) or a compatible USB port. In this mode, the backlight remains continuously on and offers 3 levels of brightness adjustment.

This image demonstrates the two power options for the main unit: using 3 AAA batteries (backlight on for 10 seconds) or connecting via USB cable (backlight always on with 3 brightness levels).
4.2 Powering the Wireless Sensors
- Open the battery compartment on each wireless sensor and insert 2 AA batteries (not included), observing the correct polarity.
4.3 Sensor Placement and Mounting
The main unit offers flexible mounting options to suit your needs:
- 立つ: Use the built-in foldable stand for tabletop placement.
- 磁石: Utilize the magnetic cover on the back to attach the unit to metal surfaces, such as a refrigerator door.
- 下がる: Use the hanging hole on the back for wall mounting.

The image displays the versatile installation methods for the main unit, including using its integrated stand, magnetic attachment to a refrigerator, or hanging it on a wall.

この詳細な view of the back of the main unit highlights the battery compartment, magnetic cover, power port, sounding hole, and the foldable stand for easy setup.
Place the wireless sensors inside your refrigerator and freezer. Ensure they are not obstructed by large items or metal walls that might interfere with the wireless signal. The maximum transmission distance is approximately 100 meters (328 feet) in open areas, but this can be reduced by walls and other obstacles.

This image depicts the wireless remote sensor's capability to transmit data from inside a refrigerator to the main display unit, highlighting a maximum transmission distance of 100 meters (328 feet).
5. 操作手順
5.1 表示機能
The main unit displays current indoor temperature and humidity, along with the temperatures from Sensor 1 and Sensor 2. It also records and displays the maximum (MAX) and minimum (MIN) temperature and humidity values.
- To switch between 24-hour and "All Time" MAX/MIN records, briefly press the +/CLE ボタン。
5.2 温度アラームの設定
You can set individual high and low temperature alarms for both Sensor 1 (typically for the refrigerator) and Sensor 2 (typically for the freezer) to alert you to critical temperature changes.
- を押し続けます モード button to enter alarm setting mode. The high alarm temperature for Sensor 1 will start flashing.
- 使用 +/CLE そして -/RF 希望する高温制限を調整するためのボタン。
- プレス モード again to confirm the high limit and move to setting the low alarm temperature for Sensor 1. Adjust using +/CLE そして -/RF.
- Repeat the process for Sensor 2's high and low alarm temperatures.
- プレス モード 最後にもう一度押すと、アラーム設定モードが終了します。
When the temperature in either sensor exceeds or falls below its preset alarm range, the digital thermometer will activate an audible alarm for 2 minutes. This helps you address temperature issues promptly.
に view the currently pre-set alarm temperatures, briefly press the -/RF ボタン。

This image illustrates the temperature alarm feature, showing an alarm bell icon on the display and indicating that the alarm will sound for 2 minutes when triggered.
5.3 バックライトコントロール
- If the main unit is powered by batteries, the backlight automatically turns off after 10 seconds to conserve energy.
- If the main unit is powered via USB, the backlight remains continuously on. You can adjust its brightness to 3 different levels by pressing the backlight button (usually indicated by a light bulb icon).
6. メンテナンス
6.1 電池の交換
A low battery icon will appear on the screen when the batteries of the main unit or any of the sensors are running low. Replace them promptly to ensure continuous and accurate operation.
- 本体: 単3電池XNUMX本が必要です。
- Each Sensor: Requires 2 x AA batteries.
6.2 クリーニング
Wipe the main display unit and wireless sensors with a soft, dry cloth. Do not use abrasive cleaners, solvents, or immerse the devices in water, as this can cause damage.
7。 トラブルシューティング
- 本体にディスプレイが表示されない: Check if the batteries are correctly installed and have sufficient charge. If using USB power, ensure the cable is securely connected and the power source is active.
- Sensor not transmitting data or showing "--": Ensure the sensors have fresh batteries. Check the distance between the sensor and the main unit; reduce obstructions like thick walls or large metal objects. Press the -/RF button on the main unit to manually search for sensors and re-establish connection.
- 不正確な読み取り: Ensure sensors are placed correctly and not directly exposed to heat sources (e.g., oven vents) or extreme cold that might affect their internal components. Allow time for readings to stabilize after initial placement or battery change.
- アラームが鳴らない: Verify that the high and low alarm settings are correctly configured for the desired sensors. Check battery levels, as low batteries can affect alarm functionality.
8. 仕様
- モデル番号: WA181-AK / B0FXWPYRTQ
- Outdoor Temperature Range (Sensors): -40°C ~ 70°C (-40°F ~ 158°F)
- 温度精度: ±1°C (±2°F)
- 湿度精度: ±5% 相対湿度
- リフレッシュレート: 30秒ごとに
- 無線伝送距離: Up to 100 meters (328 feet) in open air (may vary with obstructions)
- 本体電源: 単4電池3本(別売)またはUSBケーブル(付属)
- センサーパワー: センサーごとに単三電池2本(別売)
- 特別な機能: Temperature Alarm, MAX/MIN Record, Backlight (adjustable with USB power), Dual Power Supply, Flexible Mounting Options
This image provides a visual summary of the device's capabilities, including temperature and humidity ranges, accuracy, and refresh rate.
9. 保証とサポート
For warranty information, technical support, or any inquiries regarding your Ankilo Wireless Refrigerator Freezer Thermometer, please refer to the contact details provided with your purchase documentation or visit the official Ankilo webサイトをご覧ください。ご質問や問題が発生した場合には、当社のカスタマーサービスチームがサポートいたします。