
1. はじめに
This manual provides essential information for the proper setup, operation, and maintenance of your Pisichen 24 Inch Touchscreen Monitor (Model 24INSXT-1080P). Please read this manual thoroughly before using the product to ensure optimal performance and safety. Keep this manual for future reference.

Image 1.1: The Pisichen 24 inch touchscreen monitor, featuring a built-in webcam and a sleek design.
2. パッケージ内容
Verify that all items are present in the package. If any items are missing or damaged, contact your retailer for assistance.
- Pisichen 24 Inch Touchscreen Monitor
- 電源アダプター(DC)
- HDMIケーブル
- VGAケーブル
- USB-Cケーブル
- ユーザーマニュアル
3. セットアップ手順
3.1 物理的なセットアップ
スタンドの取り付け: Carefully place the monitor face down on a soft, clean surface. Align the stand base with the monitor's mounting points and secure it with the provided screws. Ensure the stand is firmly attached before proceeding.
VESA 取り付け: This monitor supports VESA 100mm x 100mm mounting. If you plan to use a VESA-compatible arm or wall bracket, remove the stand and attach the monitor to your VESA mount according to the mount's instructions.

Image 3.1: The monitor's adjustable stand allows for height, tilt, swivel, and 90-degree pivot adjustments.
3.2 デバイスへの接続
The monitor offers multiple connectivity options. Ensure the monitor is powered off before making any connections.
- 電源接続: Connect the DC power adapter to the monitor's DC Power Port and then plug it into a power outlet.
- ビデオ接続: 次のいずれかのオプションを選択します。
- HDMI: Connect one end of the HDMI cable to the monitor's HDMI Port and the other end to your computer's HDMI output.
- VGA: Connect one end of the VGA cable to the monitor's VGA Port and the other end to your computer's VGA output.
- USB-C: Connect one end of the USB-C cable to the monitor's Type C Port and the other end to your computer's USB-C port. Ensure your computer's USB-C port supports DisplayPort Alternate Mode for video output. This connection also supports touch functionality and data transfer.
- オーディオ接続: If using HDMI or USB-C, audio will typically transmit automatically. For other setups or external speakers, use the Audio Port.

画像3.2: 詳細 view of the monitor's rear ports, including HDMI, VGA, Type C, DC Power, and Audio ports.
3.3 Touchscreen and Webカムのセットアップ
For touchscreen functionality and webcam operation, ensure the USB-C cable is connected between the monitor and your computer, or a separate USB-A to USB-B cable (not always included, check package contents) is connected from the monitor's upstream USB port to your computer. Most operating systems will automatically detect and install the necessary drivers.

Image 3.3: Compatibility chart for touchscreen functionality. Multi-touch is supported on laptops, smartphones, tablets, all-in-one PCs, and desktop hosts. Single-touch is supported on MacBooks. Touch functionality is not supported on iPhones, iPads, Nintendo Switch, Xbox, PlayStation consoles, Fire TV devices, and Steam Deck.
4. 操作手順
4.1 電源オン/オフ
モニターの電源ボタンを押すと、電源のオン/オフを切り替えることができます。モニターがアクティブなときは、電源インジケーターライトが点灯します。
4.2タッチスクリーンの使用
The monitor features a 10-point multi-touch screen for intuitive interaction. Use gestures such as tapping, swiping, pinching to zoom, and dragging, similar to a tablet or smartphone. Ensure your operating system is configured for touch input.

Image 4.1: Demonstrating precise and fluid interaction with the 10-point multi-touch screen.
4.3 Webカメラとマイクの使用
内蔵の webcam and microphone are designed for video conferencing and online communication. Once connected via USB-C or a dedicated USB cable, they should be automatically recognized by your computer's operating system and video conferencing applications. Adjust privacy settings within your operating system or application as needed.

Image 4.2: The integrated webcam facilitates clear video calls and online meetings.
4.4 表示調整
モニターのスタンドでは、人間工学に基づいたさまざまな調整が可能です。
- 高さ調整: モニターを好みの高さに上げたり下げたりできます view高さ。
- Adjust the screen's vertical angle (forward or backward) for optimal viewing。
- スイベル: Rotate the monitor horizontally (left or right) on its base.
- ピボット: Rotate the screen 90 degrees to switch between landscape and portrait modes. This is useful for coding, document review, or specific creative tasks.
4.5 オンスクリーンディスプレイ(OSD)メニュー
The OSD menu allows you to adjust various display settings such as brightness, contrast, color temperature, input source, and audio volume. Access the OSD menu using the buttons located on the monitor (refer to the physical layout for exact button locations).
5. メンテナンス
5.1 モニターの掃除
モニター画面を清掃するには、柔らかく糸くずの出ない布で優しく拭いてください。頑固な汚れには、軽くampen the cloth with water or a non-abrasive screen cleaner. Avoid using alcohol, ammonia, or abrasive cleaners, as these can damage the screen surface. For the monitor casing、柔らかく乾いた布を使用してください。
5.2 ストレージ
モニターを長期間保管する場合は、必ず電源を切り、すべてのケーブルを外してください。ほこりや物理的な損傷から保護するため、涼しく乾燥した場所に、できれば元の梱包のまま保管してください。
6。 トラブルシューティング
モニターに問題が発生した場合は、次の一般的な問題と解決策を参照してください。
| 問題 | 考えられる原因 | 解決 |
|---|---|---|
| 画面に画像がありません | Power cable loose; Video cable loose or incorrect input selected; Monitor is off. | Check power connections; Ensure video cable is securely connected and correct input source is selected via OSD; Press power button. |
| タッチスクリーンが反応しない | USB-C cable not connected or not supporting data; Drivers not installed; Device not compatible with touch. | Ensure USB-C cable is fully connected and supports data/touch; Check device compatibility (refer to Image 3.3); Restart computer. |
| Webcam/Microphone not working | USB-C cable not connected or not supporting data; Privacy settings blocking access; Drivers not installed. | Verify USB-C connection; Check privacy settings in your operating system and application; Restart computer. |
| モニタースピーカーから音が出ない | Volume too low; Incorrect audio output selected on computer; Audio cable not connected (if applicable). | Adjust monitor volume via OSD; Select monitor as audio output in computer settings; Ensure audio cable is connected if using VGA. |
| Screen flickers or displays distorted image | ビデオ ケーブルが緩んでいる。解像度/リフレッシュ レートが正しくない。干渉がある。 | Check video cable connection; Adjust display settings on your computer to 1920x1080 at 60Hz; Move away from other electronic devices. |
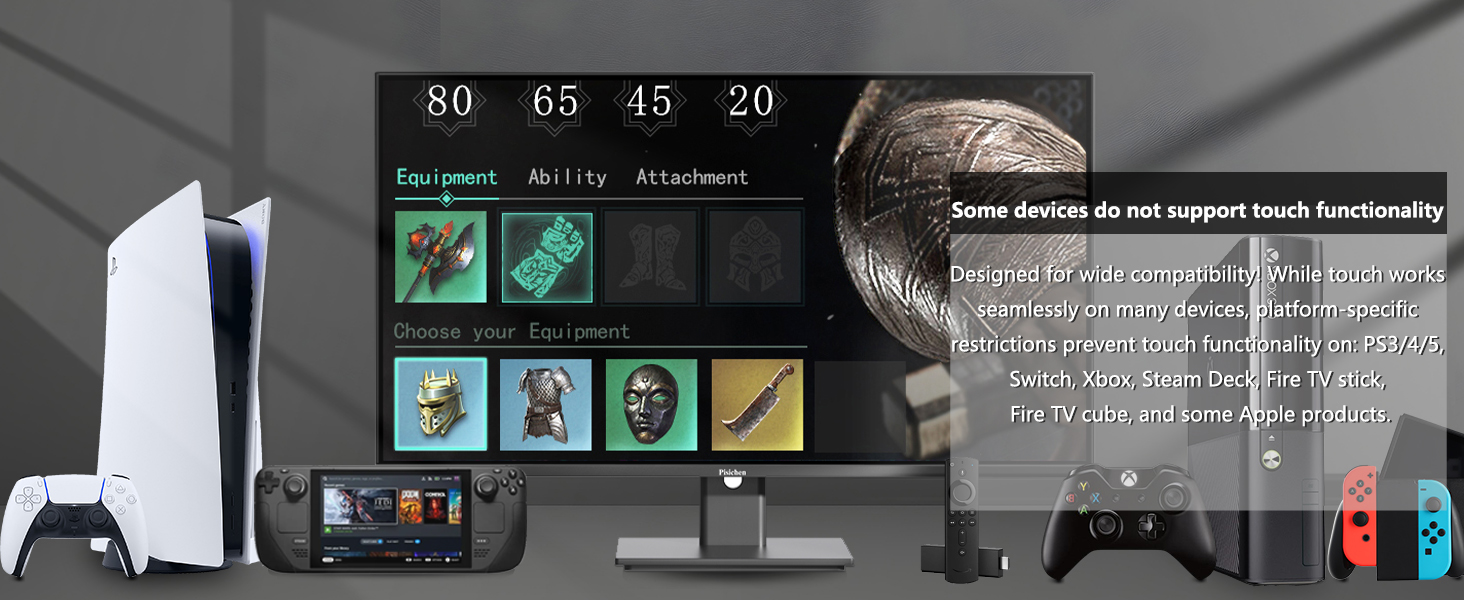
Image 6.1: Some devices, such as specific game consoles (PS3/4/5, Xbox, Steam Deck) and certain Apple products, do not support touch functionality with this monitor due to platform-specific restrictions.
7. 仕様
| 特徴 | 仕様 |
|---|---|
| モデル番号 | 24INSXT-1080P |
| 画面サイズ | 23.8インチ |
| 解決 | FHD 1920 x 1080p |
| ディスプレイ技術 | LED IPS |
| リフレッシュレート | 60Hz |
| 輝度 | 400カンデラ |
| コントラスト比 | 3000:1 |
| 応答時間 | 5ミリ秒 |
| タッチスクリーン | 10-Point Multi-touch |
| 接続性 | 1x HDMI, 1x VGA, 1x USB 3.1 Type C, Audio Port, DC Power Port |
| 追加機能 | Built-In Speakers, Built-In Webcam, Swivel Adjustment, Tilt Adjustment, Height Adjustment, Pivot (90-degree rotation) |
| VESA互換性 | 100mm×100mm |
| 寸法(D x W x H) | 1.97"D x 21.26"W x 12.6"H (Monitor only, without stand) |

Image 7.1: Detailed product dimensions for the Pisichen 24 Inch Touchscreen Monitor.
8. 保証とサポート
8.1 保証情報
This product comes with a limited warranty. Please refer to the warranty card included in your package or contact Pisichen customer support for detailed warranty terms and conditions. The warranty typically covers manufacturing defects for a specified period from the date of purchase.
8.2 カスタマーサポート
For technical assistance, troubleshooting not covered in this manual, or warranty claims, please contact Pisichen customer support. Contact information can usually be found on the product packaging, the official Pisichen webサイト、または購入書類をご覧ください。