
1. はじめに
This manual provides detailed instructions for the assembly, operation, and maintenance of your Growell Large Hydroponics Growing System Kit, 60 Pods, 2-Tier model. This vertical indoor gardening system allows you to cultivate up to 60 plants simultaneously, including vegetables, fruits, and herbs. It is designed to optimize growth cycles, reduce water usage, and save space compared to traditional soil gardening.

Image: The Growell 60-Pod 2-Tier Hydroponics Growing System in an indoor setting, showcasing its capacity for growing multiple plants.
2. 含まれるもの
Your Growell Hydroponics Growing System includes the following components:
- 60 Grow Pods (Grow Baskets and Grow Sponges)
- 2 Light Panels (60W total, 30W x 2)
- ウォーターポンプ
- 32L Water Tank (24L + 8L capacity)
- ロックホイール
- Full-Spectrum LED Lights
- タイマーシステム
- 水循環システム
- Plant Food A & B (initial supply and refills)
- 100ml計量カップ
- 2L Measuring Pitcher
- 小型レンチ
- Labels and Label Holders
- ピンセット
- Sticky Pod Hole Covers
- ドームを育てる
- Pod Hole Covers
- ユーザーマニュアル
- Low Water Alarm (requires 2 AA batteries, not included)
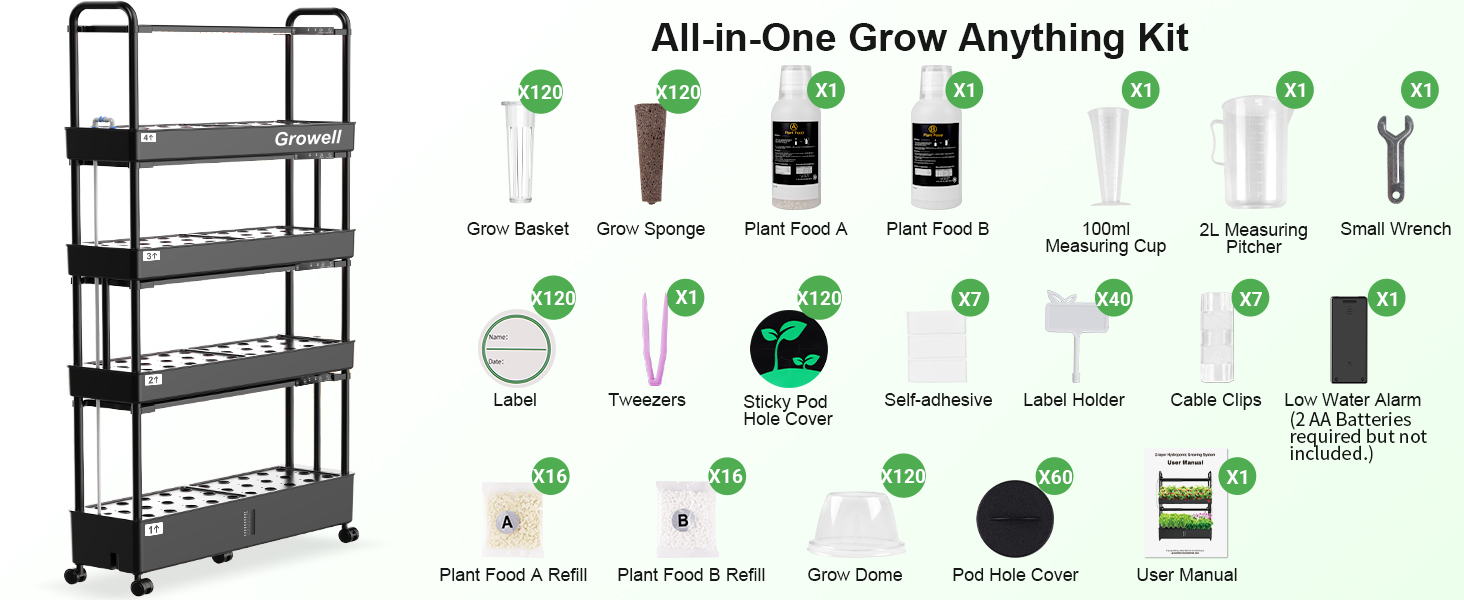
Image: Visual representation of all components included in the 2-Tier Growell Hydroponics Kit.
3. セットアップと組み立て
Follow these steps to assemble your Growell Hydroponics Growing System. Refer to the video for visual guidance.
- 低水位警報器を設置する: Insert the low water alarm into the designated slot on the bottom of the 1st tier water tank. (Requires 2 AA batteries, not included).
- ホイールを取り付ける: Secure the four wheels to the bottom of the 1st tier water tank. Ensure the two wheels with locks are installed on the same side for easy locking.
- サポートポールを挿入する: Insert the four long metal support poles into the corners of the 1st tier water tank. These poles are thicker than the drain pipes.
- Install 2nd Tier Water Tank: Place the 2nd tier water tank onto the top of the support poles.
- 排水管を接続する: Push the long drain pipe up until it is firmly attached to the 2nd tier water tank.
- Install Top Support Poles: Install the two top support poles into the designated slots on the 2nd tier water tank.
- 給水管を配管する: Run the water supply pipe through each tier, from top to bottom. Connect it to the water pump located in the 1st tier tank. Remove the blue clip, insert the pipe, then push the blue clip back on to secure.
- Install Grow Decks: Click the water tank support bars onto each water tank, then install the grow decks onto the water tanks.
- Attach Grow Light Clips: Click the four grow light clips onto the support poles as shown.
- Install Grow Light Panels: Install the two grow light panels. The panel with the pump button should be installed on the bottom tier (Tier 1). The other panel (without the pump button) can be installed on Tier 2. Ensure all control panels face forward.
- Connect Grow Light Cable: Connect the two grow light panels in series using the provided grow light cable. The connectors at both ends of the cable can be inserted into any slot on the grow light panel on Tier 2. No specific direction is required.
- Connect Power and Pump Cables: Connect the pump cable to the right slot on the Tier 1 panel. For the grow light cable (from Tier 2) and the power cord, you can insert them into either the right or middle slots – there's no specific requirement for which slot to use.
- プラグイン: 電源アダプタを適切な電源コンセントに差し込みます。
Video: Official Growell installation guide for the 2-Tier hydroponic system.

Image: Product dimensions and the lockable wheel feature for easy mobility.

Image: Detail of how the support poles connect to the water tanks.
4. 操作手順
4.1コントロールパネルオーバーview
The control panel on each light bar allows you to manage the system's functions:
- 電源ボタン: システムのオン/オフを切り替えます。
- Pump Button (Tier 1 only): Controls the water pump.
- 16h / 22h Timers: Select between a 16-hour or 22-hour lighting cycle. The lights will be on for the selected duration and off for the remainder of a 24-hour period.
- 野菜モード: Activates a light spectrum optimized for leafy greens and vegetative growth.
- 花と果物モード: Activates a light spectrum designed to stimulate blooming and fruiting.

Image: The smart control panel showing various settings for light and pump operation.
4.2 Water System Operation
The system features an auto-circulating water system with a powerful, quiet pump. This ensures oxygen and nutrients are evenly distributed to plant roots. The pump operates on a 30-minute on/off cycle.

Image: Illustration of the quiet water recycling system, highlighting its 30-minute on/off cycle and ultra-quiet pump.
4.3 Lighting System Operation
The 60W (30W x 2) full-spectrum LED lights mimic natural sunlight, promoting photosynthesis and faster plant growth. The light panels are height-adjustable to accommodate plants at different growth stages. Adjust the height by sliding the light panels along the support poles.

Image: Close-up of the full-spectrum LED grow lights, detailing the different light wavelengths for optimal plant growth.

Image: Mechanism for adjusting the height of the grow lights to suit plant growth.
5. 植え付けガイド
To begin planting, you will need your own seeds (not included). The kit provides all other necessary components.
- 成長スポンジを準備する: Soak the grow sponges in water before placing seeds.
- 成長スポンジを挿入します: Place one soaked grow sponge into each grow basket.
- 植物の種: Insert your desired seeds into the center of each grow sponge.
- 栽培バスケットを配置します。 Insert the grow baskets into the holes on the grow decks.
- Use Grow Domes: Cover the planted seeds with grow domes to create a humid environment for germination.
- Label Plants: Use the provided labels and label holders to identify your plants.
- Utilize Hole Covers: If you are not planting in all 60 pods, use the provided pod hole covers to prevent algae growth and reduce water evaporation.
- 植物栄養剤を追加する: Follow the instructions on the Plant Food A & B bottles for proper nutrient solution mixing and dosage.

Image: A grow sponge, ready for seed placement in the hydroponic system.

Image: A grow basket, designed to hold the grow sponge and plant in the system.
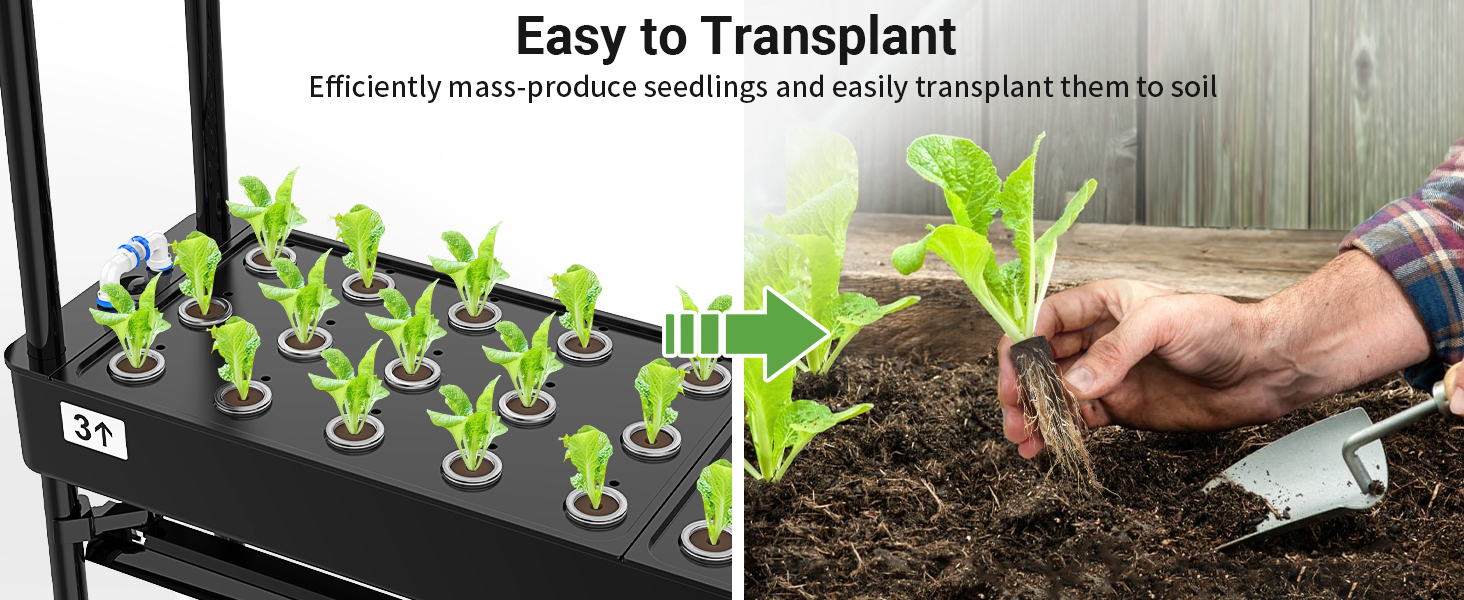
Image: Seedlings growing in the hydroponic system, demonstrating their readiness for transplanting to soil if desired.
6. メンテナンス
6.1 水位監視
The 1st tier water tank includes a visual water level window, allowing you to easily monitor the remaining water. Refill the tank when the water level drops below the recommended minimum.

画像: 詳細 view of the water level indicator on the main water tank.
6.2 Low Water Alarm
The system is equipped with a low water alarm to alert you when the water level is critically low. Ensure 2 AA batteries are installed for this feature to function.

Image: The low water alarm, indicating its placement and function.
6.3 クリーニング
Regular cleaning of the water tanks and components is recommended to prevent algae buildup and maintain optimal growing conditions. Disconnect power before cleaning. Use mild soap and water, then rinse thoroughly.
7。 トラブルシューティング
- ライトが点灯しない: Check power connections and ensure the system is plugged into a working outlet. Verify the power button is pressed.
- ポンプが水を循環していない: Ensure the pump cable is securely connected to the Tier 1 control panel. Check for any obstructions in the water supply pipe or pump.
- Plants not growing: Verify correct light mode and timer settings for your plant type. Ensure adequate water and nutrient levels. Check that grow sponges are properly saturated and seeds are viable.
- 藻類の増殖: Ensure all unused pod holes are covered to block light from reaching the water. Regularly clean the water tanks.
- Low water alarm not working: Check if 2 AA batteries are installed correctly in the alarm unit.
8. 仕様
| 特徴 | 仕様 |
|---|---|
| モデル | 2 Tier-60 Pods |
| 材料 | Plastic (Food Grade ABS) & Stainless Steel |
| 色 | 黒 |
| 製品寸法 | 奥行き10.2インチ x 幅36.6インチ x 高さ51.5インチ |
| 容量 | 32リットル(24L + 8L) |
| ポッドの数 | 60 |
| 光パワー | 60W (30W x 2) Full-Spectrum LED |
| 取り付けタイプ | 床立ち |
| 屋内/屋外での使用 | 屋内 |
| アイテム重量 | 28.7 ポンド |
9. 保証とサポート
For warranty information, product support, or to purchase replacement parts and plant food refills, please visit the official Growell website or contact Growell customer service. Keep your purchase receipt for warranty claims.