
導入
This manual provides detailed instructions for the installation, operation, and maintenance of the ASUS B760M-AYW WiFi D4 II microATX motherboard. Please read this manual thoroughly before installing or using the product to ensure correct setup and optimal performance.
安全情報
- 内部コンポーネントに触れる前に、必ず電源ケーブルを壁のコンセントから抜いてください。
- Wear an anti-static wrist strap or frequently touch a grounded object to prevent electrostatic discharge (ESD) damage to components.
- 敏感な部分に触れないように、コンポーネントの端を持って取り扱ってください。
- 過熱を防ぐために、PC ケース内の換気が適切であることを確認してください。
設定
1. CPUの取り付け
The motherboard supports Intel LGA 1700 socket processors. Carefully align the CPU with the socket, ensuring the triangular mark on the CPU matches the mark on the socket. Lower the CPU gently into the socket, then close the load plate and secure the retention lever.
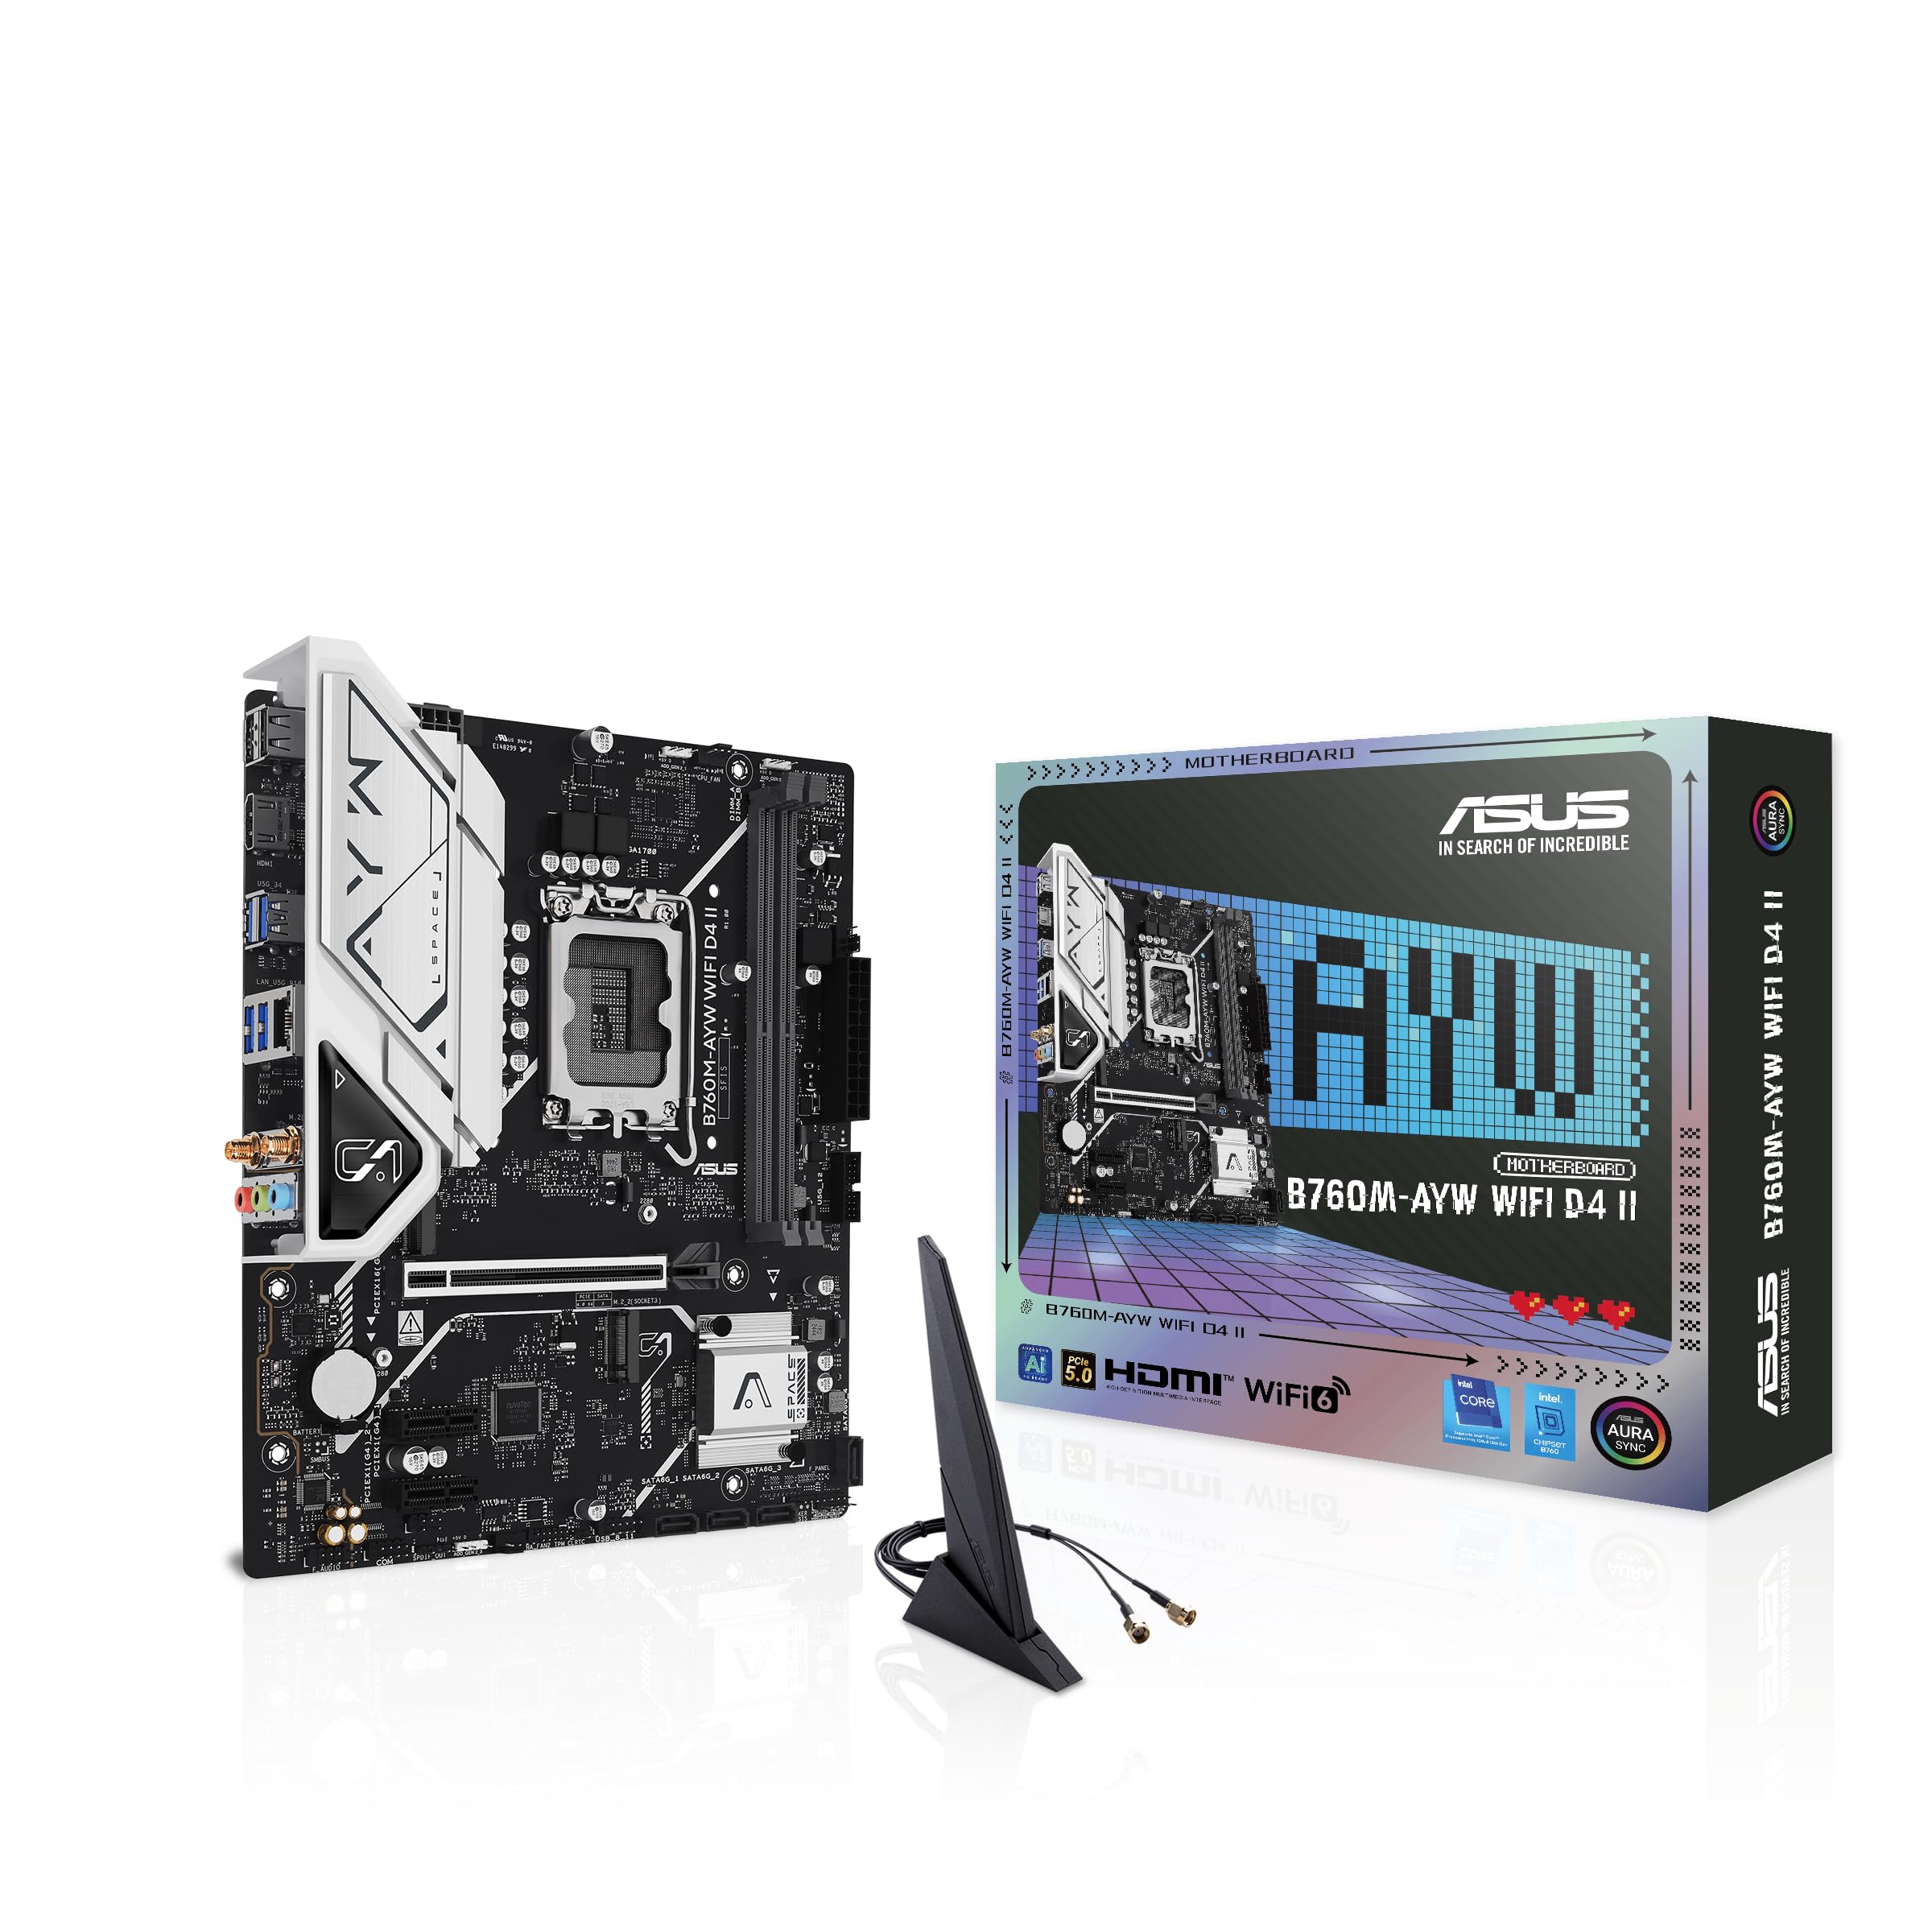
画像: トップダウン view of the ASUS B760M-AYW WiFi D4 II motherboard, highlighting the LGA 1700 CPU socket.
2. メモリ(RAM)のインストール
This motherboard features two DDR4 DIMM slots. For optimal performance, install memory modules in a dual-channel configuration. Open the clips on both ends of the DIMM slot, align the memory module with the slot key, and press down firmly until the clips snap into place.
3. ストレージのインストール(M.2およびSATA)
The motherboard includes two M.2 slots for NVMe SSDs and four SATA 6 Gbps ports for traditional hard drives or SSDs.
- M.2 SSD: Insert the M.2 SSD into the slot at a 30-degree angle, then push it down and secure it with the provided M.2 screw package.
- SATAドライブ: ストレージドライブからのSATAデータケーブルをマザーボードのSATAポートに接続します。電源ユニットからの電源ケーブルをドライブに接続します。

Image: The ASUS B760M-AYW WiFi D4 II motherboard shown with its retail box, Wi-Fi antenna, SATA cables, and M.2 screw packages.
4. 拡張カードの取り付け(PCIe)
The motherboard features one PCIe 5.0 x16 slot for graphics cards and additional PCIe 4.0 x1 slots for other expansion cards. Insert the card firmly into the desired slot until it clicks into place and secure it with a case screw.
5.電源接続
電源装置の 24 ピン ATX 電源コネクタと 8 ピン CPU 電源コネクタをマザーボードの対応するポートに接続します。
6. フロントパネルの接続
Connect your PC case's front panel cables (USB 5Gbps, audio, power switch, reset switch, power LED, HDD LED) to the corresponding headers on the motherboard. Refer to the motherboard layout for exact header locations.
7. 背面I/O接続
Connect your peripherals to the rear I/O ports. These include HDMI, USB 5Gbps Type-A, Realtek 2.5Gb Ethernet, and audio jacks.
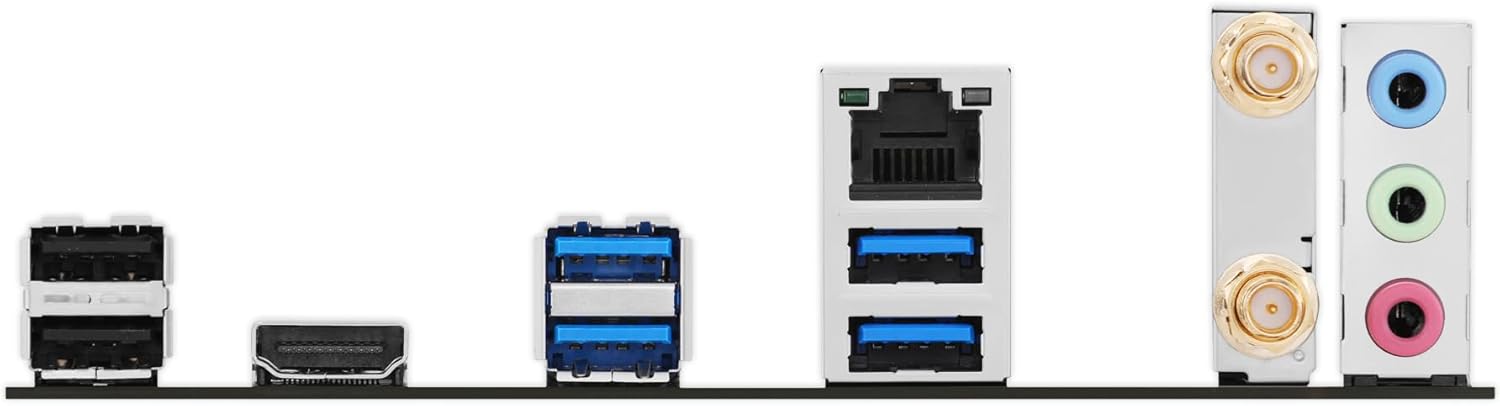
画像: 詳細な view of the rear input/output panel of the ASUS B760M-AYW WiFi D4 II motherboard, showing USB ports, Ethernet, and audio jacks.
8. Wi-Fiアンテナの設置
付属のWi-Fiアンテナを背面I/Oパネルの2つのアンテナコネクタにねじ込みます。最適な信号受信が得られるようにアンテナの位置を調整してください。
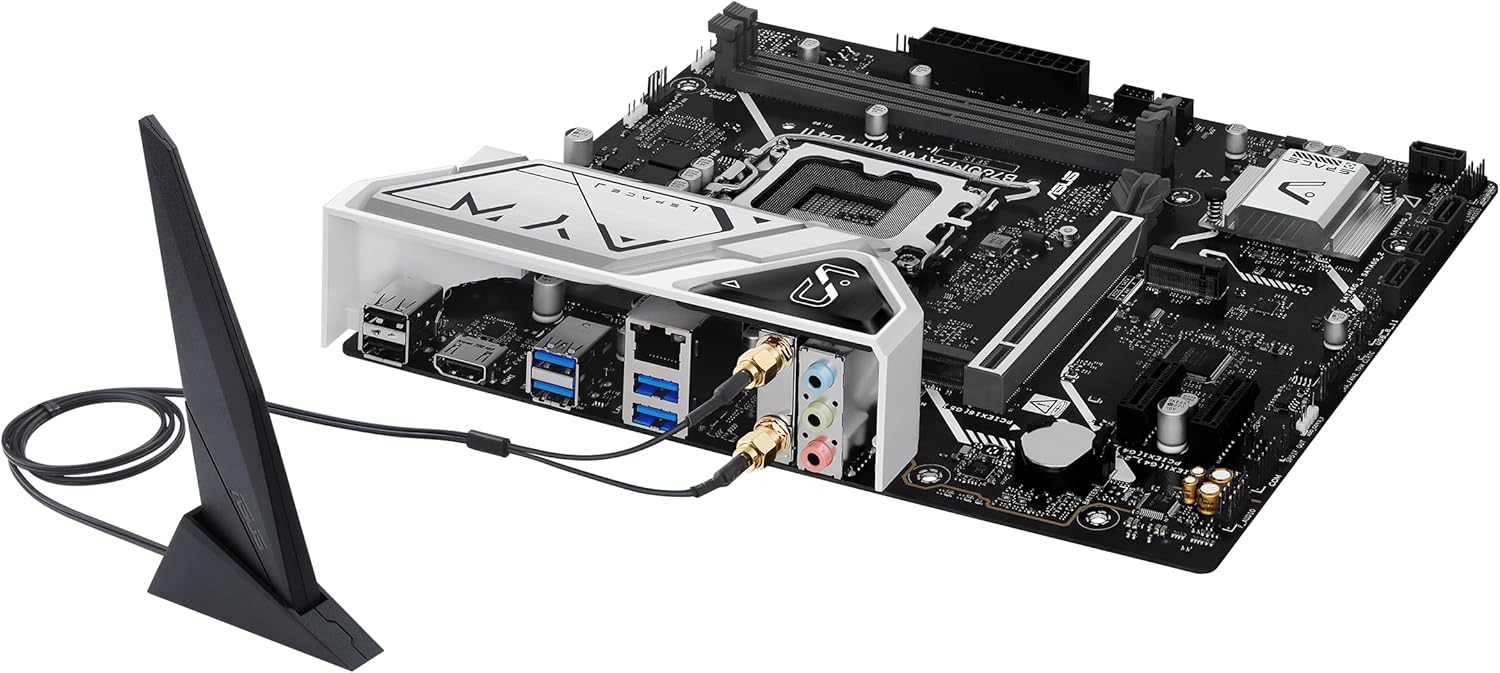
Image: The ASUS B760M-AYW WiFi D4 II motherboard with its external Wi-Fi antenna connected to the rear I/O ports.
オペレーティング
1. BIOS/UEFI設定
BIOS/UEFIセットアップユーティリティにアクセスするには、 消去 key during the Power-On Self-Test (POST). Here you can configure boot order, enable XMP for memory, adjust fan speeds, and manage other system settings.
2. ドライバーのインストール
After installing your operating system, install the necessary drivers for the motherboard's components. These include chipset drivers, LAN drivers, Wi-Fi drivers, and audio drivers. Drivers can be found on the ASUS support web特定のマザーボード モデルのサイトをご覧ください。
3. ソフトウェアユーティリティ
ASUS provides several utilities to enhance your system experience:
- Aura Sync: For controlling RGB lighting on compatible components.
- ファンエキスパート2+: 高度なファン制御とシステム冷却の最適化を実現します。
- 武器庫: A centralized software suite for system monitoring, driver updates, and utility management.
メンテナンス
1. BIOSアップデート
定期的にASUSサポートを確認してください website for BIOS updates. BIOS updates can improve system stability, add support for new hardware, or fix bugs. Use the ASUS EZ Flash utility within the BIOS to perform updates, following the instructions carefully.
2. ドライバーの更新
Keep your drivers updated to ensure optimal performance and compatibility. Regularly check the ASUS support webマザーボードの最新ドライバーのサイト。
3. 清掃
To maintain optimal performance and longevity, regularly clean dust from your PC case and motherboard components. Use compressed air to remove dust from heatsinks, fans, and slots. Ensure the system is powered off and unplugged before cleaning.
トラブルシューティング
1. Q-LED Core Indicators
The motherboard features Q-LED Core indicators that light up to indicate the status of key components during POST. These LEDs can help diagnose issues:
- CPU LED: Indicates CPU initialization status.
- DRAM LED: Indicates memory detection status.
- VGA LED: Indicates graphics card detection status.
- ブートLED: Indicates boot device detection status.
If an LED remains lit, it suggests an issue with the corresponding component.
2. よくある問題
- 電源なし: すべての電源接続(24ピンATX、8ピンCPU、GPU電源)を確認してください。電源がオンになっていることを確認してください。
- 表示なし: Verify the graphics card is properly seated and connected to power. Ensure the monitor cable is connected to the graphics card, not the motherboard (unless using integrated graphics).
- システムの不安定性: Check memory seating, run memory diagnostic tools, ensure CPU cooler is properly installed, and verify BIOS settings.
- 周辺機器が検出されません: Ensure the device is properly connected and its drivers are installed. Try a different port if available.
仕様
| 特徴 | 仕様 |
|---|---|
| ブランド | エイスース |
| モデル名 | B760M-AYW WIFI D4 II |
| CPUソケット | 1700 号線 |
| 互換性のあるプロセッサ | Intel Core 14th, 13th, 12th Gen, Pentium Gold, Celeron Processors |
| チップセットタイプ | インテル B760 |
| RAMメモリ技術 | DDR4 |
| 利用可能なメモリスロット | 2 |
| 最大メモリストレージ容量 | 96ギガバイト |
| グラフィックカードインターフェース | PCI エクスプレス 5.0 x16 |
| Total M.2 Slots | 2 |
| SATAポート合計 | 4 |
| イーサネット | Realtek 2.5Gb イーサネット |
| Wi-Fi | Wi-Fi6 について |
| HDMIポート | 1 |
| フロントUSB | USB 5Gbps support |
| 背面USB | USB 5Gbps タイプA |
| フォームファクター | マイクロATX |
| 商品の寸法 (長さ x 幅 x 高さ) | 長さ9.6インチ x 幅8.3インチ x 高さ1.4インチ |
保証情報
The ASUS B760M-AYW WiFi D4 II motherboard comes with a 3-year limited warranty. For detailed terms and conditions, please refer to the warranty card included with your product or visit the official ASUS support webサイト。
サポート
テクニカルサポート、ドライバーのダウンロード、BIOSアップデート、その他の製品情報については、ASUSの公式サポートをご覧ください。 webサイト:
サポート ポータルでは、FAQ やトラブルシューティング ガイドも見つかります。