1. はじめに
This manual provides detailed instructions for the installation, operation, and maintenance of your TESmart HDMI KVM Switch 8 Port 8K@60Hz. Please read this manual thoroughly before using the device to ensure proper functionality and to prevent damage.
2. パッケージ内容
下記のすべての品目がパッケージに含まれていることをご確認ください。不足または破損している品目がある場合は、カスタマーサポートまでご連絡ください。
- 8x1 HDMI KVMスイッチ x 1
- 8 x KVM Cables (HDMI + USB, 5ft each)
- 赤外線リモコン x 1 (単4電池は付属していません)
- 1 x IRレシーバーケーブル
- 1 x DC 12V電源アダプター
- ラックイヤー2個
- ユーザーマニュアル x 1
- 1 x 3-Pin Connector (for RS232)
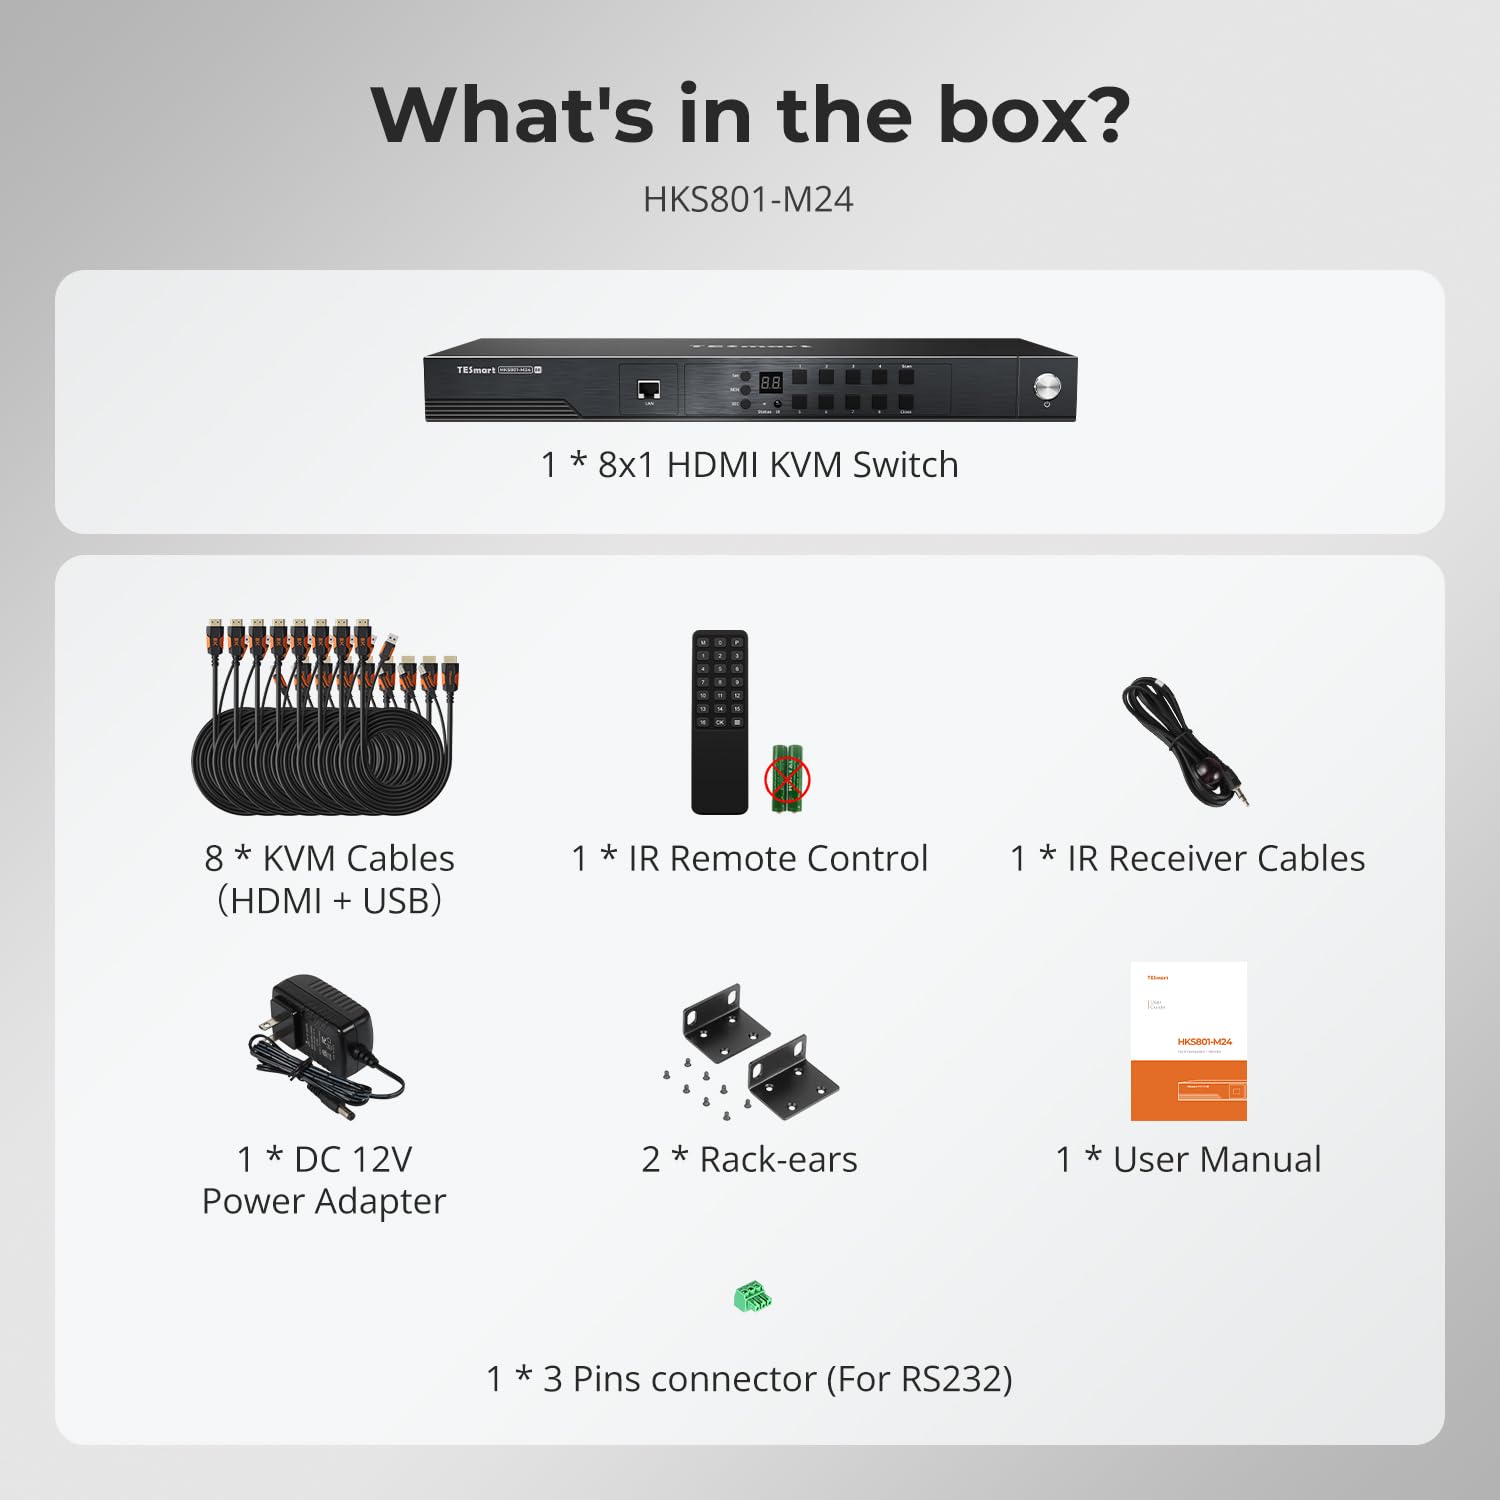
Image: All components included in the TESmart HDMI KVM Switch package.
3 製品の特徴
- 8ポートHDMI KVMスイッチ: Connects up to 8 HDMI-enabled computers to a single monitor, keyboard, and mouse console.
- 8K@60Hz解像度: Supports ultra-high-definition resolutions up to 7680x4320 at 60Hz.
- USB 3.0 ハブ: Features two standard USB 3.0 ports for connecting additional peripherals like barcode scanners or USB hard drives.
- EDID エミュレーター: Integrated EDID emulators ensure correct display information is maintained across all input ports, preventing display setting changes during switching.
- 複数の切り替え方法: Offers flexible control via IR remote, front panel buttons, keyboard hotkeys, mouse wheel, RS232 commands, and IP control.
- Auto Switching & Auto Detect Mode: Supports automatic switching between connected computers at specified intervals and automatically detects active devices.
- プラグアンドプレイ: Requires no special software installation and supports hot-swapping of devices.
- ラックマウント設計: Includes rack-ears for easy installation into standard server racks.
4. セットアップとインストール
KVM スイッチを設定するには、次の手順に従います。
- デバイスの電源を切ります: Ensure all computers and the monitor are powered off before beginning the installation.
- モニターを接続: Connect your monitor to the HDMI OUTPUT port on the KVM switch using an HDMI cable.
- キーボードとマウスを接続します。 Connect your USB keyboard and mouse to the dedicated K/M USB ports on the KVM switch.
- コンピューターを接続する: For each computer (up to 8), connect an HDMI cable from the computer's HDMI output to an HDMI INPUT port (PC 1-8) on the KVM switch. Simultaneously, connect a USB cable from the computer's USB port to the corresponding USB INPUT port (PC 1-8) on the KVM switch. Use the provided KVM cables for optimal performance.
- 接続電源: Plug the DC 12V power adapter into the KVM switch and then into a power outlet.
- 電源オン: Power on the KVM switch, then power on your monitor, and finally power on your connected computers.

Image: Connection diagram for the TESmart 8-port KVM switch.

Image: Comprehensive connection overview including optional RS232, LAN, and USB device connections.
5. 操作手順
TESmart KVM スイッチには、接続されたコンピュータ間を切り替えるためのいくつかの方法があります。
5.1 スイッチング方式
- フロントパネルのボタン: Press the numbered buttons on the front panel to switch directly to the corresponding PC input.
- IRリモートコントロール: Use the included IR remote control to switch inputs. (Requires 2x AAA batteries, not included).
- キーボードのホットキー: Specific key combinations allow for quick switching without moving your hand from the keyboard. Refer to the full user manual for specific hotkey commands.
- マウスホイール切り替え: Scroll the mouse wheel to switch between inputs.
- RS232制御: Connect via RS232 for serial command control.
- IP コントロール: Control the KVM switch over a network using IP commands.

画像: 上view of the six available switching methods.
5.2 Auto Detect Mode
The KVM switch can automatically detect when a connected PC becomes active and switch to its input. This eliminates the need for manual switching when a computer is powered on.

Image: Auto Detect Mode functionality.
5.3 自動スキャンモード
In Auto Scan Mode, the KVM switch cycles through all connected active inputs at a user-defined interval (e.g., 5 seconds to 1 hour). This is useful for monitoring multiple systems.

Image: Auto Scan Mode for monitoring multiple devices.
5.4 EDIDエミュレーション
The built-in EDID emulators ensure that your computers always receive correct display information, preventing issues like desktop icon rearrangement, screen flicker, or resolution changes when switching between inputs or when a computer is disconnected.

Image: EDID Emulation prevents display issues during switching.
5.5 ロック機能
The KVM switch includes a lock function to prevent accidental input changes. Press the [0/Close] button on the front panel to turn off the HDMI display and disable hotkeys and remote control functions. Press it again to re-enable the display and controls.
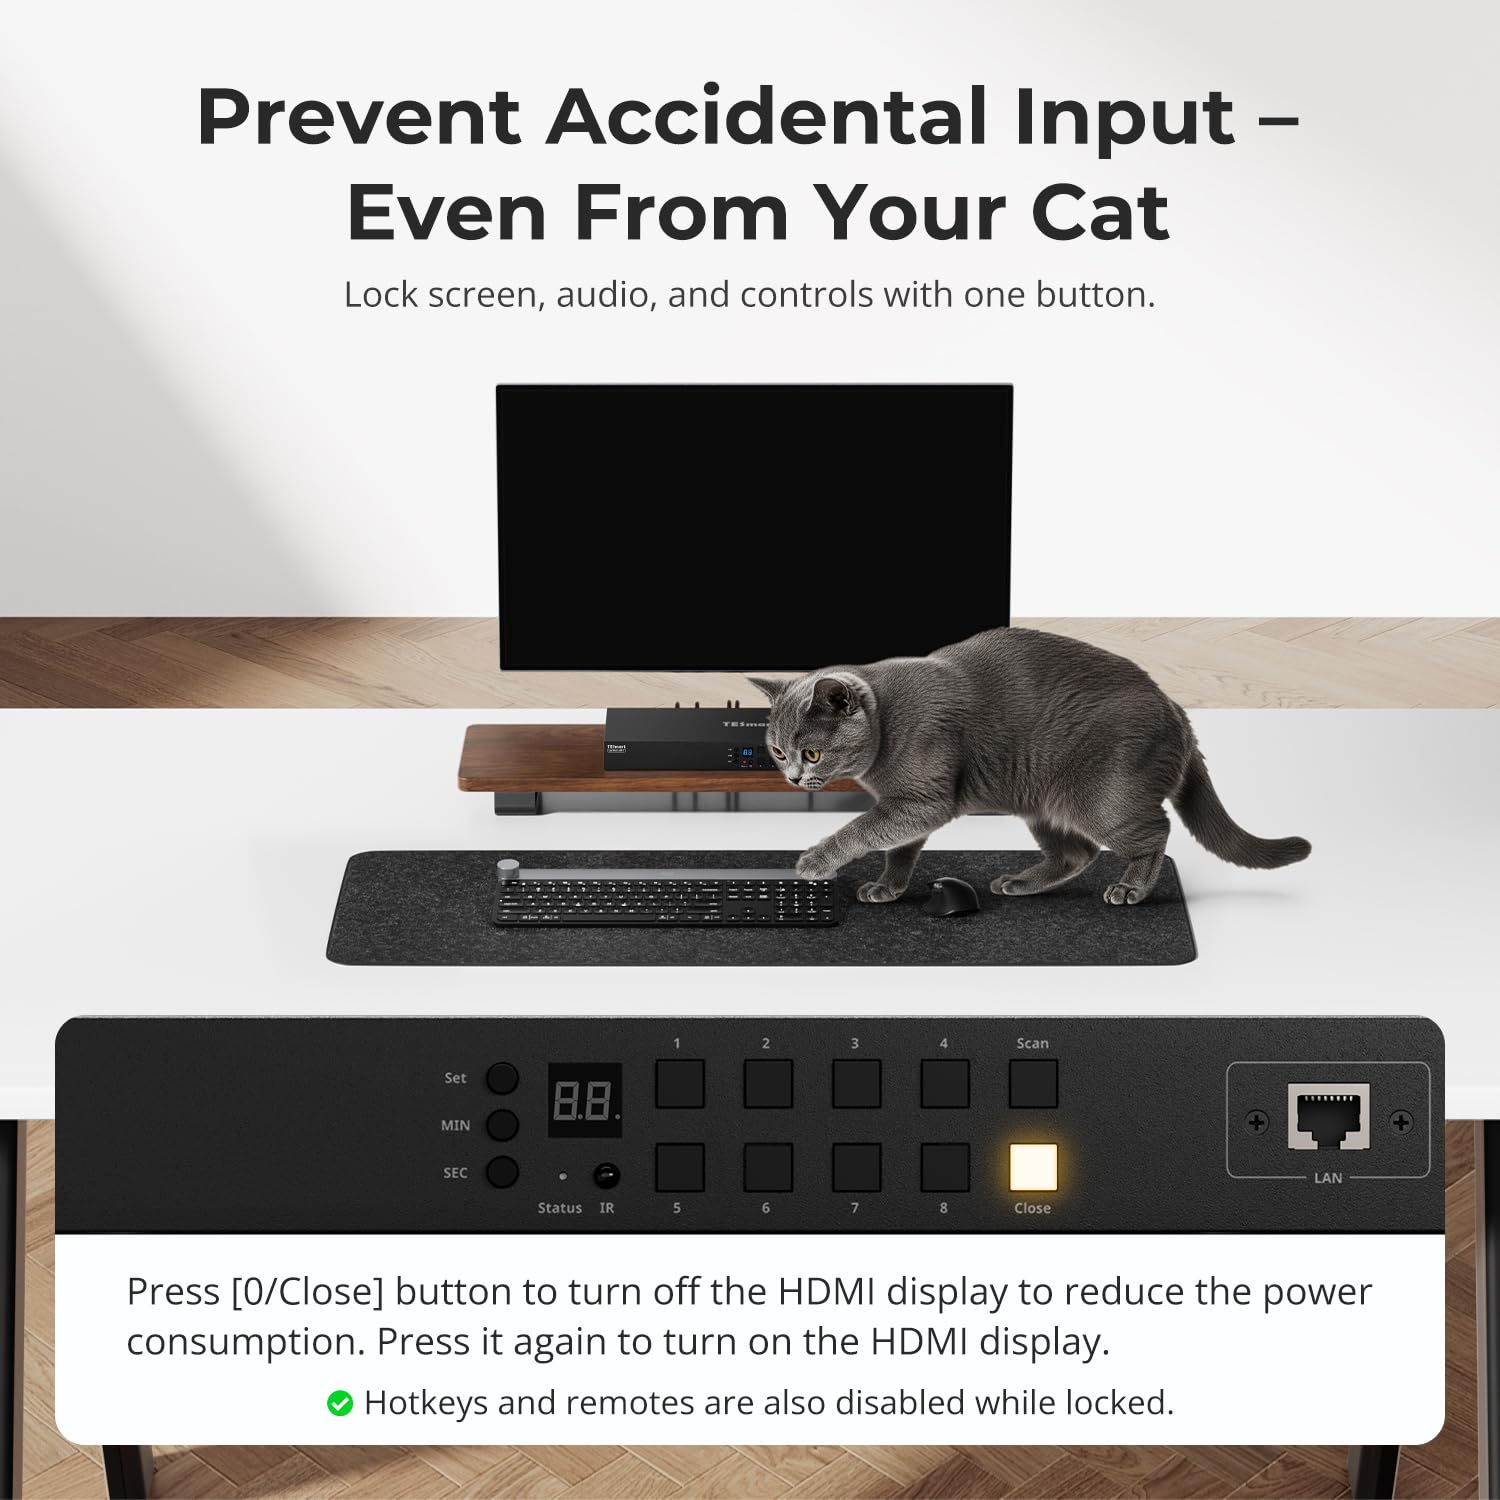
Image: Using the lock function to prevent unintended input.
6. メンテナンス
KVM スイッチの寿命を延ばし、最適なパフォーマンスを確保するには、次のメンテナンス ガイドラインに従ってください。
- クリーニング: デバイスの外装を清掃する際は、柔らかく乾いた布をご使用ください。液体クリーナーや溶剤の使用は避けてください。
- 換気: KVMスイッチに十分な換気が確保されていることを確認してください。換気口を塞がないでください。
- 環境: Operate the device within the specified temperature range (up to 40°C). Avoid extreme temperatures, humidity, and direct sunlight.
- ケーブル管理 コネクタやポートの損傷を防ぐために、ケーブルを整理し、よじれや過度の張力が発生しないようにしてください。
- ファームウェアの更新: メーカーの webパフォーマンスの向上や機能の追加につながるファームウェア アップデートがないか、定期的にサイトを確認してください。
7。 トラブルシューティング
KVM スイッチで問題が発生した場合は、次の一般的な問題と解決策を参照してください。
- 表示/信号なし:
- すべての HDMI ケーブルと USB ケーブルが KVM スイッチとコンピューター/モニターの両方にしっかりと接続されていることを確認します。
- KVM スイッチの電源がオンになっており、正しい入力が選択されていることを確認します。
- Try connecting the computer directly to the monitor to confirm the computer's video output is functional.
- モニターが正しい入力ソースに設定されているかどうかを確認します。
- キーボード/マウスが応答しない:
- Ensure the keyboard and mouse are connected to the dedicated K/M USB ports on the KVM switch.
- Try connecting the keyboard and mouse directly to the computer to verify functionality.
- Some specialized gaming or multimedia keyboards/mice may require pass-through mode. Refer to the full manual for enabling this feature.
- 切り替え時間が遅い:
- Switching times can vary depending on the connected devices and their display handshake processes. High-resolution or high-refresh-rate devices (e.g., PS5 at 4K 120Hz HDR) may experience longer switching delays (up to 5 minutes in some cases).
- For other devices, typical switching time is 5-10 seconds.
- Display Issues with High-Performance Devices (e.g., PS5):
- Devices requiring 4K 120Hz HDR VRR may be particularly sensitive to HDMI signal integrity.
- Ensure high-quality HDMI 2.1 certified cables are used.
- Consider simplifying the setup by connecting the KVM switch directly to the display, rather than through an A/V receiver, if experiencing signal drops or resolution degradation.
- If green lines or signal loss occur, try adjusting display settings on the source device to a lower resolution or refresh rate as a test.
- Audio Issues (e.g., Dolby Atmos):
- This KVM switch may not support certain advanced audio formats like Dolby Atmos. Verify audio compatibility with your specific setup.
- 制御ソフトウェアの問題:
- If experiencing difficulties with official control software for advanced settings (e.g., disabling the beep sound), check the TESmart website for updated software or drivers.
- Some users have reported success with third-party applications for controlling TESmart KVM switches; however, use such software at your own discretion.
8. 仕様
| 特徴 | 仕様 |
|---|---|
| モデル番号 | HKS801-M24-USBK |
| 操作モード | オンオフ |
| 現在の評価 | 3 Amps |
| 営業巻tage | 12ボルト |
| コネクタタイプ | HDMI、USB 3.0 |
| 商品の寸法 (長さ x 幅 x 高さ) | 17.32 x 5.9 x 1.8インチ |
| アイテム重量 | 4.22ポンド |
| 材料 | 金属 |
| 色 | 黒 |
| ワットtage | 36ワット |
| 上限温度定格 | 摂氏40度 |
| 国際保護格付け | IP30 |
| 対応デバイス | Computers, servers, DVR/NVR, laptops, USB devices, HDMI 2.1 compatible devices |
9. 保証とサポート
TESmart products are designed for reliability and performance. For specific warranty information, please refer to the warranty card included with your product or visit the official TESmart website. For technical support, troubleshooting assistance, or to inquire about replacement parts, please contact TESmart customer service through their official channels.