
1. はじめに
This manual provides detailed instructions for the setup, operation, maintenance, and troubleshooting of the RGBlink NDI PTZ Camera Controller (RGBBKT). This device is designed for professional video production environments, offering comprehensive control over various PTZ cameras using multiple protocols.
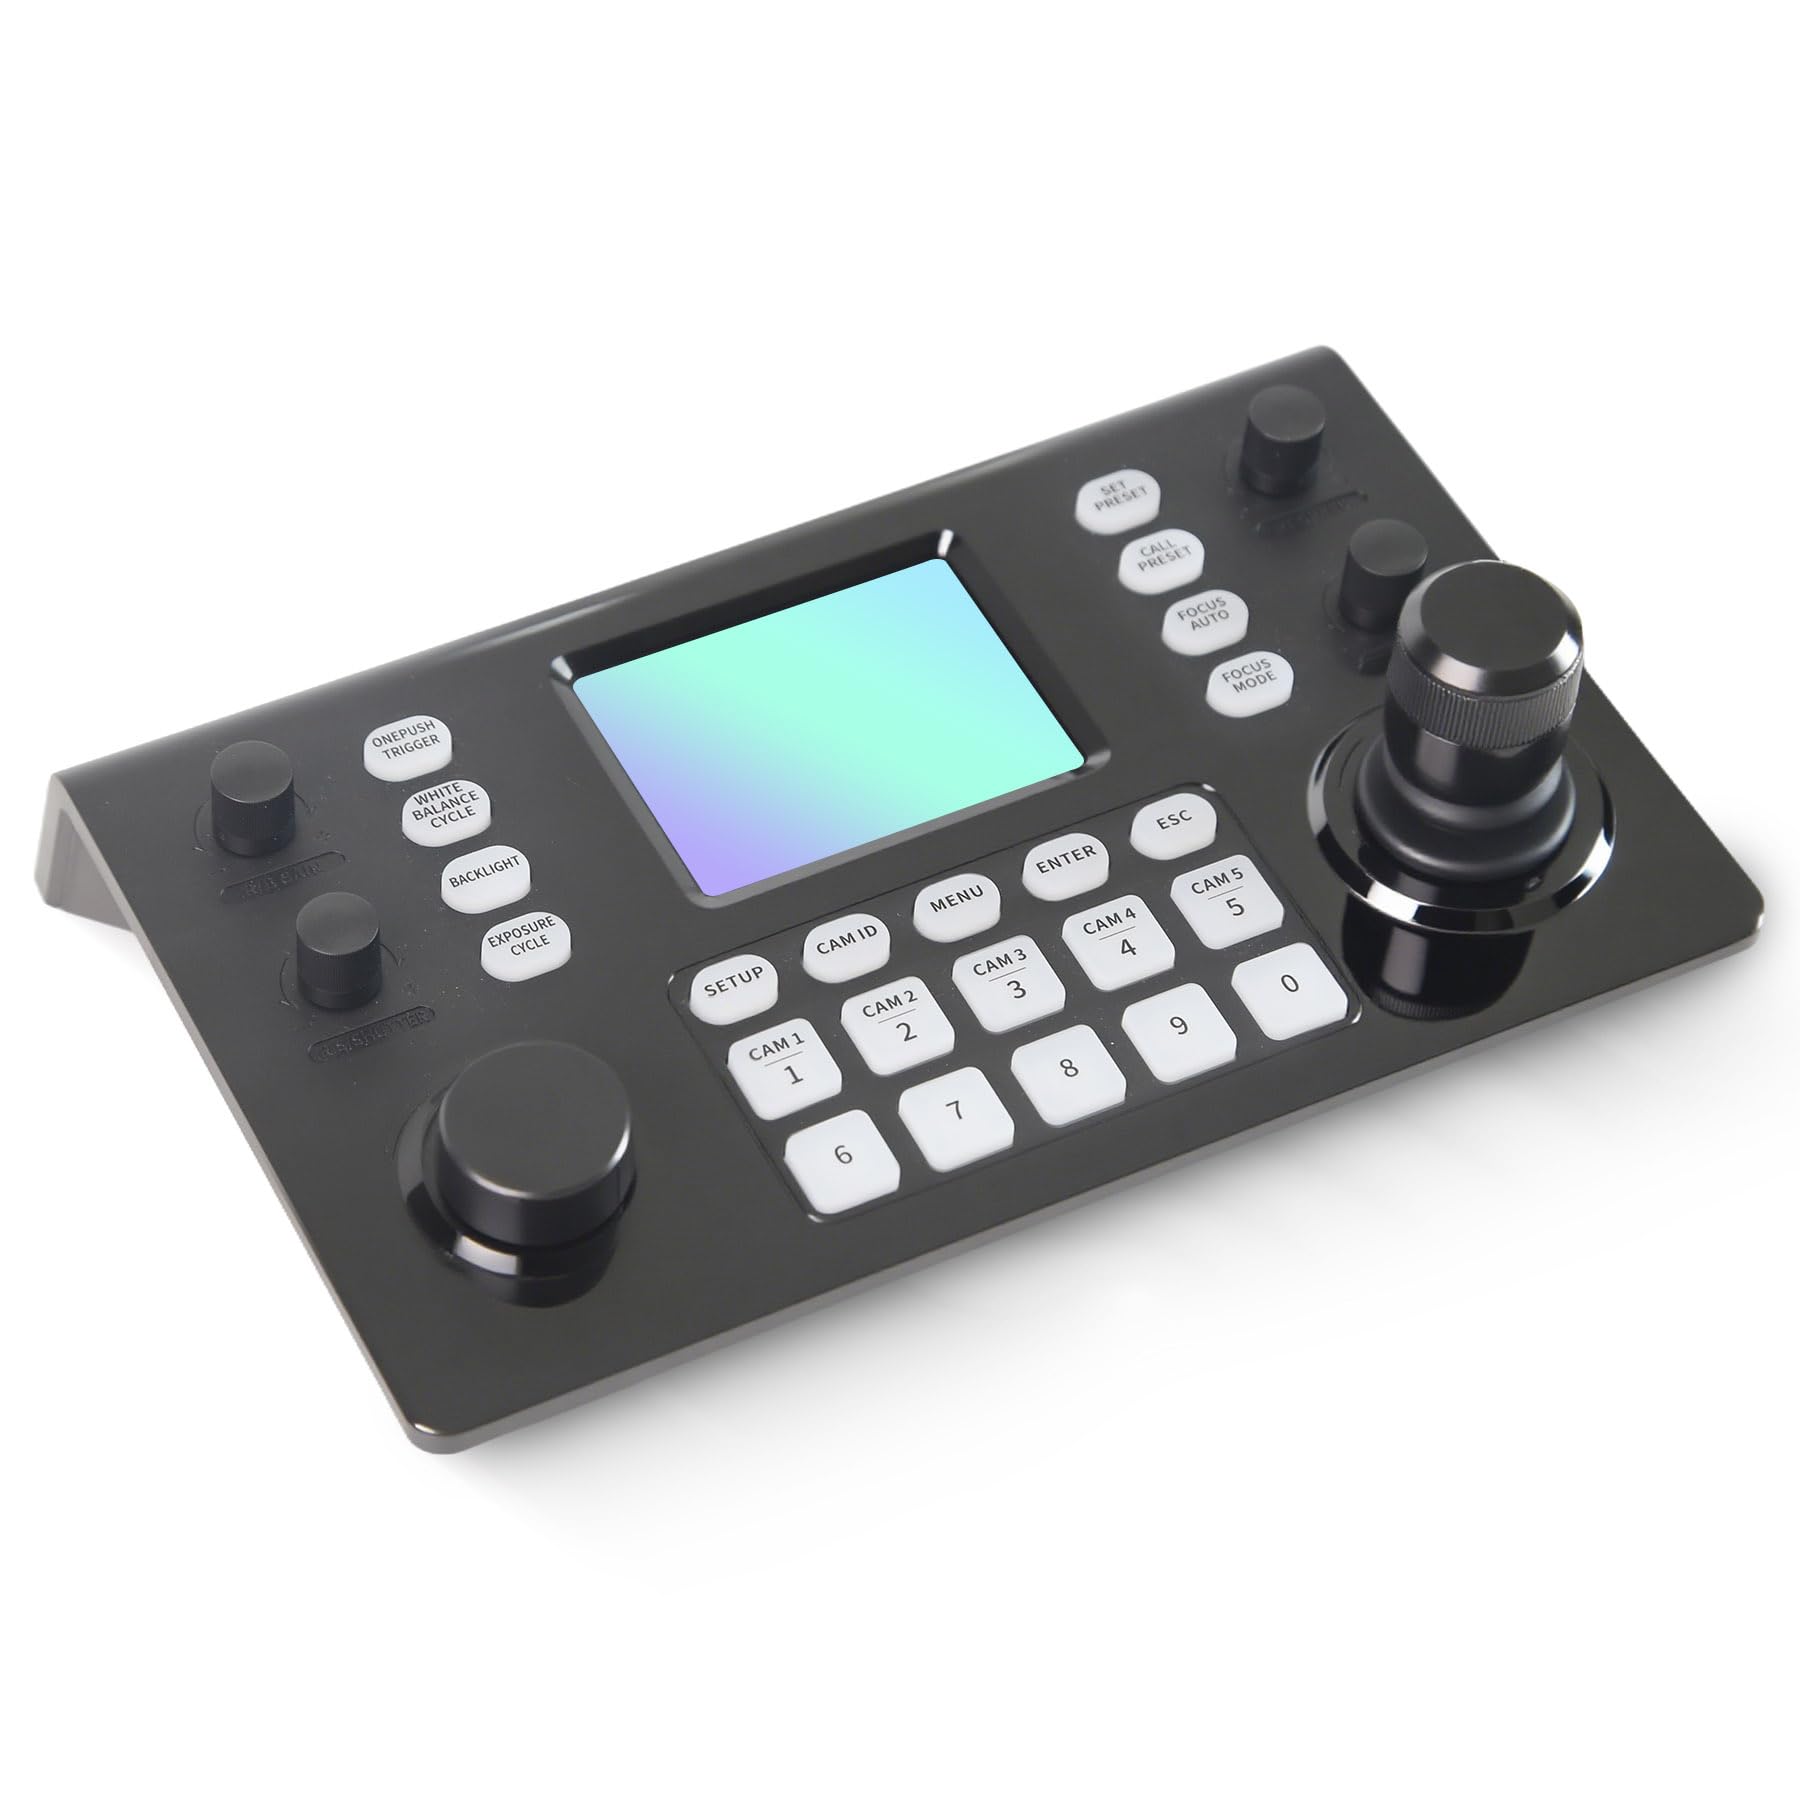
Image 1.1: RGBlink NDI PTZ Camera Controller (RGBBKT).
2. セットアップ
Follow these steps to set up your RGBlink NDI PTZ Camera Controller.
2.1 開梱と初期検査
- パッケージからすべてのコンポーネントを慎重に取り出します。
- 梱包リストに記載されているすべての品目が揃っていることを確認します。
- Inspect the controller for any signs of physical damage. If damage is found, contact your dealer immediately.
2.2 コントローラの接続
The RGBlink NDI PTZ Camera Controller supports various connection methods for power and camera control.
- Power over Ethernet(PoE): Connect a single RJ45 Ethernet cable from a PoE-enabled network switch to the controller's LAN port. This provides both power and network connectivity.
- 外部電源アダプタ: If PoE is not available, connect the provided power adapter to the DC 12V input port and to a power outlet.
- カメラ接続:
- Ethernet (IP Control): Connect PTZ cameras to the same network as the controller via RJ45 Ethernet cables. The controller supports VISCA over IP, ONVIF v2.42, and NDI v5.5 protocols.
- シリアル制御: For cameras supporting serial communication, use RS232, RS422, or RS485 interfaces. Connect the appropriate cables from the controller's serial ports to the cameras.

Image 2.1: Rear panel connections including RS-232, RS-422, LAN (PoE), and Power Input.

図2.2: 例ample connection diagram showing PTZ Controller, PoE Switch, PTZ Cameras, Audio Mixer, and Computer.

Image 2.3: Diagram illustrating IP camera connections via a network switch.
2.3ネットワーク構成
For IP-based camera control, ensure the controller and cameras are on the same network segment. The controller supports automatic detection of NDI-enabled PTZ cameras.
- Access the controller's web インターフェイスの IP アドレスを入力して、 web browser. (Refer to the device's display or network tools to find the IP address).
- The default login credentials are typically 'admin' with a blank password. It is recommended to set a strong password immediately.
- 内で web interface, configure camera protocols (e.g., ONVIF, VISCA over IP) and enter camera-specific user credentials if required.

Image 2.4: NDI|HX camera search and control interface on the controller.
3. 操作
This section details the operational functions of the RGBlink NDI PTZ Camera Controller.
3.1オーバーview コントロールの
The controller features a 3.49" LCD display, a 3D joystick, various knobs, and a numeric keypad for intuitive control.

Image 3.1: The controller's 3.49-inch LCD display.

画像3.2: 詳細 view of the 3D joystick and multi-function knobs.

Image 3.3: Layout of the controller's buttons and numeric keypad area.
3.2 カメラの選択
- クイック選択ボタン: Use the dedicated CAM 1-5 buttons for quick selection of up to 5 cameras.
- テンキー: For cameras beyond the quick select buttons (up to 255), press the カメラ ID button, then enter the camera number using the numeric keypad, and press 入力.

Image 3.4: The controller's ability to manage multiple cameras.
3.3PTZコントロール
- ジョイスティック: The 3D joystick controls pan (left/right), tilt (up/down), and zoom (rotate the joystick).
- PTスピードノブ: Adjusts the gimbal movement speed for pan and tilt.
- Zoom Knob: Provides precise zoom control, especially useful in preview モード。
3.4 Image Parameter Adjustment
- IRIS/SHUTTER Knob: Rotate to adjust aperture and shutter speed. Press to switch control modes.
- R/B GAIN Knob: Rotate to adjust red and blue gain. Press to switch control modes.
- FOCUS Button: を押す オートフォーカス button to switch the camera to auto focus mode.
- EXPOSURE Button: Cycles through exposure modes (Aperture Priority, Shutter Priority, Gain Priority, Manual Exposure, Auto Exposure).
- BACKLIGHT Button: Toggles the camera's backlight mode.
- WHITE BALANCE CYCLE Button: Cycles through white balance modes (Indoor, Outdoor, Manual, Auto).
- ONE PUSH TRIGGER Button: When white balance is set to "One-Push White Balance", press this button to initiate a one-push white balance calibration.

Image 3.5: Functions of buttons and knobs on the left side of the controller.

Image 3.6: Functions of buttons and knobs on the right side of the controller, including preset controls.
3.5プリセット
- SET PRESET Button: Press to enter preset position mode. Use the numeric keys to enter the preset number (0-9) and press 入力 保存する。 プレス ESC 終了します。
- CALL PRESET Button: Press to enter preset recall mode. Use the numeric keys to enter the preset number (0-9) and press 入力 to recall. Press ESC 終了します。
- The controller supports saving and recalling up to 255 presets per camera.
3.6メニューナビゲーション
- メニューボタン: Press to open or close the camera settings menu. In menu control mode, the joystick controls navigation (up, down, left, right), 入力 confirms selections, and ESC acts as a back button.
4. メンテナンス
Proper maintenance ensures the longevity and optimal performance of your RGBlink NDI PTZ Camera Controller.
4.1 クリーニング
- コントローラーの外側を清掃するには、柔らかく乾いた布を使用してください。
- 頑固な汚れには、軽くamp布を水または低刺激性の非研磨性の洗浄液で拭いてください。
- Avoid using harsh chemicals, solvents, or abrasive materials, as these can damage the surface and display.
- Ensure no liquids enter the device through openings or ports.
4.2 ストレージ
- 長期間使用しない場合は、コントローラーを直射日光や極端な温度を避け、涼しく乾燥した場所に保管してください。
- デバイスをほこりや湿気から保護してください。
5。 トラブルシューティング
このセクションでは、発生する可能性のある一般的な問題に対する解決策を示します。
5.1 電源なし
- 電源を確認してください: 電源アダプタがコントローラと正常な電源コンセントの両方にしっかりと接続されていることを確認します。
- PoEチェック: If using PoE, verify that the Ethernet cable is connected to a PoE-enabled port on your network switch and that the switch is powered on.
- ケーブルの完全性: Inspect the power cable and Ethernet cable for any damage.
5.2 Cannot Control Camera
- ネットワーク接続: For IP cameras, ensure the controller and cameras are on the same network and can communicate. Check network cables and IP addresses.
- プロトコルの不一致: Verify that the correct control protocol (e.g., VISCA over IP, ONVIF, NDI, Pelco-D/P) is selected on both the controller and the camera.
- カメラID: Ensure the correct camera ID is selected on the controller.
- ログイン資格情報: If the camera requires authentication, confirm that the correct username and password are configured in the controller's web インタフェース。
- シリアル接続: For serial control, check RS232/RS422/RS485 cable connections and ensure baud rates and addresses match between the controller and camera.
- ファームウェア: Ensure both the controller and cameras have the latest firmware installed. Visit the RGBlink support web更新のためのサイト。
5.3 LCDディスプレイの問題
- 表示なし: コントローラーの電源がオンになっていることを確認してください。
- 薄暗いディスプレイ: Check if there are any brightness settings on the controller that can be adjusted.
6. 仕様
| 特徴 | 詳細 |
|---|---|
| モデル | RGBBKT |
| 寸法(長さ×幅×高さ) | 11.4 x 7.8 x 5.9インチ(約290 x 200 x 150 mm) |
| 重さ | 2.2ポンド(約1kg) |
| 画面 | 3.49インチ液晶 |
| 制御プロトコル | VISCA over IP, ONVIF v2.42, NDI v5.5, Pelco-D/P |
| インターフェース | RS232, RS422, RS485, RJ45 Ethernet (PoE) |
| Camera Capacity | Up to 255 PTZ cameras |
| 電源入力 | PoE or DC 12V (external adapter) |
| ジョイスティック | High-precision Hall sensor 3D joystick |

Image 6.1: Controller dimensions and typical usage environments.

Image 6.2: Visual representation of supported protocols including RJ45, RS485, RS422, RS232, ONVIF, NDI, Pelco-D, Pelco-P, and Visca.
7. 製品ビデオデモンストレーション
Watch the official product video for a visual demonstration of the RGBlink NDI PTZ Camera Controller's features and operation.
Video 7.1: Official demonstration of the RGBlink PTZ Camera Controller Joystick, showcasing multi-camera control and key features.
8. 保証とサポート
For warranty information, technical support, or service inquiries, please contact RGBlink customer service or visit their official webサイト。
- メーカー: 厦門RGBlinkサイエンス&テクノロジー株式会社
- 正式 Webサイト: www.rgblink.com (注: これはプレースホルダーです URL正しいサポートについては、製品のパッケージまたは公式ドキュメントを参照してください。 webサイト。)
- 連絡先: Refer to the RGBlink official website for the most current contact details for technical support and warranty claims.