1. はじめに
This manual provides essential information for setting up, operating, and maintaining your KOOSMILE Mini Laptop P8. The P8 is an 8-inch 2-in-1 convertible laptop featuring Windows 11 Pro, an Intel N150 processor, 12GB LPDDR5 RAM, and a 512GB SSD. Its compact design and versatile modes make it suitable for various tasks and environments.
2. パッケージ内容
パッケージに以下の項目が含まれているか確認してください。
- KOOSMILE Mini Laptop P8 x1
- PD Adapter x1
- Active Stylus x1
- HDMIケーブルx1
- USBハブx1
- ユーザーマニュアル x1
3.製品オーバーview
Familiarize yourself with the physical components and ports of your KOOSMILE Mini Laptop P8.
3.1. 主な特徴
画像: 上view of the KOOSMILE P8 Mini Laptop highlighting its key features including Intel N150 CPU, 12GB LPDDR5 RAM, SSD storage, 0.78kg weight, 2MP camera, and 8-inch HD IPS screen.
3.2. ポートとボタン
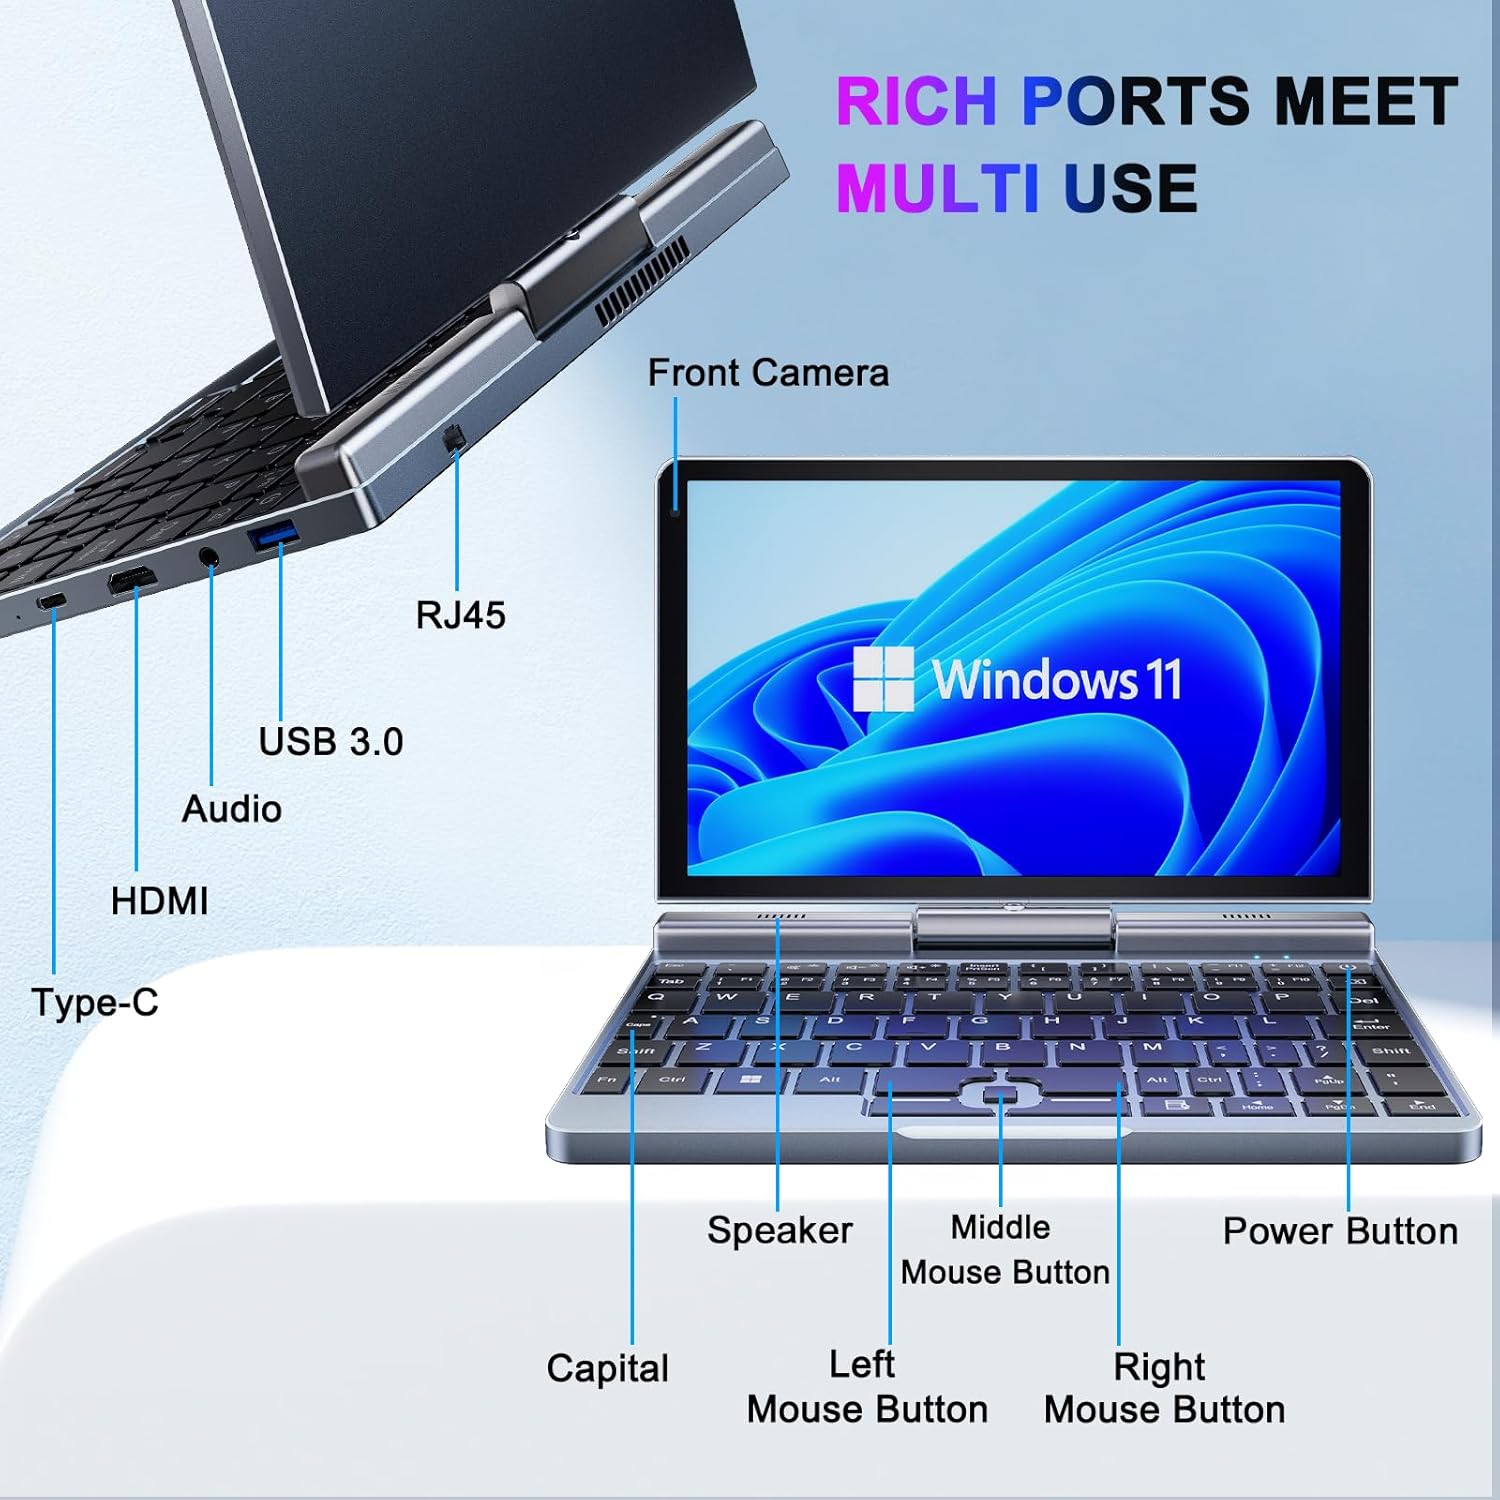
画像: 詳細 view of the KOOSMILE P8 Mini Laptop's side ports and keyboard layout, labeling the RJ45 Ethernet port, USB 3.0, Audio jack, HDMI, Type-C port, Front Camera, Speaker, Middle Mouse Button, Left Mouse Button, Right Mouse Button, Power Button, and Capital key.
- USB 3.0ポート: USB デバイスを接続します。
- USB Type-Cポート: For data transfer, charging, and DisplayPort (DP) video output.
- HDMIポート: 外部ディスプレイに接続します。
- オーディオジャック: ヘッドフォンまたは外部スピーカー用。
- RJ45イーサネットポート: 有線ネットワーク接続用。
- 電源ボタン: デバイスの電源をオン/オフにしたり、スリープ状態にしたりします。
- フロントカメラ: 2MP camera for video calls and conferencing.
4. セットアップ
Follow these steps for initial setup of your KOOSMILE Mini Laptop P8.
- デバイスを充電します。 Connect the PD Adapter to the USB Type-C port on the laptop and plug it into a power outlet. Allow the device to charge fully before first use.
- 電源オン: 画面が点灯するまで電源ボタンを押し続けます。
- Windows 11 Pro セットアップ: 画面上の指示に従って、言語の選択、ネットワーク接続、ユーザー アカウントの作成などの Windows 11 Pro の初期セットアップを完了します。
- 周辺機器を接続します。 If desired, connect the included USB Hub, external mouse, or other peripherals to the available USB ports.
5. 操作手順
This section covers basic operation and usage modes of your device.
5.1. 電源のオン/オフとスリープモード
- 電源オン: 電源ボタンを押します。
- スリープモード: Briefly press the Power Button while the device is on. Press again to wake.
- シャットダウン: From the Windows desktop, click the Start button, then Power, and select 'Shut down'.
- 再起動: From the Windows desktop, click the Start button, then Power, and select 'Restart'.
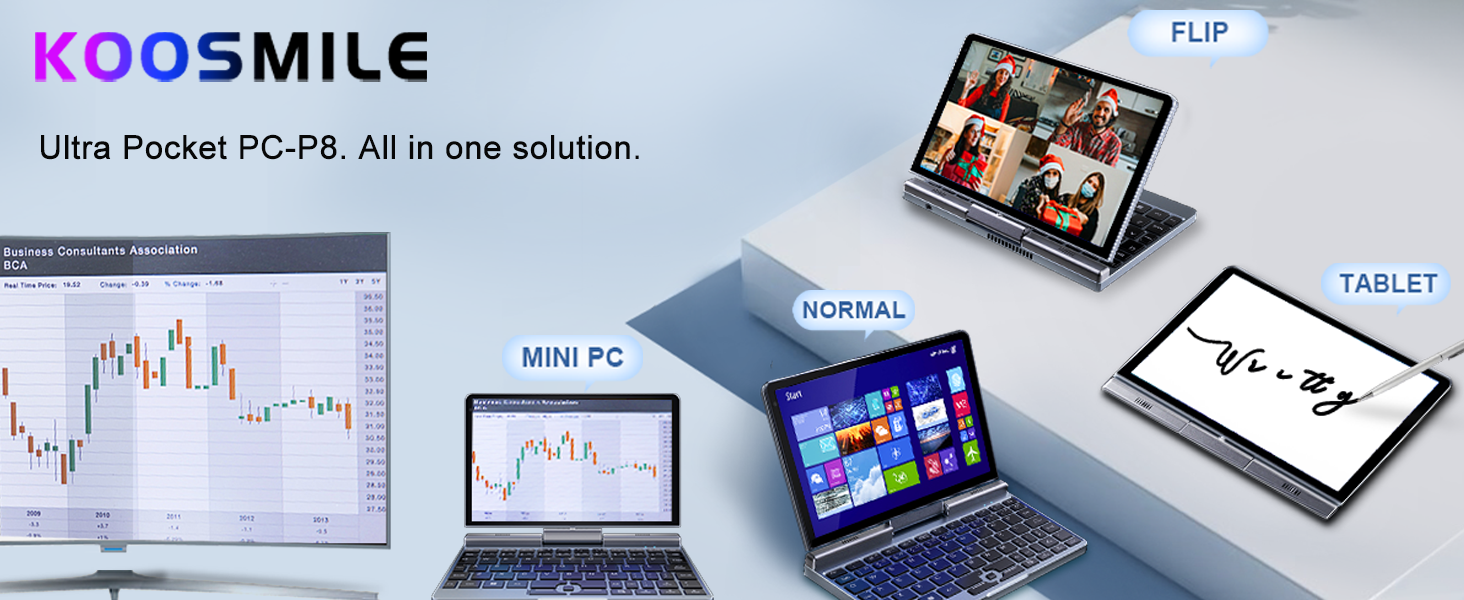
5.2. 2-in-1 コンバーチブルモード
The KOOSMILE P8 features a 180° rotating screen, allowing it to transform into multiple modes:
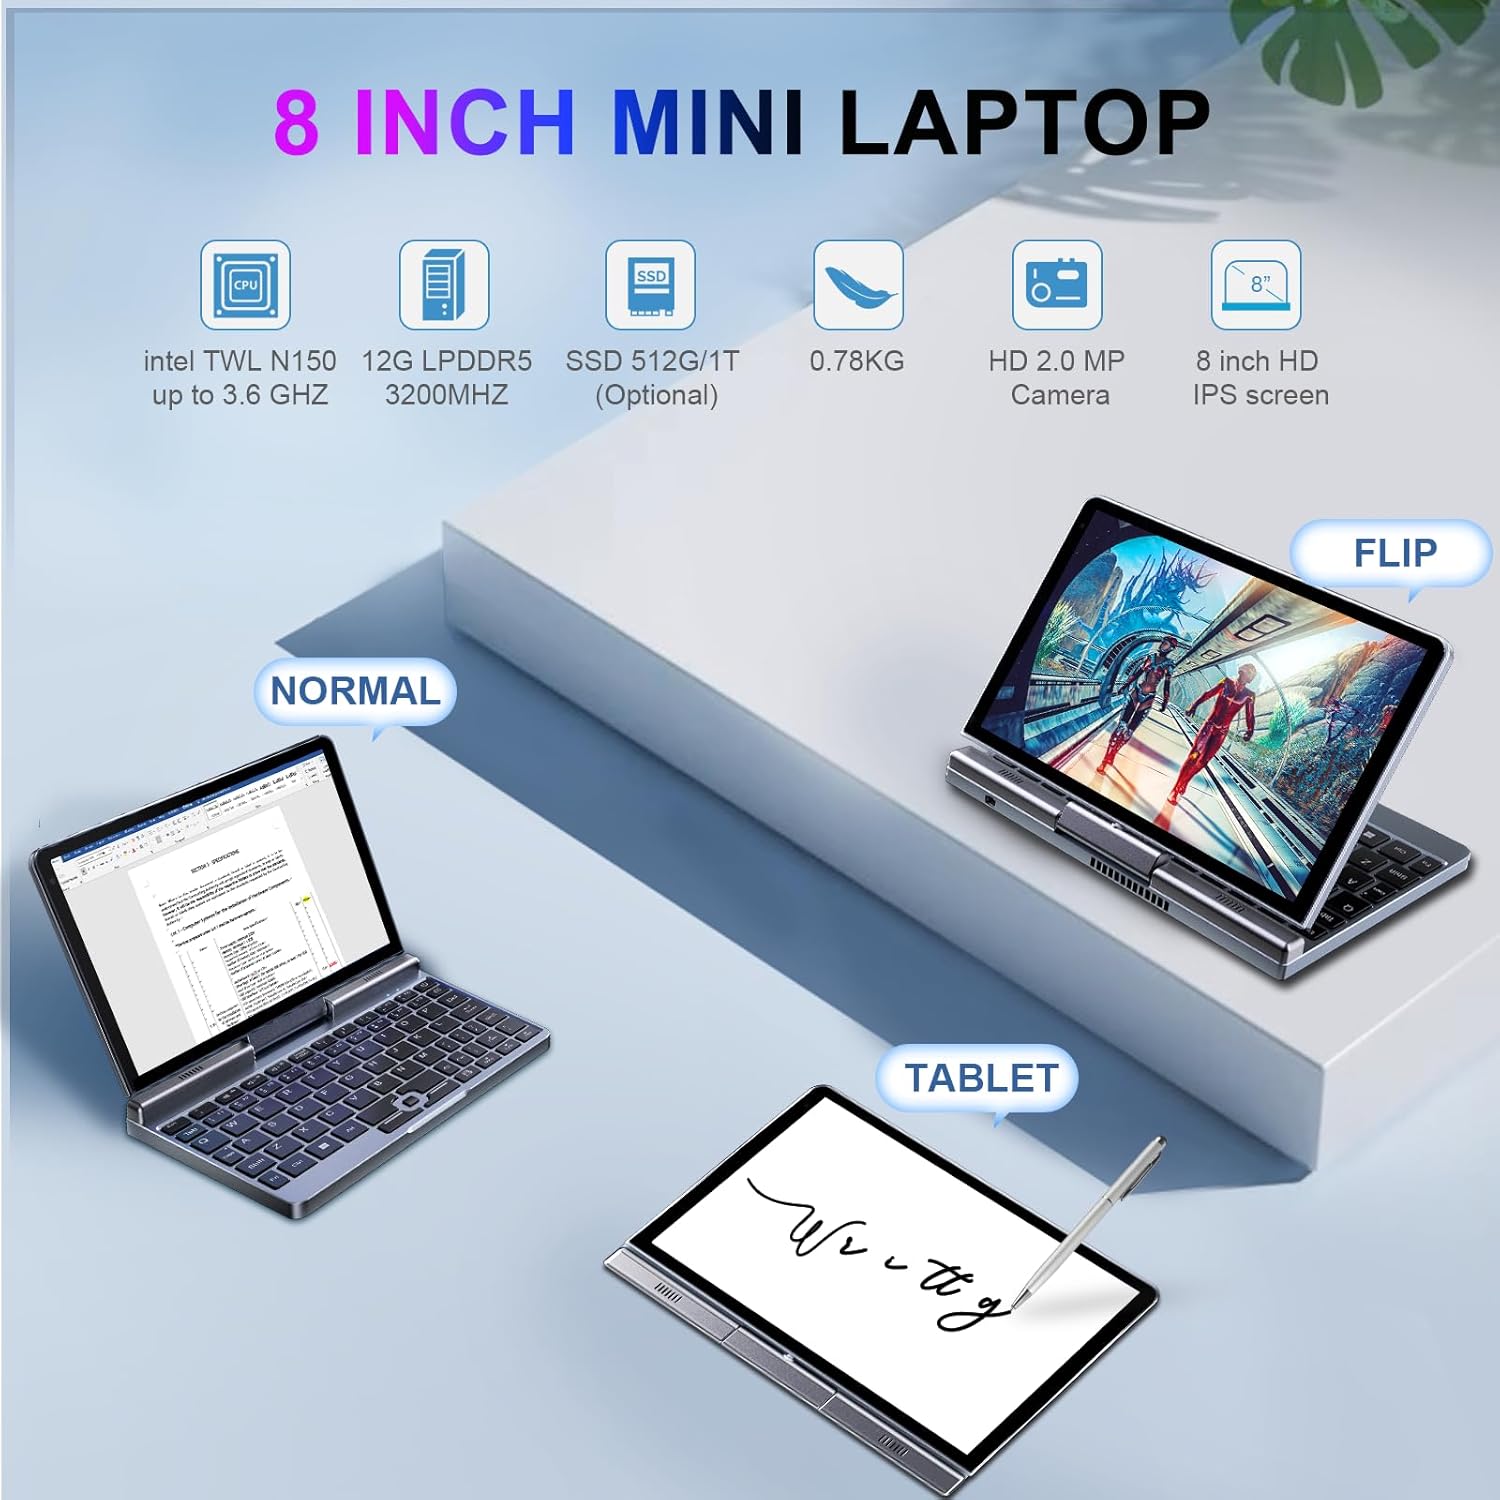
Image: The KOOSMILE P8 Mini Laptop shown in three different modes: Normal (laptop), Flip (tent/stand), and Tablet mode, demonstrating its 180-degree screen rotation capability.
- ラップトップモード: Standard configuration for typing and traditional computing.
- タブレットモード: Rotate the screen 180° and fold it back against the keyboard for a full touchscreen experience. Windows will automatically switch to tablet interface.
- Tent/Stand Mode: Position the device in an inverted 'V' shape or with the keyboard facing down for media consumption or presentations.
5.3. Touchscreen and Stylus Use
The 8-inch HD touch screen supports multi-touch gestures and input from the included active stylus.
- タッチジェスチャー: ナビゲーション、ズーム、スクロールには標準の Windows タッチ ジェスチャを使用します。
- アクティブスタイラス: The stylus allows for precise input, drawing, and note-taking. Ensure the stylus is charged if it requires power.
5.4. 外部ディスプレイの接続
Connect your laptop to an external monitor or TV using the HDMI or USB Type-C (DisplayPort Alt Mode) ports.

Image: The KOOSMILE P8 Mini Laptop connected to an external monitor via HDMI, illustrating its Type-C DisplayPort (DP) out and HDMI DisplayPort (DP) out capabilities for extended display.
- HDMI: Use the included HDMI cable to connect to an HDMI-compatible display.
- USBタイプC: If your external display supports DisplayPort over USB-C, you can use a compatible USB-C to DisplayPort cable.
- ディスプレイの設定: 接続後、 Windowsキー+P to select your preferred display mode (Duplicate, Extend, Second screen only).
6. 接続性
The KOOSMILE P8 offers various connectivity options.
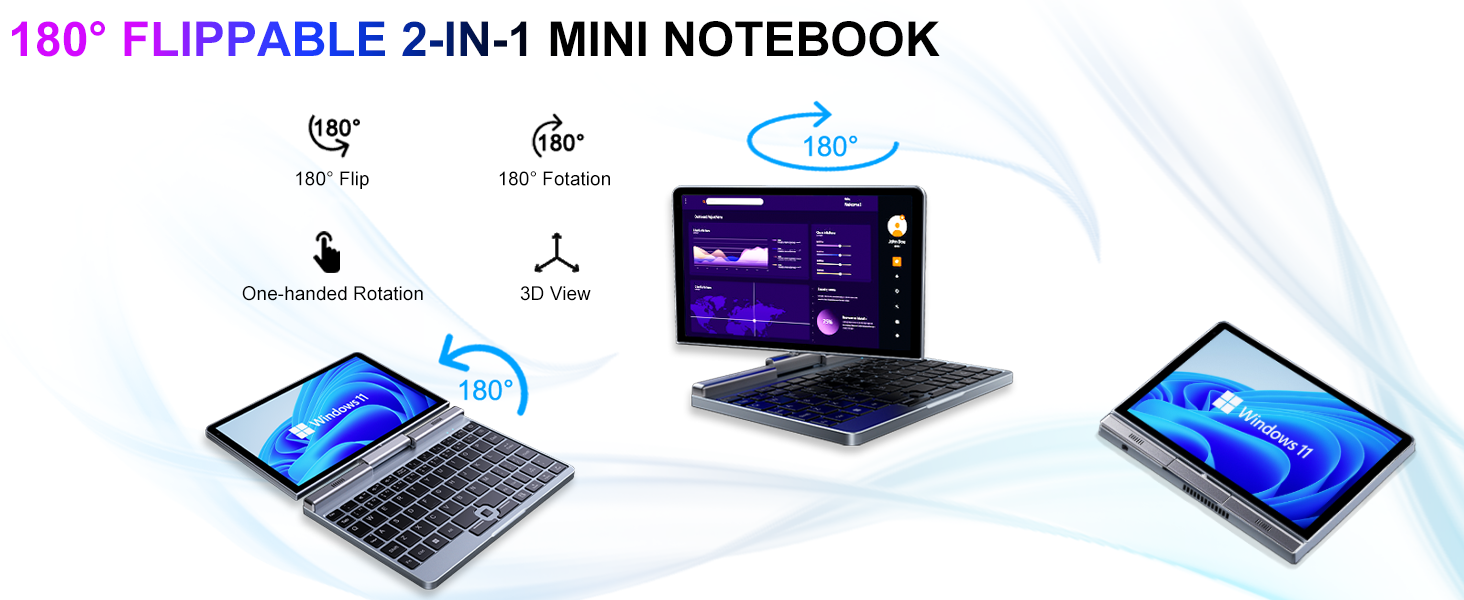
Image: Graphic illustrating the high-speed connectivity of the KOOSMILE P8 Mini Laptop, featuring Wi-Fi 6 and Bluetooth 5.2, with comparison bars showing improved speed, capacity, and reduced delay compared to Wi-Fi 5.
6.1。 Wi-Fi接続
- タスクバーの Wi-Fi アイコンをクリックします。
- 希望するネットワークを選択し、プロンプトが表示されたらパスワードを入力します。
- The device supports Wi-Fi 6 for faster and more stable wireless connections.
6.2.Bluetoothペアリング
- へ移動 設定 > Bluetoothとデバイス > Bluetooth.
- Turn on Bluetooth and select 'Add device'.
- Choose the device you wish to pair and follow the on-screen instructions.
- The device supports Bluetooth 5.2 for efficient wireless accessory connections.
6.3. Wired Ethernet
- Connect an Ethernet cable to the RJ45 port on the laptop for a stable wired network connection.
7. メンテナンス
適切な手入れにより、デバイスの寿命とパフォーマンスが保証されます。
- クリーニング: 画面と筐体の清掃には、柔らかく糸くずの出ない布を使用してください。頑固な汚れには、amp布に水か画面に安全なクリーナーを軽く含ませてください。刺激の強い化学薬品は避けてください。
- 換気: 過熱を防ぐために通気口が塞がれていないことを確認してください。
- バッテリーのケア: For optimal battery life, avoid fully discharging the battery frequently. Store the device in a cool, dry place if not used for extended periods.
- ソフトウェアアップデート: システムの安定性とセキュリティを確保するために、Windows とドライバーを定期的に更新してください。
8。 トラブルシューティング
このセクションでは、発生する可能性のある一般的な問題について説明します。
8.1. Screen Orientation Issues
- 自動回転: When switching between laptop and tablet modes, the screen should automatically adjust its orientation.
- 手動回転: If the screen does not rotate automatically or is stuck in an incorrect orientation, press Windows Key + A to open the Quick Settings panel. Look for the 'Rotation lock' tile and ensure it is off. You can also go to 設定 > システム > ディスプレイ and manually change the 'Display orientation'.
8.2. デバイスの電源が入らない
- 電力を確認します: Ensure the PD adapter is securely connected to the laptop and a working power outlet.
- バッテリー残量: バッテリーが完全に消耗している場合は、デバイスの電源が入るまでに数分間充電が必要になることがあります。
- ハードリセット: Disconnect the charger, then press and hold the Power Button for 15-20 seconds. Reconnect the charger and attempt to power on again.
8.3. Wi-Fi接続の問題
- Wi-Fiの切り替え: Turn Wi-Fi off and on again from the Quick Settings or Windows Settings.
- ルーターを再起動します。 Wi-Fiルーターとモデムを再起動します。
- ネットワークを忘れる: In Windows Settings, forget the problematic Wi-Fi network and reconnect.
9. 仕様
Detailed technical specifications for the KOOSMILE Mini Laptop P8.
| 特徴 | 仕様 |
|---|---|
| プロセッサ | Intel N150 (4 コア/4 スレッド、最大 3.6 GHz) |
| ラム | 12GB LPDDR5 3200MHz |
| ストレージ | 512GB SSD(最大2TBまで拡張可能) |
| 画面 | 8-inch HD Touch Screen, 1280x800 pixels |
| オペレーティング·システム | ウィンドウズ11プロ |
| グラフィックス | Intel UHD グラフィックス(統合) |
| ワイヤレス接続 | Wi-Fi 6、Bluetooth 5.2 |
| ポート | 1x USB 3.0, 1x USB Type-C (DP Out), 1x HDMI (DP Out), 1x Headphone Jack, 1x RJ45 Ethernet |
| カメラ | 2MPフロントカメラ |
| 重さ | 0.78 kg (1.72 ポンド) |
| 寸法(長さx幅x高さ) | 7.87 x 5.51 x 0.79インチ |
| バッテリー | 36.5 WH, PD 30W Charging |
9.1. パフォーマンスオーバーview
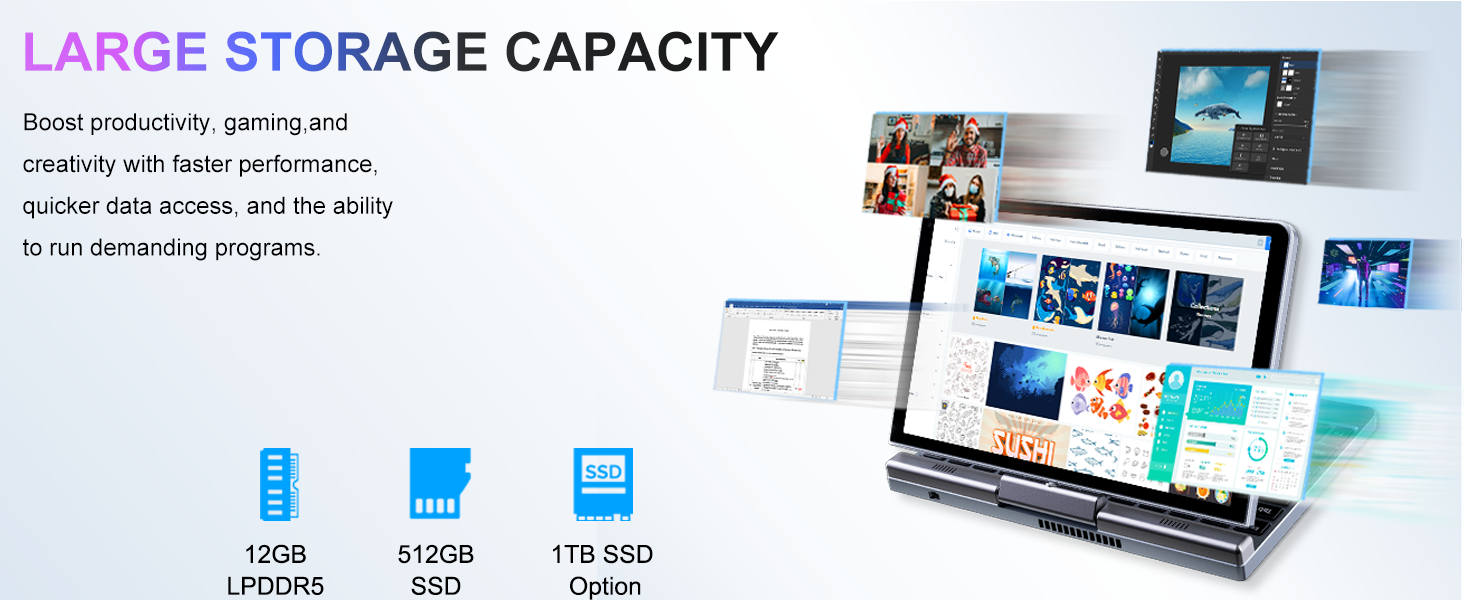
Image: Graphic detailing the performance aspects of the KOOSMILE P8 Mini Laptop, highlighting the Intel TwinLake N150 processor (4 cores, 4 threads, 3.6GHz turbo frequency, 10nm process) and Intel UHD Graphics for smooth content streaming and immersive experiences.
9.2. ストレージ容量
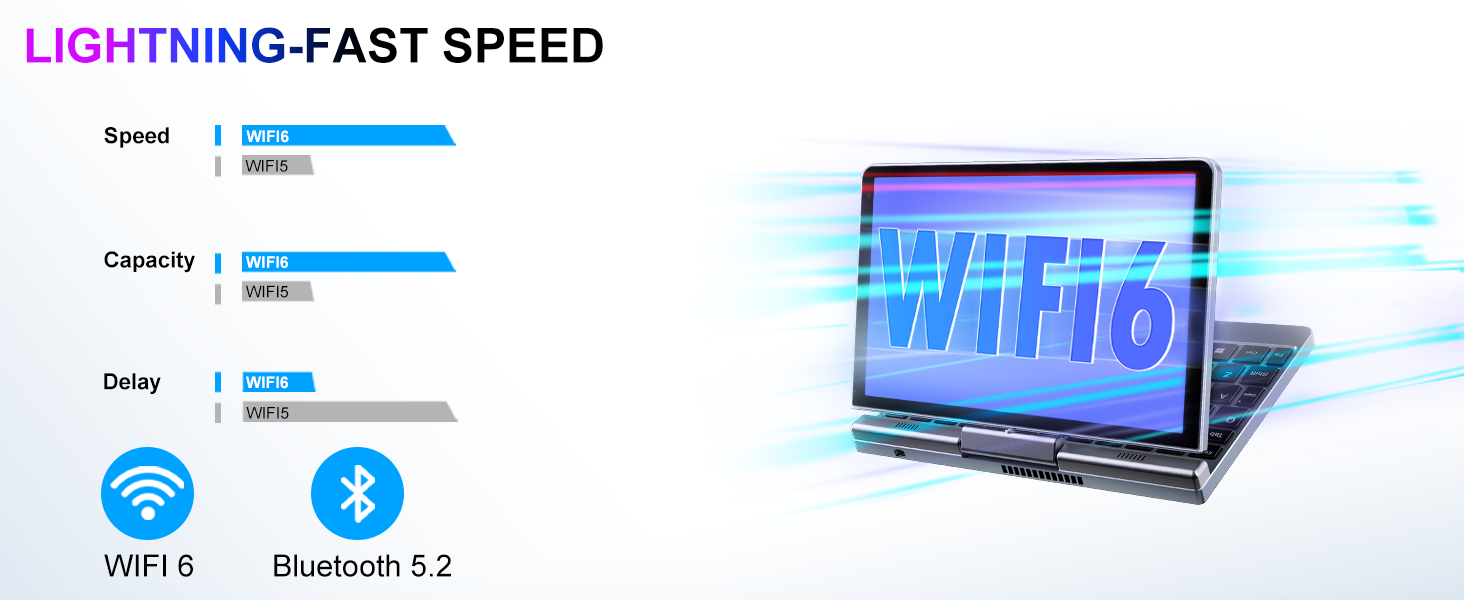
Image: Graphic illustrating the large storage capacity of the KOOSMILE P8 Mini Laptop, featuring 12GB LPDDR5 RAM, 512GB SSD, and an option for 1TB SSD, designed to boost productivity and handle demanding programs.
9.3. Compact Size and Weight
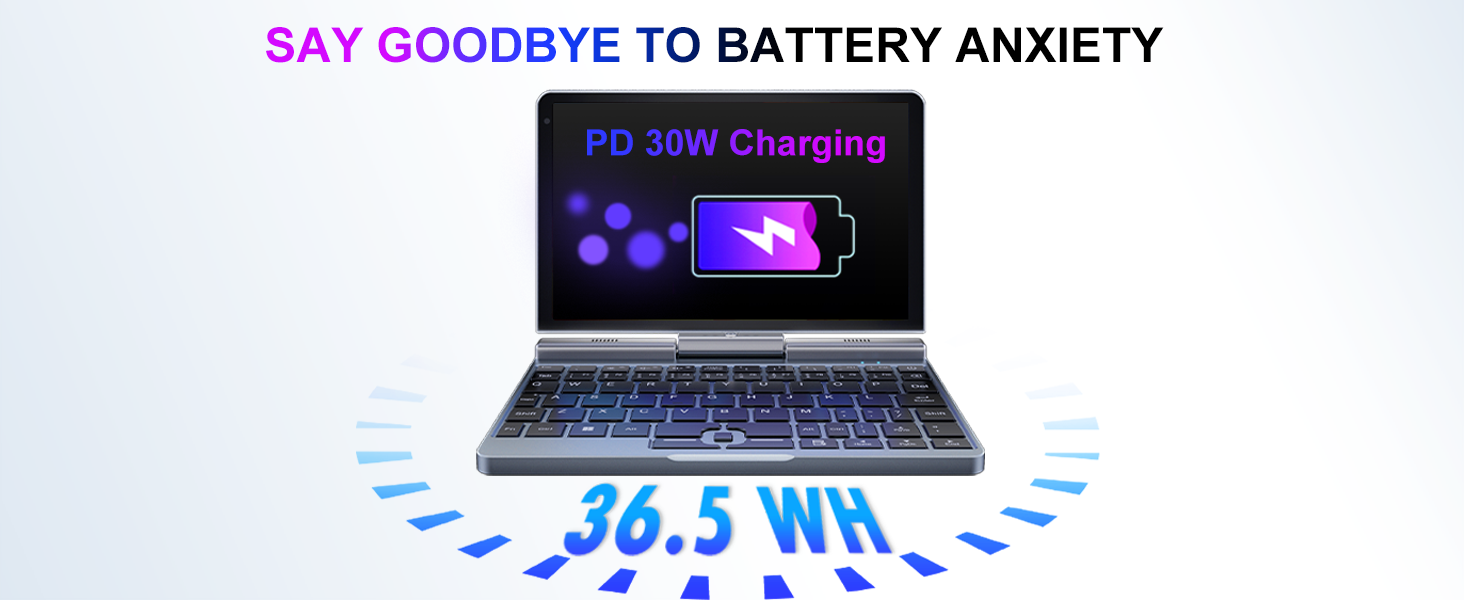
Image: Graphic demonstrating the ultra-compact size and light weight of the KOOSMILE P8 Mini Laptop, showing its 8.0-inch portable screen, 0.78-inch thin profile, and 0.78kg weight, compared to a smartphone for scale.
9.4.バッテリー情報
Image: Graphic highlighting the battery features of the KOOSMILE P8 Mini Laptop, indicating 36.5 WH battery capacity and PD 30W charging support to alleviate battery anxiety.
10. 保証とサポート
Your KOOSMILE Mini Laptop P8 comes with a 1-year warranty. For technical assistance, troubleshooting, or warranty claims, please contact our customer support team. We provide 24-hour customer support to ensure a worry-free experience.
詳細な利用規約については、パッケージに同梱されている保証カードを参照してください。