
1. はじめに
This manual provides essential information for the safe and efficient operation, maintenance, and troubleshooting of your FOHERE Commercial Slushy Machine 4Gal/15L Model 120A. This machine is designed for commercial use, featuring a single 15-liter tank capable of producing up to 48 cups (12oz/cup) of slushies per cycle. It is ETL certified, ensuring compliance with safety standards.
2. 安全に関する注意事項
警告: これらの安全指示に従わなかった場合、感電、火災、または重傷を負う可能性があります。
- Always unplug the machine from the power outlet before cleaning, maintenance, or when not in use.
- 電源がボリュームと一致していることを確認してくださいtag機械の定格ラベルに指定された要件。
- Do not operate the machine with a damaged cord or plug. Contact qualified service personnel for repairs.
- 操作中は可動部分に手や異物を近づけないでください。
- 過熱を防ぐために、機械の周囲に適切な換気を確保してください。
- 本体を水などの液体に浸さないでください。
- Minimum sugar content for liquids must not be less than 13% to prevent damage to the machine.
- If using liquids with alcohol, the temperature needs to be set around -9°C.
- Always add liquid above the white plastic beater to ensure proper mixing and prevent damage.
- Ensure the tank is properly locked in position before operation.
3.製品オーバーview
The FOHERE Slushy Machine 120A is built with high-quality stainless steel and features a single 15-liter food-grade tank. It is designed for rapid freezing and consistent beverage texture.
主な特徴:
- High-Capacity Performance: Equipped with a single 15L tank, producing up to 48 cups (12oz/cup) of slushies per cycle.
- Powerful Air-Cooled Compressor: Delivers ready-to-serve slushies in 25–30 minutes with ultra-efficient, low-noise operation.
- Single-Zone Customization: Precise temperature control (0°C to -9°C) to adjust ice hardness and texture.
- Commercial-Grade Consistency: Helical auger design ensures even freezing and optimal blending.
- LED-Embedded Lids: Illuminates the tank contents, enhancing product visibility.
- Self-Serve Handle: Ergonomically designed with a drip-free pour spout for convenience.
- Easy-Fill Tanks: Designed for easy refilling, topping off, and removal for cleaning.

Figure 1: FOHERE Slushy Machine showcasing its 15L capacity, capable of producing over 48 servings per batch.

Figure 2: Illustration of the powerful air-cooled Embraco compressor, highlighting its low noise and energy-saving features for instant chilling.
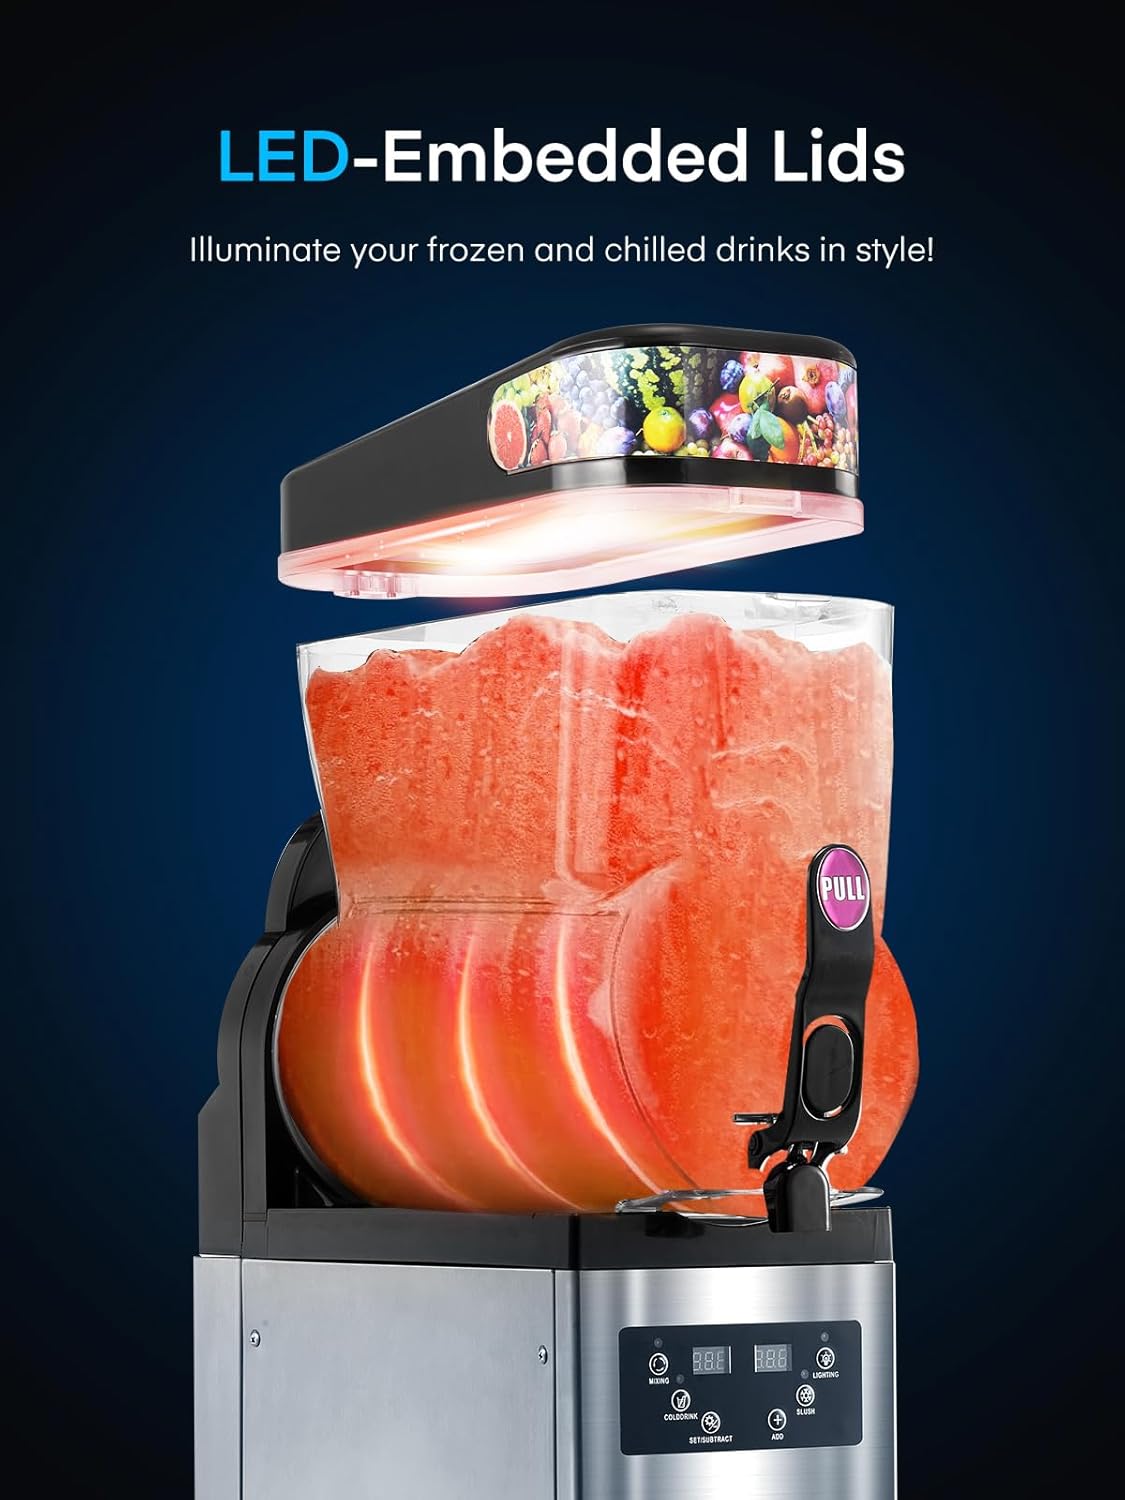
Figure 3: The machine features LED-embedded lids that illuminate the contents, making drinks visually appealing.

Figure 4: The control panel allows for separate temperature control and one-touch slushing, offering settings for cold drinks, slushies, and margaritas.

Figure 5: The self-serve handle features a drip-free pour spout for convenient and mess-free dispensing.

Figure 6: The tanks are designed for easy filling, topping off, and removal, simplifying the preparation process.
4. セットアップ
Before first use, ensure all packaging materials are removed and the machine is placed on a stable, level surface with adequate ventilation.
4.1 組み立て
Follow these steps to assemble the tank components:
- Place the sealing ring onto the material cylinder.
- Insert the mixing shaft into the material cylinder.
- Carefully place the assembled tank onto the machine base, ensuring it aligns with the seal and snaps into place securely.
- タンクの上に蓋を置きます。
Video 1: Demonstrates the reassembly process of the slush machine tank components, including placing the sealing ring, inserting the mixing shaft, and securing the tank to the base. (Relevant segment: 0:00-0:21)
5. 操作手順
The control panel allows you to manage various functions of your slushy machine. Ensure the machine is properly assembled and filled with liquid before operation.
5.1 Control Panel Functions (Single Tank)
The control panel features buttons for MIXING, COLDDRINK, SET, TEMPSETTING, LIGHTING, and SLUSH.
- Turn on Lighting: Press the "LIGHTING" key to illuminate the tank.
- ミキシングを有効にする: Press the "MIXING" key to turn on the mixing function. Press again to turn off.
- Activate Cold Drink Function: Press the "COLDDRINK" key. The mixing function must be on for this to work. Press again to turn off.
- Activate Slush Function: Press the "SLUSH" key. The mixing function must be on for this to work. Press again to turn off.
- パラメータを設定します: Press the "SET" key to enter the user parameter setting state. Use the "LIGHTING" (-) and "TEMPSETTING" (+) keys to change temperature and slush status. The system will automatically save settings after 5 seconds of inactivity.
Video 2: Illustrates the control panel functions for a single-tank slush machine, including activating lighting, mixing, cold drink, and slush modes, and adjusting settings. (Relevant segment: 0:21-1:12)
5.2 Adjusting Minimum Temperature for Slush
To adjust the minimum temperature for slush production:
- Press 'SET' and 'ADD' simultaneously until 'P00' appears on the screen. Then release.
- Press 'LIGHTING' to adjust 'P00' to 'P02'.
- Finally, press 'SUBTRACT' to adjust the temperature to -15°C. The machine will save automatically.
Video 3: Shows how to adjust the minimum temperature setting for slush production on the control panel. (Relevant segment: 8:54-9:44)
6. メンテナンス
スラッシュマシンの寿命を延ばし、衛生的に動作させるには、定期的な清掃とメンテナンスが不可欠です。
6.1 クリーニング
- Turn off the slush function and pour out all remaining liquid from the tank.
- Pour water into the tank and stir for approximately 1 minute using the mixing function, then pour out the water.
- Turn off the lighting and mixing functions.
- 主電源を切ります。
- Remove all spare parts (tank, auger, seals) and wash them thoroughly with detergent.
- 洗浄後、すべての部品を組み立て直します。

Figure 7: The machine is designed for simple cleaning and maintenance, with only four main parts needing disassembly for deep cleaning.
Video 4: Demonstrates the cleaning process for the slush machine, including draining liquid, rinsing, and disassembling parts for thorough washing. (Relevant segment: 3:35-4:15)
6.2 部品の交換
Periodically inspect components for wear and tear. Replace parts as needed to maintain optimal performance.
6.2.1 Handle Replacement
To replace the handle:
- Press the handle with your left hand and hold the pin with your right hand to remove it.
- Check the seal for any damage. Install a new seal if necessary.
- Install the new handle back onto the machine.
Video 5: Shows the steps for replacing the handle, including removing the old handle, checking the seal, and installing the new one. (Relevant segment: 4:15-5:00)
6.2.2 シールの交換
To replace the seals:
- Remove the pin and piston from the handle.
- Take off the old seal and replace it with a new one.
- Install the piston and pin back into the handle.
Video 6: Details the process of replacing the seals within the handle mechanism. (Relevant segment: 8:05-8:54)
7。 トラブルシューティング
This section provides solutions for common issues you might encounter with your FOHERE Slushy Machine.
7.1 Error Code "LLL"
If the error code "LLL" appears, it indicates a low voltage alert. Please check the operating voltage. 営業ボリュームtage is regular, contact customer support to cancel the error code.
7.2 ディスプレイが点灯しない
If the display does not light up when the machine is powered on:
- First, remove the 4 screws on the left side panel of the machine.
- Re-check the 2 internal water pipes for any breaks or disconnections.
- Remove the screws on the left and right sides of the machine (total 8 screws).
- Then remove the screws from the back panel of the machine (total 5 screws).
- Locate the 2 wires on the motherboard and check for loose or disconnected wires.
- First check that the wires connecting to the plastic switch are not loose or detached.
- Re-check the wires on the power switch for looseness or detachment.
- Confirm that the previous 2 steps show no problem. If the motherboard still does not light, check the motherboard on the 2 wires.
- The display will not light up if the motherboard does not. Check whether the connecting wires between the motherboard and the display are loose or detached.
Video 7: Provides guidance on troubleshooting a display that does not light up, including checking wiring connections. (Relevant segment: 7:12-7:33)
7.3 Mixture Leakage
If you observe mixture leakage:
- Remove the material cylinder and mixing shaft.
- Adjust the placement of the sealing ring or use a new sealing ring.
- Note that the material cylinder must be pressed against the seal, or it will cause leakage. The front should be jammed to prevent dislodging.
Video 8: Demonstrates how to address mixture leakage by checking and adjusting the sealing ring or replacing it. (Relevant segment: 7:33-8:05)
7.4 Machine Cannot Mix
If the machine's mixing function is not working:
- Remove the screws on the left and right sides of the machine (total 8 screws).
- Then remove the screws from the front panel of the machine (total 4 screws).
- Locate these 2 wires on the motherboard and check for loose or disconnected wires.
- Open the black rear cover panel again and check the wires on this end of the motor for any dislodged connections and try plugging them back in again.
Video 9: Guides through troubleshooting steps when the machine cannot mix, focusing on checking motor connections. (Relevant segment: 14:22-14:48)
7.5 Fan Blades Do Not Turn in 'SLUSH' Mode
If the fan blades are not turning when in 'SLUSH' mode:
- Remove the screws on the left and right sides of the machine (total 8 screws).
- Then remove the screws on the front panel of the machine (total 4 screws).
- Locate these 2 wires on the motherboard and check for loose or disconnected wires.
Video 10: Explains how to troubleshoot fan blades not turning in 'SLUSH' mode by checking wiring connections. (Relevant segment: 15:12-15:46)
7.6 Tanks Not Dropping in Temperature
If the tanks are not reaching the desired low temperature:
- Remove the screws on the left and right sides of the machine (total 8 screws).
- Then remove the screws on the front panel of the machine (total 4 screws).
- Locate these 2 wires on the motherboard and check for loose or disconnected wires.
- Remove the screw on the solenoid valve with a screwdriver and energize the machine. Refer to the video to lift the solenoid valve upward by hand; normally there is resistance and a “zip” sound. If it lifts easily and makes no sound, it's bad. (Note that the test must be conducted with the display energized to be effective).
Video 11: Details troubleshooting steps for tanks not dropping in temperature, including checking motherboard wires and testing the solenoid valve. (Relevant segment: 14:48-15:12)
8. 仕様
| 属性 | 詳細 |
|---|---|
| ブランド | フォヒア |
| モデル名 | 120A |
| 容量 | 15リットル(4ガロン) |
| 材料 | ステンレス鋼 |
| 色 | 銀 |
| 商品の寸法 (長さ x 幅 x 高さ) | 長さ21.65インチ x 幅16.3インチ x 高さ32.28インチ |
| アイテム重量 | 134.92 ポンド |
| 操作モード | 自動 |
| 製品のお手入れ方法 | 手洗い |
9. 保証とサポート
FOHERE provides the following warranty for this product:
- コンプレッサー: 5年
- 部品と労力: 3年
For technical support, warranty claims, or any inquiries, please refer to the contact information provided with your purchase or visit the official FOHERE webサイト。


