
1. はじめに
Thank you for choosing the Gevi Electric Burr Coffee Grinder. This manual provides essential information for the safe and efficient operation, maintenance, and troubleshooting of your new appliance. Please read it thoroughly before first use and keep it for future reference.
2. 重要な安全上の注意事項
- 機器を使用する前にすべての説明書をお読みください。
- 機器、コード、プラグを水やその他の液体に浸さないでください。
- 使用しないとき、部品の取り付けや取り外しの前、および清掃の前には、必ずコンセントからプラグを抜いてください。
- 可動部品との接触を避けてください。
- コードやプラグが損傷した状態で、またはアプライアンスが誤動作したり、落下または損傷した後は、アプライアンスを操作しないでください。
- 製造元が推奨または販売していないアタッチメントを使用すると、火災、感電、またはけがの原因となる可能性があります。
- 屋外では使用しないでください。
- コードをテーブルやカウンターの端から垂らしたり、熱い表面に触れたりしないでください。
- 使用前に豆ホッパーに異物がないか確認してください。
- この機器は家庭用にのみご使用いただけます。
3.製品オーバーview
The Gevi Electric Burr Coffee Grinder is designed for precision grinding, offering 35 settings for various brewing methods. It features a digital display for easy control and an anti-static design for mess-free operation.

Figure 1: Gevi Electric Burr Coffee Grinder with its main components visible.
コンポーネント:
- Bean Hopper (8.5 oz capacity)
- アッパーバリ
- Grinds Container (4.6 oz capacity)
- Digital Control Panel (Cup Selection, Time Selection, Start/Stop)
- Portafilter Cradle (compatible with 51mm and 58mm portafilters)
- クリーニングブラシ
- コーヒースプーン
4. セットアップ
- グラインダーを開梱します。 すべての梱包材を慎重に取り除き、すべてのコンポーネントが揃っていることを確認します。
- コンポーネントをクリーンにします: Wash the bean hopper, grinds container, and lids with warm, soapy water. Rinse thoroughly and dry completely before assembly.
- Bean Hopper をインストールします。 Place the bean hopper onto the top of the grinder base. Rotate it clockwise until it locks securely into place.
- コーヒー豆を加える: Fill the bean hopper with your desired amount of whole coffee beans. Do not overfill.
- 安全な蓋: Place the bean hopper lid firmly on top of the bean hopper.

Figure 2: Filling the bean hopper with coffee beans.
5. 操作
5.1 Selecting Grind Settings
The Gevi grinder offers 35 precise grind settings, allowing you to customize your coffee for various brewing methods. Rotate the bean hopper to adjust the grind size:
- Settings 1-10 (Espresso): For very fine grounds suitable for espresso machines.
- Settings 11-25 (Drip/Pour Over): For medium grounds ideal for drip coffee makers and pour-over brewing.
- Settings 26-35 (French Press): For coarse grounds best for French press and cold brew methods.

Figure 3: Grind setting dial on the bean hopper.
Video 1: Demonstrating the Gevi Integrated Burr Coffee Grinder with its 35 grind settings.
5.2 デジタルコントロールパネル
The digital display and control buttons allow for precise control over the grinding process.
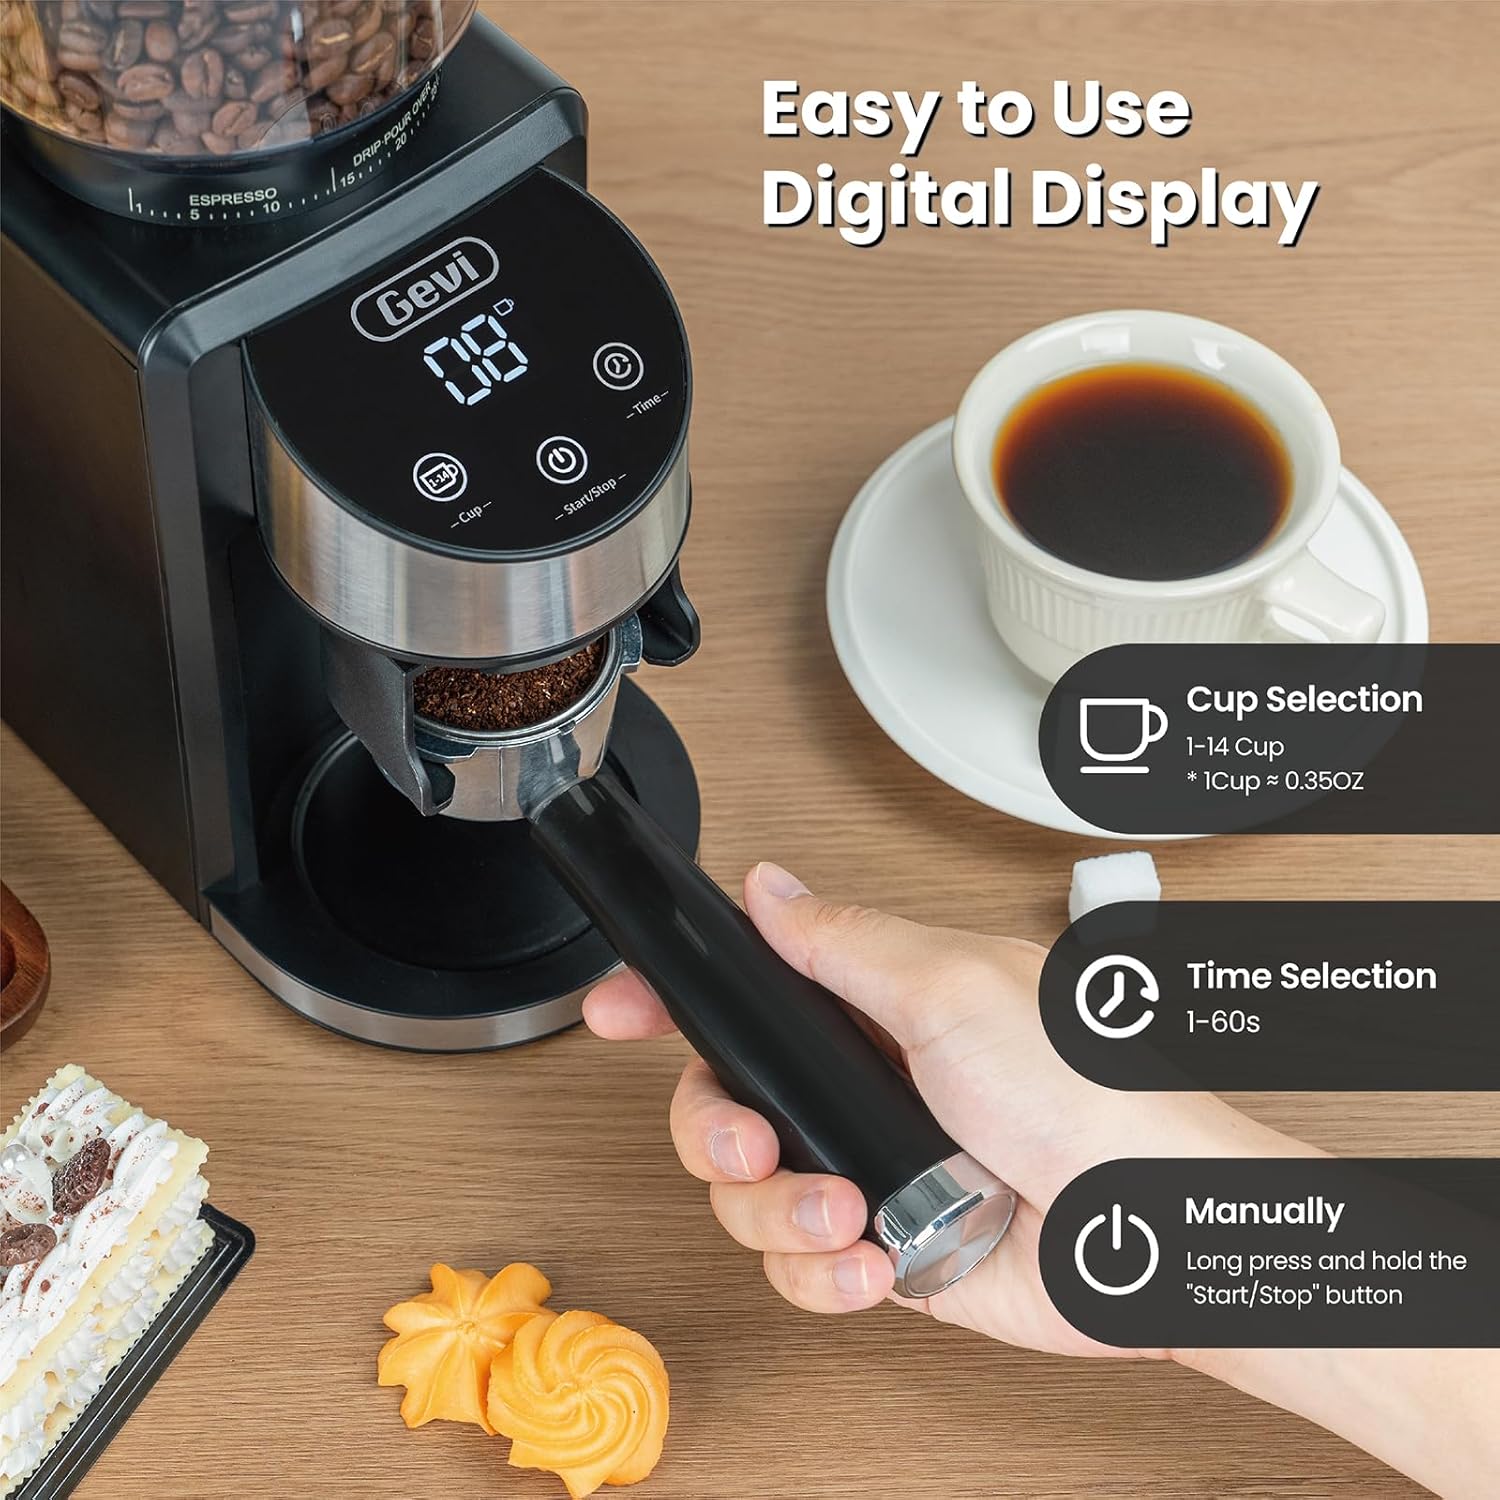
Figure 4: Digital control panel for cup and time selection.
- Cup Selection (1-14 cups): Press the 'Cup' button to select the desired number of cups. The grinder will automatically grind the appropriate amount of coffee.
- Time Selection (1-60 seconds): Press the 'Time' button to set the grinding duration in seconds. This allows for precise control over the amount of coffee ground.
- 開始/停止: Press the 'Start/Stop' button to begin or end the grinding process. You can also long-press this button for manual grinding.
5.3 Using the Portafilter Cradle
The grinder includes a portafilter cradle for direct grinding into your espresso machine's portafilter.

Figure 5: Portafilter cradle for direct grinding.
- Select the appropriate portafilter cradle (51mm or 58mm) for your portafilter.
- ポルタフィルターをクレードルに挿入します。
- Place the portafilter with cradle under the grinding chute.
- Select your desired grind setting and cup/time, then press Start/Stop to begin grinding.
6. メンテナンス
Regular cleaning ensures optimal performance and extends the life of your grinder. The anti-static design helps minimize mess.
6.1毎日の清掃
- グラインダーのプラグを抜きます。 Always ensure the grinder is unplugged before cleaning.
- 豆ホッパーを削除します。 Rotate the bean hopper counter-clockwise until it stops, then lift it off. Empty any remaining beans into an airtight container to preserve freshness.
- 上部バリの除去: Lift the upper conical burr straight out from the grinding chamber.
- クリーンバリ: Use the provided cleaning brush to remove coffee grounds from both the upper and lower burrs.
- Clean Grinds Container: Empty and wash the grinds container and its lid with warm, soapy water. Rinse and dry thoroughly.
- 外側を拭く: グラインダーの外側を洗剤で拭きますamp 布で拭いてください。研磨剤入りの洗剤は使用しないでください。
- 組み立て直す: Once all parts are dry, reassemble the grinder by reversing the removal steps.

Figure 6: Detachable upper burr for easy cleaning.

Figure 7: Anti-static design for a cleaner grinding experience.
6.2 Cleaning Clogged Coffee Grounds
If you experience clogging, particularly with oily or dark roast beans, follow these steps:
Video 2: Instructions on how to clean clogged coffee grounds from the Gevi Coffee Grinder.
- グラインダーのプラグを抜きます。 電源から切断します。
- 豆ホッパーと上部バーを取り外します。 Follow steps from Daily Cleaning.
- Clear Lower Burr: Use the cleaning brush to carefully dislodge any compacted coffee grounds around the lower burr.
- Tap the Grinder: Gently tap the back side of the grinder to help dislodge any remaining grounds from the chute into the grinds container.
- 再組み立てとテスト: Reassemble the grinder and run a small amount of beans through it to ensure proper function.
7。 トラブルシューティング
If you encounter issues with your Gevi Electric Burr Coffee Grinder, refer to the following common problems and solutions:
- グラインダーがオンにならない:
- 電源コードが正常に動作しているコンセントにしっかりと差し込まれていることを確認してください。
- Check that the bean hopper is correctly installed and locked into place. The grinder has a safety mechanism that prevents operation if the hopper is not secured.
- Verify that the lid on the bean hopper is properly closed.
- No coffee grinding or inconsistent grind:
- Check if the bean hopper is empty.
- Inspect the burrs for any blockages or foreign objects. Clean the burrs as described in the Maintenance section.
- Ensure the grind setting is appropriate for the type of beans and desired fineness. Very fine settings with oily beans can sometimes cause clogging.
- Grinder stops during operation:
- The grinder may have an overheating protection feature. Allow it to cool down for a period before attempting to use it again.
- Check for clogs in the grinding chamber or chute.
- Excessive static or mess:
- While the grinder has an anti-static design, some static can still occur depending on environmental conditions and bean type. Ensure the grinds container is fully inserted.
- Lightly misting beans with water before grinding can help reduce static.
8. 仕様
| 特徴 | 仕様 |
|---|---|
| ブランド | ゲビ |
| モデル | B0F31Z2HT7 |
| 色 | 黒 |
| 材料 | プラスチック、ステンレス |
| アイテム重量 | 5.92 ポンド |
| 寸法(長さ×幅×高さ) | 長さ7.8インチ x 幅4.72インチ x 高さ11.85インチ |
| BeanHopperの容量 | 8.5オンス(約240g) |
| Grinds Container Capacity | 約130g |
| グラインド設定 | 35 (Espresso, Drip, French Press) |
| カップセレクション | 1〜14カップ |
| 時間の選択 | 1~60秒 |
| ワットtage | 200ワット |
| 巻tage | 120ボルト |
| 欧州連合 | 767791886878 |
9. 保証とサポート
Gevi is committed to delivering high-quality products. For warranty information, technical support, or any inquiries regarding your Gevi Electric Burr Coffee Grinder, please refer to the warranty card included with your product or contact Gevi customer service directly. Keep your purchase receipt as proof of purchase.


