1. はじめに
This manual provides detailed instructions for the installation, operation, and maintenance of your GIGABYTE B550M DS3H AC R2 motherboard. This micro-ATX motherboard is designed to support AMD Ryzen 5000, 4000, and 3000 series CPUs on the AM4 socket, offering a robust platform for various computing needs. Please read this manual thoroughly before beginning installation to ensure proper setup and functionality.
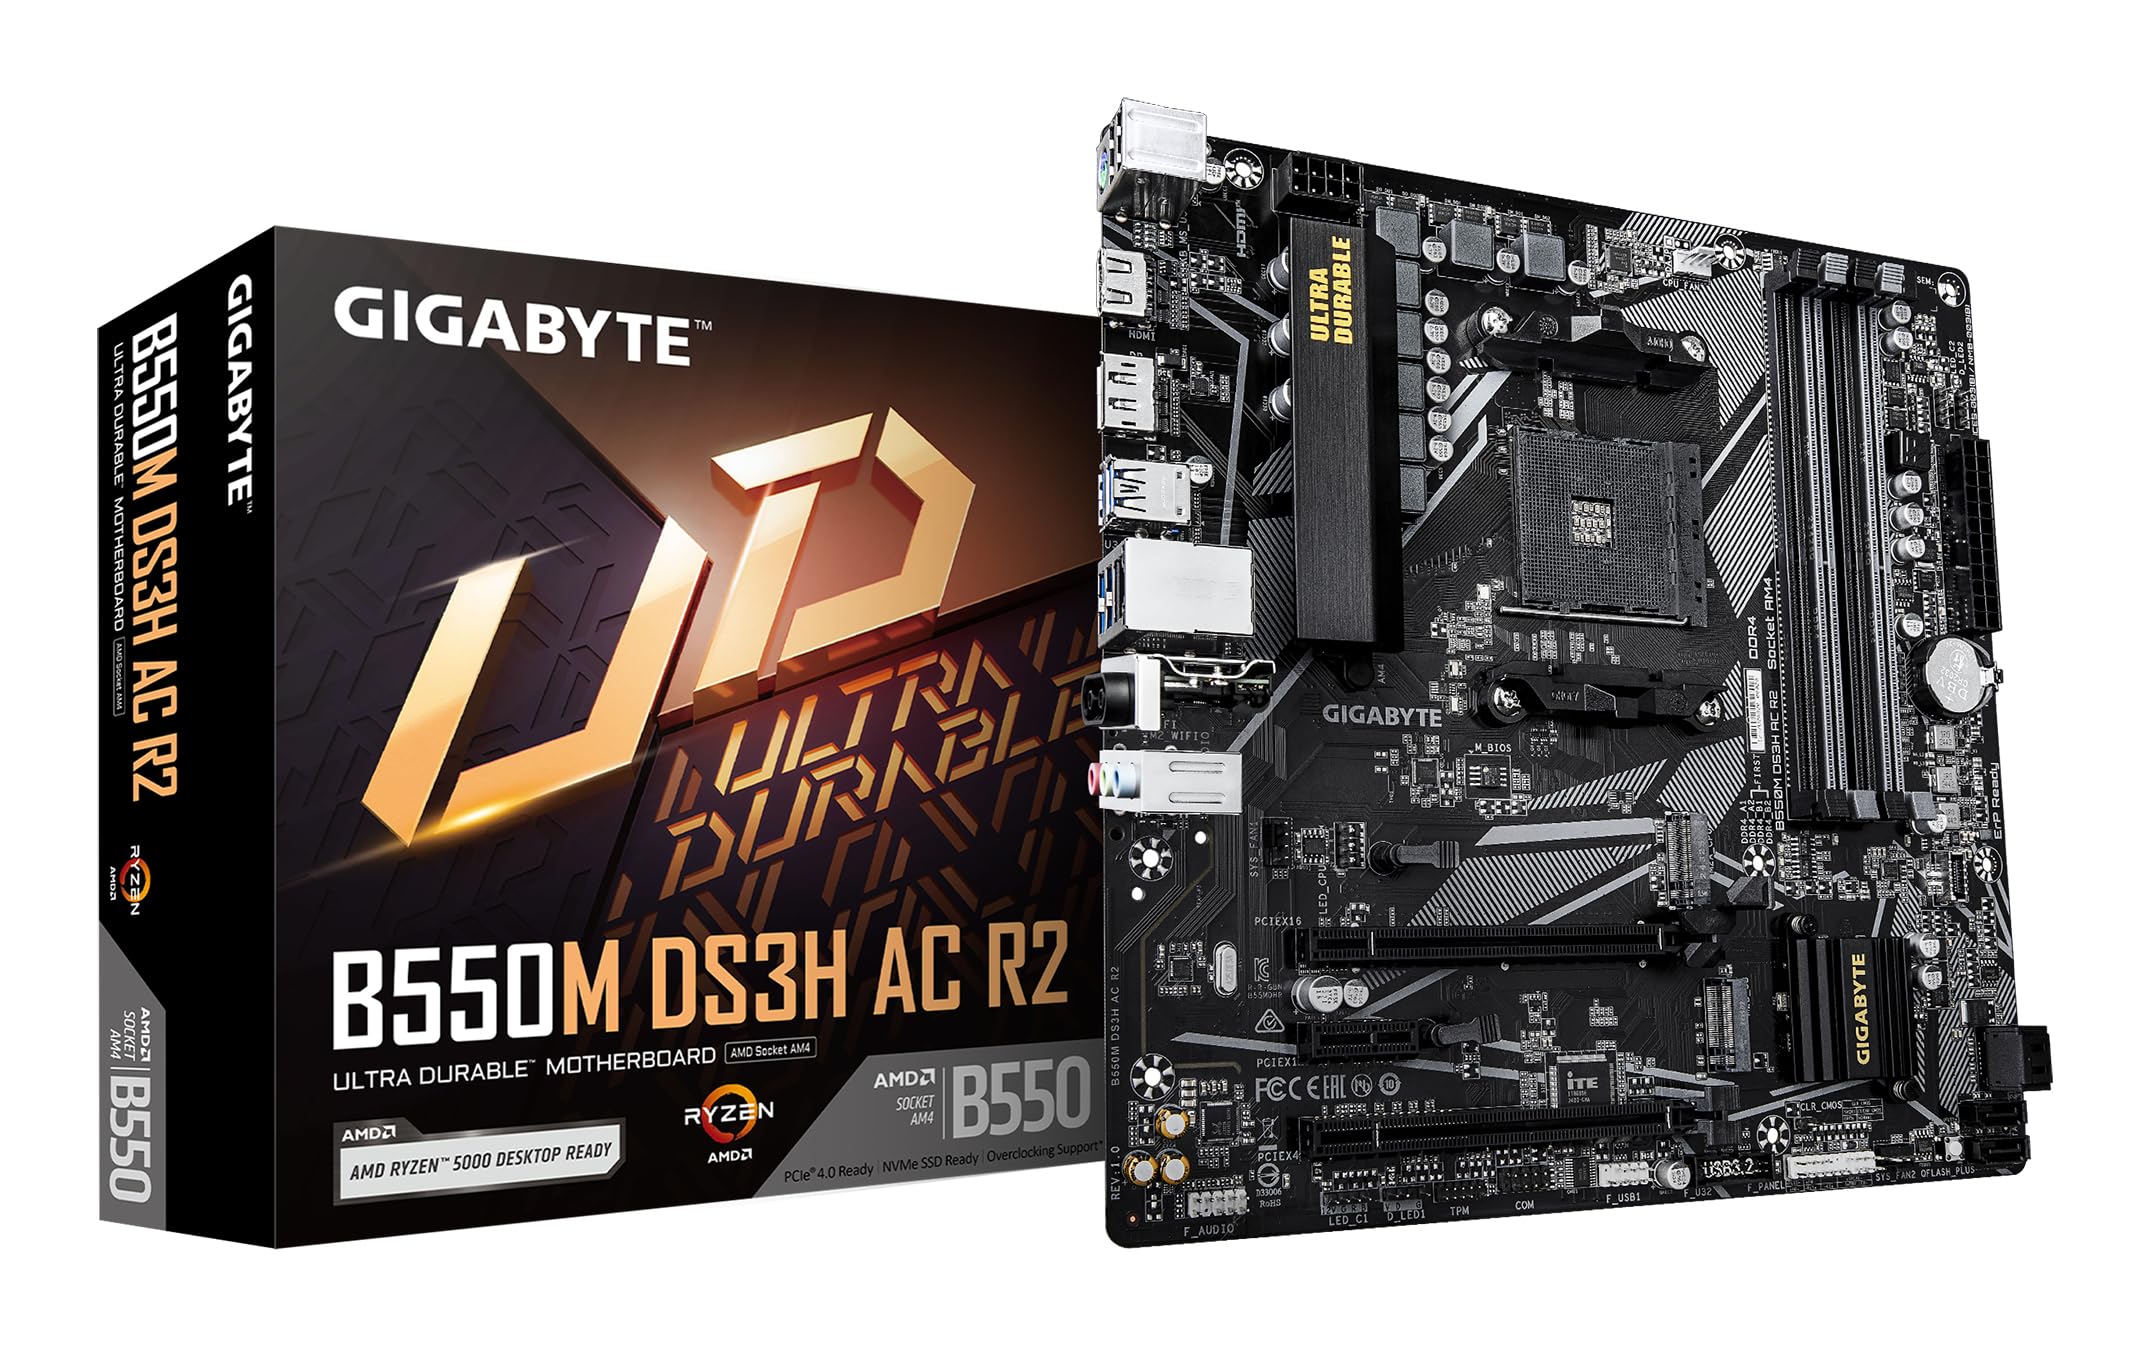
図1.1: トップダウン view of the GIGABYTE B550M DS3H AC R2 Motherboard, showcasing its layout including the CPU socket, DIMM slots, and various connectors.
2. 主な特徴
- AMD B550 チップセット: Supports AMD Ryzen 5000, 4000, and 3000 series CPUs with AM4 socket.
- 高速DDR4メモリ: Dual-channel support for up to 4733MHz (O.C.) across 4 DIMM slots.
- Advanced Storage Options: Includes one PCIe 4.0 M.2 slot and one PCIe 3.0 M.2 slot, alongside PCIe slots for graphics and expansion.
- 統合接続: Features Wi-Fi 5, Bluetooth 5.0, and 1GbE LAN for reliable network connections.
- 柔軟なディスプレイ出力: Equipped with HDMI and DisplayPort for multi-monitor configurations.
- スマート冷却システム: Smart Fan 6 with multiple temperature sensors ensures efficient thermal management.
- Qフラッシュプラス: Allows BIOS updates without the need for CPU, memory, or graphics card installation.
3. セットアップとインストール
3.1 CPUの取り付け
- CPU ソケット レバーが開いた位置にあることを確認します。
- Carefully align the triangular mark on the AMD Ryzen CPU with the mark on the AM4 socket.
- 無理に力を入れずに、CPU をソケットにゆっくりと差し込みます。
- レバーを下げて CPU を所定の位置に固定します。
- 製造元の指示に従って CPU クーラーを取り付けます。
3.2 メモリ(RAM)のインストール
- DIMM スロットの両端のクリップを開きます。
- DDR4 メモリ モジュールのノッチを DIMM スロットのキーに合わせます。
- Insert the memory module firmly until the clips snap into place. For dual-channel operation, refer to the motherboard manual for recommended slot configurations.
3.3 ストレージデバイスのインストール
This motherboard supports both M.2 NVMe SSDs and SATA drives.
- M.2 SSD: Locate the M.2 slots (one PCIe 4.0, one PCIe 3.0). Insert the M.2 SSD at an angle and secure it with the provided screw.
- SATAドライブ: SSD/HDDからのSATAデータケーブルをマザーボードのSATAポートに接続します。電源ユニットからの電源ケーブルをドライブに接続します。
3.4 拡張カードの取り付け
Install your graphics card or other PCIe expansion cards into the appropriate PCIe slots. Ensure they are seated firmly and secured with the case screw.
3.5電源接続
- 電源装置の 24 ピン ATX メイン電源コネクタをマザーボードに接続します。
- 8 ピン ATX 12V CPU 電源コネクタをマザーボードに接続します。
3.6 背面I/Oパネルview

Figure 3.1: The rear I/O panel of the GIGABYTE B550M DS3H AC R2 motherboard, showing various ports including USB, HDMI, DisplayPort, LAN, and audio jacks.
The rear I/O panel provides connectivity for external devices. It includes USB 2.0, USB 3.2 Gen 1, HDMI, DisplayPort, 1GbE LAN, Wi-Fi antenna connectors, and audio jacks. Refer to the detailed diagram in the physical manual for specific port identification.
4. 操作手順
4.1BIOSセットアップ
The BIOS (Basic Input/Output System) is firmware that initializes hardware during the booting process. To enter BIOS Setup, press the 削除 key during the Power-On Self-Test (POST). Here you can configure system settings, boot order, and monitor hardware status.
4.2 Qフラッシュプラス
Q-Flash Plus allows you to update the BIOS without installing the CPU, memory, or graphics card. Simply download the latest BIOS file ギガバイトから webサイトからダウンロードし、ファイル名をGIGABYTE.binに変更してUSBフラッシュドライブに保存し、Q-Flash PlusのUSBポートに挿入します。Q-Flash Plusボタンを押してアップデートを開始します。
4.3 ドライバのインストール
After installing your operating system, install the necessary drivers for the motherboard chipset, audio, LAN, Wi-Fi, and other integrated components. These drivers are typically provided on a support DVD or can be downloaded from the official GIGABYTE webサイト。
5. メンテナンス
5.1 クリーニング
Regularly clean your computer's interior to prevent dust buildup, which can lead to overheating and reduced performance. Use compressed air to remove dust from components, especially heatsinks and fans. Ensure the system is powered off and unplugged before cleaning.
5.2 BIOS アップデート
定期的にGIGABYTEをチェックしてください website for BIOS updates. Updates can improve system stability, add support for new hardware, or fix known issues. Follow the instructions provided by GIGABYTE carefully when performing a BIOS update.
5.3 スマートファン6
Utilize the Smart Fan 6 utility in the BIOS or GIGABYTE's software to monitor system temperatures and adjust fan speeds. Proper fan configuration helps maintain optimal operating temperatures and extends component lifespan.
6。 トラブルシューティング
- システムの起動に失敗する: Check all power connections (24-pin ATX, 8-pin CPU), ensure RAM modules are properly seated, and verify the CPU is correctly installed. Try clearing the CMOS.
- ディスプレイ出力なし: Confirm the graphics card is fully seated in its PCIe slot and connected to power (if required). Ensure your monitor cable is connected to the graphics card, not the motherboard's integrated graphics ports (unless using an APU).
- 周辺機器の問題: If USB devices or other peripherals are not working, ensure drivers are installed and check BIOS settings for port enablement.
- システムの不安定性/クラッシュ: This can be caused by outdated drivers, overheating, or faulty hardware. Update drivers, monitor temperatures, and test components individually if possible.
- BIOS アップデート失敗: If a BIOS update fails, use the Q-Flash Plus feature to recover the BIOS.
7. 仕様
| 特徴 | 仕様 |
|---|---|
| ブランド | ギガバイト |
| モデル名 | B550M DS3H AC R2 |
| CPUソケット | ソケットAM4 |
| 互換性のあるプロセッサ | AMD Ryzen 3000 シリーズ、AMD Ryzen 4000 シリーズ、AMD Ryzen 5000 シリーズ |
| チップセットタイプ | B550 について |
| RAMメモリ技術 | DDR4 |
| メモリクロック速度 | 最大4733 MHz(OC) |
| 利用可能なメモリスロット | 4 |
| RAMメモリ最大サイズ | 128ギガバイト |
| グラフィックカードインターフェース | PCI エクスプレス 4.0 |
| Total PCIe Ports | 1 (PCIe 4.0 x16 for GPU) + other PCIe slots |
| M.2 スロット | 1x PCIe 4.0 M.2、1x PCIe 3.0 M.2 |
| SATAポート合計 | 4 |
| ワイヤレス接続 | Wi-Fi 5、Bluetooth 5.0 |
| 無線LAN | 1GbE LAN |
| USBポート合計 | 6 (背面I/O) + 内部ヘッダー |
| ディスプレイ出力 | HDMI x 1、ディスプレイポート x 1 |
| フォームファクター | マイクロATX |
| 商品の寸法(長さ x 幅 x 高さ) | 24.4L x 24.4W x 3.5H センチメートル |
| アイテム重量 | 980グラム |
8. 保証情報
The GIGABYTE B550M DS3H AC R2 motherboard comes with a 3-YEAR Manufacturer Warranty保証請求のために購入証明書を保管してください。詳細な条件については、GIGABYTEの公式保証ポリシーをご覧ください。 webサイト。
9. サポートとお問い合わせ
For technical support, driver downloads, BIOS updates, and further product information, please visit the official GIGABYTE website. You can also contact GIGABYTE customer service for assistance.
メーカー連絡先情報:
GIGABYTE Technology (India) Pvt. Ltd.
Unit No. 807 & 808, 8th Floor, Naman Midtown B-Wing,
Elphinstone Road, Mumbai – 400013, India
For the most up-to-date contact details and support resources, please refer to the GIGABYTE official webサイト: ギガバイト