
1. はじめに
This manual provides essential instructions for the setup, operation, and maintenance of your GOCHIFIX 10.1-inch 3-Lens Digital Microscope (Model GM-0301). This advanced digital microscope is designed for detailed observation across various applications, from coin inspection to biological slide analysis and electronic soldering. It features a high-resolution IPS display, multiple magnification lenses, adjustable LED lighting, and versatile connectivity options.
2. パッケージ内容
以下にリストされているすべてのアイテムがパッケージに含まれていることを確認してください。
- GOCHIFIX 10.1in Digital Microscope x1
- ベース x1
- スタンドx1
- Lighting Platform x1
- Thumb Screws x2
- リモコンx1
- タイプCケーブルx2
- HDMIケーブルx1
- 64GB TFカード×1
- ユーザーマニュアル x1
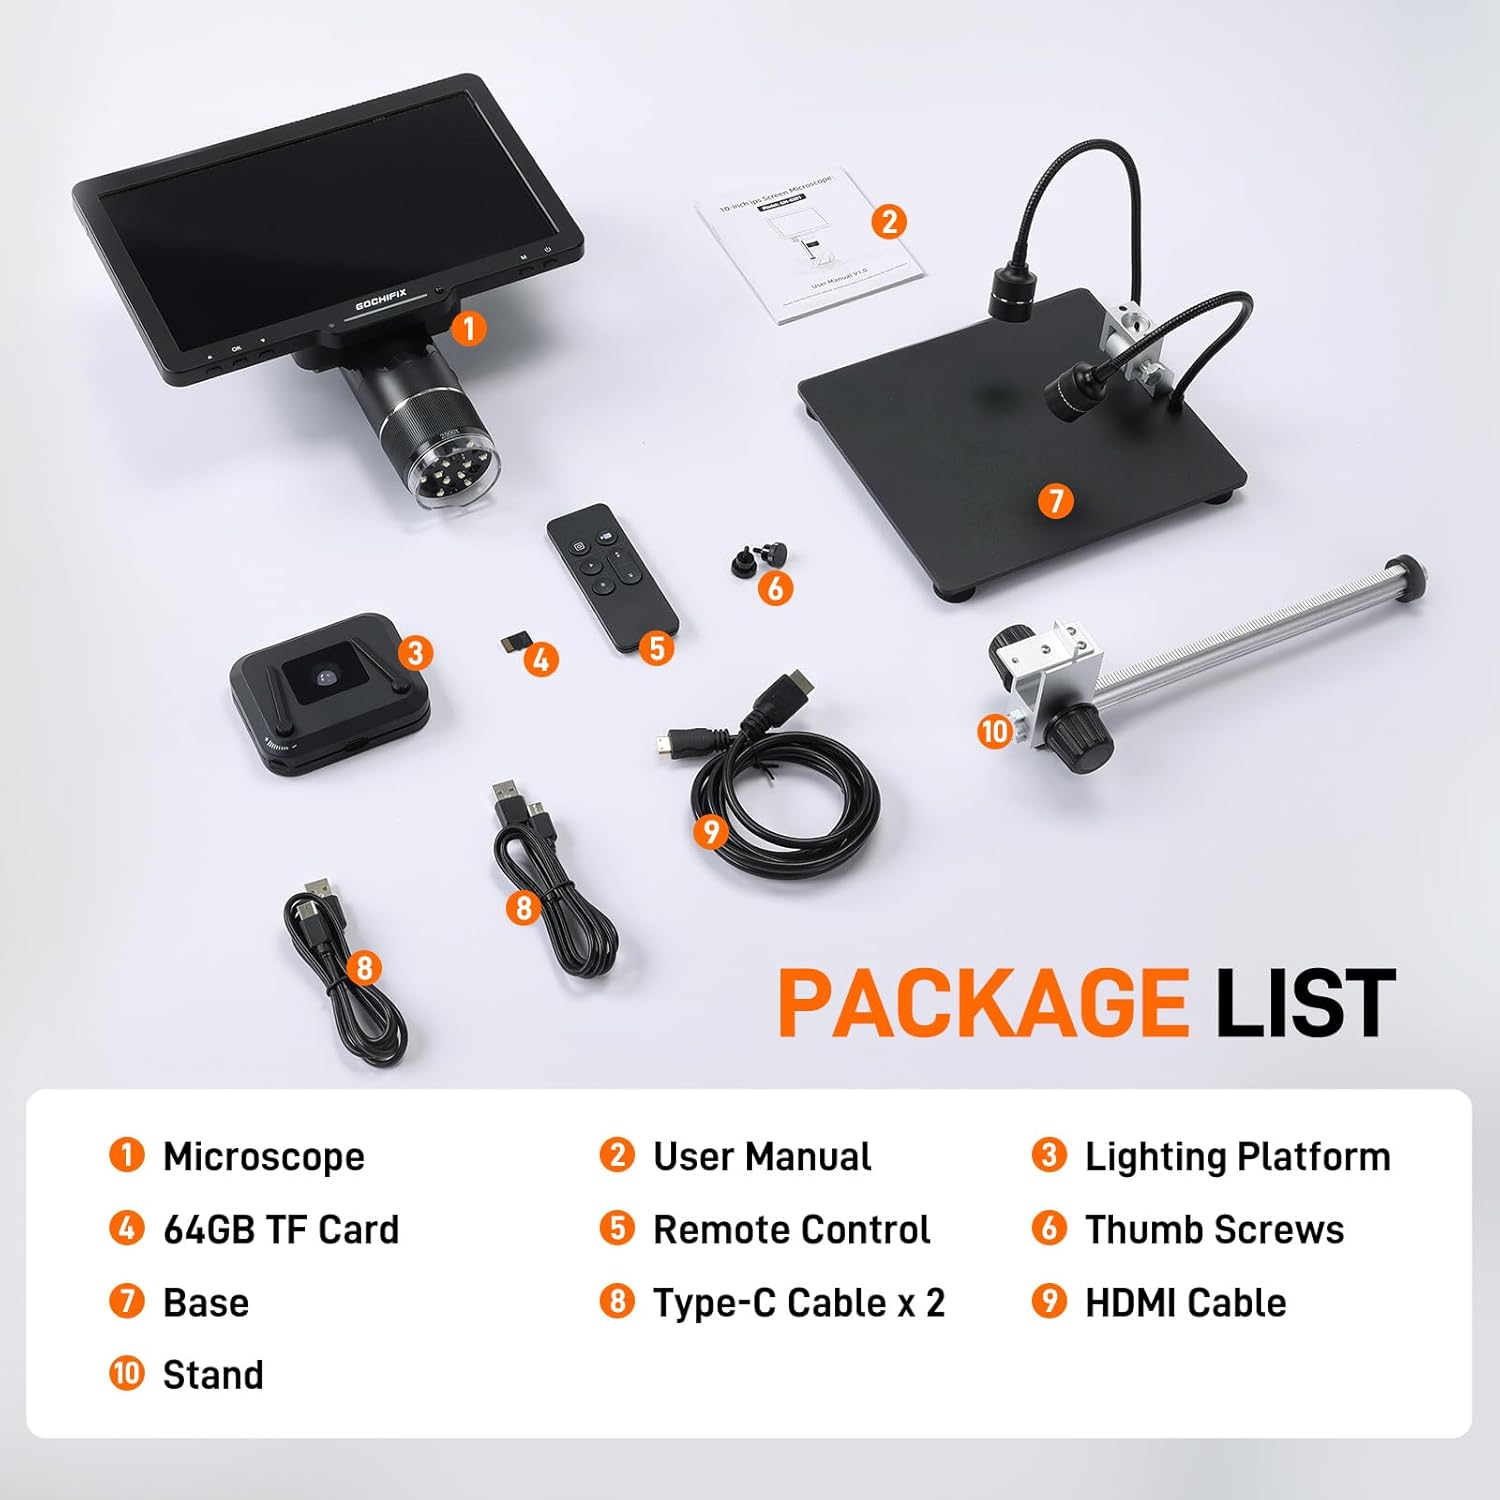
図 2.1: パッケージに含まれるすべてのコンポーネント。
3. セットアップ手順
デジタル顕微鏡を組み立てるには、次の手順に従ってください。
- スタンドを組み立てる: Attach the stand to the base using the provided thumb screws. Ensure it is securely fastened.
- 顕微鏡ユニットを取り付けます。 Carefully attach the digital microscope unit to the stand. Use the adjustment knobs to set the desired height and angle.
- 照明を接続する: Attach the two flexible gooseneck side lights to the stand. Position them to provide optimal illumination for your viewing area. The lighting platform can be placed on the base for bottom illumination.
- 電源接続: Connect one of the Type-C cables to the microscope unit and to a suitable power source (e.g., USB wall adapter, computer USB port). The microscope contains a built-in Lithium Ion battery.
- TFカードを挿入します: Locate the TF card slot on the microscope unit and insert the provided 64GB TF card. This is essential for saving photos and videos.
- Optional: HDMI/USB Connection: If connecting to an external display, use the HDMI cable for TV/monitor or a Type-C cable for PC/laptop.
4. 操作手順
4.1.電源のオン/オフ
Press and hold the 'POWER' button on the microscope unit or the remote control to turn the device on or off. The 10.1-inch IPS display will activate, showing the live view.

Figure 4.1: The 10.1-inch IPS Display provides a wide viewing angle and vivid colors.
4.2. Lens Selection and Magnification
The microscope comes with three interchangeable lenses, each designed for specific magnification ranges:
- 1000倍レンズ(2倍-1000倍): コインの観察に最適amps, and gemstones. Working distance: 50-210mm.
- 1500倍レンズ(10倍-1500倍): Suitable for precise PCB soldering and watch repair. Working distance: 40-170mm.
- 2500倍レンズ(2000倍-2500倍): Designed for detailed observation of biological slides. Working distance: 3-5mm.
To switch lenses, simply rotate the lens barrel on the microscope unit. Adjust the focus by twisting the focus knob on the microscope unit until the image on the screen is clear.
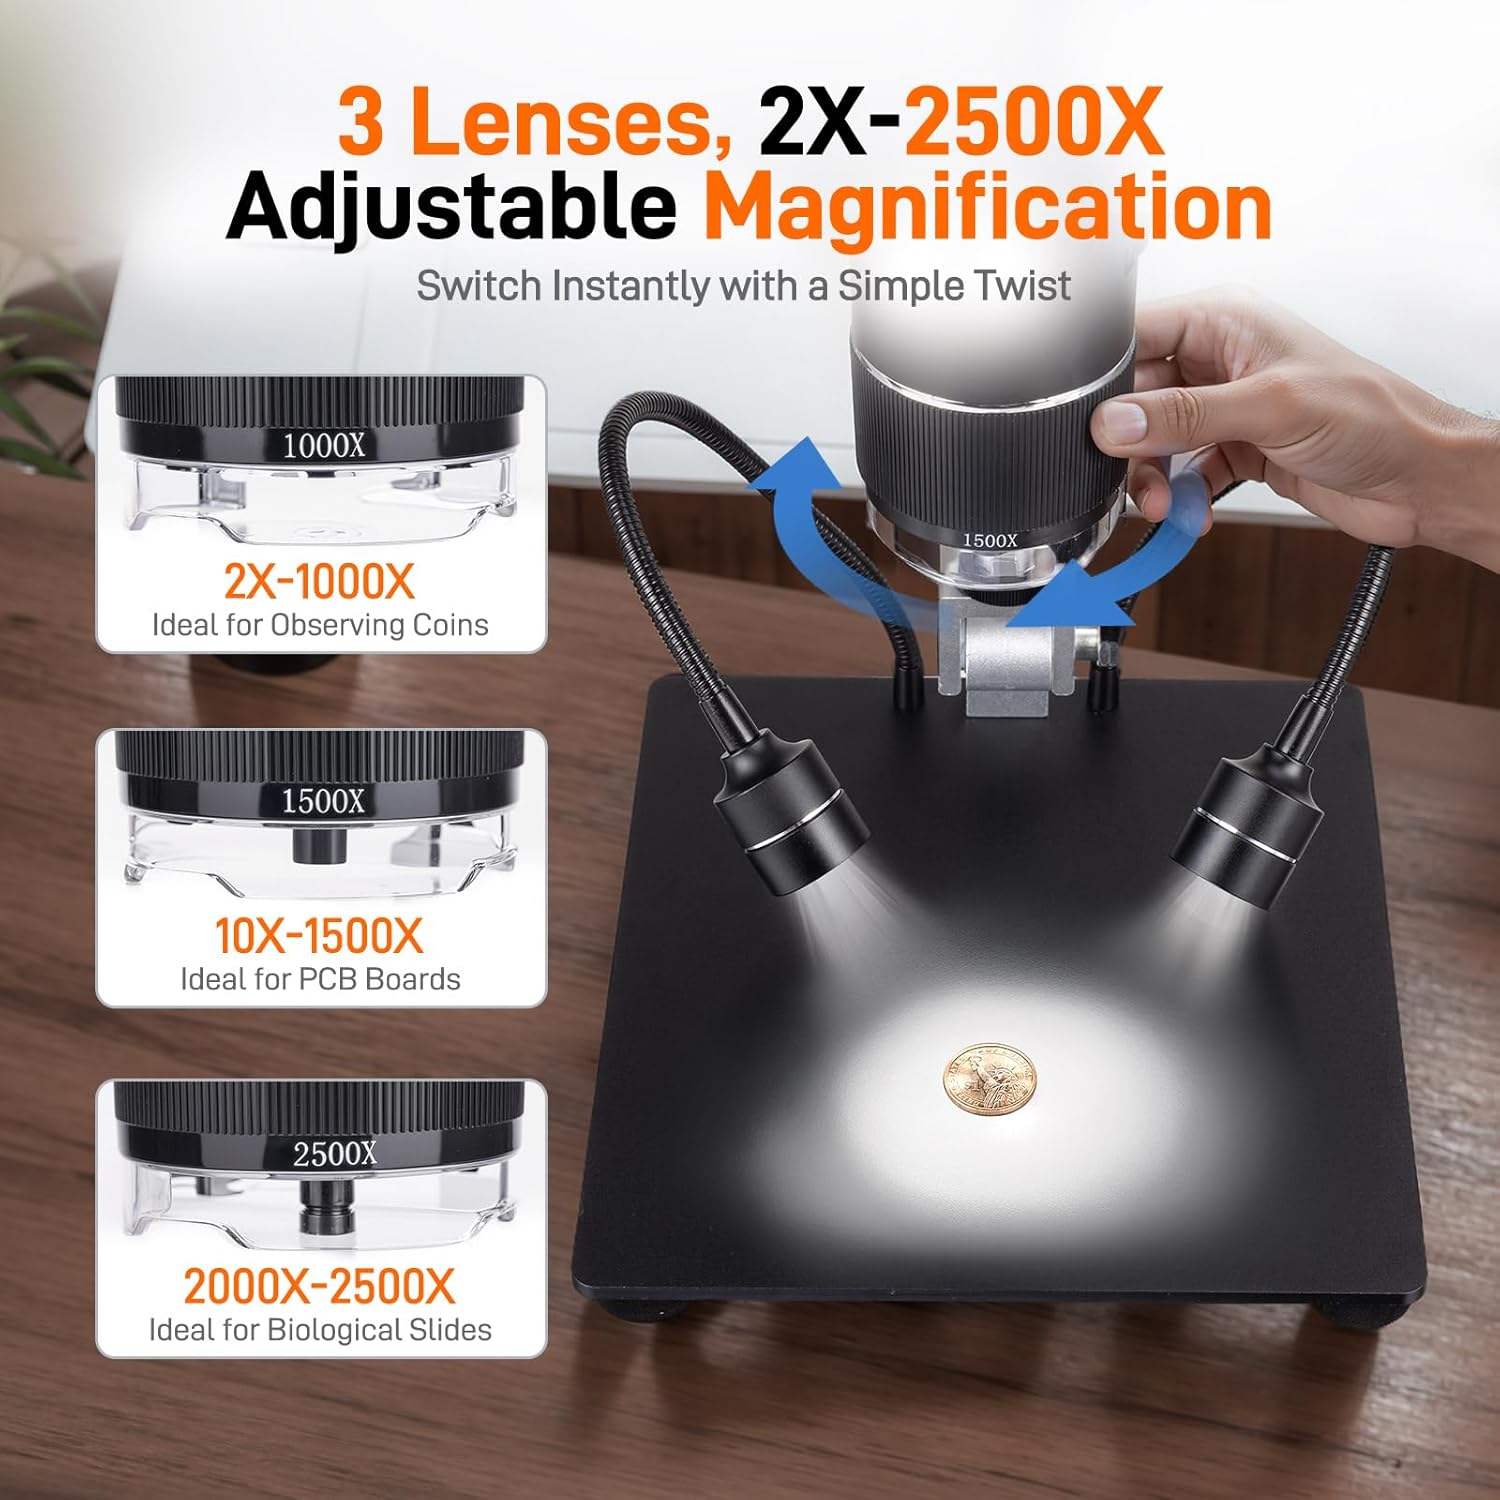
Figure 4.2: Easily switch between 3 lenses for various magnification needs.
4.3. Adjustable Lighting
The microscope is equipped with multiple lighting options to ensure optimal visibility:
- 12個の内蔵LEDメインライト: 明るさは10%から100%まで調整可能です。
- 2 Flexible Gooseneck Side Lights: Independently adjustable to illuminate objects from different angles.
- ボトムスライドライト: Provides illumination from below, useful for transparent specimens.
Each light source can be independently adjusted using the controls on the microscope unit or the remote control. This allows for precise illumination, even in low-light environments.
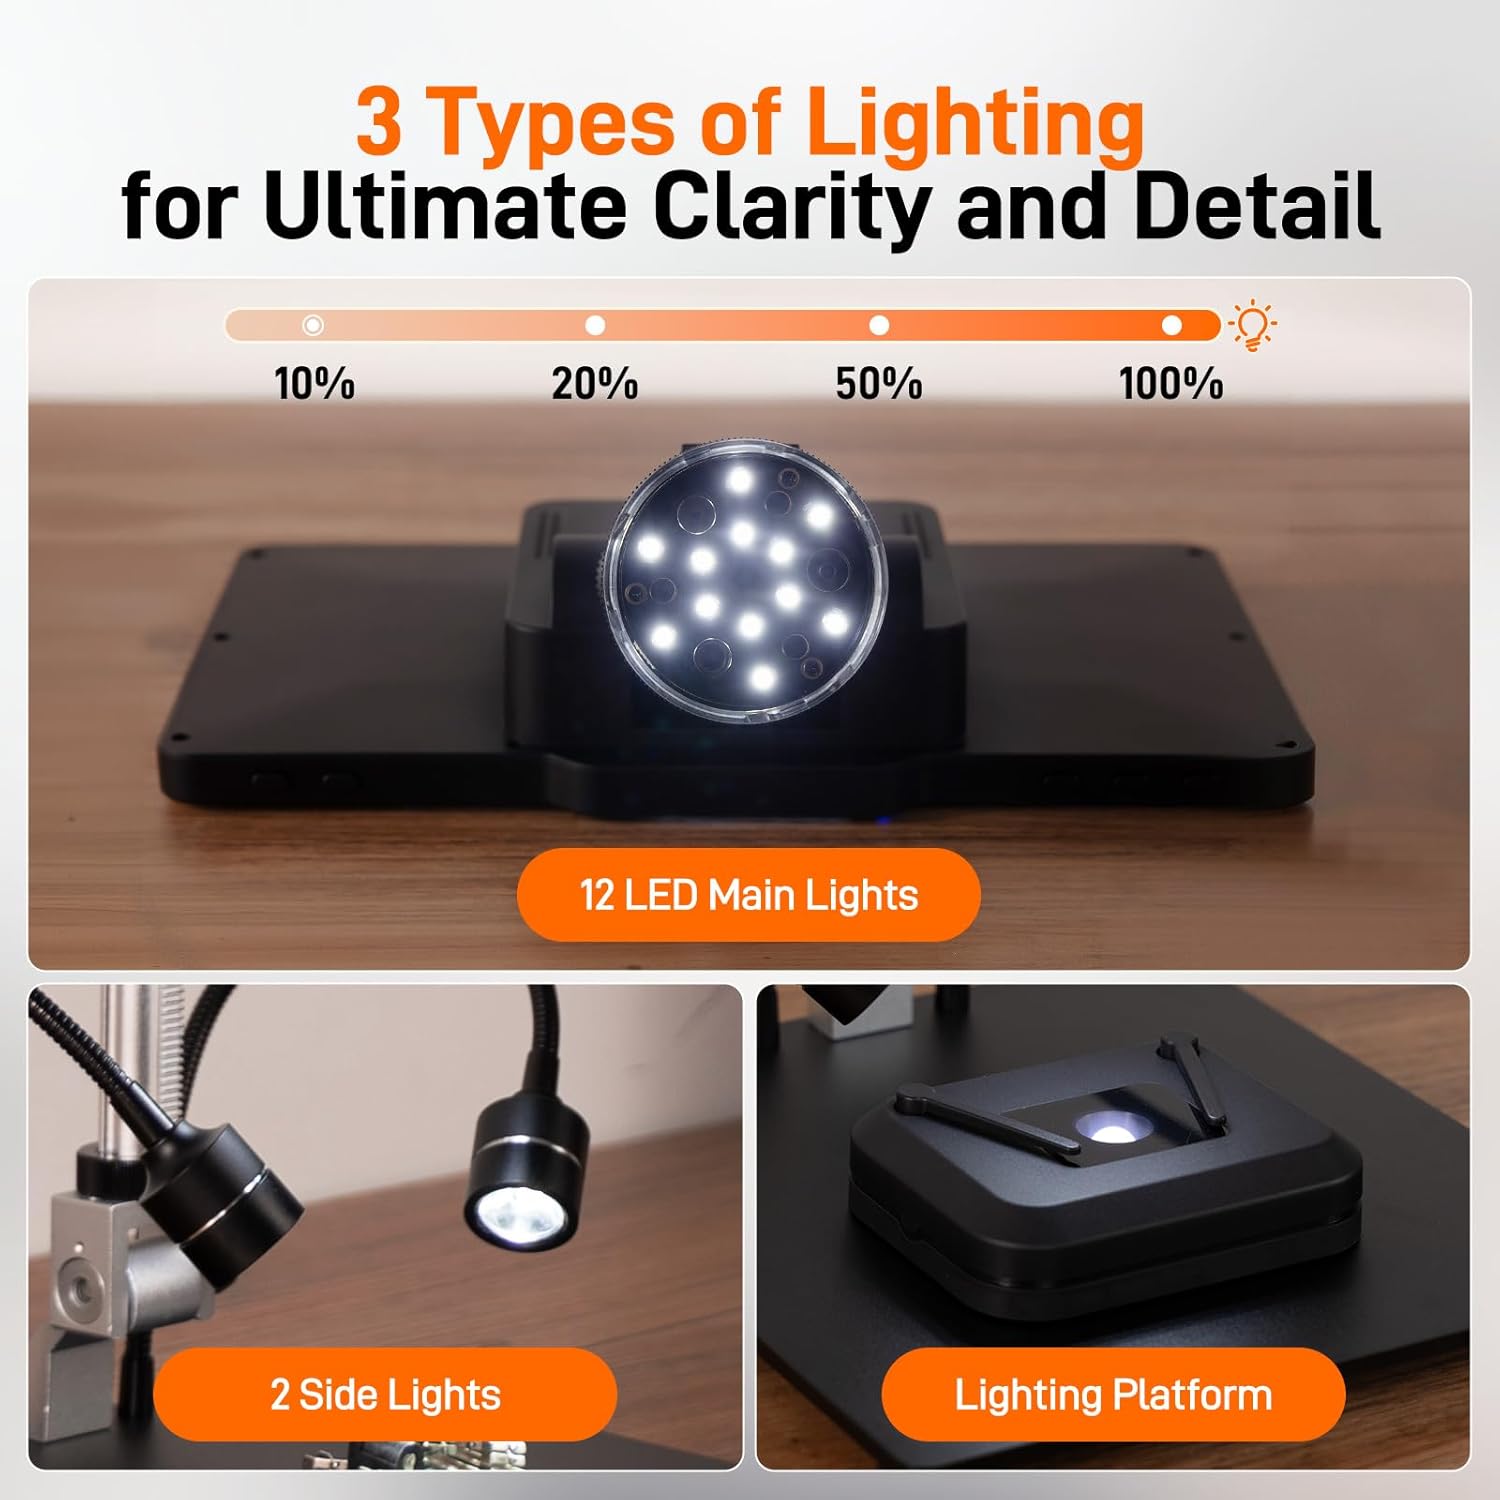
Figure 4.3: Utilize three types of lighting for ultimate clarity and detail.
4.4. ワイヤレスリモコンの使用
The included wireless remote control provides convenient operation without disturbing the microscope setup. Use it to:
- ズームインおよびズームアウトします。
- Capture photos (24MP resolution).
- Record videos (2K resolution).
- メニューを移動して設定を調整します。
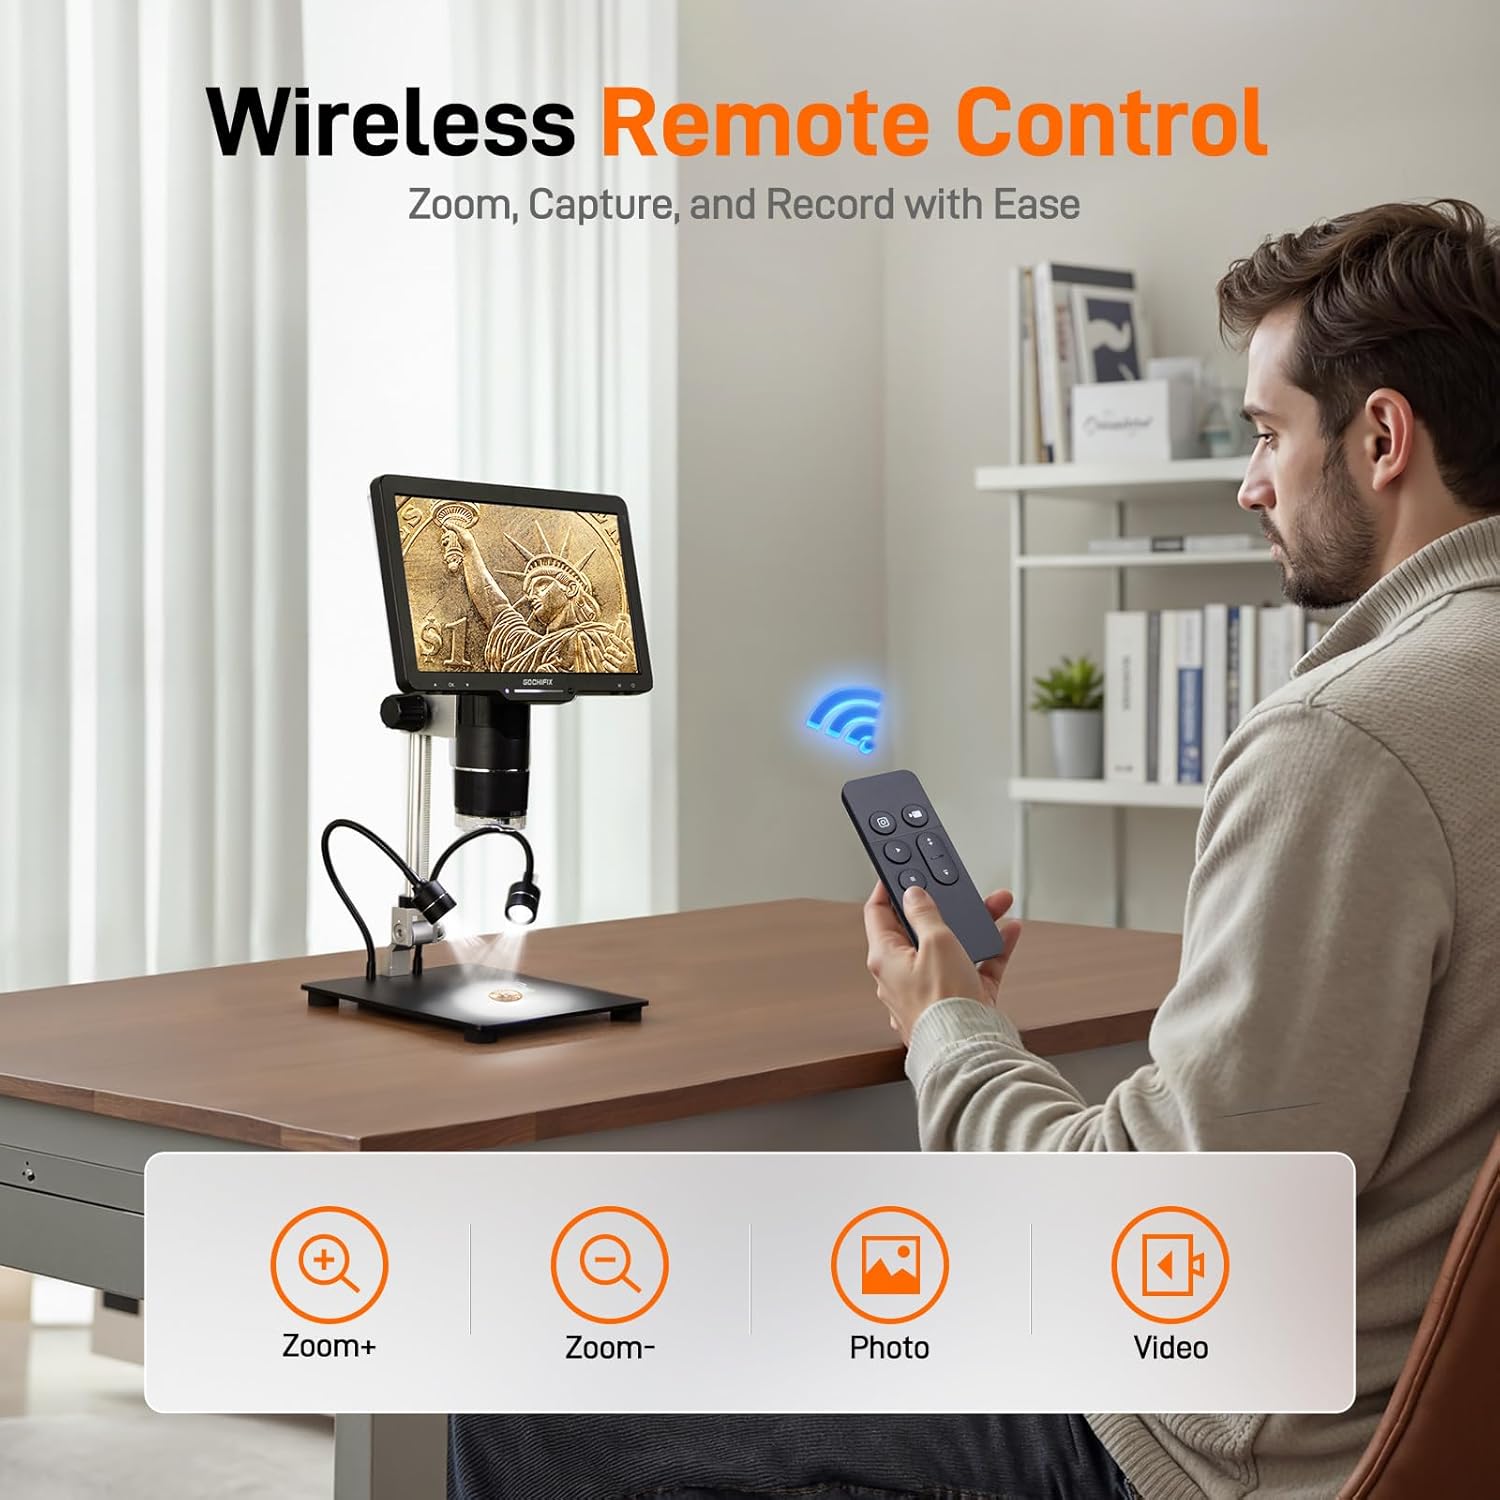
Figure 4.4: Effortless control with the wireless remote for zooming, capturing, and recording.
4.5. 写真とビデオの録画
With the 64GB TF card installed, you can easily save high-resolution photos and 2K videos directly from the microscope. Use the dedicated buttons on the remote or the microscope unit to switch between photo and video modes and to initiate recording.
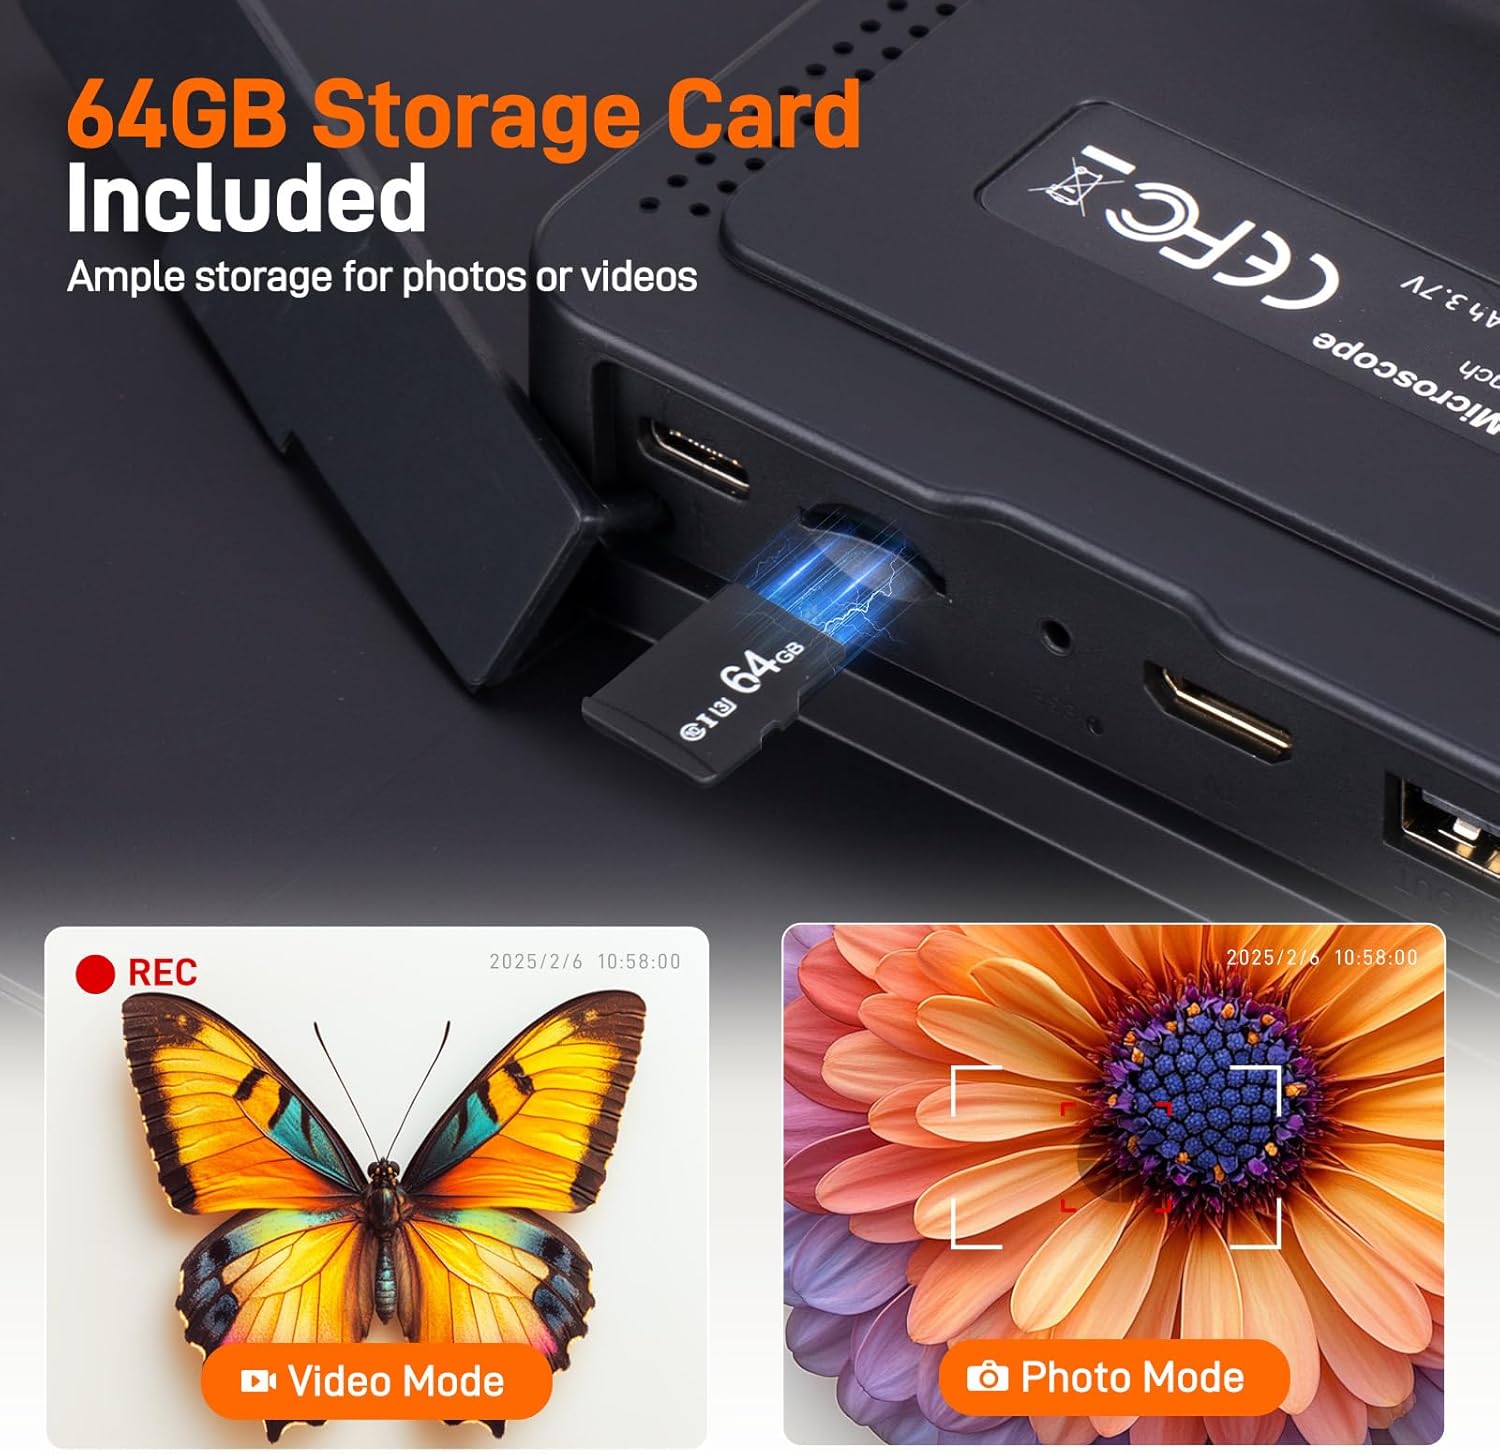
Figure 4.5: The included 64GB storage card allows ample space for high-resolution media.
5. External Connectivity (HDMI & USB Output)
The GOCHIFIX Digital Microscope supports real-time output to external displays for a larger and clearer viewing experience. It is compatible with Windows and Mac OS.
- HDMI出力: Connect the microscope to a TV or monitor using the provided HDMI cable. The microscope's display will mirror on the external screen.
- USB出力: Connect the microscope to a PC or laptop via a Type-C cable. You may need to install specific software (refer to the included User Manual for software details) to view and control the microscope from your computer.
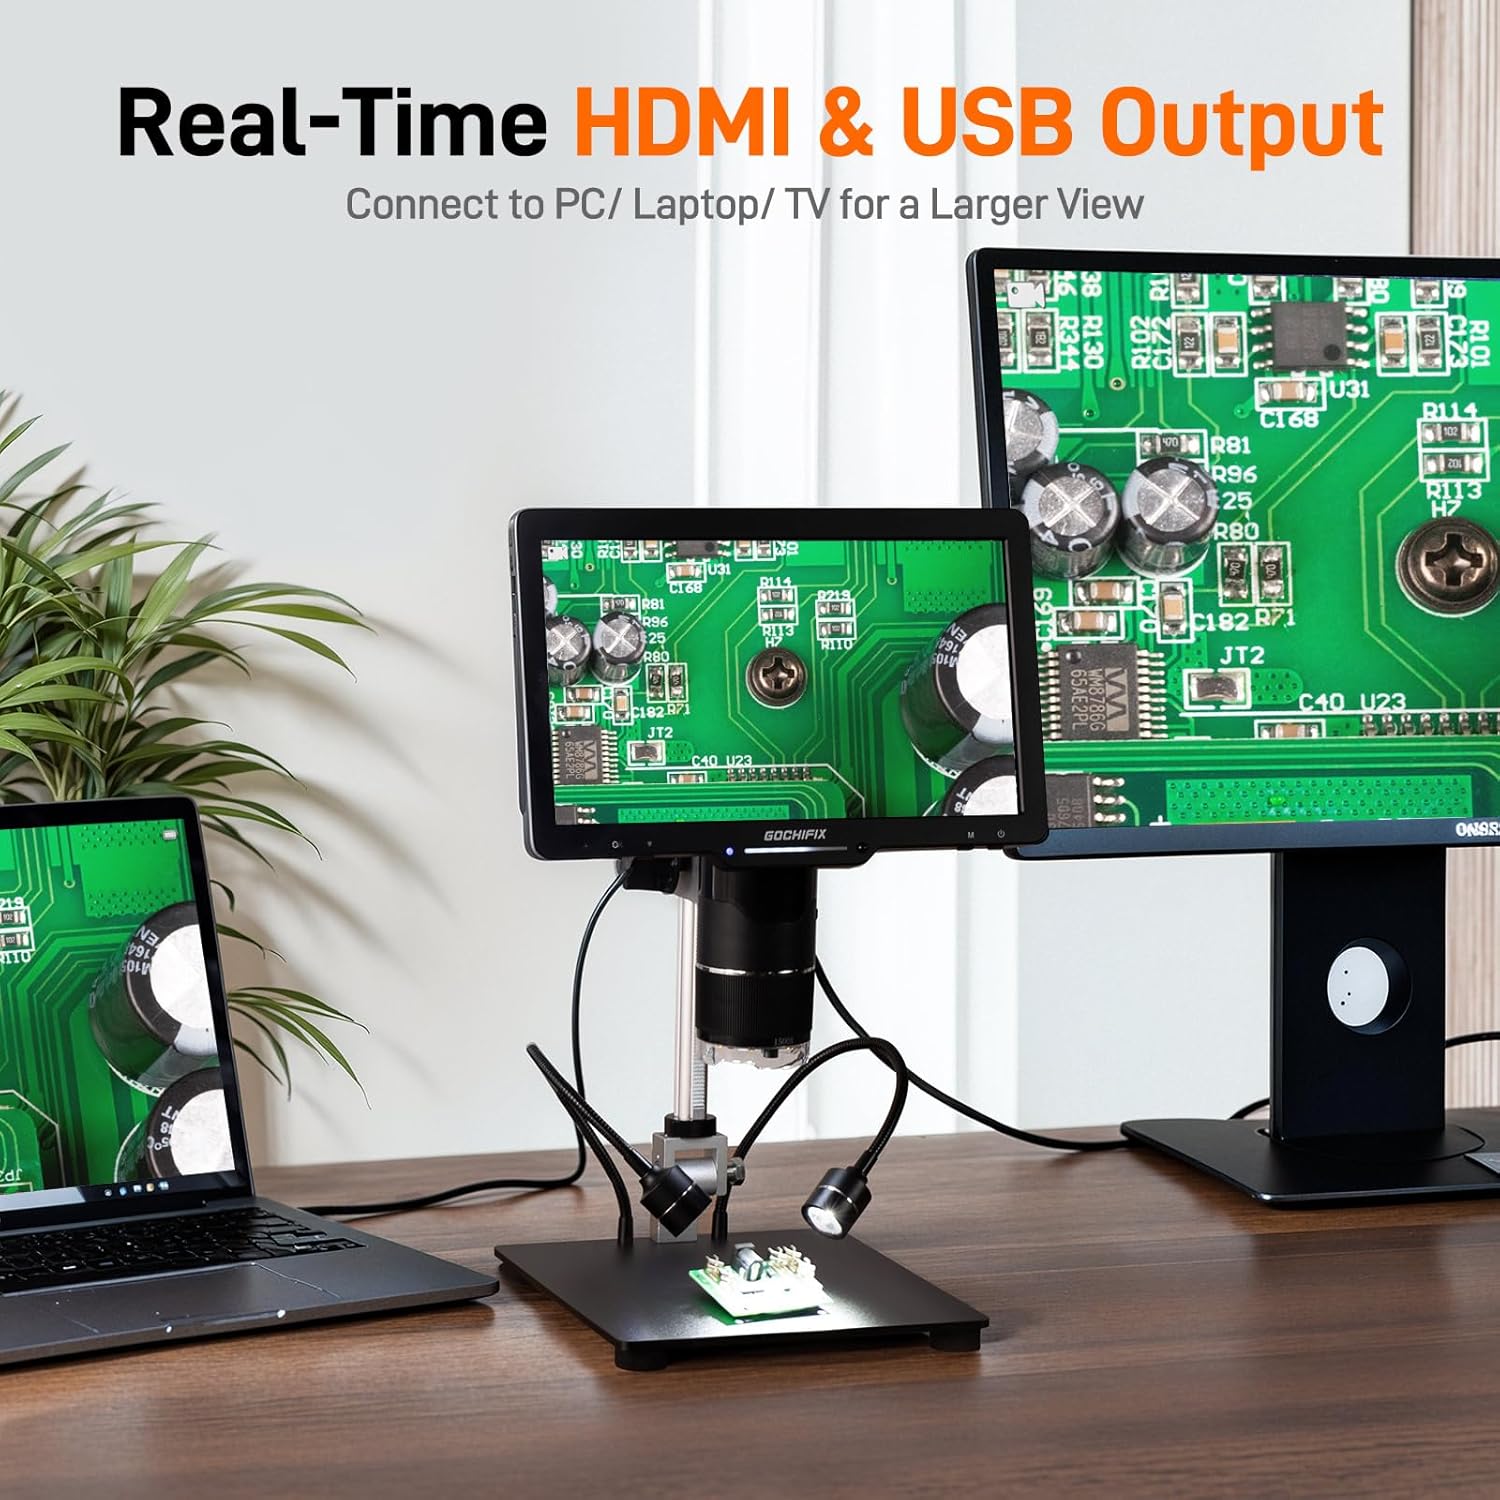
Figure 5.1: Seamlessly connect to PC, laptop, or TV for an enhanced viewing の経験。
6. メンテナンス
- クリーニング: Use a soft, dry cloth to clean the microscope body. For lenses, use a specialized lens cleaning cloth and solution to avoid scratches.
- ストレージ: 顕微鏡を使用しないときは、乾燥したほこりのない環境に保管してください。
- バッテリーのケア: The device includes a Lithium Ion battery. For optimal battery life, avoid fully discharging the battery frequently and store it with a partial charge if not used for extended periods.
7。 トラブルシューティング
- 電源なし: Ensure the Type-C cable is securely connected to both the microscope and a working power source. Check if the battery is charged.
- ぼやけた画像: Adjust the focus knob on the microscope unit. Ensure the correct lens is selected for the working distance of your specimen. Clean the lens if necessary.
- 外部ディスプレイに画像が表示されない: Verify that the HDMI or USB cable is correctly connected. For USB, ensure the correct software/drivers are installed on your computer.
- リモコンが応答しない: リモコンの電池を確認してください。リモコンと顕微鏡の間に障害物がないことを確認してください。
For further assistance, please refer to the detailed User Manual included in your package or contact GOCHIFIX customer support.
8. 仕様
| 特徴 | 詳細 |
|---|---|
| モデル番号 | GM-0301 |
| 表示サイズ | 10.1インチIPS |
| 写真解像度 | 24MP |
| ビデオ解像度 | 2K |
| 倍率(最大) | 2500倍 |
| レンズ付属 | 1000倍、1500倍、2500倍 |
| 点灯 | 12 Built-in LED Main Lights, 2 Flexible Gooseneck Side Lights, Bottom Slide Light |
| ストレージ | 64GB TFカード(付属) |
| 出力ポート | HDMI、USB |
| 互換性 | Windows、Mac OS X |
| 電源 | 電池式(リチウムイオン電池1個付属) |
| アイテム重量 | 4.81ポンド |
| パッケージ寸法 | 12.13 x 11.5 x 4.25インチ |
9. 保証とサポート
This product is subject to a 30-day return policy. For specific warranty details and technical support, please refer to the official GOCHIFIX website or contact their customer service directly. Contact information can typically be found in the included User Manual or on the product packaging.