
1.製品オーバーview
The Miofive S1 E Dash Cam is a high-performance 4K Ultra HD car camera designed to capture crystal-clear footage of your journeys. It features a 143-degree wide-angle lens, built-in GPS for precise route and speed recording, and Wi-Fi connectivity for easy access via the Miofive app. Advanced features include WDR Night Vision, 24-hour parking monitoring (requires separate hardwire kit), G-sensor for collision detection, and seamless loop recording.
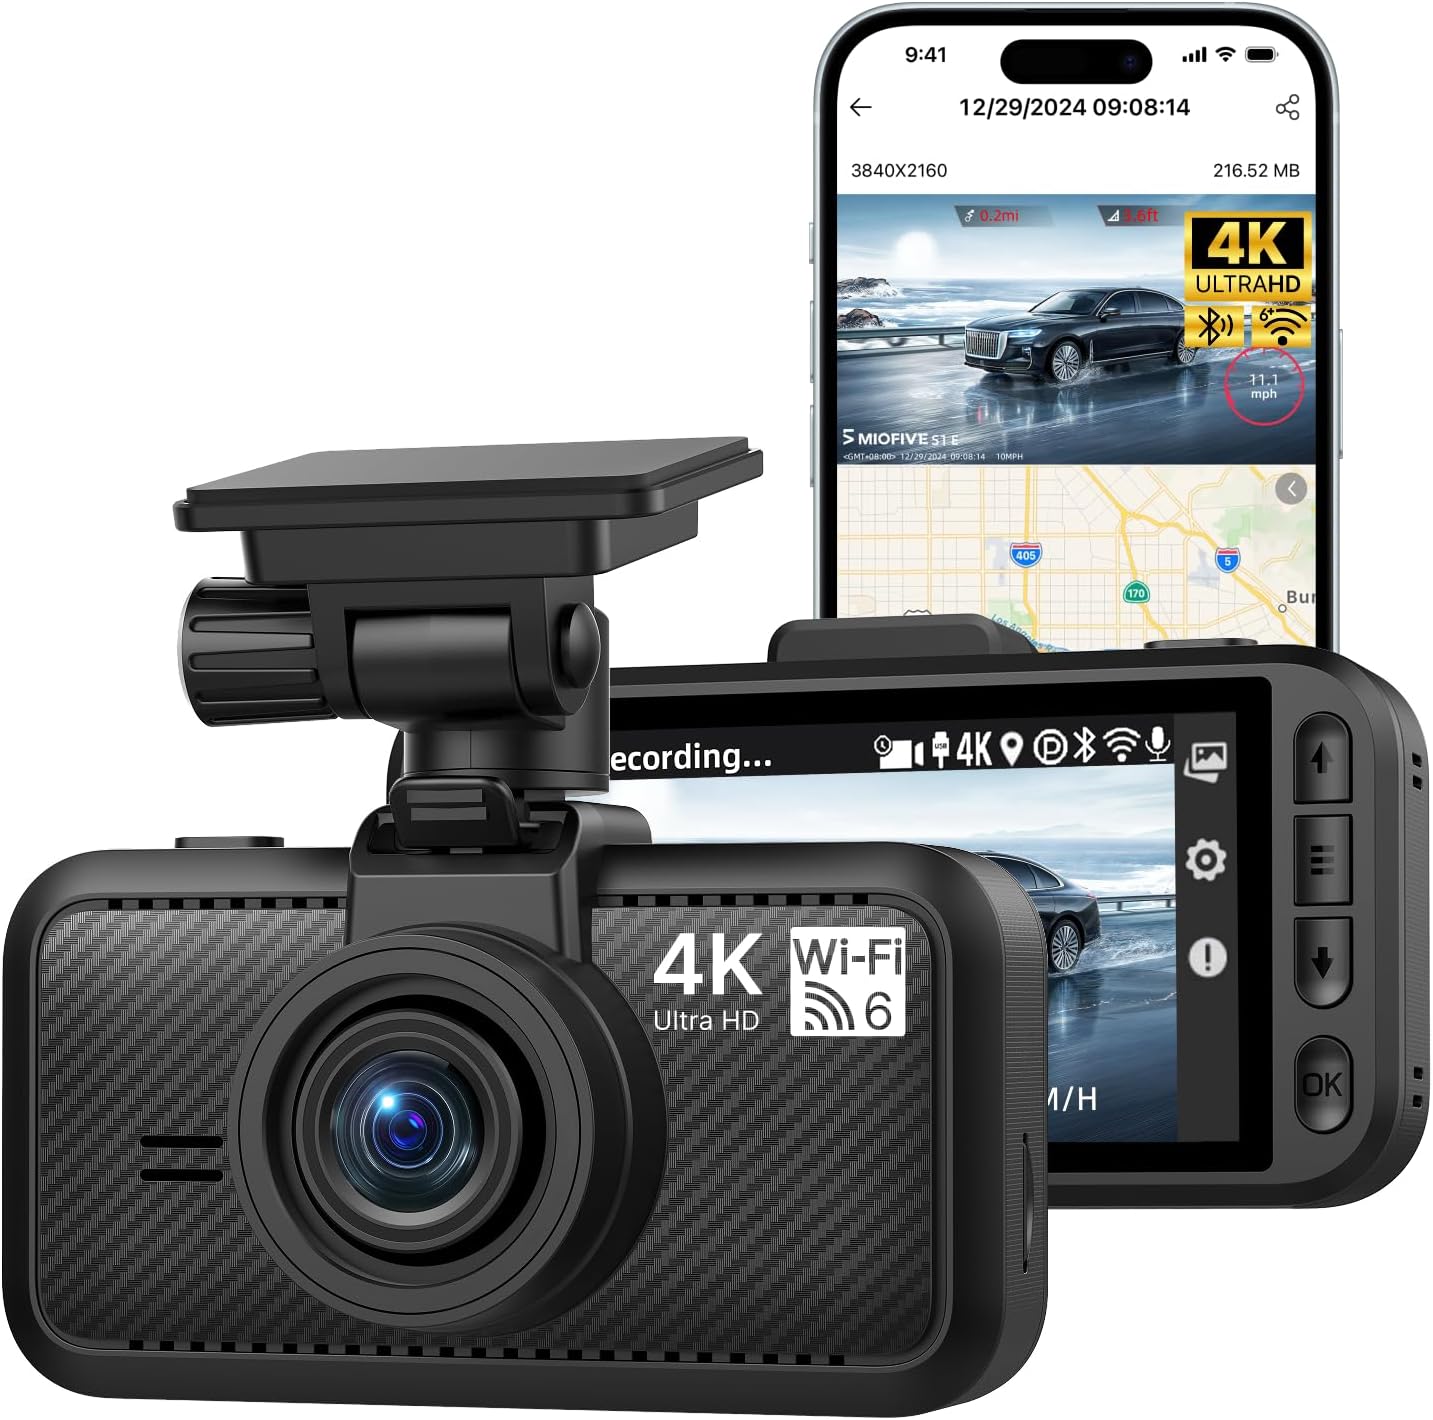
Image 1.1: Miofive S1 E Dash Cam and companion app interface.
2. 箱の中身
パッケージにすべてのコンポーネントが含まれていることを確認します。
- S1 E Dash Cam x 1
- カーチャージャー×1
- 充電ケーブル×1
- ケーブルこじ開けツール x 1
- データケーブル×1
- 静電フィルム×2
- 接着剤×1
- ユーザーマニュアル x 1

Image 2.1: All included components of the Miofive S1 E Dash Cam package.
3.セットアップガイド
3.1 ダッシュカムの取り付け
- 取り付け場所を選択してください: フロントガラス上の視界を妨げない位置を選択してください view of the road. The area behind the rearview 多くの場合、ミラーが理想的です。
- フロントガラスを掃除する: Ensure the chosen area on the windshield is clean and dry before applying the electrostatic film and adhesive.
- 静電フィルムを貼る: Adhere one of the provided electrostatic films to the cleaned windshield area. This helps in easy removal and prevents adhesive residue.
- 粘着マウントを取り付ける: Apply the adhesive mount to the electrostatic film. Press firmly for 30 seconds to ensure a secure bond.
- ダッシュカムを取り付ける: Slide the dash cam onto the mounted bracket until it clicks into place. Adjust the camera angle to ensure a clear view これからの道の。
3.2電源接続
- カーチャージャーを接続する: 車の充電器を車の 12V 電源コンセント (シガーライター ソケット) に挿入します。
- 充電ケーブルを接続します: Connect the charging cable from the car charger to the USB Type-C port on the dash cam.
- ケーブルを配線する: Use the provided cable prying tool to neatly tuck the charging cable along the edges of your windshield and dashboard to minimize obstruction.
3.3 Inserting and Formatting the Micro SD Card
The Miofive S1 E supports up to a 512GB Class 10 - U3 speed micro SD card (not included). A high-quality, reliable micro SD card is crucial for optimal performance.
- SDカードを挿入します: With the dash cam powered off, carefully insert the micro SD card into the designated slot until it clicks into place.
- SDカードのフォーマット: It is essential to format the micro SD card before first use and periodically thereafter to ensure stable recording and prevent data corruption. This can typically be done through the dash cam's settings menu or via the Miofive app.

Image 3.1: Micro SD card insertion and compatibility information.
3.4 App Connection (Wi-Fi & GPS)
The Miofive S1 E features built-in Wi-Fi and GPS for enhanced functionality and easy management via the Miofive app.
- Download the Miofive App: 検索する "Miofive" in your smartphone's app store (iOS or Android) and download the official application.
- ダッシュカムでWi-Fiを有効にする: Power on the dash cam. Navigate to the Wi-Fi settings on the dash cam's screen and enable Wi-Fi.
- アプリ経由で接続: Open the Miofive app on your smartphone. Follow the in-app instructions to connect to the dash cam's Wi-Fi network. The default Wi-Fi name and password can be found on the dash cam's screen or in the included user manual.
- アクセス機能: 接続すると、次のことができます view ライブfootage, configure settings, download recorded videos, and track GPS data directly from your smartphone.

Image 3.2: Wi-Fi 6 connectivity for high-speed data transfer to the Miofive app.
4. 操作手順
4.1 基本操作
- 自動録音: ダッシュ カメラは、車両の電源に接続され、エンジンが始動すると自動的に電源が入り、録画を開始します。
- 手動録音: Press the designated button on the dash cam to manually start or stop recording.
- 再生: Use the dash cam's screen or the Miofive app to review 録画されたビデオ。
4.2 主な特徴
4.2.1 4KウルトラHD解像度
The S1 E records in 4K (3840x2160P) Ultra HD, providing highly detailed and clear video footage. This resolution allows for better recognition of license plates and road signs.

Image 4.1: Visual representation of 4K resolution clarity.
4.2.2 スーパーナイトビジョン
Equipped with a large F/1.8 aperture and a 7-glass lens, the dash cam enhances light intake, ensuring clear video recording even in low-light conditions and at night.

Image 4.2: Super Night Vision technology details.
4.2.3 内蔵GPS
The integrated GPS module precisely records your driving route, speed, and location data. This information is embedded in the video fileできる viewed on the dash cam's screen or through the Miofive app, providing crucial evidence in case of incidents.

Image 4.3: GPS Route Tracking functionality.
4.2.4 24時間駐車監視
When properly installed with the optional Miofive hardwire kit (ASIN: B0CRHJQ3WQ, sold separately), the dash cam can provide continuous 24-hour parking monitoring. This feature records events when your vehicle is parked, protecting against potential incidents.

Image 4.4: 24-Hour Parking Monitor feature.
4.2.5 Gセンサー(緊急録画)
The built-in G-sensor detects sudden impacts or collisions. In the event of a detected incident, the dash cam automatically locks the current video segment, preventing it from being overwritten by loop recording. This ensures critical footageは証拠として保存されます。

Image 4.5: G-Sensor functionality for emergency recording.
4.2.6ループ記録
The loop recording feature ensures continuous recording by automatically overwriting the oldest unlocked video files when the micro SD card reaches its storage capacity. This eliminates the need for manual deletion of old footage.

Image 4.6: Seamless Loop Recording process.
4.2.7 Super Capacitors
The Miofive S1 E utilizes supercapacitors instead of traditional lithium batteries. This design provides superior temperature resistance (-4°F to 158°F / -20°C to 70°C) and extends the product's lifespan, ensuring reliable operation in various climates.

Image 4.7: Super Capacitor technology for enhanced durability.
5. メンテナンス
- 通常のSDカードのフォーマット: To maintain optimal recording performance and prevent data corruption, it is recommended to format the micro SD card once a month. Back up any important videos before formatting.
- レンズクリーニング: Gently clean the camera lens with a soft, lint-free cloth to ensure clear video quality. Avoid using abrasive materials or harsh chemicals.
- ファームウェアの更新: Periodically check for firmware updates via the Miofive app. Firmware updates can improve performance, add new features, and resolve bugs.
6。 トラブルシューティング
6.1 一般的な問題と解決策
| 問題 | 考えられる原因 | 解決 |
|---|---|---|
| ダッシュカムの電源が入りません。 | 電源が供給されません。ケーブル/充電器に障害があります。 | Check car charger connection and vehicle's 12V outlet. Ensure charging cable is securely connected. Test with another power source if possible. |
| 録音が停止するか、tage が破損しています。 | SD card issue (not Class 10 U3, full, corrupted, or fake). | Ensure you are using a Class 10 - U3 speed micro SD card (Miofive Ultimate Micro SD Cards recommended). Format the SD card. Replace the SD card if the issue persists. |
| 駐車監視が動作しません。 | Hardwire kit not installed or incorrectly installed. | The 24-hour parking monitor requires the Miofive hardwire kit (ASIN: B0CRHJQ3WQ), sold separately. Ensure it is correctly installed according to its instructions. |
| Wi-Fi接続の問題。 | Incorrect password; too far from dash cam; app issues. | Ensure correct Wi-Fi password. Stay within 3-5 meters of the dash cam. Restart the app and dash cam. |
| ビデオの品質が悪いです。 | レンズが汚れている、レンズに保護フィルムが貼られたまま、光が少ない。 | Clean the camera lens. Remove any protective film from the lens. Ensure WDR Night Vision is enabled in settings for low light. |
7. 仕様
| 特徴 | 詳細 |
|---|---|
| モデル名 | S1E(4K) |
| ビデオキャプチャ解像度 | 2160p(4K UHD) |
| 製品寸法 | 6 x 4 x 4インチ |
| アイテム重量 | 15.8オンス |
| 接続技術 | Bluetooth、Wi-Fi(Wi-Fi 6) |
| 特集 | Built-in Bluetooth Pairing, Wi-Fi, GPS, Supercapacitor, Microphone, Loop Recording, Parking Monitor, Night Vision, G-Sensor, Free Miofive App, Over-the-Air Firmware Updates, Up to 512GB External Storage Support (NOT INCLUDED) |
| 取り付けタイプ | フロントガラスマウント |
| 制御方法 | アプリ |
| 色 | 黒 |
| 電源 | スーパーキャパシタ |
8. 保証とサポート
Miofive offers an 18-month warranty for the S1 E Dash Cam. For any questions, suggestions, or technical assistance, please contact our dedicated customer support team.
- 保証期間: 18ヶ月
- テクニカルサポート: 24時間7日対応
- メールサポート: support@miofive.com
- Lifetime Technical Solution Support

Image 8.1: Miofive Warranty and Support information.