
1. はじめに
ご購入ありがとうございますasing the KOSUMOSU BL-330OR-2 Digital LED Alarm Clock. This manual provides essential information for the proper setup, operation, and maintenance of your device. Please read it thoroughly before use and retain it for future reference.
This digital clock features a clear 6.7-inch LED display, offering time, date, day of the week, and temperature readings. It includes dual alarm functions with snooze, and both automatic and manual brightness adjustment to suit various environments.

画像1.1:正面 view of the KOSUMOSU BL-330OR-2 Digital LED Alarm Clock.
2. セットアップ
2.1 パッケージ内容
- KOSUMOSU BL-330OR-2 Digital LED Alarm Clock
- USB電源ケーブル(1.5メートル)
- ユーザーマニュアル
注記: A 5V/1A AC adapter is required for operation and is not included in the package. Please use a compatible USB power adapter.
2.2電源接続
- Connect the provided USB cable to the USB port on the back of the alarm clock.
- Plug the other end of the USB cable into a 5V/1A AC adapter (not included) or a powered USB port.
- ディスプレイが点灯し、時計の電源がオンになっていることを示します。
The clock includes a button battery (CR2025) for time memory during power outages. This battery does not power the display or alarm functions; it only retains settings.
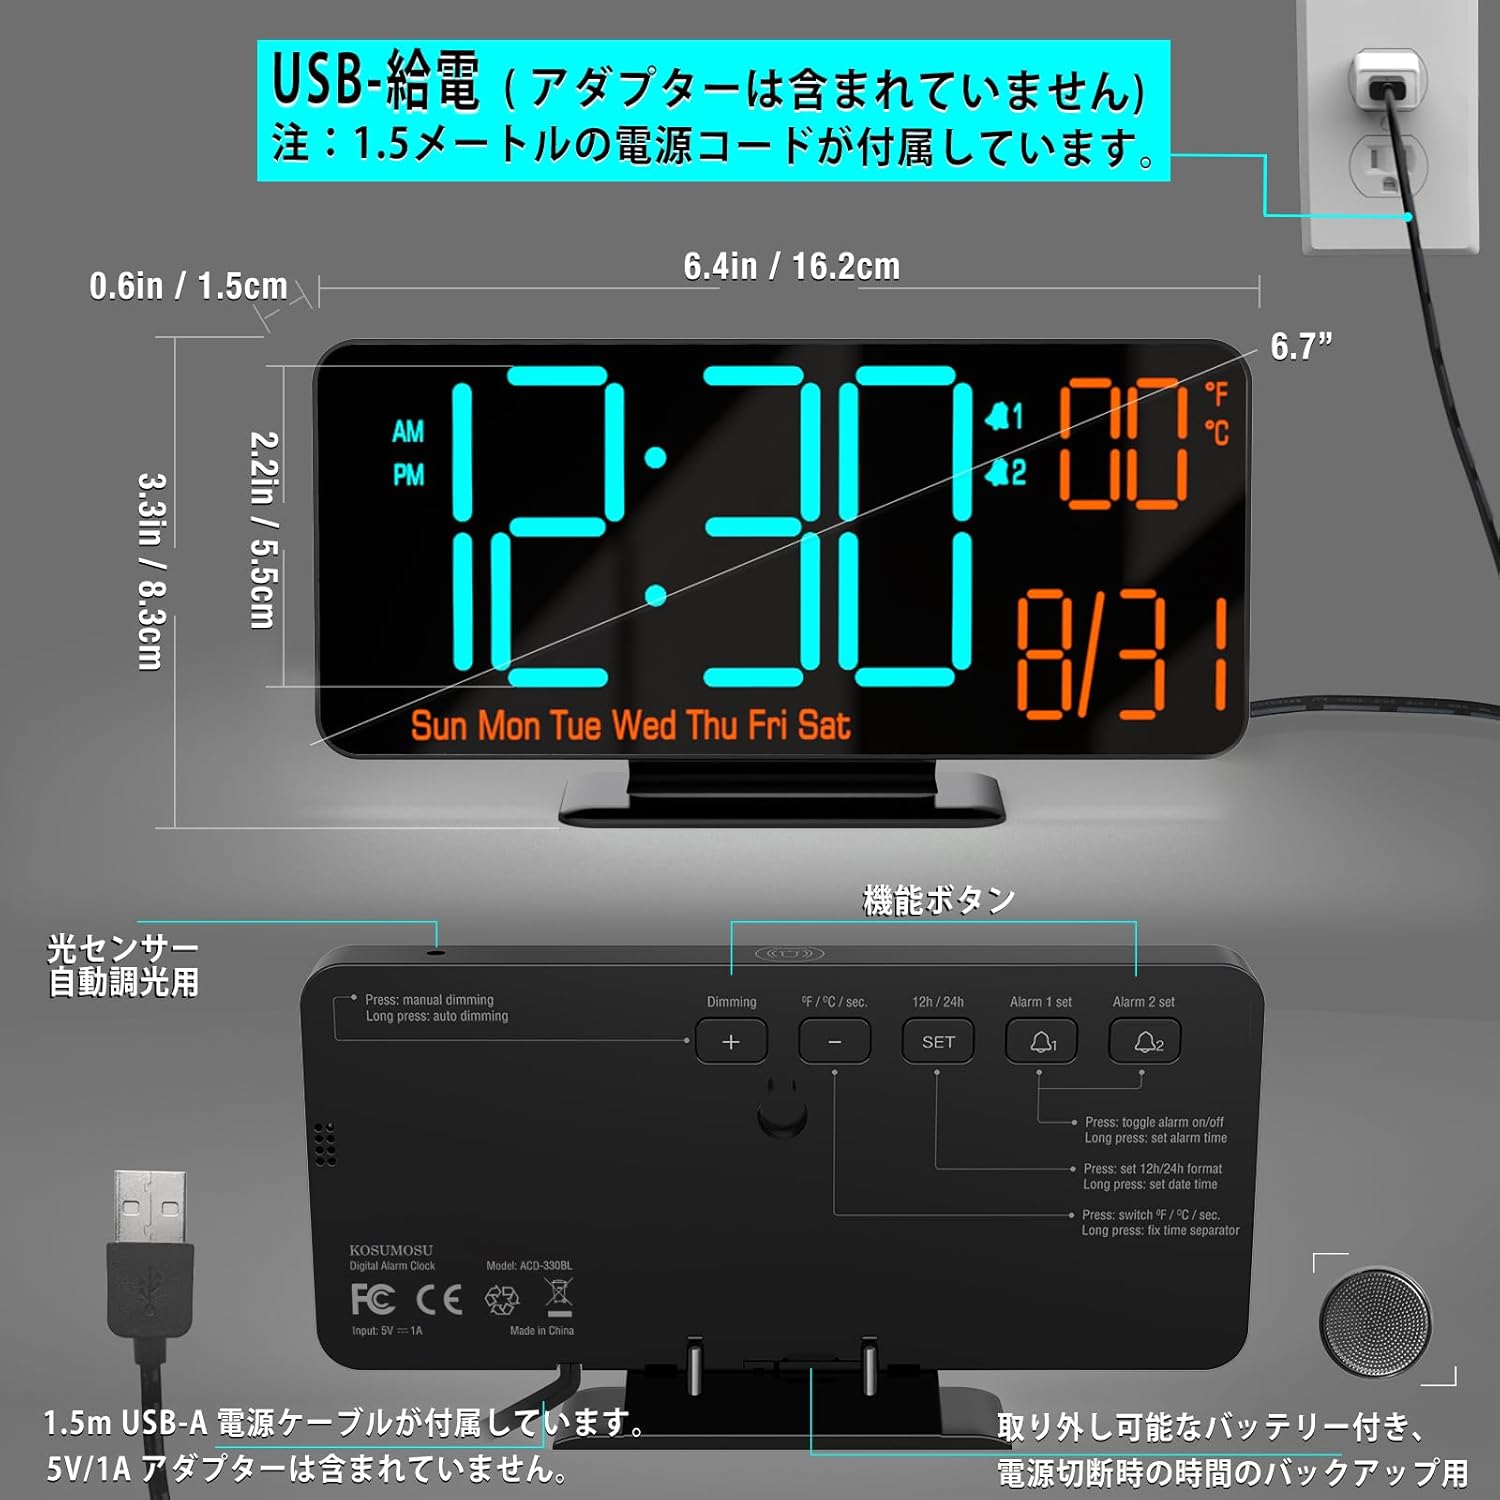
Image 2.1: Dimensions and USB power connection diagram.
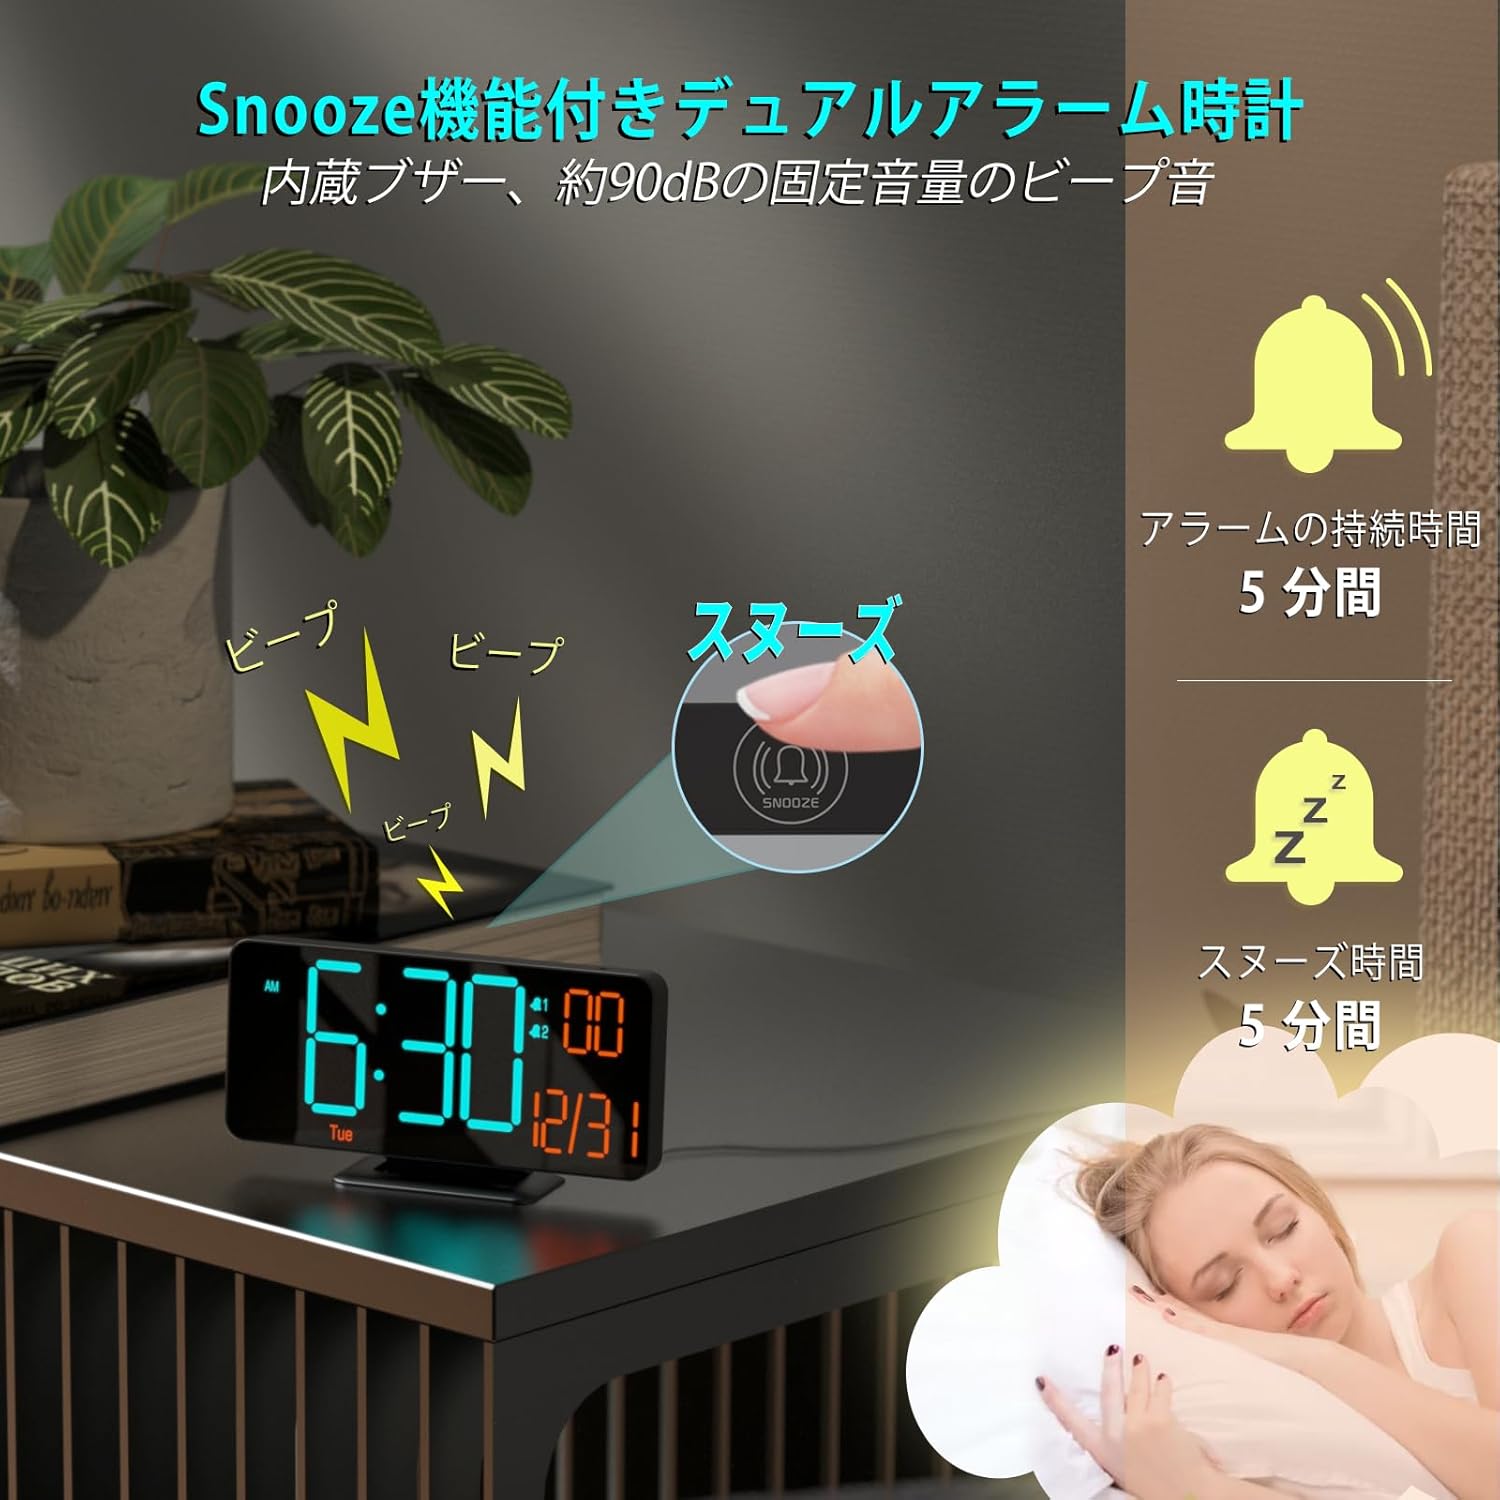
Image 2.2: Rear panel with function buttons and USB port.
2.3 初期設定(時刻、日付、温度単位)
Refer to the buttons on the back of the clock (SET, +, -, ALARM 1 SET, ALARM 2 SET).
- 時間設定: を押し続けます セット ボタンを押して時間設定モードに入ります。 + そして - ボタンで時間を調整し、 セット 確認して分数へ移動します。分数まで繰り返します。
- 12/24時間形式: 時間設定モード中に、 12時間/24時間 12 時間形式 (AM/PM インジケーター付き) と 24 時間形式を切り替えるボタン。
- 設定日: 時間を設定したら、 を押します。 セット again to enter date setting mode. Adjust year, month, and day using + そして -、押す セット to confirm each. The day of the week will update automatically.
- 温度単位: を押す °F/°C button to switch between Celsius and Fahrenheit display for temperature.
3. 操作
3.1 明るさ調整
時計には手動と自動の両方の調光機能が備わっています。
- 手動調光: を押す DIMMING button to cycle through three brightness levels (Low, Medium, High) or turn the LED display off.
- 自動調光: The clock has a built-in light sensor. To activate automatic dimming, ensure manual dimming is not set to 'Off'. The clock will automatically adjust its brightness based on ambient light conditions.
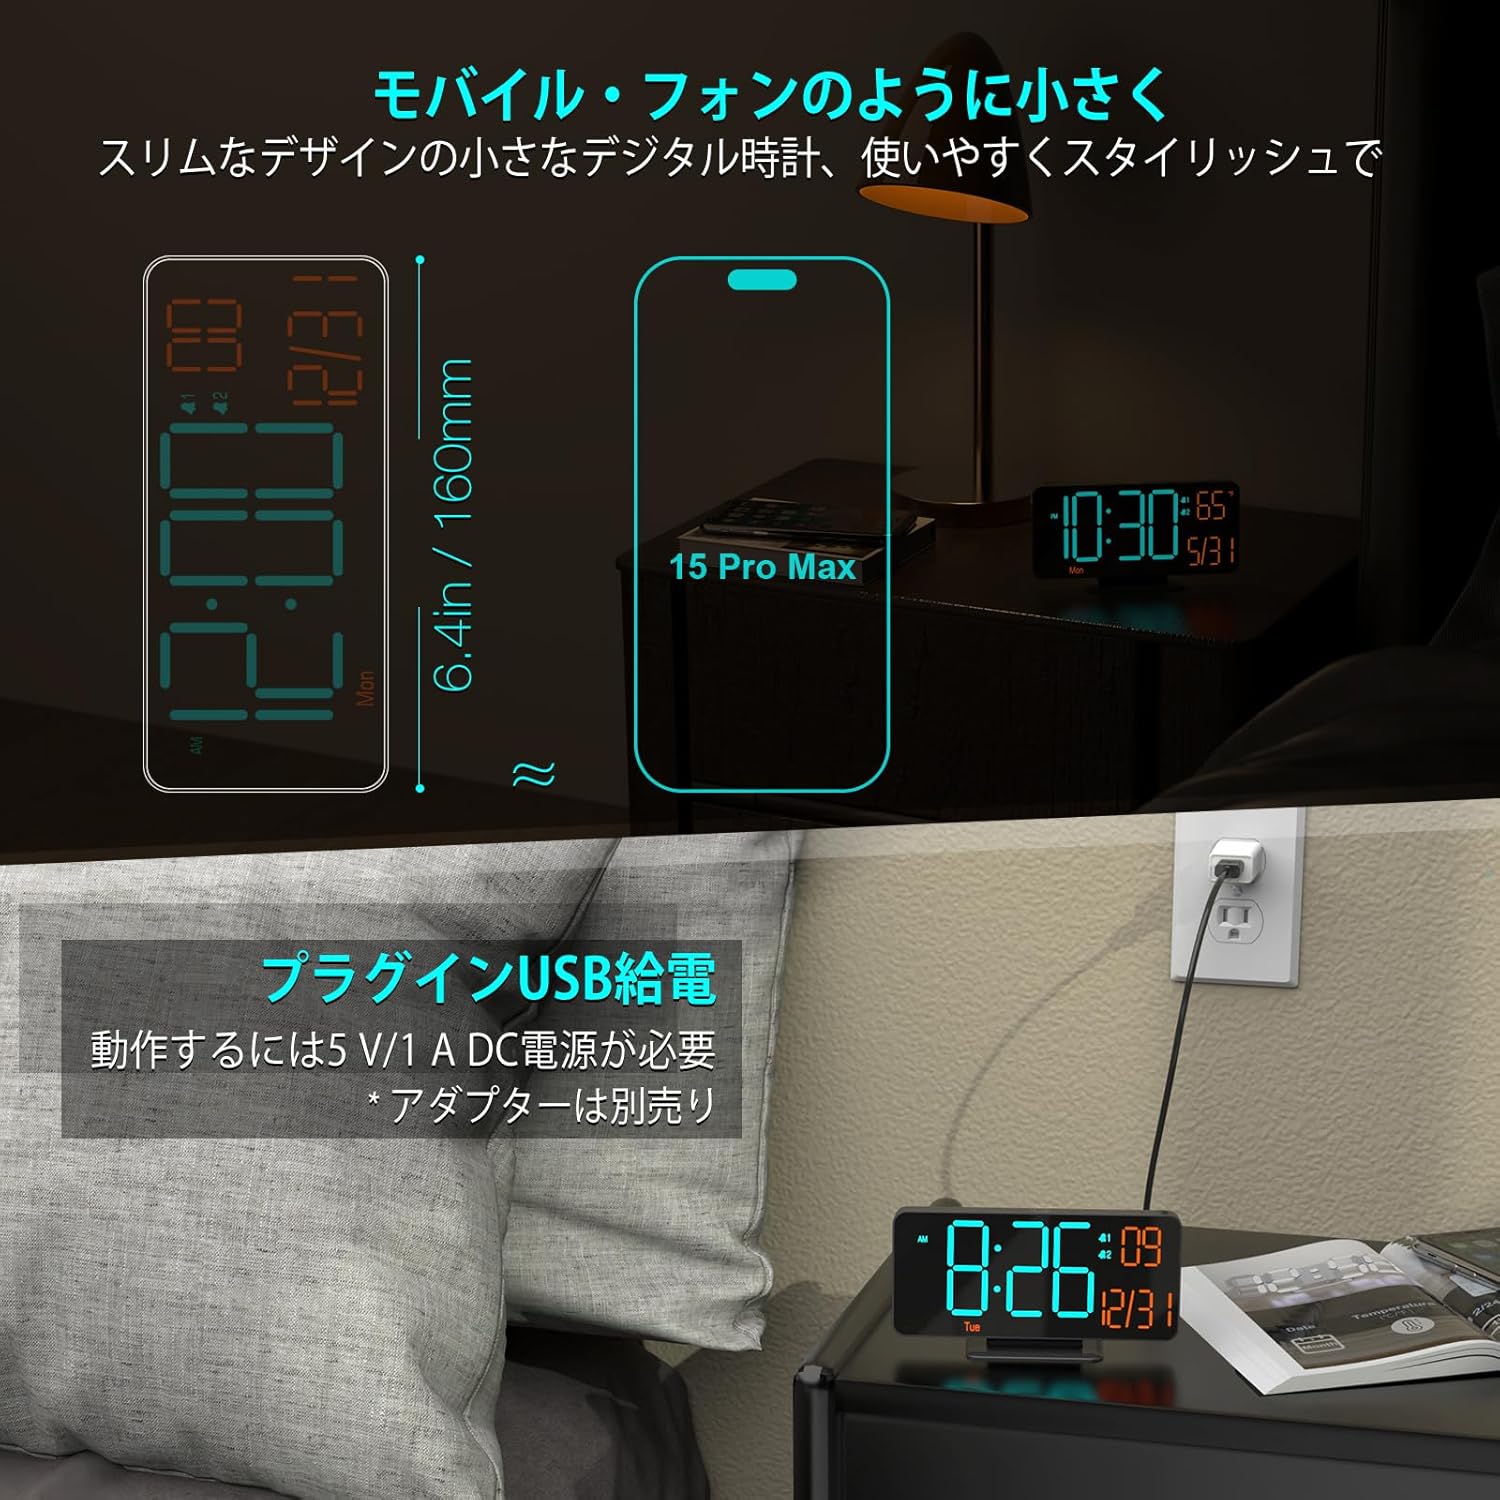
Image 3.1: Display brightness options (manual and automatic).
3.2 アラーム設定(デュアルアラーム)
時計は 2 つの独立したアラーム (アラーム 1 とアラーム 2) をサポートします。
- アラーム時間の設定: 押し続ける アラーム1セット or アラーム2セット to enter alarm time setting mode. Use + そして - 時間を調整するには、それぞれの アラームセット button to confirm and move to minutes. Repeat for minutes.
- Enable/Disable Alarm: 短く押す アラーム1セット or アラーム2セット アラームのオン/オフを切り替えます。アラームが有効な場合は、ディスプレイにアラームアイコンが表示されます。
- Alarm Cycle: The clock offers three alarm cycles: Weekdays, Weekends, and Everyday. While setting the alarm, press the アラームセット button repeatedly after setting minutes to cycle through these options.
3.3スヌーズ機能
アラームが鳴ったら、大きな スヌーズ button on the top of the clock to activate the snooze function. The alarm will pause for 5 minutes and then sound again. To turn off the alarm completely, press any other button on the back of the clock.

Image 3.2: Snooze function activation.
3.4 Display Modes (Seconds/Temperature)
The clock can display seconds or temperature alongside the time and date. Press the SECONDS/TEMPERATURE button to switch between displaying seconds and temperature (°F/°C).

Image 3.3: Various display modes including seconds and temperature.
4. メンテナンス
4.1 クリーニング
時計を掃除するには、ディスプレイを軽く拭いてから、asing with a soft, dry cloth. Do not use abrasive cleaners, solvents, or spray directly onto the device, as this may damage the surface or internal components.
4.2 バッテリーバックアップ
The internal CR2025 button battery maintains time settings during power interruptions. If the clock is unplugged for an extended period, this battery may eventually deplete. To replace it, carefully open the battery compartment on the back of the unit and insert a new CR2025 battery, ensuring correct polarity.
5。 トラブルシューティング
| 問題 | 考えられる原因 | 解決 |
|---|---|---|
| 表示が空白 | No power; LED display turned off manually. | Ensure USB cable is securely connected to a 5V/1A power source. Press the DIMMING button to check if the display was manually turned off. |
| アラームが鳴らない | Alarm is not enabled; alarm volume is too low. | プレス アラーム1セット or アラーム2セット to ensure the alarm icon is displayed. Check alarm settings for correct time and cycle. |
| 時間が不正確です | Initial setting error; prolonged power outage. | Re-set the time following section 2.3. If frequent time drift occurs, ensure a stable power supply. |
| Temperature reading is incorrect | Sensor calibration needed. | The manual does not specify temperature calibration. Ensure the clock is not placed near heat sources or in direct sunlight. |
6. 仕様
- ブランド: こすもす
- モデル: BL-330OR-2
- 表示タイプ: LEDデジタル
- 表示サイズ: 6.7インチ
- 色: Orange LED - Black
- 材料: プラスチック
- 寸法: 16.2 cm(幅)×8.3 cm(高さ)
- 電源: Corded Electric (USB 5V/1A, AC adapter not included)
- Battery Type (Backup): Lithium Metal (CR2025, included)
- 重さ: 170グラム
- 特徴: LED Display, Alarm, Calendar Display, Temperature Display, Automatic Dimming
- 部屋タイプ: オフィス、キッチン、寝室、リビングルーム、教室
7.保証とサポート
KOSUMOSU Technology provides a 2年間保証 for this product. If you encounter any quality issues or problems with usage, please contact our customer service immediately. We are committed to providing a replacement product or guiding you through setup and usage procedures.
For customer support, please refer to the contact information provided with your purchase or visit the official KOSUMOSU webサイト。