ウキテル ウキテル P1
OUKITEL P1 スマートフォン ユーザーマニュアル
モデル: OUKITEL P1
1. はじめに
This manual provides detailed instructions for the OUKITEL P1 smartphone. It covers essential information for setup, operation, maintenance, and troubleshooting to ensure optimal performance and user experience. Please read this manual thoroughly before using your device.

画像: 上view of OUKITEL P1's main features including its display, security, refresh rate, connectivity, and NFC capabilities.
2. 安全情報
自分自身や他人への傷害、またはデバイスの損傷を防ぐために、デバイスを使用する前にすべての安全情報をお読みください。
- 装置を分解、改造、修理しないでください。
- デバイスを極端な温度、直射日光、または高湿度にさらさないでください。
- OUKITELが承認した充電器とアクセサリのみを使用してください。
- Keep the device and all accessories out of reach of small children and pets.
- Dispose of the device and its battery properly according to local regulations.
3. パッケージ内容
製品パッケージに次の項目が含まれていることを確認してください。
- OUKITEL P1スマートフォン
- USB Type-Cケーブル
- 電源アダプター(18W)
- SIM取り出しツール
- 保護ケース
- スクリーンプロテクター(貼り付け済みまたは箱入り)
- クイックスタートガイド
- 保証書
4.デバイスオーバーview
Familiarize yourself with the physical components of your OUKITEL P1 smartphone.

画像: 前面と背面 view OUKITEL P1スマートフォンの、洗練されたデザインとカメラモジュールを紹介します。
主要コンポーネント:
- フロントカメラ: 自撮りやビデオ通話に。
- 画面: 6.7-inch FHD+ AMOLED screen with 120Hz refresh rate.
- 指紋センサー: 安全なロック解除のためにディスプレイに統合されています。
- リアカメラ: 50MP main camera and 32MP secondary camera for high-quality photos.
- 電源ボタン: デバイスの電源をオン/オフにしたり、画面を起動/スリープ状態にします。
- 音量ボタン: To adjust media volume and ringtone volume.
- USB Type-Cポート: 充電やデータ転送に。
- SIM/SD カードトレイ: SIMカードやmicroSDカードを挿入します。
5. セットアップ
5.1 SIMカードとSDカードの挿入
The OUKITEL P1 supports dual SIM cards and expandable storage up to 2TB.
- デバイスの側面にある SIM カード トレイを見つけます。
- SIM イジェクタ ツールをトレイの横にある小さな穴に挿入し、トレイが飛び出すまでゆっくりと押します。
- Nano-SIMカードまたはmicroSDカードをトレイの指定されたスロットに挿入します。金色の接点が下を向いていることを確認してください。
- カチッと音がするまでトレイを慎重にデバイスに戻します。

Image: Visual representation of the OUKITEL P1's memory capabilities, including 24GB RAM (8GB physical + 16GB virtual), 256GB ROM, and 2TB expandable storage.
5.2 初回電源投入と基本設定
- OUKITELのロゴが表示されるまで電源ボタンを押し続けます。
- 画面上の指示に従って言語と地域を選択し、Wi-Fi ネットワークに接続します。
- Google サービスと Play ストアにアクセスするには、Google アカウントでログインするか、新しいアカウントを作成してください。
- 優先する画面ロック方法(PIN、パターン、パスワード、指紋、または顔認証)を設定します。
6. デバイスの操作
6.1 ナビゲーションとユーザーインターフェース
OUKITEL P1はAndroid 14上で動作し、直感的でカスタマイズ可能なユーザーエクスペリエンスを提供します。

Image: Depiction of the Android 14 operating system interface on the OUKITEL P1, showcasing various app icons and a clean layout.
- タッチジェスチャー: Swipe up for app drawer, swipe down for quick settings and notifications, pinch to zoom, tap to select.
- ホーム画面: ウィジェットとアプリのショートカットでカスタマイズします。
- 最近使用したアプリ: 画面下部から上にスワイプして長押しすると view 最近使用したアプリケーションを切り替えることができます。
6.2 通話とメッセージ
- 電話をかける: 電話アプリを開き、番号を入力して、通話アイコンをタップします。
- メッセージの送信: Open the Messages app, start a new conversation, enter recipient and text, then send.
6.3 カメラの使用
The OUKITEL P1 features a 50MP main camera and a 32MP front camera for high-quality photography.
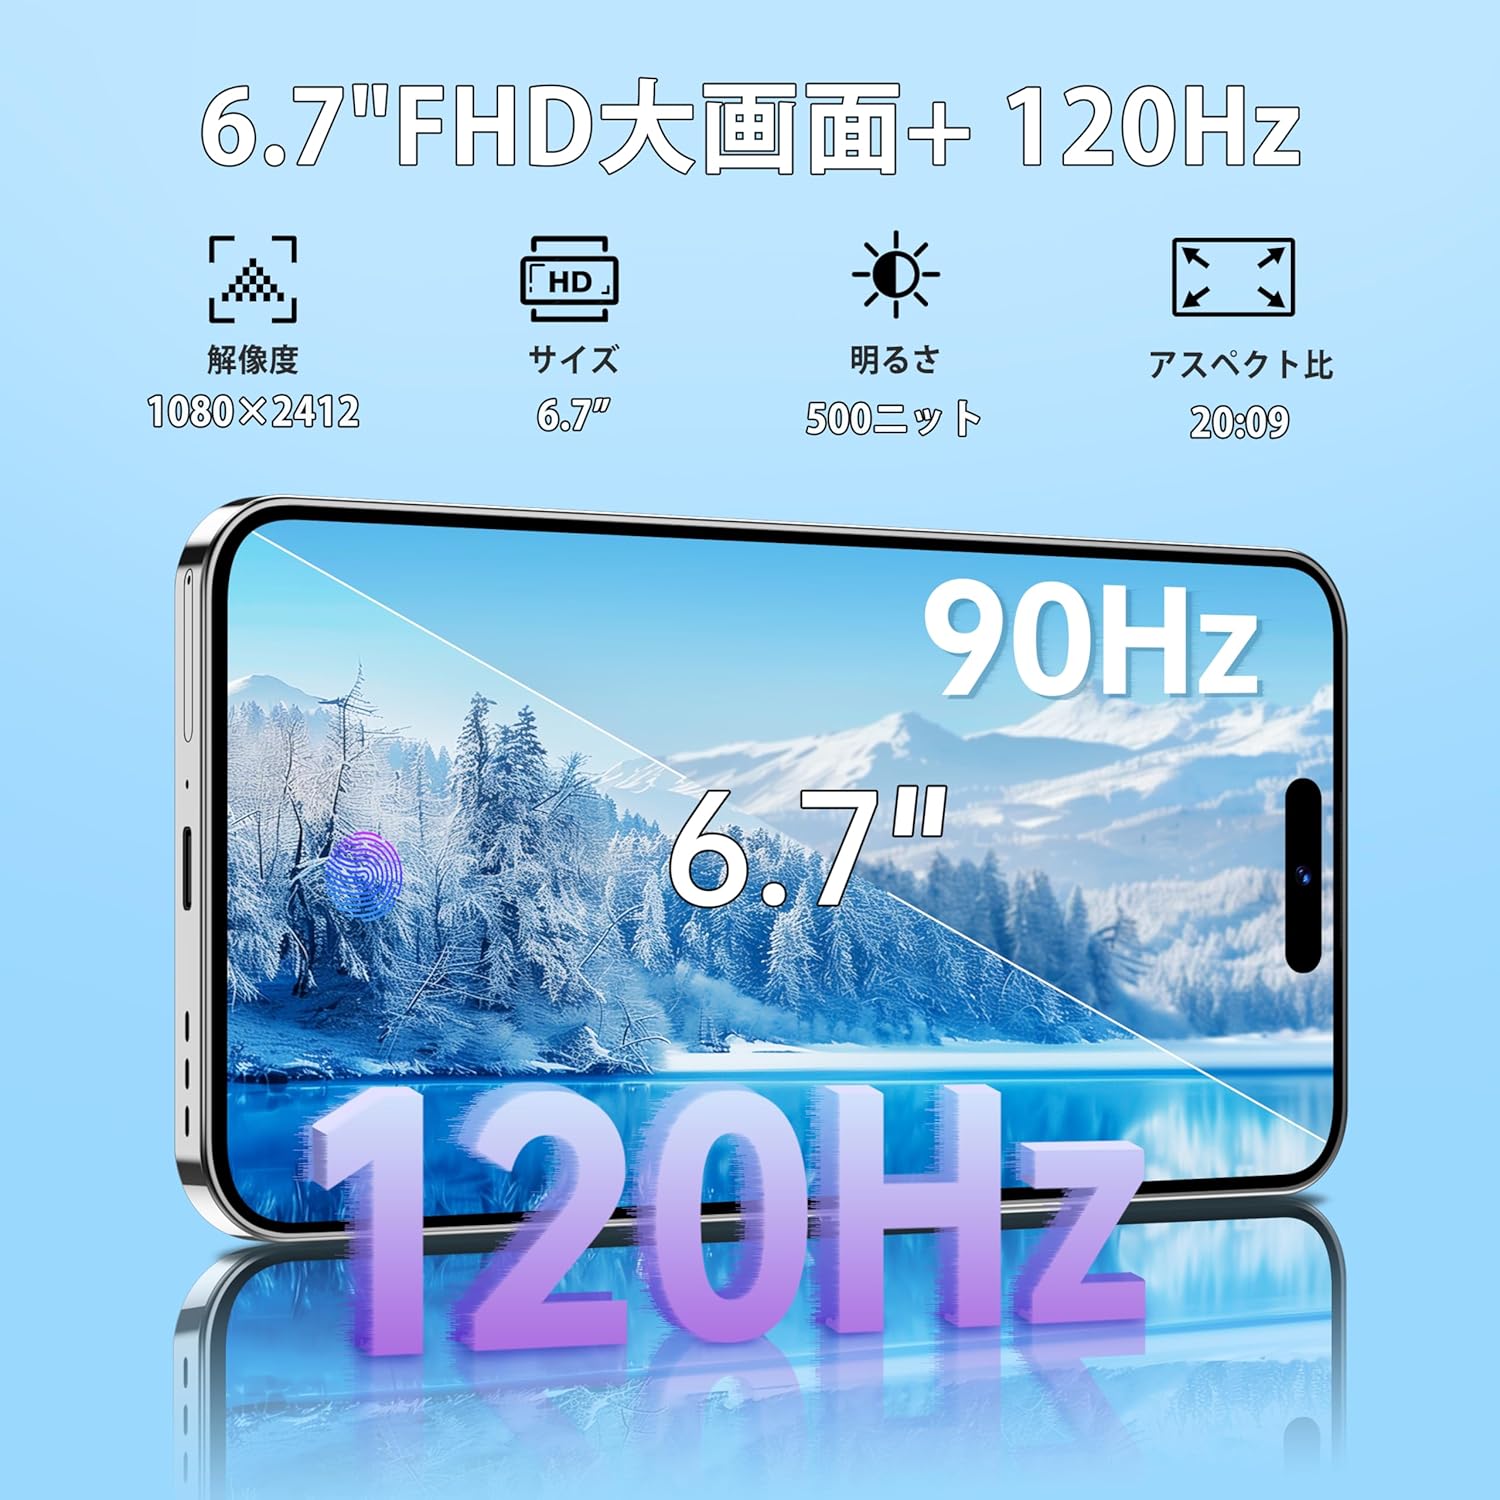
Image: Illustrates the 50MP main camera and 32MP rear camera capabilities of the OUKITEL P1, showing example photos in various modes like HD, wide-angle, and macro.
- カメラアプリを開きます。
- 希望のモード(写真、ビデオ、ポートレート、プロなど)を選択します。
- シャッターボタンをタップして撮影します。
6.4 接続性
- Wi-Fi: 利用可能なネットワークに接続するには、[設定] > [ネットワークとインターネット] > [Wi-Fi] に移動します。
- ブルートゥース: 他の Bluetooth デバイスとペアリングするには、[設定] > [接続されたデバイス] > [Bluetooth] に移動します。
- NFC: このデバイスは非接触型決済とデータ転送にNFCをサポートしています。「設定」>「接続済みデバイス」>「接続設定」>「NFC」で有効にしてください。
- GPS: Built-in GPS/GLONASS/Beidou/Galileo for accurate location services.
6.5セキュリティ機能
- 指紋によるロック解除: Register your fingerprints in Settings > Security & privacy > Device unlock > Fingerprint.
- 顔認証: Set up face recognition in Settings > Security & privacy > Device unlock > Face unlock.
6.6 バッテリー管理
The OUKITEL P1 is equipped with a 5150mAh large capacity battery and supports 18W fast charging.

Image: Diagram illustrating the 5150mAh battery capacity of the OUKITEL P1, showing estimated usage times for gaming, video playback, music, and continuous calls.
- To charge, connect the USB Type-C cable to the device and the power adapter, then plug into a power outlet.
- Utilize power-saving modes in Settings > Battery to extend battery life.
- The device supports OTG reverse charging, allowing it to act as a power bank for other devices.
7. メンテナンス
- クリーニング: 画面と本体の清掃には、柔らかく糸くずの出ない布をご使用ください。刺激の強い化学薬品は使用しないでください。
- ソフトウェアアップデート: 最適なパフォーマンスとセキュリティを確保するために、[設定] > [システム] > [システム アップデート] でシステム アップデートを定期的に確認してください。
- ストレージ管理: 定期的にキャッシュと不要なものをクリアする files to free up storage space. Go to Settings > Storage.
8。 トラブルシューティング
| 問題 | 解決 |
|---|---|
| デバイスの電源が入らない | バッテリーが充電されていることを確認してください。電源ボタンを10秒以上押し続けると、強制的に再起動します。 |
| アプリが遅い、またはクラッシュする | Close background apps, clear app cache, or restart the device. Ensure sufficient storage space. |
| Wi-Fiに接続できません | Restart your router and the device. Check Wi-Fi settings and ensure the password is correct. |
| 指紋/顔認証が機能しない | Ensure your finger/face is clean and properly positioned. Re-register your fingerprint/face if issues persist. |
9. 仕様
| 特徴 | 詳細 |
|---|---|
| モデル | OUKITEL P1 |
| オペレーティング·システム | アンドロイド14 |
| プロセッサ | MediaTek Helio G99 Octa-Core (6nm) |
| ラム | 24GB(物理8GB + 仮想16GB) |
| 内部ストレージ | 256GB |
| 拡張可能なストレージ | microSDカードで最大2TB |
| 画面 | 6.7-inch FHD+ AMOLED, 2400x1080 resolution, 120Hz Refresh Rate |
| リアカメラ | 50MPメインカメラ |
| フロントカメラ | 32MP |
| バッテリー容量 | 5150mAh |
| 充電 | 18W急速充電、OTGリバース充電 |
| SIMサポート | 4GデュアルSIM |
| 接続性 | Wi-Fi, Bluetooth 5.2, USB Type-C, NFC |
| ポジショニング | GPS、GLONASS、北斗、ガリレオ |
| 安全 | 指紋認証、顔認証 |
| 寸法 | Approximately 8mm thin, 187g weight |
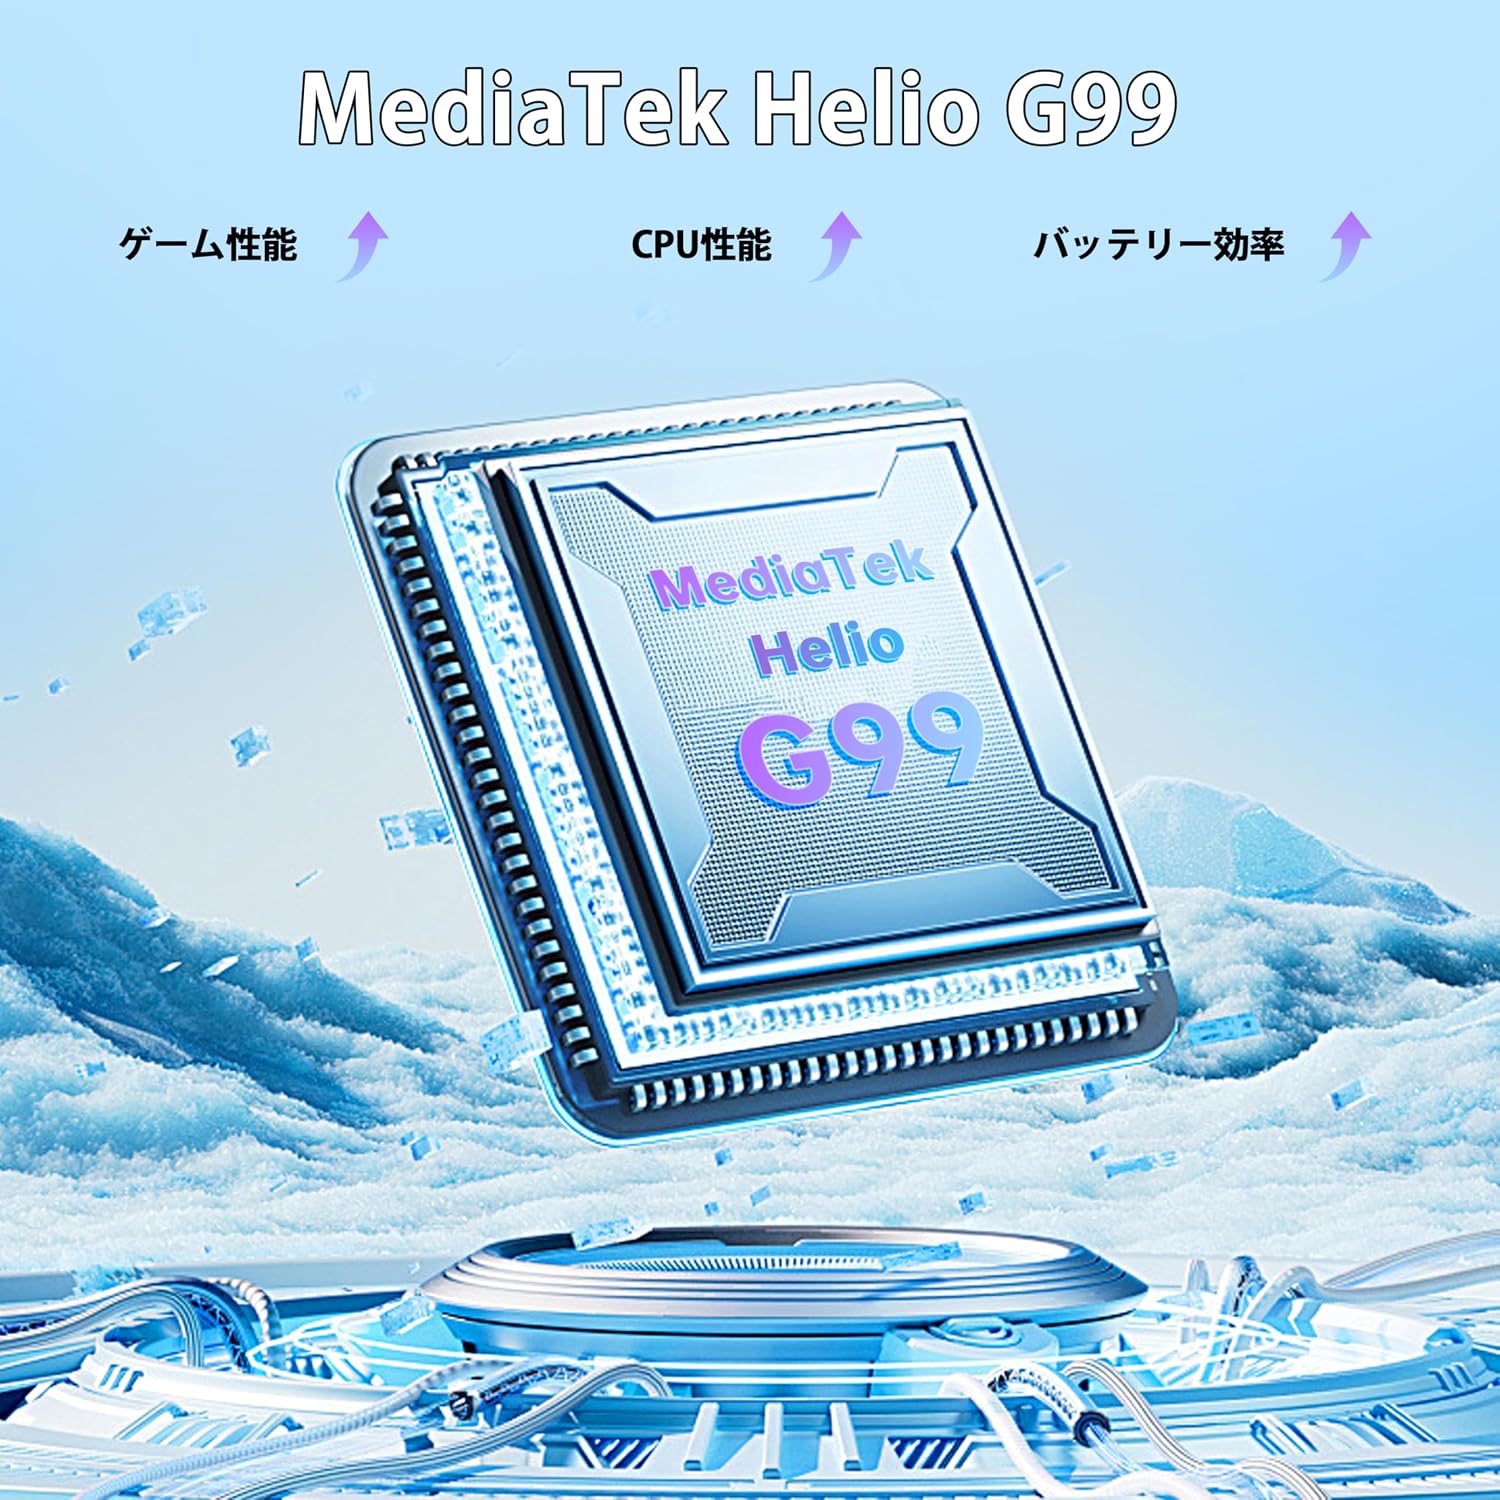
Image: Diagram illustrating the MediaTek Helio G99 processor, highlighting its performance, CPU efficiency, and battery efficiency.

Image: Visual representation of the OUKITEL P1's 6.7-inch FHD+ display with 120Hz refresh rate, showing resolution, size, brightness, and aspect ratio.
10. 保証とサポート
OUKITELは、製品に対して包括的なサポートを提供します。
- 保証: 2年間の無料保証。
- 戻り値: 30 日間の無条件返品ポリシー。
- テクニカルサポート: Long-term technical support and 24-hour online customer service.
- サポートについては、OUKITELの公式ウェブサイトをご覧ください。 webサイトにアクセスするか、カスタマーサービスにお問い合わせください。
Ask a question about this manual
Ask about setup, troubleshooting, compatibility, parts, safety, or missing instructions. Manuals+ will review the question and use this page’s manual context to help answer it.