GenMachine Ren4000
GenMachine Mini PC AMD Ryzen 3 4300U (Ren4000) Instruction Manual
Model: Ren4000
1. はじめに
Thank you for choosing the GenMachine Mini PC AMD Ryzen 3 4300U. This compact and high-performance mini computer is designed for both home and office use, offering efficient multitasking, 4K visuals, and advanced connectivity. This manual provides essential information for setting up, operating, and maintaining your device.
2. 箱の中身
パッケージにすべてのアイテムが含まれていることを確認します。
- GenMachine Mini PC (R3 4300U 8G 256G)
- ユーザーマニュアル
- 電源アダプター
- HDMIケーブル
- Mounting Bracket (for VESA mounting)

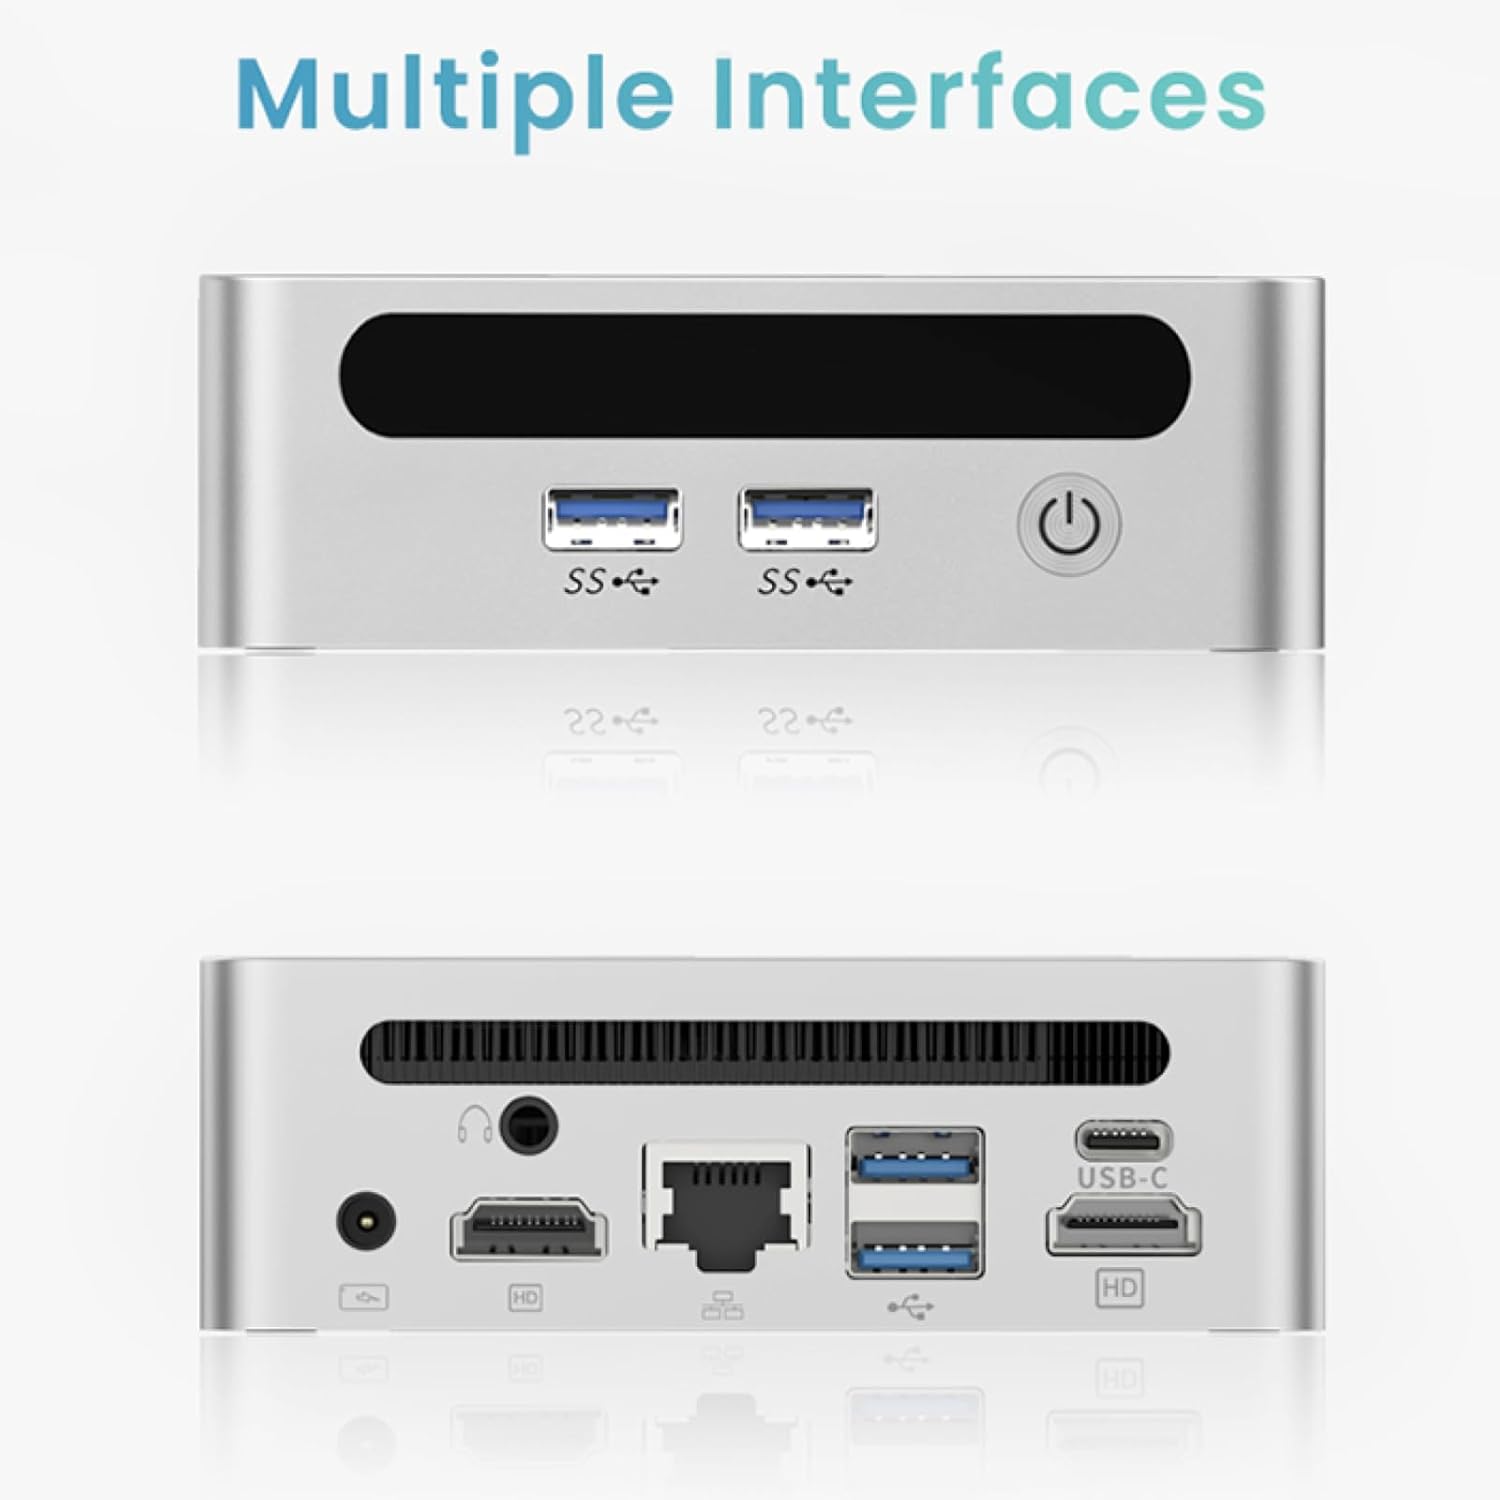
3.製品オーバーview (ハードウェア)
The GenMachine Mini PC features a compact design with various ports for connectivity and expansion.
フロントパネル
- 電源ボタン: デバイスの電源をオン/オフにします。
- USB 3.0 ポート (x2): For high-speed data transfer and peripheral connections.
- USB 2.0 ポート (x1): 標準的な周辺機器接続用。
背面パネル
- DC電源入力: 付属の電源アダプターをここに接続します。
- USB 2.0 ポート (x1): 標準的な周辺機器接続用。
- HDMIポート(x2): For connecting displays, supporting up to 4K resolution.
- イーサネット (LAN) ポート: 有線ネットワーク接続用。
- 3.5mmオーディオジャック: ヘッドフォンまたはスピーカー用。
- ケンジントンロックスロット: デバイスを固定するため。
4.セットアップガイド
初期接続
- ミニ PC の電源をオフにし、すべてのケーブルを外します。
- Connect your monitor(s) to the HDMI port(s) on the rear panel.
- キーボードとマウスを利用可能な USB ポートに接続します。
- (Optional) For a wired network connection, plug an Ethernet cable into the LAN port.
- 電源アダプターを DC 入力ポートに接続し、電源コンセントに接続します。
- 前面パネルの電源ボタンを押して、ミニ PC の電源をオンにします。
Operating System Setup (Windows 11)
Your GenMachine Mini PC comes with Windows 11 pre-installed. Upon first boot, you will be guided through the initial Windows setup process, including:
- 地域とキーボード レイアウトの選択。
- Network connection (Wi-Fi 6 or Ethernet).
- Microsoft account sign-in or local account creation.
- プライバシー設定の構成。
画面の指示に従ってセットアップを完了します。
5. パフォーマンスと使用方法
The AMD Ryzen 3 4300U processor, combined with 8GB DDR4 RAM and a 256GB SSD, provides robust performance for various tasks.
主な特徴:
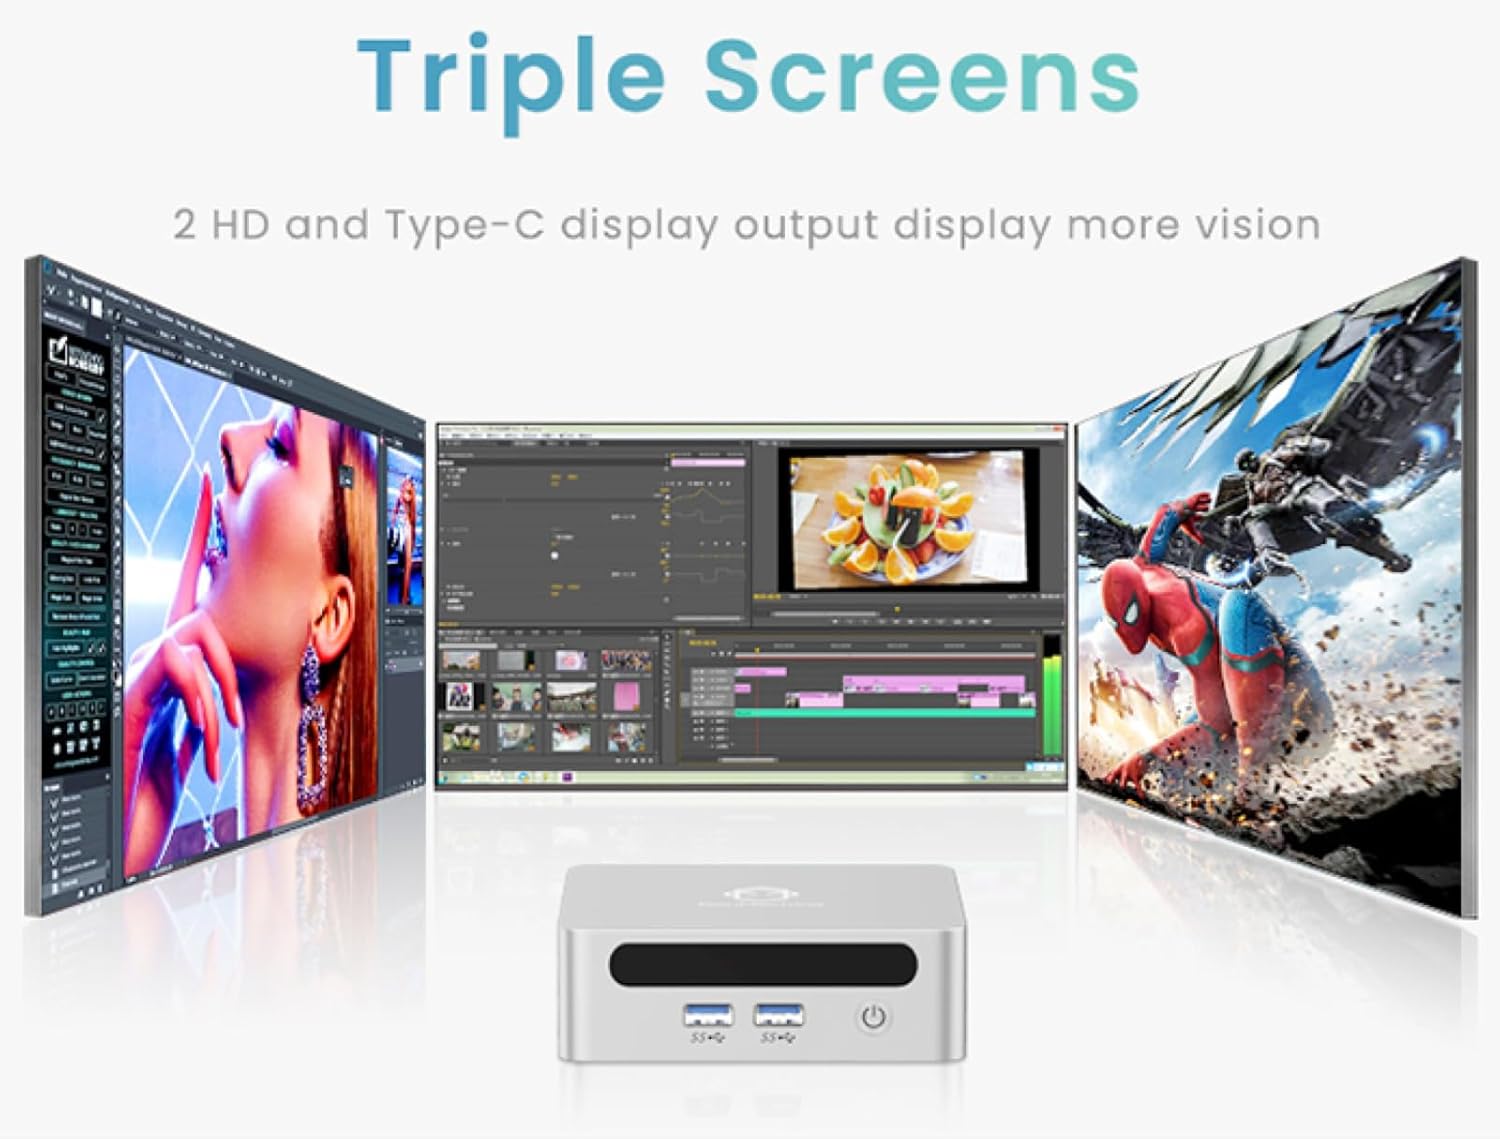
- 4K Ultra HD Visuals & Dual Display Support: Connect up to two 4K monitors for enhanced productivity or immersive entertainment.
- Wi-Fi 6とBluetooth 5.2: Enjoy faster and more stable wireless internet and seamless connectivity with Bluetooth peripherals.
- Compact and Quiet Design: Its small footprint and ultra-quiet cooling system make it suitable for any workspace without distraction.

6. Upgrading Components (Maintenance)
The GenMachine Mini PC allows for easy upgrades of its RAM and SSD to further enhance performance or storage capacity.
必要なツール:
- 小型プラスドライバー
- Plastic pry tool (optional, for opening the case)
- New SSD (M.2 2280 NVMe or 2.5-inch SATA SSD)
- New RAM (DDR4 SODIMM)
手順:
- ミニ PC の電源をオフにし、すべてのケーブルを外します。
- Carefully remove the four rubber foot pads on the bottom of the Mini PC to reveal the hidden screws.
- 4本のネジを外します。
- Gently pry open the bottom plate along the edges. Be careful with the internal clips.
- Locate the existing SSD and RAM modules.
- To remove the SSD: If fixed by screws, unscrew them. If by clips, open the clips and pull out the original SSD.
- To remove RAM: Open the clips at both ends of the memory slot and pull out the original memory vertically.
- Insert the new SSD/RAM into the respective slots, ensuring they are properly seated and secured.
- Replace the bottom plate, aligning it with the clips and screw holes.
- Screw on the previously removed screws and reattach the foot pads.
7. 取り付けオプション
The GenMachine Mini PC can be mounted behind a VESA-compatible monitor using the included mounting bracket, saving desk space and creating a clean setup.

8. 仕様
| 特徴 | 詳細 |
|---|---|
| プロセッサ | AMD Ryzen 3 4300U(2.7GHz) |
| ラム | 8GB DDR4 SDRAM |
| ストレージ | 256GB 2280 SSD (PCIE x 16 interface) |
| グラフィックス | 統合型AMD Radeonグラフィックス |
| オペレーティング·システム | OS(Windows 11プリインストール) |
| 接続性 | Wi-Fi 6, Bluetooth 5.2, Ethernet |
| ビデオ出力 | 2x HDMI (4K @ 60Hz), USB-C (DisplayPort Alt Mode) |
| USBポート | USB 3.0 x 2、USB 2.0 x 2、USB-C x 1 |
| 寸法 | 6.26 x 6.26 x 3.6インチ |
| 重さ | 2ポンド |
9。 トラブルシューティング
- 電源なし: 電源アダプタがミニ PC と正常な電源コンセントの両方にしっかりと接続されていることを確認します。
- 表示なし: Verify that the HDMI cable(s) are correctly connected to the monitor(s) and the Mini PC. Check monitor input source settings.
- No Internet (Wi-Fi): Ensure Wi-Fi is enabled in Windows settings and you are connected to the correct network.
- インターネットなし(有線): Check the Ethernet cable connection and ensure your router is functioning correctly.
- パフォーマンスが遅い: Close unnecessary applications. Check for background updates. Consider upgrading RAM or SSD if issues persist.
10. 保証とサポート
For warranty information, technical support, or service inquiries, please refer to the contact details provided in your product packaging or visit the official GenMachine webサイト。 保証請求に備えて購入時のレシートを保管しておいてください。