MOUNT PRO Freelift Pro Single
MOUNT PRO Freelift Pro シングルモニターデスクマウント 取扱説明書
Model: Freelift Pro Single
1.製品オーバーview
The MOUNT PRO Freelift Pro Single Monitor Desk Mount is designed to provide an ergonomic and space-saving solution for your workspace. This adjustable monitor arm supports a single screen, offering flexibility in positioning for optimal view快適性と生産性を向上させます。
主な特徴:
- ユニバーサル互換性: Fits most flat or curved LCD/LED screens from 13 to 32 inches, with a maximum load capacity of 22 lbs. Supports VESA patterns of 75x75mm and 100x100mm.
- フルモーション調整: Offers 360° rotation, +/-90° swivel, and +85°/-45° tilt for versatile screen positioning.
- スペースの最適化: Frees up desktop space with two mounting options (clamp or grommet) and integrated cable management.
- 耐久性のある構造: Features an aluminum arm and a gas spring counterbalance system for stable and long-lasting performance.
2. 安全情報
Please read and understand all instructions before installation and use. Failure to do so may result in personal injury or property damage. If you have any questions, contact customer support.
- 最大積載量 22 ポンド (10 kg) を超えないようにしてください。
- Ensure the mounting surface (desk) is strong enough to support the combined weight of the mount and monitor.
- Use only the provided hardware. If any parts are missing or damaged, contact customer support for replacement.
- Keep children away from the product during installation.
- Adjust the gas spring tension carefully. Improper adjustment may cause the monitor to fall or spring up unexpectedly.
3. パッケージ内容
インストールを続行する前に、すべてのコンポーネントが揃っていて損傷がないことを確認してください。
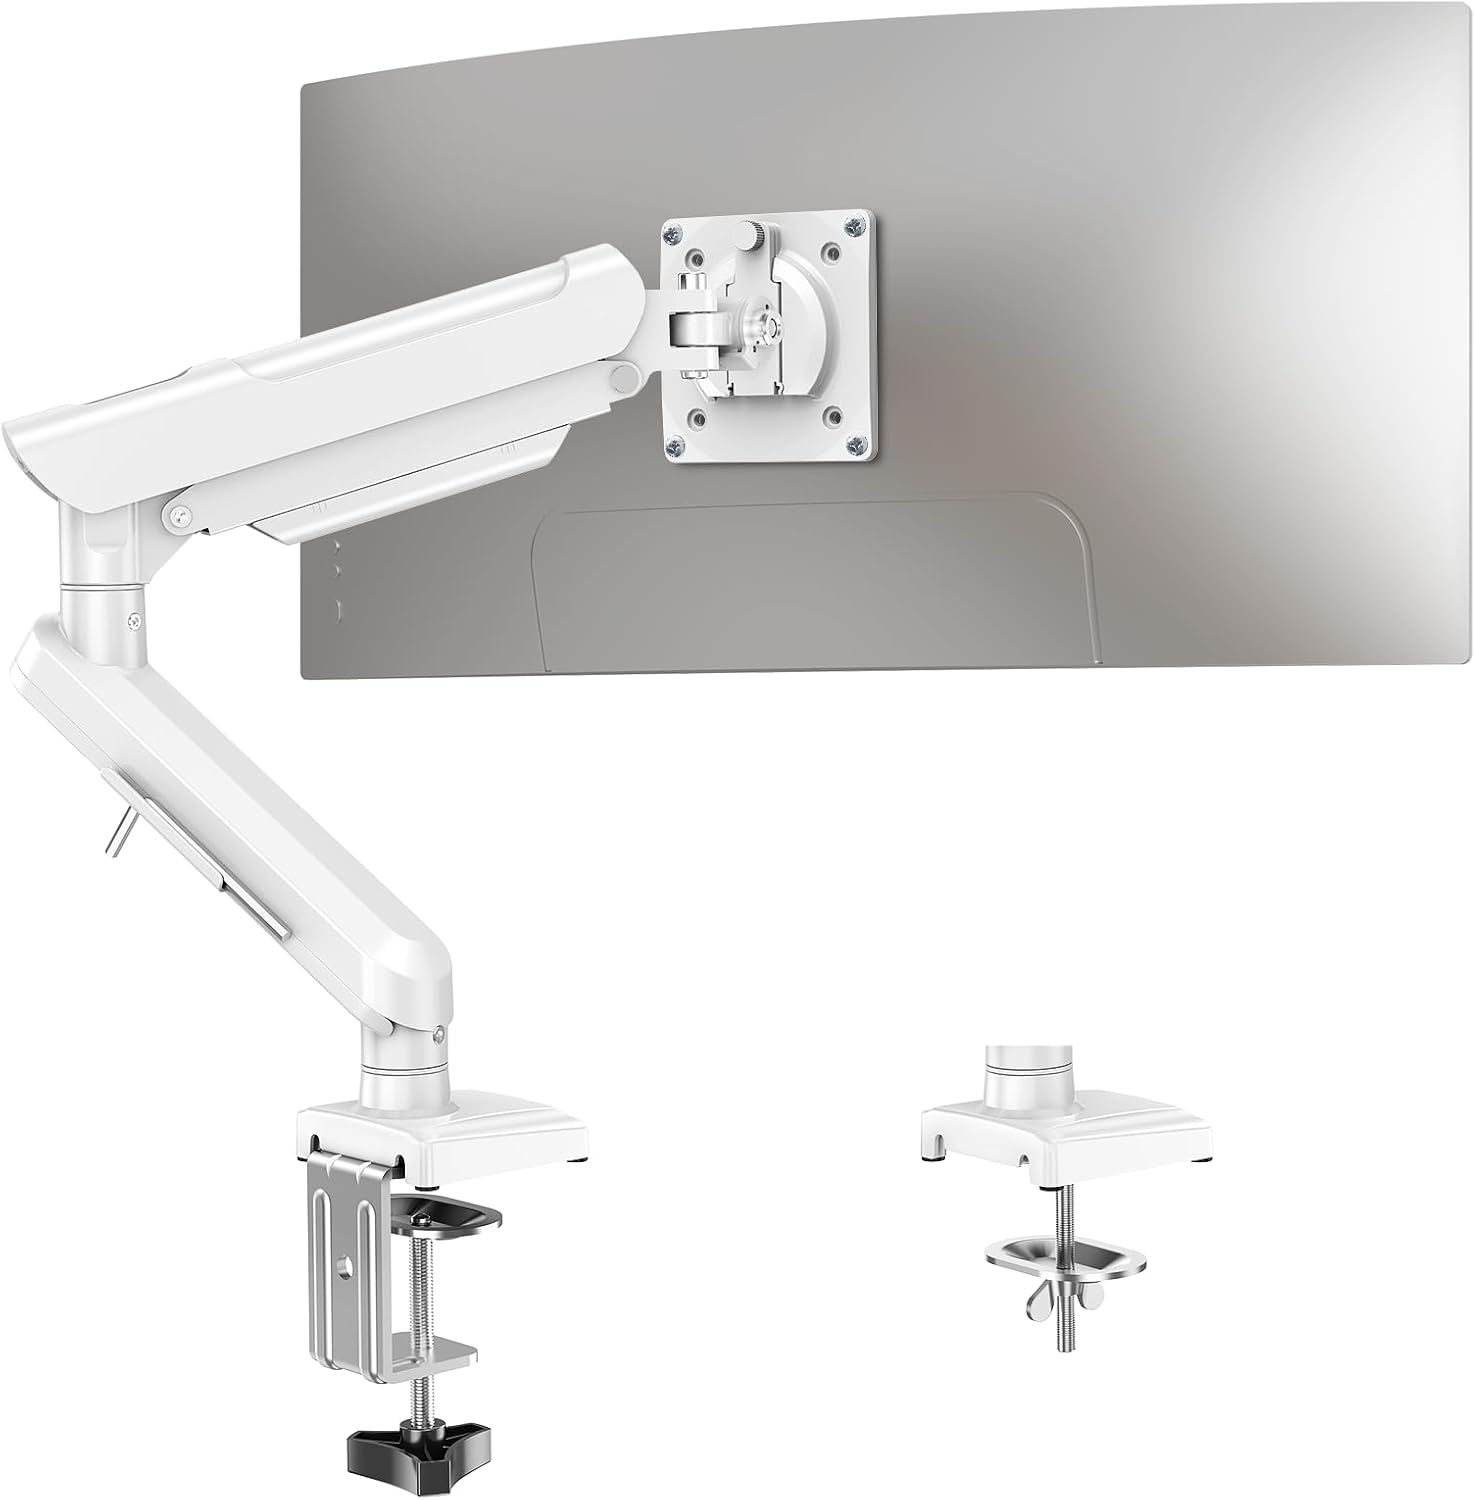
Image: All components of the MOUNT PRO Freelift Pro Single Monitor Desk Mount, including the arm, base, VESA plate, and hardware.
The package includes the monitor arm, desk clamp, grommet base components, VESA plate, and various screws and tools for assembly.
4. セットアップとインストール
4.1 取り付けオプションを選択する
The monitor mount offers two installation methods: C-clamp or Grommet base. Select the option that best suits your desk.

Image: Illustration showing the C-clamp mounting method on the right and the grommet mounting method on the left, with desk thickness requirements.
C-Clamp インストール:
- Suitable for desk thicknesses from 0.39 to 2.76 inches (10-70mm).
- C-clを取り付けるamp to the base using the provided bolts and tighten securely.
- clを配置するamp on the edge of your desk and tighten the knob until the base is firmly secured.
グロメットベースの取り付け:
- Suitable for desk thicknesses from 0.39 to 2.76 inches (10-70mm) and hole diameters from 0.39 to 2.36 inches (10-60mm).
- C-clを分解するamp コンポーネント。
- Insert the long bolt through the base, then through the grommet hole in your desk.
- Secure the base from underneath the desk using the clip plate and wingnut.
4.2 Install the Monitor Arm
- Slide the lower arm onto the base pole.
- Slide the upper arm onto the lower arm.
- Secure the arms by tightening the internal screws with the provided Allen key.
4.3 VESA プレートをモニターに取り付ける
- Remove any existing monitor stand.
- VESA プレートをモニターの背面にある取り付け穴 (75x75mm または 100x100mm) に合わせます。
- Secure the VESA plate to the monitor using the appropriate screws.
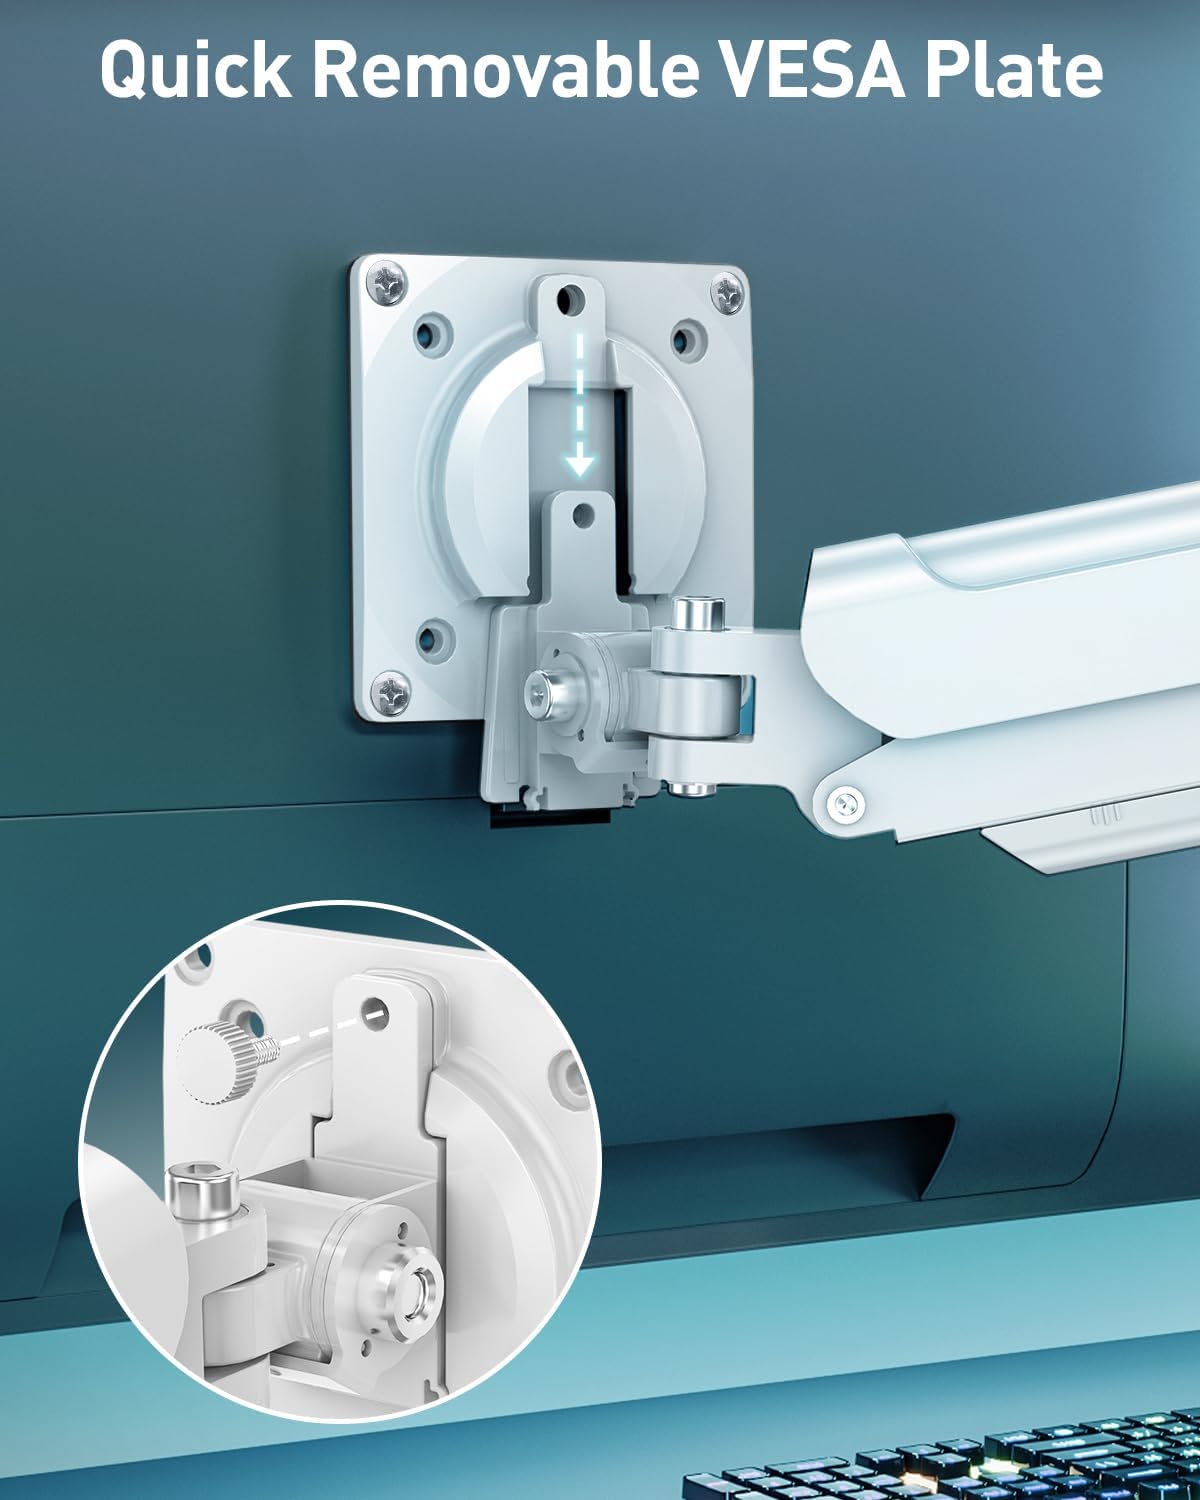
画像: クローズアップ view of the quick-release VESA plate being attached to the back of a monitor with screws, highlighting the ease of installation.
4.4 モニターをアームに取り付ける
- Carefully slide the monitor (with attached VESA plate) onto the end of the monitor arm.
- Install the security bolt to prevent accidental detachment.
4.5 ケーブル管理
Route your monitor cables through the integrated cable management channels on the arm to maintain a tidy workspace. Allen keys can be stored in the designated slot on the lower arm for easy access.

Image: The monitor arm showing cables routed through its internal channels and a close-up of the Allen key storage slot.
インストールビデオ:
Video: Official installation guide for the Freelift Pro White Single Monitor Arm, demonstrating step-by-step assembly.
5. 運営と調整
The monitor arm features a gas spring system for smooth and effortless adjustments.
5.1 Gas Spring Tension Adjustment:
The gas spring tension needs to be adjusted to match the weight of your monitor. This ensures the monitor stays in place at any height.

Image: Diagram showing how to adjust the gas spring tension. Turn clockwise towards '-' to reduce tension for lighter monitors, and counter-clockwise towards '+' to increase tension for heavier monitors. Hold the arm horizontally during adjustment.
- If the monitor rises too easily or does not stay down, turn the adjustment screw clockwise (towards '-') to reduce tension.
- If the monitor falls or is difficult to raise, turn the adjustment screw counter-clockwise (towards '+') to increase tension.
- Hold the arm in a horizontal position while adjusting the tension.
5.2 Tilt, Swivel, and Rotation:
カスタマイズ viewing experience with a wide range of motion.

Image: Visual representation of the monitor arm's adjustable features: tilt (+85° to -45°), swivel (180° at two points), and 360° rotation.
- Adjust the monitor angle +85°/-45° to reduce glare and find your ideal view角度。
- スイベル: Swivel the monitor +/-90° at the VESA plate and +/-180° at the arm joints for easy screen sharing.
- 回転: モニターを 360 度回転させて、横向きと縦向きを切り替えます。
5.3 Height and Extension Adjustment:
Easily position your screen at the optimal height and distance.

Image: Diagram illustrating the maximum extension of 19.7 inches (50cm) and a height range from 5.1 to 17.3 inches (13-44cm) above the desk surface.
- The arm can extend up to 19.7 inches (50cm) to bring the screen closer.
- Adjust the height from 5.1 inches (13cm) to 17.3 inches (44cm) above the desk surface.
6. メンテナンス
定期的なメンテナンスにより、モニター マウントの寿命が長くなり、最適なパフォーマンスが確保されます。
- クリーニング: マウントを柔らかくてdで拭きますamp 布で拭いてください。研磨剤入りの洗剤や溶剤は使用しないでください。
- 検査: すべてのネジと接続部がしっかりと締められているか、定期的に確認してください。必要に応じて締め直してください。
- ガススプリング: If the monitor's weight changes (e.g., replacing the monitor), re-adjust the gas spring tension as described in Section 5.1.
7。 トラブルシューティング
問題が発生した場合は、次の一般的な問題と解決策を参照してください。
- モニターがたわんだり、希望の高さに維持されない場合: The gas spring tension is too low for your monitor's weight. Increase tension by turning the adjustment screw counter-clockwise (towards '+').
- モニターが跳ね上がったり、押し下げにくくなったりする場合: The gas spring tension is too high for your monitor's weight. Decrease tension by turning the adjustment screw clockwise (towards '-').
- Monitor is wobbly: すべての取り付けネジ(デスククランプ)がamp/grommet and VESA plate) are securely tightened. Check that the desk surface is stable.
- Difficulty with movement (tilt/swivel): Check if any adjustment bolts are overtightened. Loosen slightly if necessary.
問題が解決しない場合は、カスタマー サポートに問い合わせてサポートを受けてください。
8. 仕様
| 特徴 | 仕様 |
|---|---|
| ブランド | マウントプロ |
| モデル | Freelift Pro Single |
| 画面サイズの互換性 | 13~32インチ |
| 重量容量 | 4.4~22ポンド(2~10kg) |
| VESA互換性 | 75x75mm、100x100mm |
| 傾斜角度 | +85° から -45° |
| スイベル角度 | +/-90° (at VESA plate), +/-180° (at arm joints) |
| 回転 | 360° |
| 最大アーム伸長 | 19.7インチ(50cm) |
| 高さ範囲 | 5.1 to 17.3 inches (13-44cm) |
| 取り付けオプション | C-Clamp、グロメットベース |
| デスクの厚さ(Clamp) | 0.39~2.76インチ(10~70mm) |
| デスクの厚さ(グロメット) | 0.39~2.76インチ(10~70mm) |
| グロメット穴径 | 0.39~2.36インチ(10~60mm) |
| 材料 | アルミニウム |
| 色 | 白 |
9. 保証とサポート
For warranty information or technical support, please refer to the product packaging or contact MOUNT PRO customer service directly. Keep your purchase receipt for warranty claims.
Ask a question about this manual
Ask about setup, troubleshooting, compatibility, parts, safety, or missing instructions. Manuals+ will review the question and use this page’s manual context to help answer it.