
1. はじめに
This manual provides detailed instructions for the installation, operation, and maintenance of your Ailgely Motorcycle LED Display Gauge. This multi-functional instrument integrates a speedometer, odometer, tachometer, and fuel gauge, designed to provide essential riding information with enhanced visibility and customizable settings.
主な特徴:
- カスタマイズ可能な設定: Easily adjust speed, RPM, and fuel capacity with a button press for a personalized driving experience.
- 多機能ディスプレイ: Integrates speedometer, odometer, tachometer, and fuel gauge for comprehensive monitoring.
- 簡単なインストール: Designed for quick and hassle-free setup, enhancing rider convenience.
- 強化された可視性: Features a white backlight and large LCD display for clear readability day and night, reducing eye strain.
- Accurate Fuel Gauge: Displays fuel level in 5 segments, providing precise and reliable information for efficient fuel management.
2. 安全情報
Please read all safety warnings and instructions carefully before installation and operation. Failure to follow these instructions may result in product damage, property damage, or personal injury.
- Ensure the motorcycle's power is off before beginning installation.
- インストール手順が不明な場合は、資格のある技術者にご相談ください。
- Do not modify the product or its wiring in any way not described in this manual.
- 製品を極端な温度や湿気を避けて保管してください。
3. パッケージ内容
パッケージにすべてのアイテムが揃っていることを確認します。
- Ailgely Motorcycle LED Display Gauge (Model Aiafz5gcgpun-2)
- ワイヤハーネス
- Speed Sensor (if included with your specific variant)
- 取り付け金具(ボルト、ナット、ワッシャー)
- ユーザーマニュアル(このドキュメント)

画像1:正面 view of the Ailgely Motorcycle LED Display Gauge with its wiring harness.

画像2:リア view of the gauge, highlighting the mounting bolts and electrical connectors.
4. セットアップとインストール
This section details the steps for installing your new LED display gauge. Professional installation is recommended if you are unfamiliar with motorcycle electrical systems.
4.1 配線図
Refer to the following general wiring guide. Specific wire colors may vary, but the functions are standard. Always cross-reference with your motorcycle's wiring diagram.
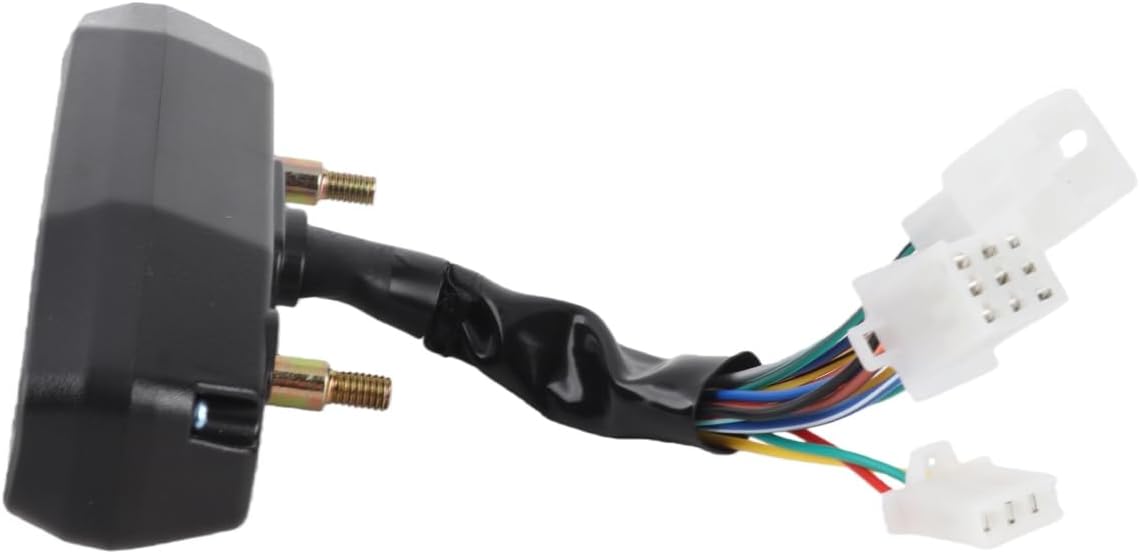
図3: 例ample wiring diagram showing connections for power, ground, speed sensor, tachometer, and indicator lights.
- 赤いワイヤー: +12V (Ignition Switched Power)
- 黒ワイヤー: 地面 (-)
- 緑のワイヤー: 速度センサー信号
- Yellow/Black Wire: Tachometer Signal (Connect to ignition coil positive or ECU tach output)
- 青いワイヤー: High Beam Indicator (+)
- オレンジワイヤー: Left Turn Signal Indicator (+)
- Light Blue Wire: Right Turn Signal Indicator (+)
- 茶色のワイヤー: Fuel Level Sensor Input
- 白いワイヤー: Neutral Gear Indicator (+)
- Other Wires (if present): Refer to specific product documentation or consult a professional.
注: 一部のviews indicate that the turn signal indicators might not be separated for left/right. If your motorcycle uses separate left/right signals and the gauge only has one input, you may need to use diodes to combine the signals before connecting to the gauge.
4.2 ゲージの取り付け
- Choose a suitable location on your motorcycle's dashboard or handlebars.
- Use the provided mounting hardware to securely attach the gauge. Ensure it is stable and visible to the rider.

画像4: 側面 view showing the compact design and mounting points of the gauge.
4.3 スピードセンサーの取り付け
- Install the speed sensor near a rotating part of the wheel (e.g., brake rotor bolts).
- Attach the magnet(s) to the rotating part, ensuring they pass close to the sensor head with each rotation.
- Connect the speed sensor wire to the corresponding input on the gauge's wiring harness.
4.4 Initial Configuration (Speed and RPM)
To enter the setup mode for speed and RPM calibration:
- With the motorcycle's ignition OFF, press and hold the button on the gauge.
- While holding the button, turn the ignition ON.
- The display will enter configuration mode. Follow the on-screen prompts or refer to the specific instructions provided with your unit for detailed calibration steps.
- 速度キャリブレーション: Set the tire circumference (diameter x π). This value is crucial for accurate speed and odometer readings.
- RPM Calibration: Adjust the RPM setting according to your engine's cylinder count and ignition type. This typically involves setting the pulse ratio.
5. 操作手順
Once installed and configured, the gauge will display various parameters:
- スピード: 現在の走行速度。
- 回転数: 1分間あたりのエンジン回転数。
- オドメーター: 移動した総距離。
- 燃料計: Displays current fuel level in 5 segments. If not connected, it may display battery voltage.
- インジケーターライト: High beam, turn signals (left/right), and neutral gear.
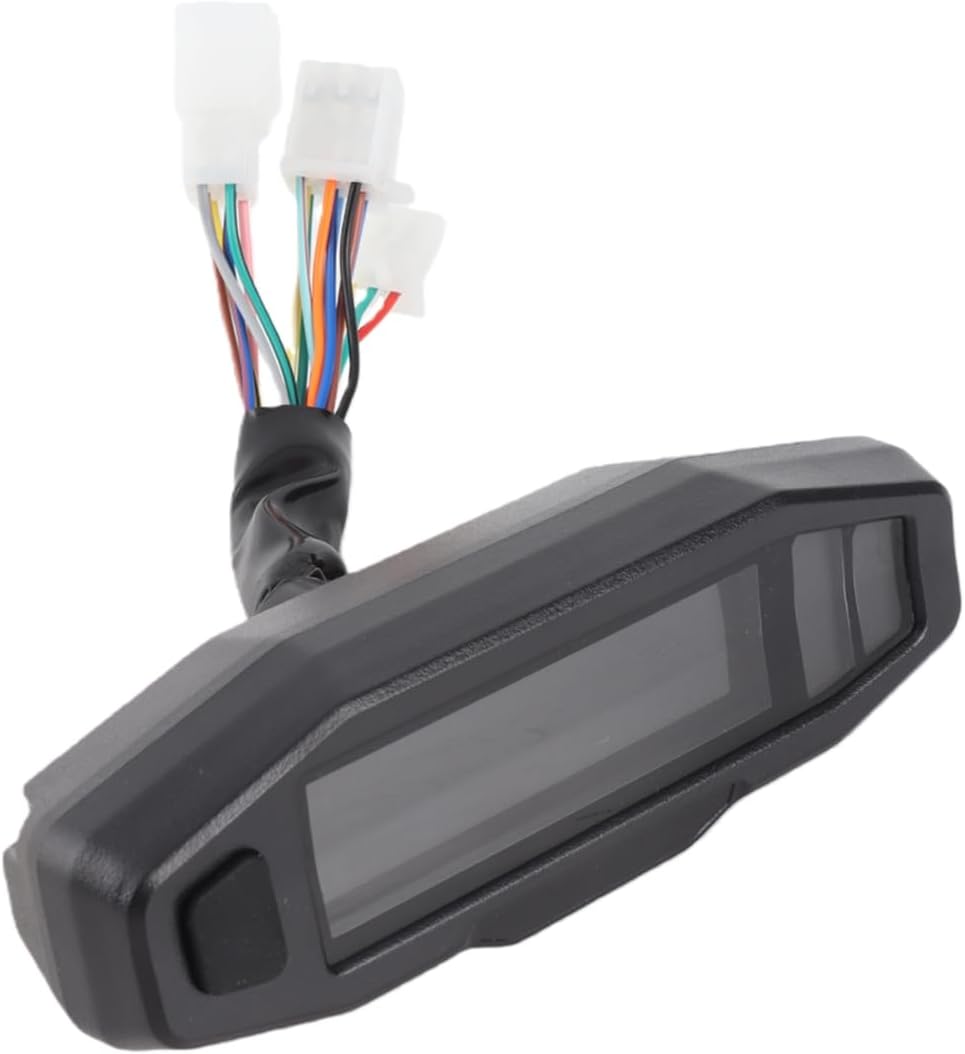
画像5:正面 view of the gauge, illustrating the display screen and control button.
5.1 ボタンの機能
The single button on the gauge typically serves multiple functions:
- ショートプレス: Cycle through display modes (e.g., Odometer, Trip A, Trip B).
- 長押し: Reset trip meters or enter/exit settings mode (as described in Section 4.4).
6. メンテナンス
To ensure the longevity and optimal performance of your Ailgely LED Display Gauge, follow these maintenance guidelines:
- クリーニング: ディスプレイを柔らかくて乾いた布で拭いてください。amp 布で拭いてください。画面を傷つける可能性のある研磨剤入りの洗剤や溶剤は使用しないでください。
- 配線検査: Periodically check all wiring connections for looseness or corrosion. Ensure wires are securely routed and protected from heat and moving parts.
- センサーチェック: Verify that the speed sensor and its magnet(s) are clean and properly aligned.
- 水への露出: While designed to be water-resistant, avoid direct high-pressure water jets on the unit.
7。 トラブルシューティング
If you encounter issues with your gauge, refer to the following common problems and solutions:
| 問題 | 考えられる原因 | 解決 |
|---|---|---|
| 電源なし/ディスプレイオフ | Loose wiring connection, blown fuse, faulty power supply. | Check all power and ground connections. Inspect motorcycle fuses. Ensure 12V power is reaching the red wire. |
| Speed/Odometer Inaccurate or Not Working | Incorrect speed calibration, faulty speed sensor, misaligned magnet. | Recalibrate speed setting (tire circumference). Check speed sensor wiring. Ensure magnet passes close to the sensor. |
| タコメーターが動作しない | Incorrect RPM calibration, incorrect wiring to ignition coil/ECU, weak signal. | Recalibrate RPM setting. Verify tachometer signal wire connection. Try connecting to a different signal source if available (e.g., negative side of ignition coil if connected to positive). |
| Fuel Gauge Inaccurate or Not Working | Incorrect fuel sensor wiring, incompatible fuel sensor, faulty sensor. | Check fuel sensor wiring. Ensure the fuel sensor type is compatible with the gauge. If no fuel sensor is connected, the gauge may display battery voltage. |
| インジケーターライトが機能しない | Incorrect wiring, faulty bulb/LED in motorcycle, diode required for combined signals. | Verify wiring for each indicator. If turn signals are combined, ensure diodes are used if necessary. |
If the problem persists after attempting these solutions, contact customer support or a qualified motorcycle technician.
8. 仕様
| 特徴 | 詳細 |
|---|---|
| ブランド名 | Ailgely |
| モデル番号 | Aiafz5gcgpun-2 |
| メーカー型番 | Aiafz5gcgpun-2 |
| 起源 | 中国 |
| 製品タイプ | Car Monitor Accessory (Motorcycle Instrument Cluster) |
| 表示タイプ | LED LCD with White Backlight |
| 機能 | Speedometer, Odometer, Tachometer, Fuel Gauge, Indicator Lights |
| 材料 | Black Plastic + Metal |
9. 保証とサポート
保証: この製品には、 1年間保証 ご購入日から製造上の欠陥が保証対象となります。保証請求の際は、購入証明書を保管してください。
除外事項: 保証は、不適切な取り付け、誤用、事故、許可されていない改造、または通常の消耗によって生じた損傷には適用されません。
カスタマーサポート: For technical assistance, warranty claims, or any questions regarding your Ailgely Motorcycle LED Display Gauge, please contact your retailer or the manufacturer directly. Refer to your purchase documentation for contact details.