1. はじめに
Thank you for choosing the ELUSH 100A MPPT Solar Charge Controller. This device is designed to efficiently manage power from your solar panels to charge various battery types, ensuring optimal performance and longevity of your solar system. It automatically recognizes 12V, 24V, 36V, and 48V systems and features dual USB 5V charging ports for added convenience.
This manual provides essential information for the safe and effective installation, operation, and maintenance of your solar charge controller. Please read it thoroughly before use.

画像1:正面 view of the ELUSH 100A MPPT Solar Charge Controller, showing the LCD display and control buttons.
2.製品オーバーview および機能
2.1 Superior MPPT Technology
This controller incorporates an advanced Maximum Power Point Tracking (MPPT) algorithm to swiftly track the maximum power point of your photovoltaic (PV) array. This ensures a tracking efficiency of no less than 99.5%, significantly enhancing energy utilization within your solar system. It's important to note that this controller integrates both MPPT and PWM charging technologies, offering high charging efficiency and consistent performance.
2.2 Versatile Design and User Interface
The controller features a multi-function LCD with a backlight display and an integrated clock. It offers seven distinct operating modes to suit various application needs:
- 充電モード
- ライトコントロールモード
- Light Control + Time Delay Control Mode
- ユニバーサルコントロールモード
- 手動制御モード
- タイミング制御モード
The upgraded version supports precise time control, allowing connected devices to be automatically powered on and off according to user-defined schedules. The screen can also maintain a continuous bright state without entering hibernation or lock mode.
2.3 User-Centric Display and Controls
The LCD dynamically displays operational data and the working status of the equipment. Key parameters visible include:
- 作業モード
- バッテリー巻tage
- PV充電電流
- Battery Discharging Current
- 製品の動作温度
- 遅延時間
For configuration adjustments or restoring default settings, a 'reset to factory settings' feature is available, providing a quick and effective solution.

Image 2: Diagram illustrating the four major upgrades: accurate time control, screen stays lit, quick restore factory settings, and solar panel voltageディスプレイ。
3. セットアップとインストール
3.1 Important Startup Sequence
WARNING: Incorrect connection order can damage the controller or battery. Always follow these steps:
- First, connect the rechargeable battery to the controller. Ensure the battery has sufficient power.
- After the controller successfully starts up and displays battery information, then connect the solar panel(s) to the controller.
- Finally, connect any DC loads to the controller's load terminals.
3.2つの接続端子
The controller features clearly labeled terminals for solar panel input, battery connection, and DC load output. Additionally, it includes a DC output port and dual USB output ports for charging external devices.

画像3: 下部 view of the controller, highlighting the aluminum base plate for heat dissipation and the DC output and dual USB output ports.

Image 4: Diagram illustrating the connection of solar panels, battery, and load to the charge controller, along with the LCD display and USB outputs.
4. 操作手順
4.1 LCDディスプレイナビゲーション
The LCD provides real-time data. Use the 'MENU' button to cycle through different display screens and parameters. The 'RESET' button can be used to restore factory settings when needed.
4.2 動作モードの設定
The controller offers seven operating modes. Refer to the detailed instructions in the full product manual (if available) for specific configuration of each mode, including light control, time delay, and timing control. The 'ON/OFF' button typically controls the load output.
4.3 Time Control Function
The upgraded time control feature allows users to set precise schedules for powering devices on and off. This can be configured through the controller's menu interface. The screen can be set to remain continuously bright for constant monitoring.
5. Battery Charging Options
The ELUSH 100A MPPT Solar Charge Controller is compatible with a diverse range of battery types, ensuring flexibility for various solar power systems. Supported battery types include:
- Seal (Sealed Lead-Acid)
- ゲル
- Flooded (Open Lead-Acid)
- LifePO4 (Lithium Iron Phosphate)
Ensure you select the correct battery type in the controller's settings for optimal charging and battery health.
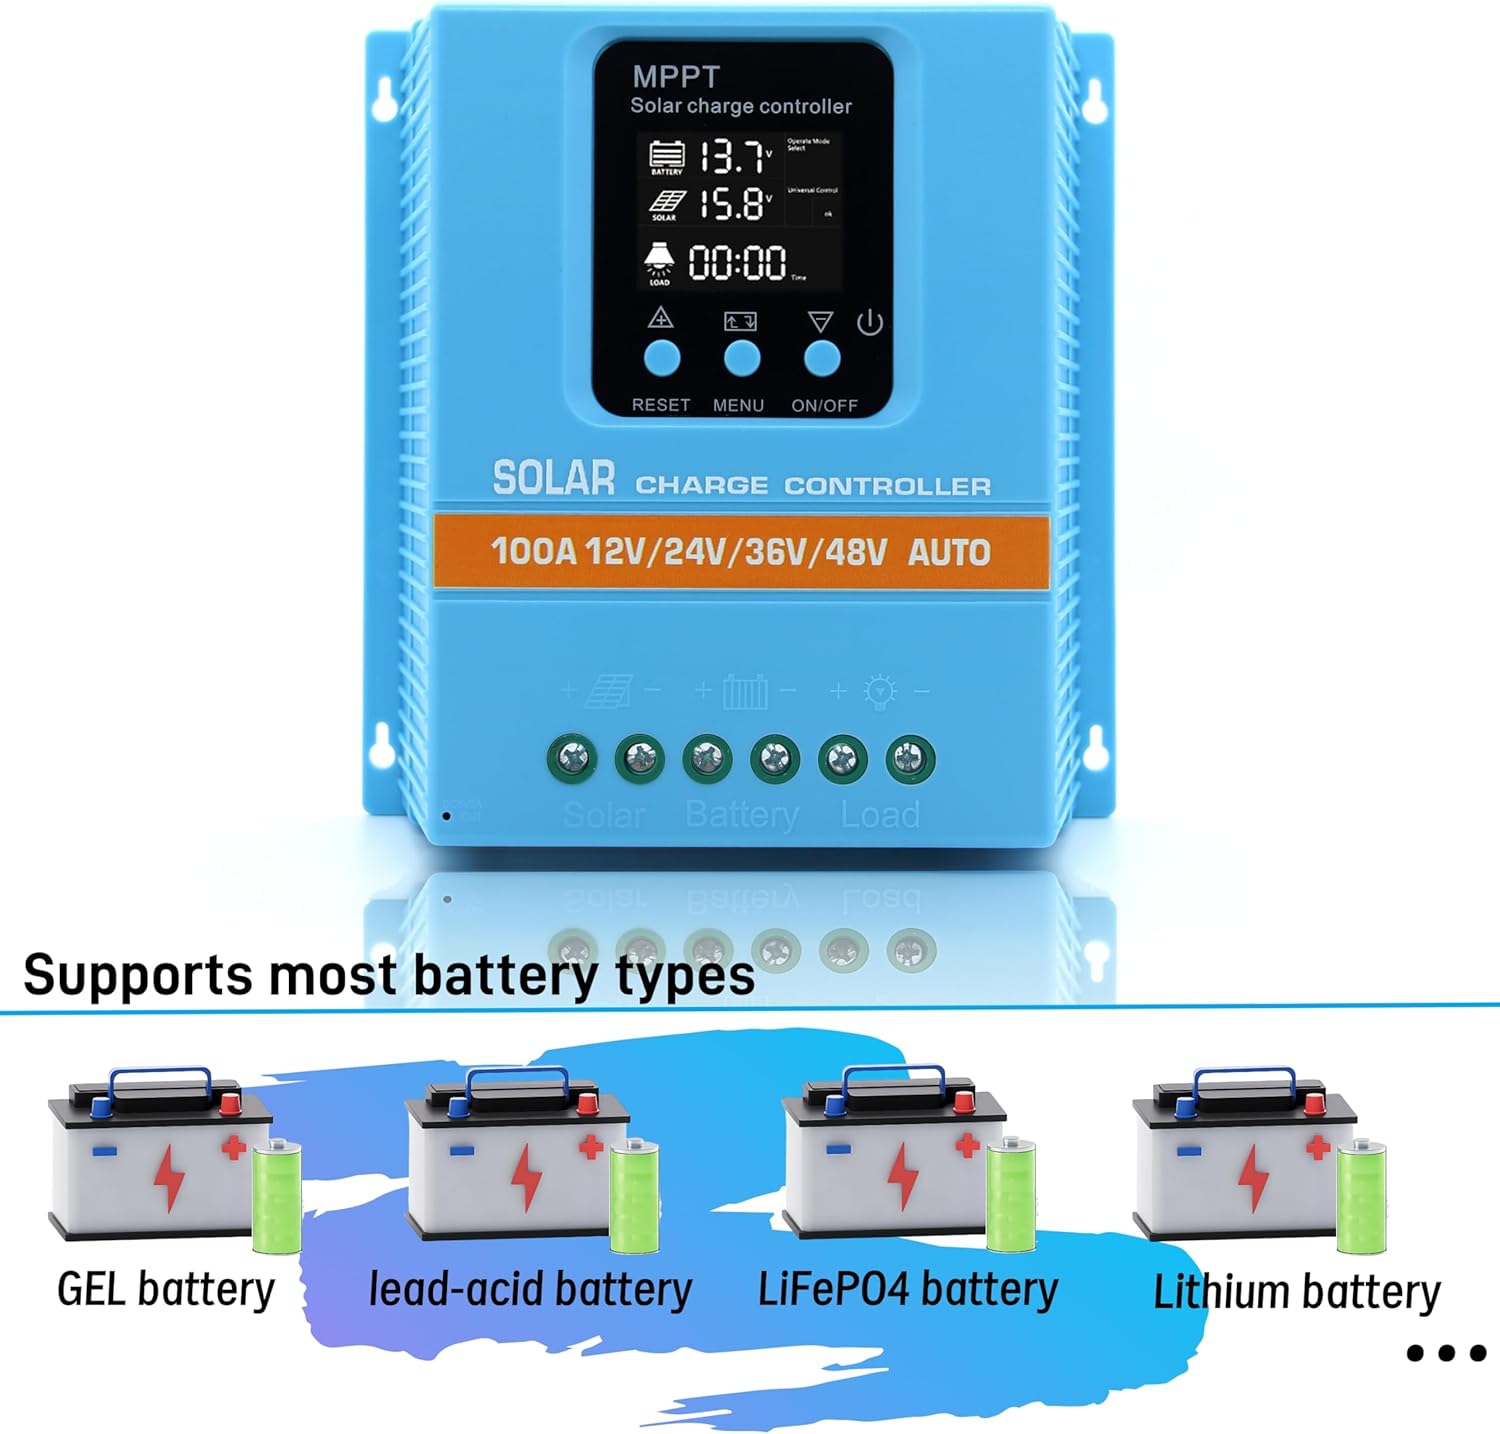
Image 5: Visual representation of the controller's compatibility with GEL, lead-acid, LiFePO4, and Lithium battery types.
6. 安全および保護機能
The MPPT solar controller is equipped with comprehensive voltage protection mechanisms to safeguard your system and ensure reliable operation. These include:
- バッテリー過容量tag保護
- 過電流保護
- 停電保護
- 過充電保護
- 深い放電保護
- 逆接続保護
- 過熱保護
The device also displays the real-time voltage of the solar panel, allowing users to monitor energy input and assist in troubleshooting any potential issues.
7. メンテナンス
To ensure the long-term performance and reliability of your ELUSH 100A MPPT Solar Charge Controller, consider the following maintenance guidelines:
- 定期点検: すべての配線接続が安全で腐食がないことを定期的に確認してください。
- 清潔さ: コントローラーは清潔に保ち、ほこりやゴミが付かないようにしてください。清掃には乾いた布をご使用ください。
- 換気: Ensure the installation location provides adequate ventilation to prevent overheating, especially given the aluminum base plate designed for heat dissipation.
- 環境条件: Protect the controller from direct sunlight, moisture, and extreme temperatures outside its operating range.
8。 トラブルシューティング
ソーラー充電コントローラで問題が発生した場合は、次の一般的なトラブルシューティング手順を検討してください。
8.1 Device Not Starting or Displaying Data
- バッテリーの接続を確認してください: Ensure the rechargeable battery is connected first and has sufficient power to activate the controller. The controller requires battery power to operate.
- Verify Solar Panel Connection: Confirm that solar panels are connected correctly 後 バッテリー。
- 配線の検査: Check all wiring for loose connections, breaks, or incorrect polarity.
8.2 Low Charging Efficiency
- ソーラーパネル出力: Ensure solar panels are clean, unobstructed, and receiving adequate sunlight.
- バッテリータイプの設定: Verify that the correct battery type is selected in the controller's settings.
- システム巻tage: Confirm that the system voltage (12V/24V/36V/48V) is correctly recognized by the controller.
- ハイブリッドテクノロジー: Remember that this controller integrates both MPPT and PWM technologies. While efficient, its performance characteristics may differ from pure MPPT controllers.
8.3 Load Not Functioning
- Check Load Connection: Ensure the load is correctly connected to the load terminals.
- ロードモード: Verify the operating mode (e.g., light control, timing control) is correctly configured and enabled.
- バッテリー巻tage: バッテリー容量tage is too low, the controller may disconnect the load to protect the battery from deep discharge.
9. 仕様
The following table outlines the technical specifications for the ELUSH 100A MPPT Solar Charge Controller:
| 特徴 | 仕様 |
|---|---|
| バッテリー巻tage | 12V / 24V / 36V/48Vオート |
| 充電電流 | 100A |
| Max Solar Input (Voc) | 15-25V (12V Battery); 30-50V (24V Battery); 45-75V (36V Battery); 60-100V (48V Battery) |
| 最大PV入力電力 | 1200W (12V Battery); 2400W (24V Battery); 3600W (36V Battery); 4800W (48V Battery) |
| USBポート | DC 5V/1.5A x 2 USB |
| 動作温度 | -25°C ~ 55°C |
| 表示タイプ | 液晶 |
| メーカー | ELUSH |
| パッケージ寸法 | 8.5 x 8.23 x 2.83インチ |
| アイテム重量 | 2.09 ポンド (0.95 キログラム) |
| 色 | 青 |
| 材料 | プラスチック |

Image 6: Dimensions of the ELUSH 100A MPPT Solar Charge Controller (7.6in x 7.3in x 2.6in).
10. 保証とサポート
The ELUSH 100A MPPT Solar Charge Controller comes with a 1年間保証 and lifetime technical support. Should you require assistance, have questions, or encounter any issues, please do not hesitate to contact the ELUSH support team. Our engineers are available to provide advice and solutions.