1. はじめに
This manual provides detailed instructions for the installation, operation, and maintenance of the Elitech Cold Storage Temperature Controller series. These controllers are designed for precise temperature management in various cold storage applications, ensuring optimal conditions for stored goods. Please read this manual thoroughly before installation and operation to ensure safe and efficient use.
2. 安全上の注意
- すべての配線は、地域の電気規則に従って資格のある電気技師によって行われるようにしてください。
- 設置、配線、メンテナンスを行う前に電源を切ってください。
- 過度の湿気、ほこり、腐食性ガスが発生する環境ではコントローラを操作しないでください。
- 電源電圧を確認するtage matches the controller's specifications.
- デバイスを強力な電磁干渉から遠ざけてください。
3.製品オーバーview
The Elitech temperature controller features a clear digital display, intuitive buttons for parameter setting, and robust construction for reliable performance in demanding environments. It typically includes inputs for temperature sensors and outputs for controlling refrigeration, defrost, and fan operations.
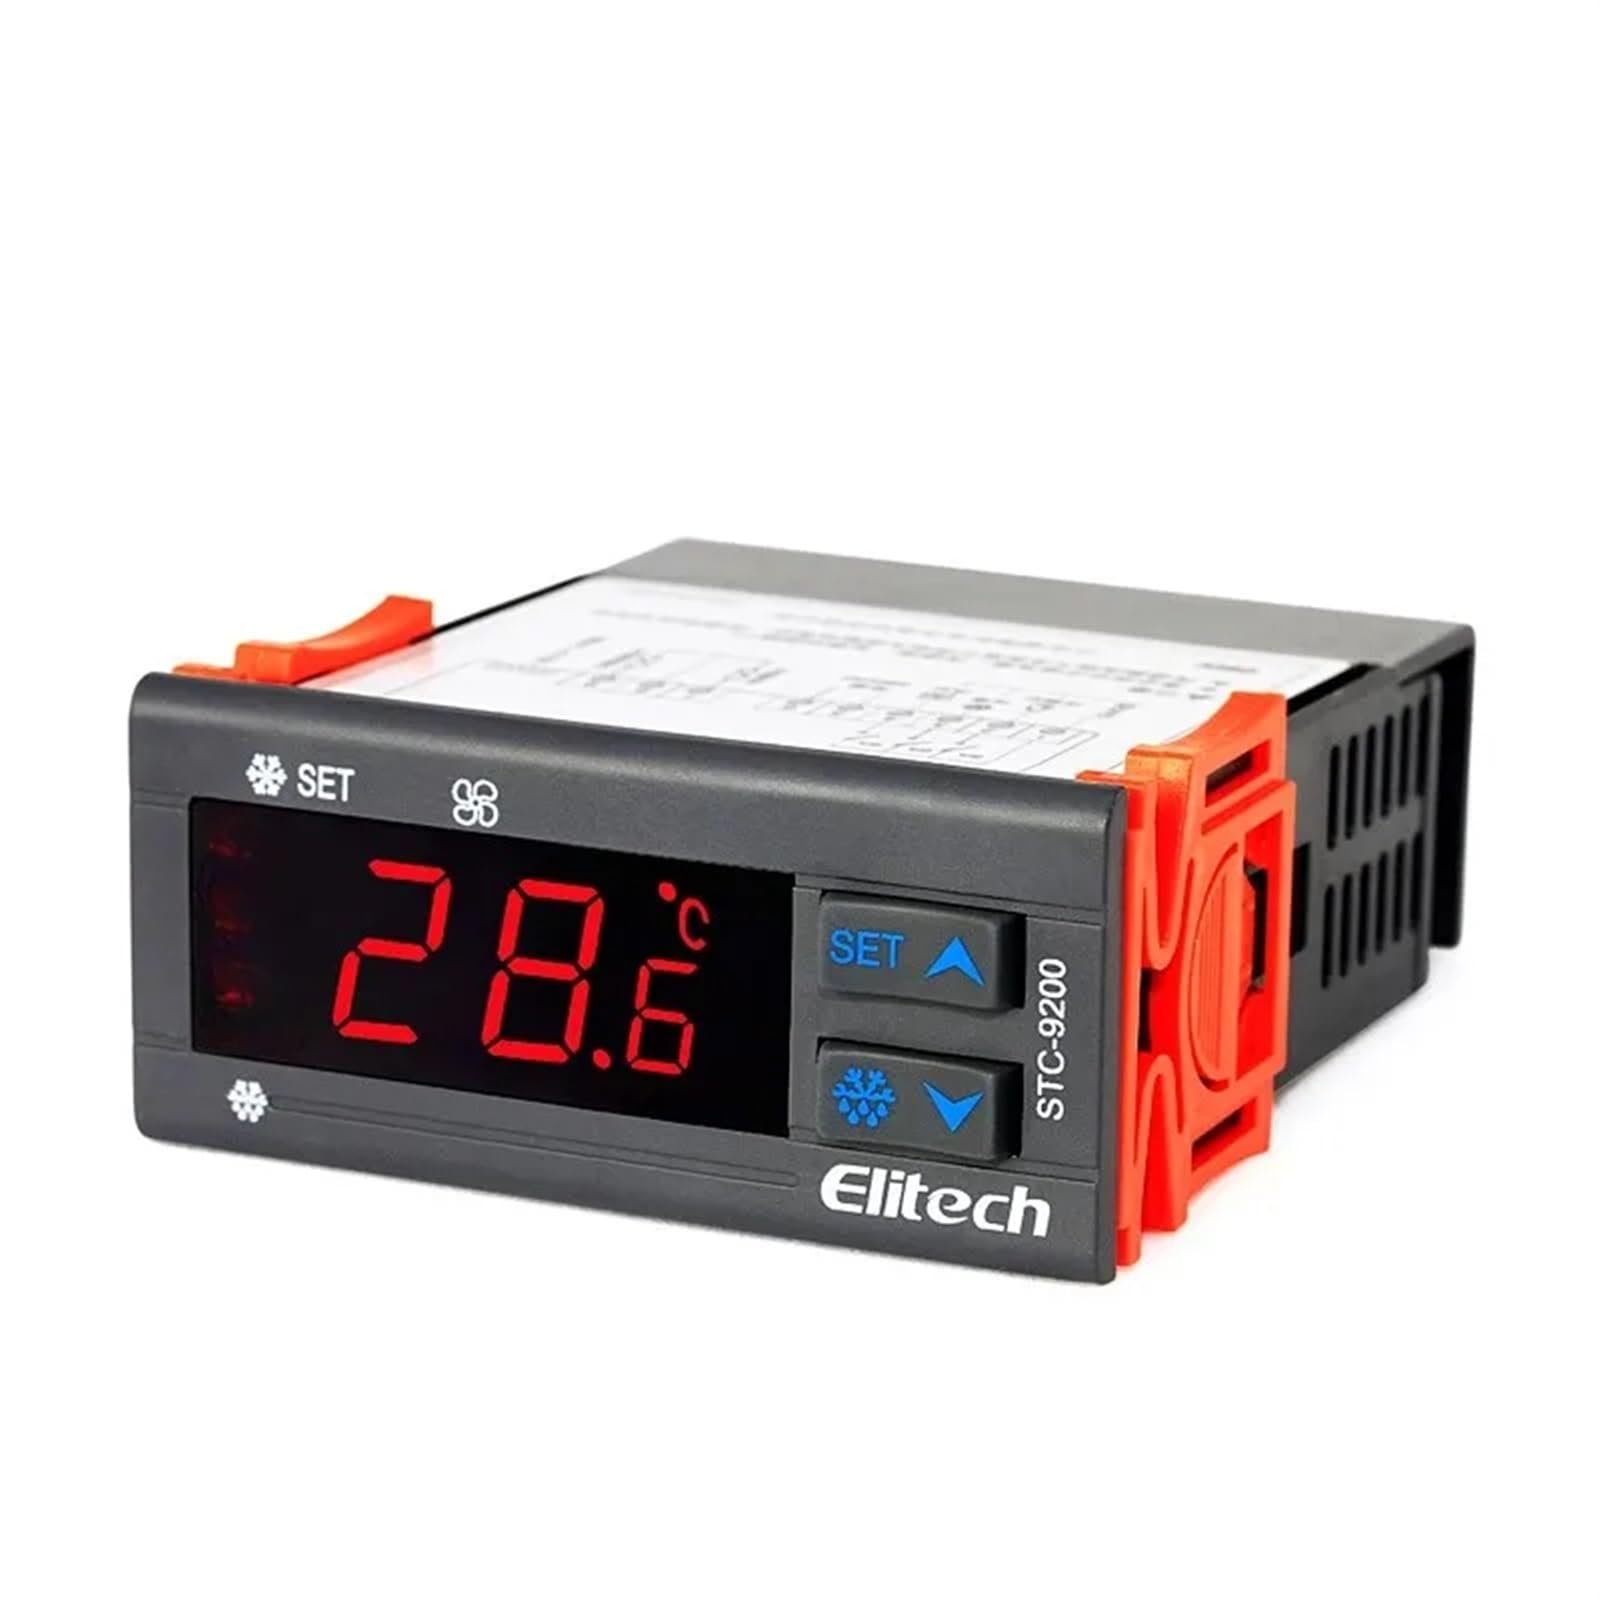
図1: フロント view of an Elitech temperature controller (model EK-3010 shown). This image displays the digital display, control buttons (Up, OK/Set, Down), and indicators for various functions like refrigeration, defrost, and fan operation. The display shows a temperature reading of -44.5.
4. 仕様
| 特徴 | 説明 |
|---|---|
| 電源 | AC 220V ±10%, 50/60Hz (Typical, may vary by model) |
| 温度測定範囲 | -50°C ~ 99°C (-58°F ~ 210°F) (標準) |
| 制御範囲 | -40°C ~ 70°C (-40°F ~ 158°F) (標準) |
| 解決 | 0.1°C / 1°F |
| センサータイプ | NTC sensor (Typical) |
| リレー出力容量 | Compressor: 10A/250VAC; Defrost: 10A/250VAC; Fan: 10A/250VAC (Typical) |
| 動作温度 | 0°C ~ 60°C (32°F ~ 140°F) |
| 保管温度 | -30°C ~ 75°C (-22°F ~ 167°F) |
| 相対湿度 | 20% ~ 85% (結露なし) |
Note: Specifications may vary slightly between different models (STC-9200, STC-8080A, STC-200, STC-9100, STC-1000X, EK-3020). Refer to the specific model's packaging or label for precise details.
5. セットアップとインストール
5.1 取り付け
- Choose a suitable location for mounting the controller, away from direct heat sources, moisture, and vibrations.
- ユニットの周囲に十分な換気を確保してください。
- Cut a rectangular opening in the panel according to the controller's dimensions (refer to the product diagram for exact measurements).
- Insert the controller into the opening and secure it using the provided mounting clips.
5.2配線
警告: 配線する前に必ず電源を切ってください。
- 電源: Connect the main power supply (L and N) to the designated terminals on the controller.
- 温度センサー: Connect the NTC temperature sensor to the sensor input terminals. Ensure correct polarity if applicable. The sensor should be placed in the area where temperature needs to be monitored and controlled.
- コンプレッサー出力: Connect the compressor's power line to the compressor relay output terminals.
- Defrost Heater Output: Connect the defrost heater's power line to the defrost relay output terminals.
- ファン出力: Connect the evaporator fan's power line to the fan relay output terminals.
Refer to the wiring diagram printed on the side of the controller or in the specific model's manual for precise terminal connections.
6. 操作手順
6.1 電源オン/オフ
- To power on, connect the main power supply. The display will show the current temperature.
- To power off, disconnect the main power supply.
6.2 View温度
The current measured temperature is continuously displayed on the front panel.
6.3 パラメータの設定
The controller allows adjustment of various parameters such as setpoint temperature, differential, defrost cycle, and fan operation. The exact procedure may vary slightly by model, but generally follows these steps:
- を押し続けます SET / OK button for 3-5 seconds to enter parameter setting mode.
- 使用 UP そして 下 buttons to navigate through the parameter codes (e.g., F1, F2, P1, P2).
- プレス SET / OK に view 選択したパラメータの値。
- 使用 UP そして 下 ボタンで値を調整します。
- プレス SET / OK again to confirm the new value and move to the next parameter, or press and hold SET / OK to save all changes and exit the setting mode.
一般的なパラメータは次のとおりです。
- Set Point (SP): 希望する温度。
- Differential (Hy): The temperature difference between the set point and the turn-on/off temperature.
- Defrost Cycle (Id): Interval between defrost cycles.
- Defrost Duration (Ed): Length of the defrost cycle.
- Fan Control (Fc): Settings for fan operation during refrigeration and defrost.
7. メンテナンス
7.1 クリーニング
- 定期的にフロントパネルを柔らかくて乾いた布で拭いてください。amp 布で拭いてください。研磨剤や溶剤は使用しないでください。
- 過熱を防ぐために、通気口にほこりやごみがないことを確認してください。
7.2 Sensor Check
- Periodically inspect the temperature sensor and its wiring for any damage or corrosion.
- Ensure the sensor is securely placed and making proper contact.
8。 トラブルシューティング
| 問題 | 考えられる原因 | 解決 |
|---|---|---|
| Display shows "EE" or "HH" | Sensor error or temperature out of range. | Check sensor connection and wiring. Replace sensor if damaged. Ensure temperature is within operating range. |
| コントローラーの電源が入らない | 電源が供給されていないか、配線が間違っています。 | 電源接続と音量を確認してくださいtage. Check wiring according to diagram. |
| コンプレッサーが作動していない | Temperature not reaching set point, compressor delay, or wiring issue. | Check set point and differential. Wait for compressor delay. Verify compressor wiring. |
| 不正確な温度測定 | Sensor placement, sensor damage, or calibration needed. | Relocate sensor to a representative area. Check sensor for damage. Refer to manual for calibration procedure if available. |
9. 保証とサポート
Elitech products are typically covered by a limited warranty against defects in materials and workmanship. The warranty period and terms may vary by region and specific product model. Please retain your purchase receipt as proof of purchase.
For technical support, warranty claims, or service inquiries, please contact your authorized Elitech distributor or visit the official Elitech website for contact information. When contacting support, please have your product model number and purchase date available.