導入
The RYOBI Expand-It Universal Tiller Attachment transforms your attachment-capable string trimmer into a versatile cultivator. This attachment is designed to efficiently prepare soil in garden rows and flower beds, eliminating the need for a separate, dedicated tilling tool. It features heavy-duty steel tines and an adjustable tilling width for various gardening needs.
主な特徴:
- Converts attachment-capable RYOBI string trimmers into a cultivator.
- Equipped with 4 heavy-duty steel tines for effective soil breaking.
- Adjustable tilling width from 7 to 10 inches for customized soil preparation.
- Includes transport wheels for easy maneuverability.
- Features a protective guard to shield the user from debris.
- Durable steel shaft construction.
- Compatible with most gas and cordless RYOBI EXPAND-IT attachment-capable powerheads.
安全ガイドライン
電動工具を使用する際は、常に安全を最優先に考えてください。ご使用前に必ずすべての取扱説明書をよく読んで理解してください。これらのガイドラインに従わない場合、重傷を負う可能性があります。
- Wear appropriate safety gear, including eye protection, gloves, and sturdy footwear.
- Be aware of potential debris thrown by the tines. Keep bystanders, children, and pets at a safe distance.
- Keep hands and other body parts away from moving parts during operation and maintenance.
- Do not operate the tiller attachment in enclosed spaces due to potential exhaust fumes if using a gas powerhead.
- Ensure the attachment is securely fastened to the powerhead before starting.
- Inspect the work area for rocks, roots, or other objects that could be thrown or cause damage to the tines.
- Always disconnect the power source (battery or spark plug wire) before performing any adjustments, cleaning, or maintenance.
組み立てとセットアップ
The RYOBI Expand-It Universal Tiller Attachment requires minimal assembly. Follow these steps to prepare your tiller for use:
- Install the Tines: The tines typically slide onto the shaft and are secured with a cotter pin or similar fastener. Ensure they are firmly in place and rotate freely.
- Adjust Wheels: The transport wheels can be adjusted to control the tilling depth and ease of movement. Set them to your desired height for initial use.
- ハンドルを取り付ける: Install the auxiliary handle for improved control and comfort during operation.
- Connect to Powerhead: Remove the end cap from your attachment-capable RYOBI string trimmer powerhead. Align the tiller attachment shaft with the powerhead's coupling and push until it clicks into place. Secure it with the locking mechanism on your powerhead.

Image: The RYOBI Tiller Attachment being connected to a compatible string trimmer powerhead. Ensure a secure connection before operation.
Operating the Tiller Attachment
Once assembled and connected to your powerhead, the tiller attachment is ready for use. Always start in an area free of obstacles and ensure you have a firm grip on the tool.
- 起動: Engage the powerhead according to its specific instructions. The tines will begin to rotate.
- 耕作技術: Guide the tiller attachment slowly over the soil you wish to cultivate. Allow the tines to dig into the ground. For compacted soil, multiple passes may be required to achieve the desired depth and looseness.
- 深度コントロール: The adjustable wheels help control the tilling depth. For deeper tilling, adjust the wheels higher. For shallower cultivation, lower the wheels.
- 土壌条件: The tiller performs best in moderately moist soil. Avoid tilling extremely wet or dry, hard-packed soil, as this can strain the tool and reduce effectiveness.
- Handling Tree Roots: While the tines are robust, avoid direct contact with large tree roots or rocks to prevent damage to the attachment or powerhead.
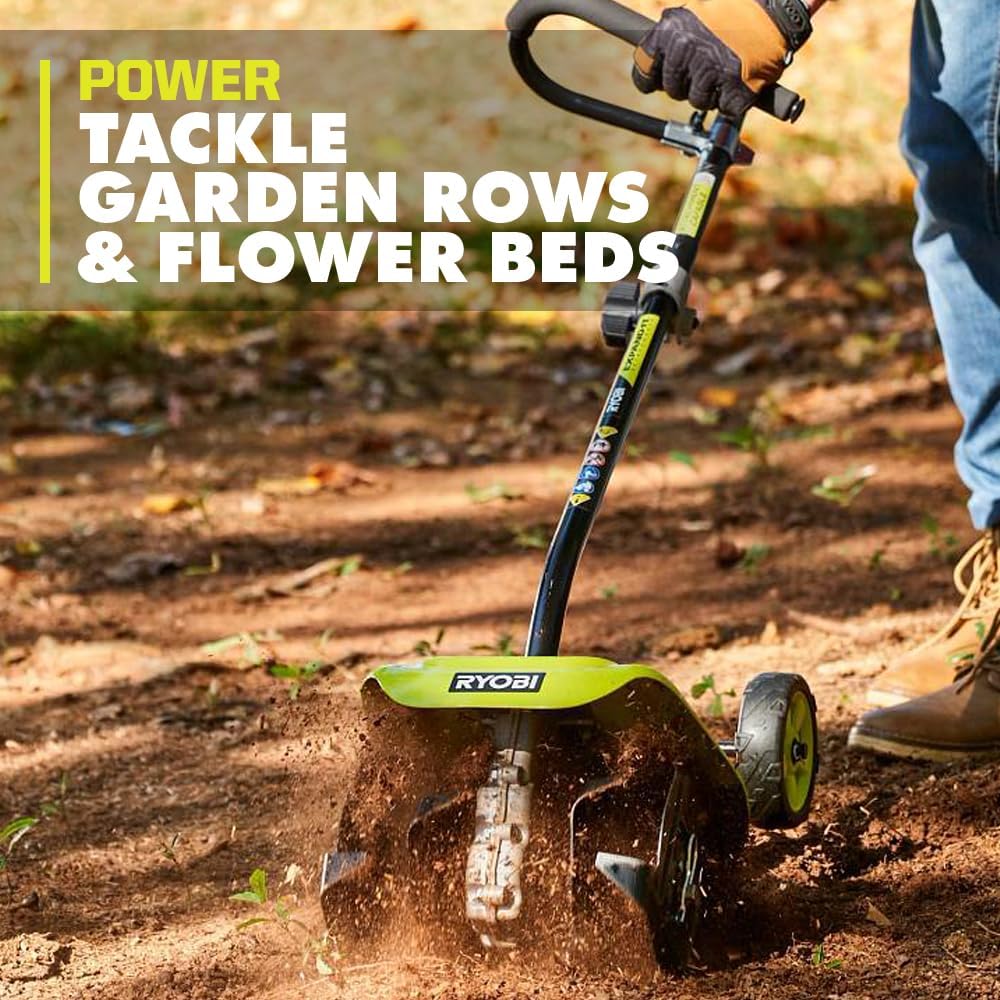
Image: The RYOBI Tiller Attachment actively cultivating soil in a garden area. The tines are breaking up the ground effectively.
製品デモビデオ
Video: A demonstration of the RYOBI Tiller Attachment in action, showing its effectiveness in breaking up soil. This video illustrates the assembly process and how to operate the tiller for optimal results.
メンテナンス
Regular maintenance ensures the longevity and optimal performance of your tiller attachment.
- クリーニング: After each use, clean soil and debris from the tines and housing. Use a stiff brush or cloth. Do not use water directly on electrical components if using a cordless powerhead.
- 検査: Periodically inspect the tines for wear, damage, or bending. Replace worn or damaged tines promptly. Check all fasteners for tightness.
- 潤滑: Refer to your powerhead's manual for any specific lubrication requirements for the attachment coupling.
- ストレージ: Store the tiller attachment in a clean, dry place, away from direct sunlight and extreme temperatures. Ensure it is disconnected from the powerhead before storage.
一般的な問題のトラブルシューティング
If you encounter issues with your tiller attachment, consider these common solutions:
- Tiller not engaging/spinning: Ensure the attachment is fully and securely connected to the powerhead. Check the powerhead's battery (if cordless) or fuel (if gas) and ensure it is functioning correctly.
- Ineffective tilling: The soil may be too hard or dry. Try moistening the soil slightly before tilling. Make multiple passes over the area. Check tines for excessive wear or damage.
- 過度の振動: Inspect tines for damage or imbalance. Ensure all components are securely fastened.
- 操縦困難: Adjust the height of the transport wheels to find a comfortable balance for your tilling depth and effort.
If problems persist, consult the RYOBI customer support or an authorized service center.
製品仕様
| ブランド | RYOBI |
| モデル番号 | ライティル |
| 耕うん幅 | Adjustable 7 to 10 inches |
| 歯の材質 | 合金鋼 |
| 歯の数 | 4 |
| アイテム重量 | 16.1 ポンド |
| 電源 | Powered by compatible string trimmer (Battery Powered or Gas) |
| 欧州連合 | 046396041104 |
保証とカスタマーサポート
For warranty information, product registration, or technical assistance, please refer to the documentation included with your RYOBI powerhead or visit the official RYOBI website. You can also contact RYOBI customer support directly for specific inquiries regarding your tiller attachment.
連絡先: Please refer to your product packaging or the official RYOBI web最新のカスタマー サービス連絡先の詳細については、サイトをご覧ください。