
1. 重要な安全上の注意事項
Please read all instructions carefully before using the Teesa Steam Mop TSA5051. Keep this manual for future reference.
- Always ensure the appliance is unplugged before filling the water tank or performing maintenance.
- Do not leave the steam mop unattended while powered on.
- 作動中は、子供やペットを機器から遠ざけてください。
- ミネラルの蓄積を防ぐため、タンクには蒸留水または脱塩水のみを使用してください。
- 人、動物、電気製品に蒸気を向けないでください。
- Avoid using the steam mop on unsealed hardwood floors or surfaces that are sensitive to heat and moisture.
- Always attach a cleaning pad before operating the steam mop.
- 電源コードが損傷した場合は、危険を回避するために、製造元、サービス代理店、または同様の資格を持つ担当者が交換する必要があります。
2.製品オーバーview およびコンポーネント
Familiarize yourself with the parts of your Teesa Steam Mop TSA5051 before assembly and operation.

図2.1: Fully assembled Teesa Steam Mop TSA5051, front view.

図2.2: 側 view of the steam mop, showing the handle and power cord wrap.
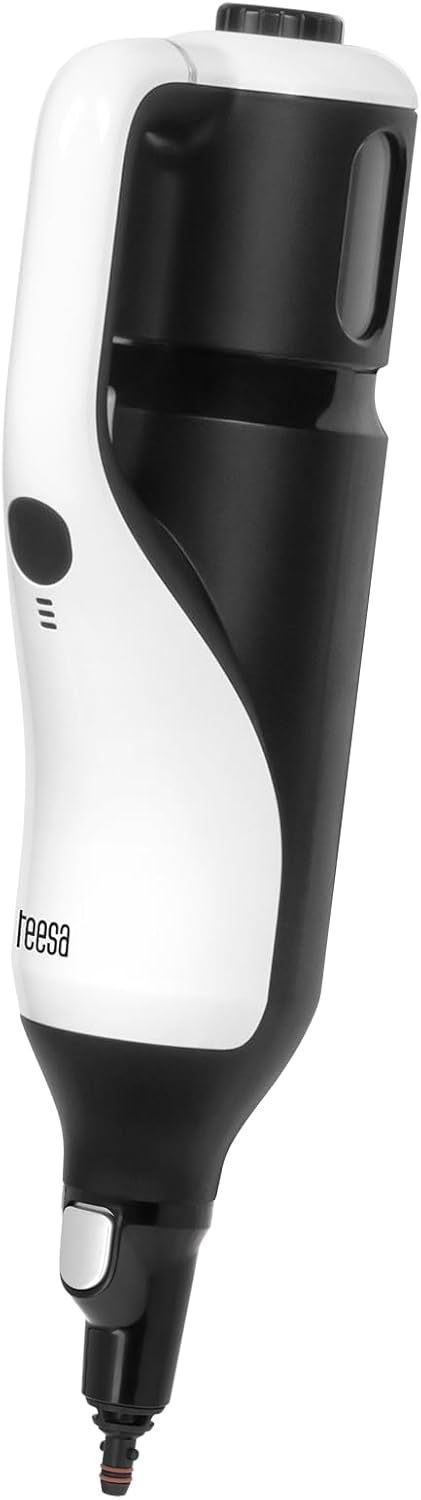
図2.3: The detachable handheld steam unit.

図2.4: Illustration of detaching the handheld unit from the main body.
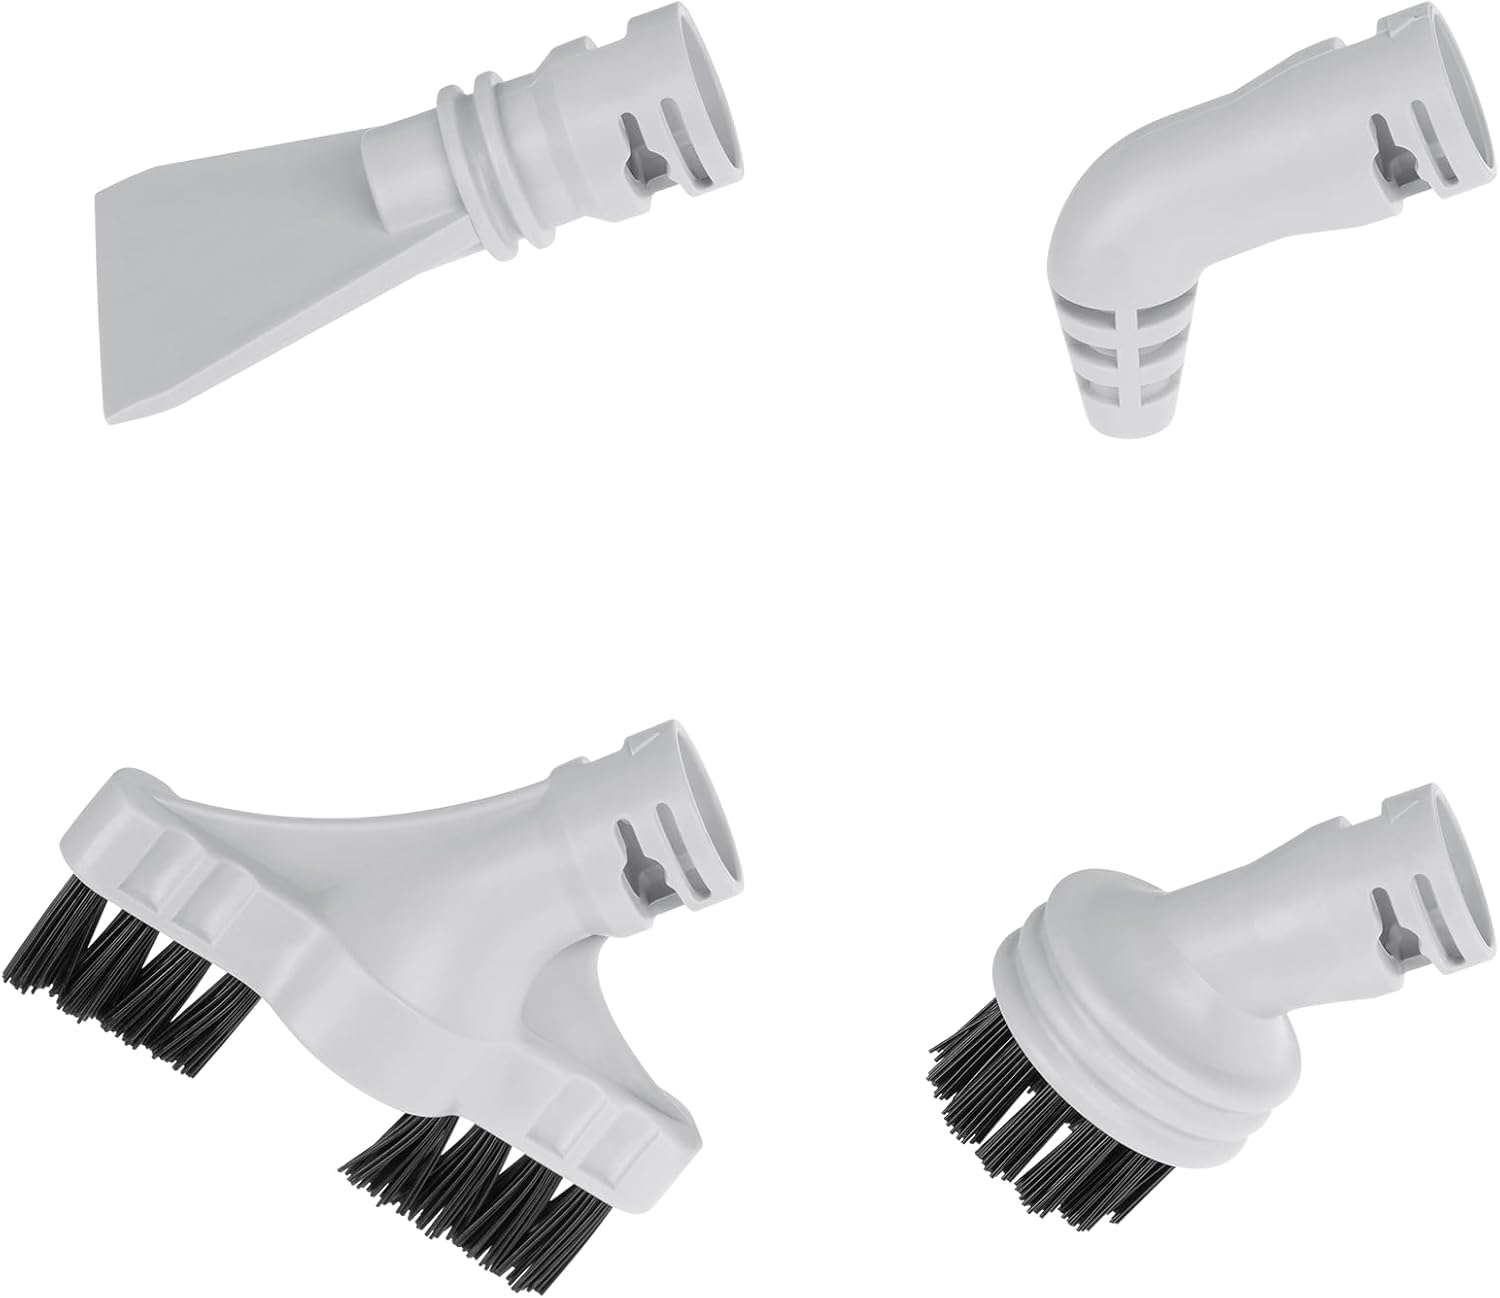
図2.5: Included accessories: round brush, joint accessory, slot nozzle, scraper.

図2.6: Measuring cup for water and adapter for accessories.
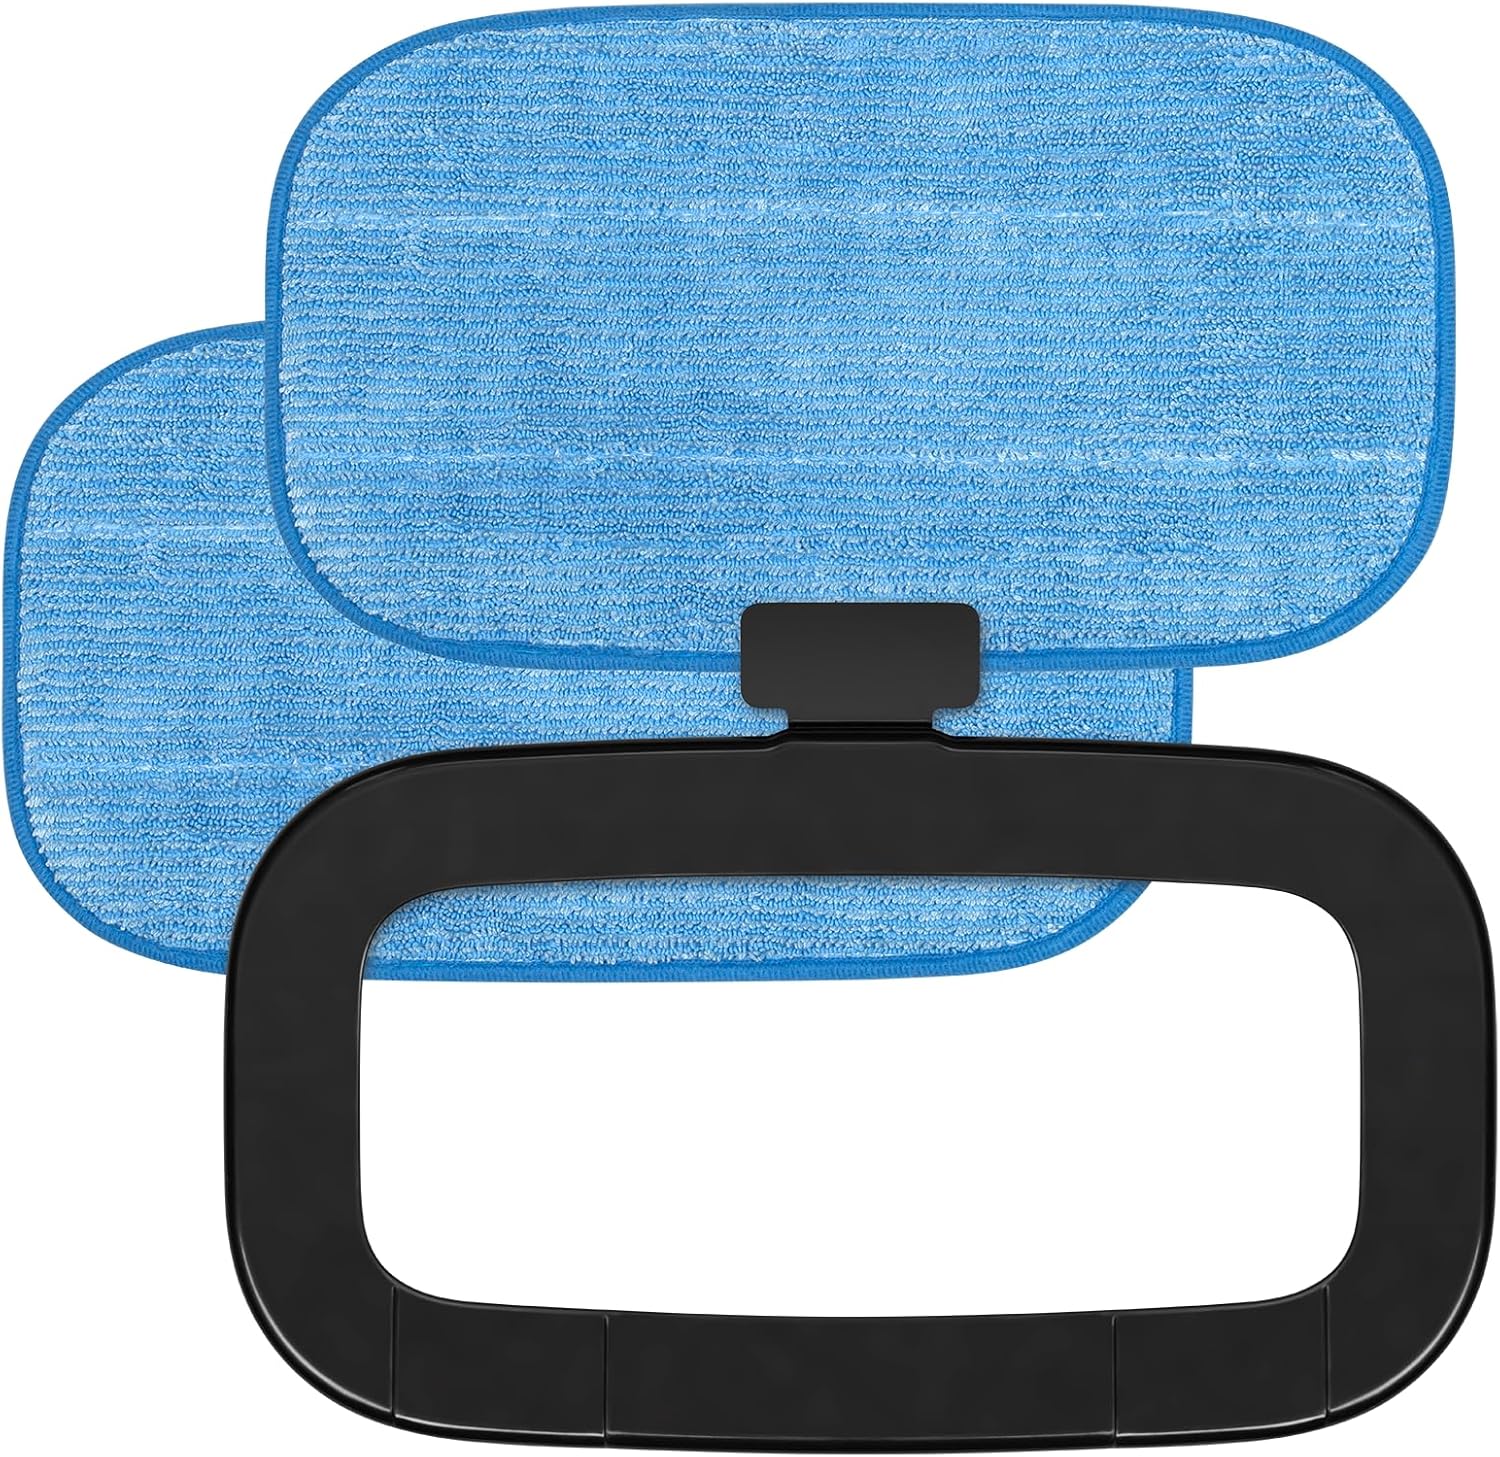
図2.7: Two sponge cloths (mop pads) and the carpet glider frame.
含まれるコンポーネント:
- Main Steam Mop Unit (with detachable handheld steamer)
- ハンドルアセンブリ
- 2 x Sponge Cloths (Mop Pads)
- 計量カップ
- アクセサリーアダプター
- ラウンドブラシ
- Joint Accessory
- スロットノズル
- スクレーパー
- Carpet Glider Frame
3. セットアップと組み立て
- ハンドルを組み立てる: Insert the handle assembly into the main steam mop unit until it clicks securely into place.
- クリーニングパッドを取り付ける: Place one of the sponge cloths onto the bottom of the mop head, ensuring it is securely attached.
- 水タンクに水を入れる:
- 水タンクのキャップを開けます。
- Using the provided measuring cup, fill the water tank with up to 380 ml of distilled or demineralized water. Do not overfill.
- 水タンクのキャップをしっかり閉めてください。
- Optional: Attach Carpet Glider: For refreshing carpets, place the mop head with the attached cleaning pad into the carpet glider frame.
4. 操作手順
4.1. スチームモップとして使用する
- Ensure the water tank is filled and a cleaning pad is attached.
- Plug the power cord into a grounded electrical outlet (220-240 V AC, 50 Hz).
- The steam mop will begin heating. The indicator light will illuminate, signaling preparation. The device is ready in approximately 25 seconds.
- Select the desired steam level (3 levels available) using the control button.
- Begin cleaning by moving the mop head slowly and steadily over the floor surface. The swivel head allows for easy maneuverability.
- For carpet refreshing, ensure the carpet glider is attached and move the mop over the carpet.
- When finished, unplug the appliance and allow it to cool before emptying any remaining water and cleaning.
4.2. ハンドヘルドスチームクリーナーとして使用する
- Unplug the steam mop and ensure it is cool.
- Press the release button to detach the handheld steam unit from the main body (refer to Figure 2.4).
- Attach the desired accessory (e.g., round brush, slot nozzle, joint accessory, scraper) to the handheld unit using the accessory adapter if needed.
- Fill the water tank if necessary (follow instructions in Section 3.3).
- Plug in the handheld unit. Wait for the indicator light to show it's ready (approx. 25 seconds).
- Direct the steam towards the surface to be cleaned. Use caution as steam is hot.
- After use, unplug the unit and allow it to cool before detaching accessories and storing.
5. メンテナンス
定期的なメンテナンスにより、最適なパフォーマンスが確保され、スチームモップの寿命が延びます。
- クリーニングパッド: The sponge cloths can be machine washed with mild detergent. Do not use bleach or fabric softeners. Air dry only. Replace pads when they become worn or lose their cleaning effectiveness.
- 水タンクを空にする: After each use, unplug the appliance and allow it to cool. Empty any remaining water from the tank.
- 外装の清掃: スチームモップの外側を拭きますamp 布で拭いてください。強力な化学薬品や研磨剤入りの洗剤は使用しないでください。
- スケール除去: If you notice a decrease in steam production or mineral residue, descaling may be necessary.
- 白酢1に対して水2の割合で混ぜます。
- 溶液を水タンクに注ぎます。
- Plug in the unit and allow it to heat up.
- Run the unit until half of the solution is used, then unplug and let it sit for 30 minutes.
- Plug it back in and run until the tank is empty.
- Rinse the tank thoroughly with fresh water and run two full tanks of fresh water through the unit to flush out any vinegar residue.
- ストレージ: Store the steam mop in a cool, dry place. Wrap the power cord around the designated cord wraps on the handle (refer to Figure 2.2).
6。 トラブルシューティング
| 問題 | 考えられる原因 | 解決 |
|---|---|---|
| No steam or low steam. |
|
|
| モップヘッドから水が漏れています。 |
|
|
| モップがスムーズに滑りません。 |
|
|
7. 仕様
| モデル番号 | TSA5051 |
| 力 | 1500ワット |
| 水タンク容量 | 380ml |
| Steam Ejection Rate | 21 / 28 ml/min (3 levels) |
| 加熱時間 | 約。 25秒 |
| 電源 | 220〜240 V AC、50 Hz |
| 電源コードの長さ | 5メートル |
| 重さ | 3.0 kg (product), 4 kg (package) |
| 寸法(組み立て済み) | 30 x 25 x 110 cm |
8. 保証とサポート
保証情報とカスタマーサポートについては、製品に付属の保証書を参照するか、Teesaの公式ウェブサイトをご覧ください。 webサイトでご確認ください。保証請求に備えて購入証明書を保管してください。
For further assistance, you may contact Teesa customer service through their official channels.