
1. はじめに
This manual provides detailed instructions for the installation, configuration, and maintenance of your CCYLEZ B85M K Motherboard. Please read this manual thoroughly before proceeding with installation to ensure correct setup and optimal performance.
2. 安全情報
以下の安全上の注意事項を常に守ってください。
- Disconnect the power supply from your computer before installing or removing any components.
- 静電気放電 (ESD) によるコンポーネントの損傷を防ぐために、静電気防止リスト ストラップを着用してください。
- ピンや回路との接触を避け、コンポーネントの端を持って取り扱ってください。
- 過熱を防ぐために、コンピューターケース内の換気が適切であることを確認してください。
- インストール手順について不明な点がある場合は、資格のある技術者にご相談ください。
3. パッケージ内容
パッケージにすべてのアイテムが含まれていることを確認します。
- 1 x CCYLEZ B85M K Motherboard
- 金属プレート(I/Oシールド)×1
- 1 x Connection Cable (likely SATA cable)
4.製品オーバーview
The CCYLEZ B85M K Motherboard is designed for desktop computing, offering robust features for enhanced performance.

画像1: 以上view of CCYLEZ B85M K Motherboard key features. This image highlights the dual DDR3 memory slots supporting up to 16GB, the LGA1150 CPU socket, M.2 NGFF/NVMe interface for high-speed data transfer, a PCI Express x16 slot for graphics cards, and a Gigabit network port.
主な特徴:
- CPU サポート: LGA1150 socket for Intel Core i3/i5/i7 4th and 5th generation processors.
- メモリ: 2 x UDIMM DDR3 slots, supporting 1066/1333/1600MHz, up to 16GB total capacity.
- ストレージ: 3 x SATA3.0 ports, 2 x SATA2.0 ports.
- 拡張スロット: 1 x PCI Express x16 slot for graphics cards, 1 x PCI Express x1 slot.
- ネットワーキング: 1 x RTL8111H Gigabit NIC for high-speed wired internet.
- USB ポート: 2 x USB2.0, 2 x USB3.0.
- ビデオ出力: VGA インターフェイス。
- 電力設計: Full solid capacitors for stable power delivery and enhanced durability.
- 工事: Premium PCB material for stable and efficient performance.
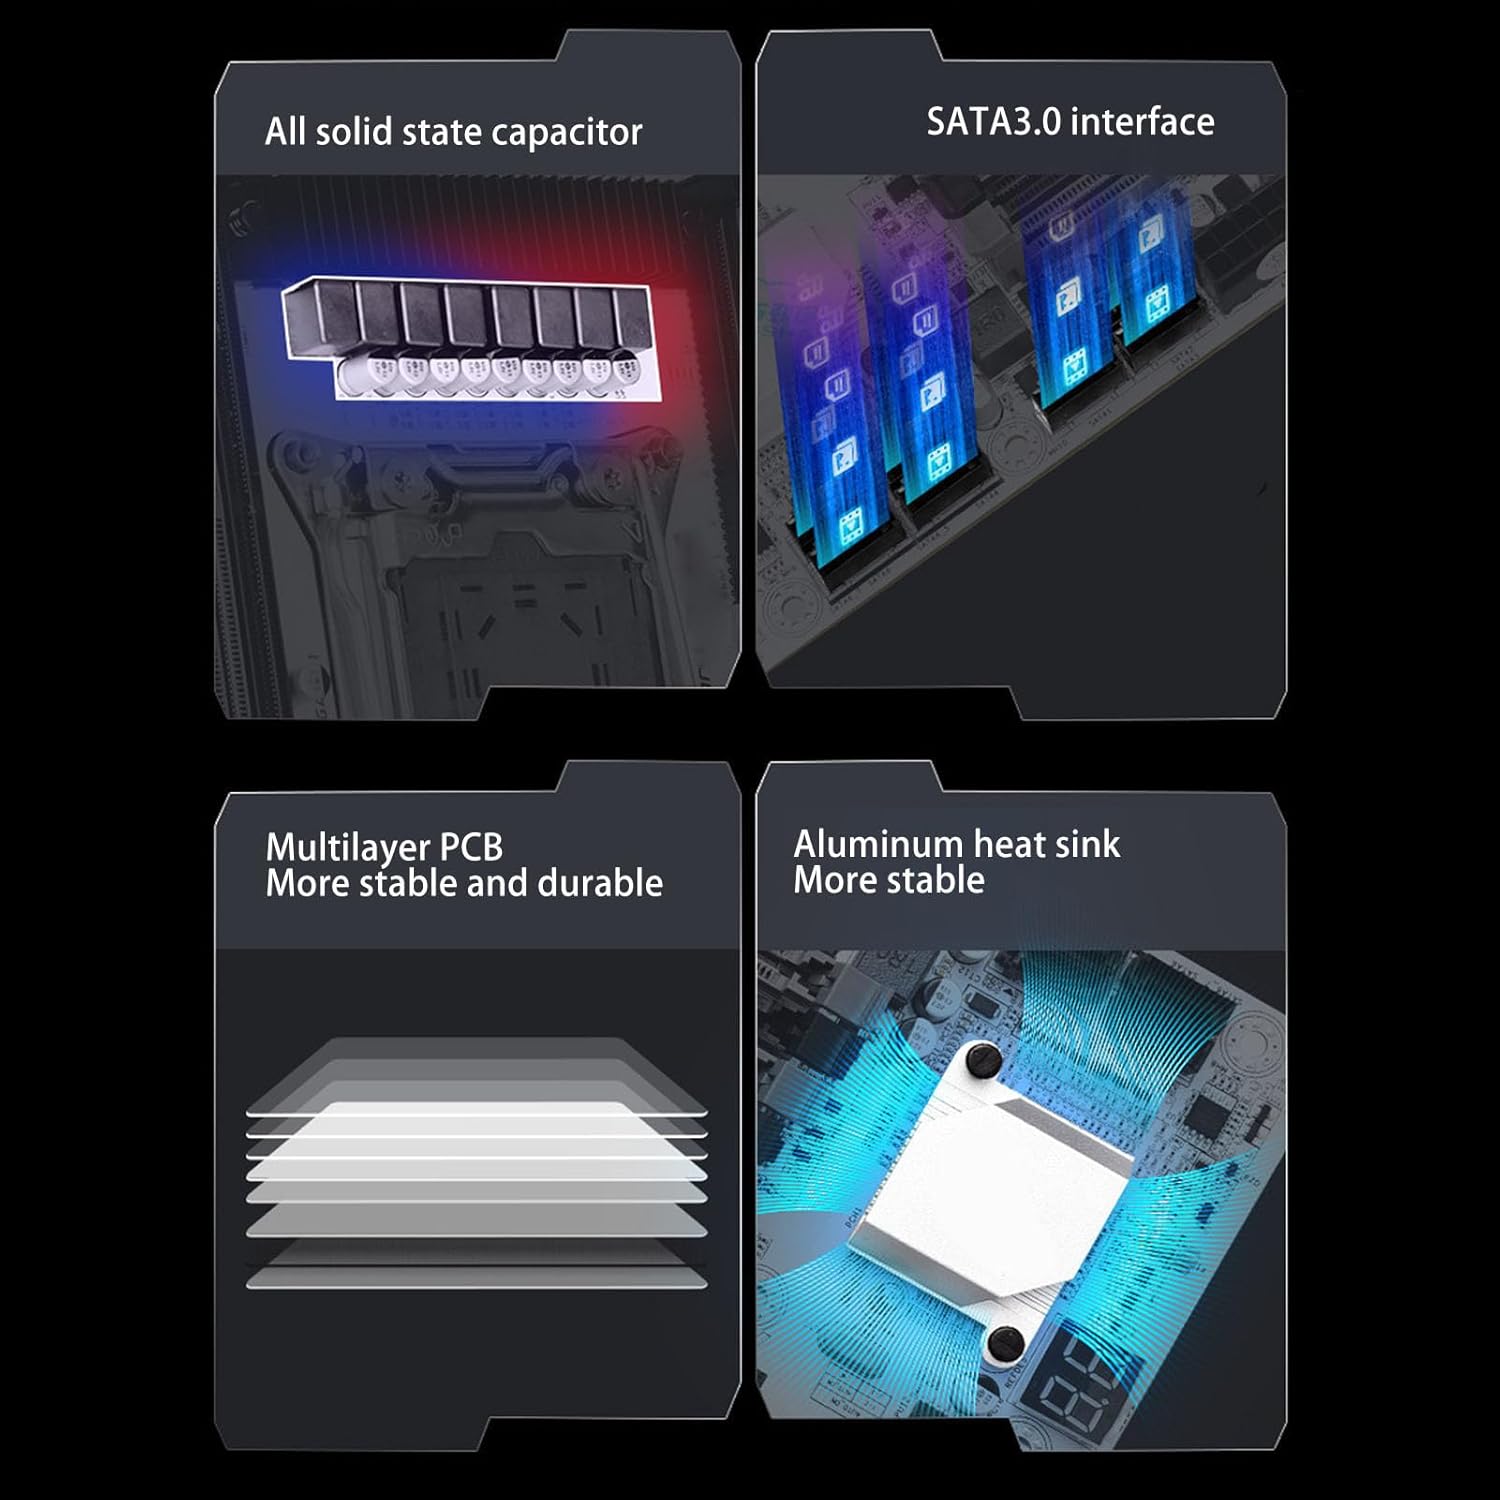
画像2: 詳細 view of motherboard components. This image illustrates the full solid state capacitors for stable power, the SATA3.0 interfaces for high-speed storage, the multilayer PCB design for durability, and the aluminum heat sink for efficient cooling.
背面 I/O パネル:
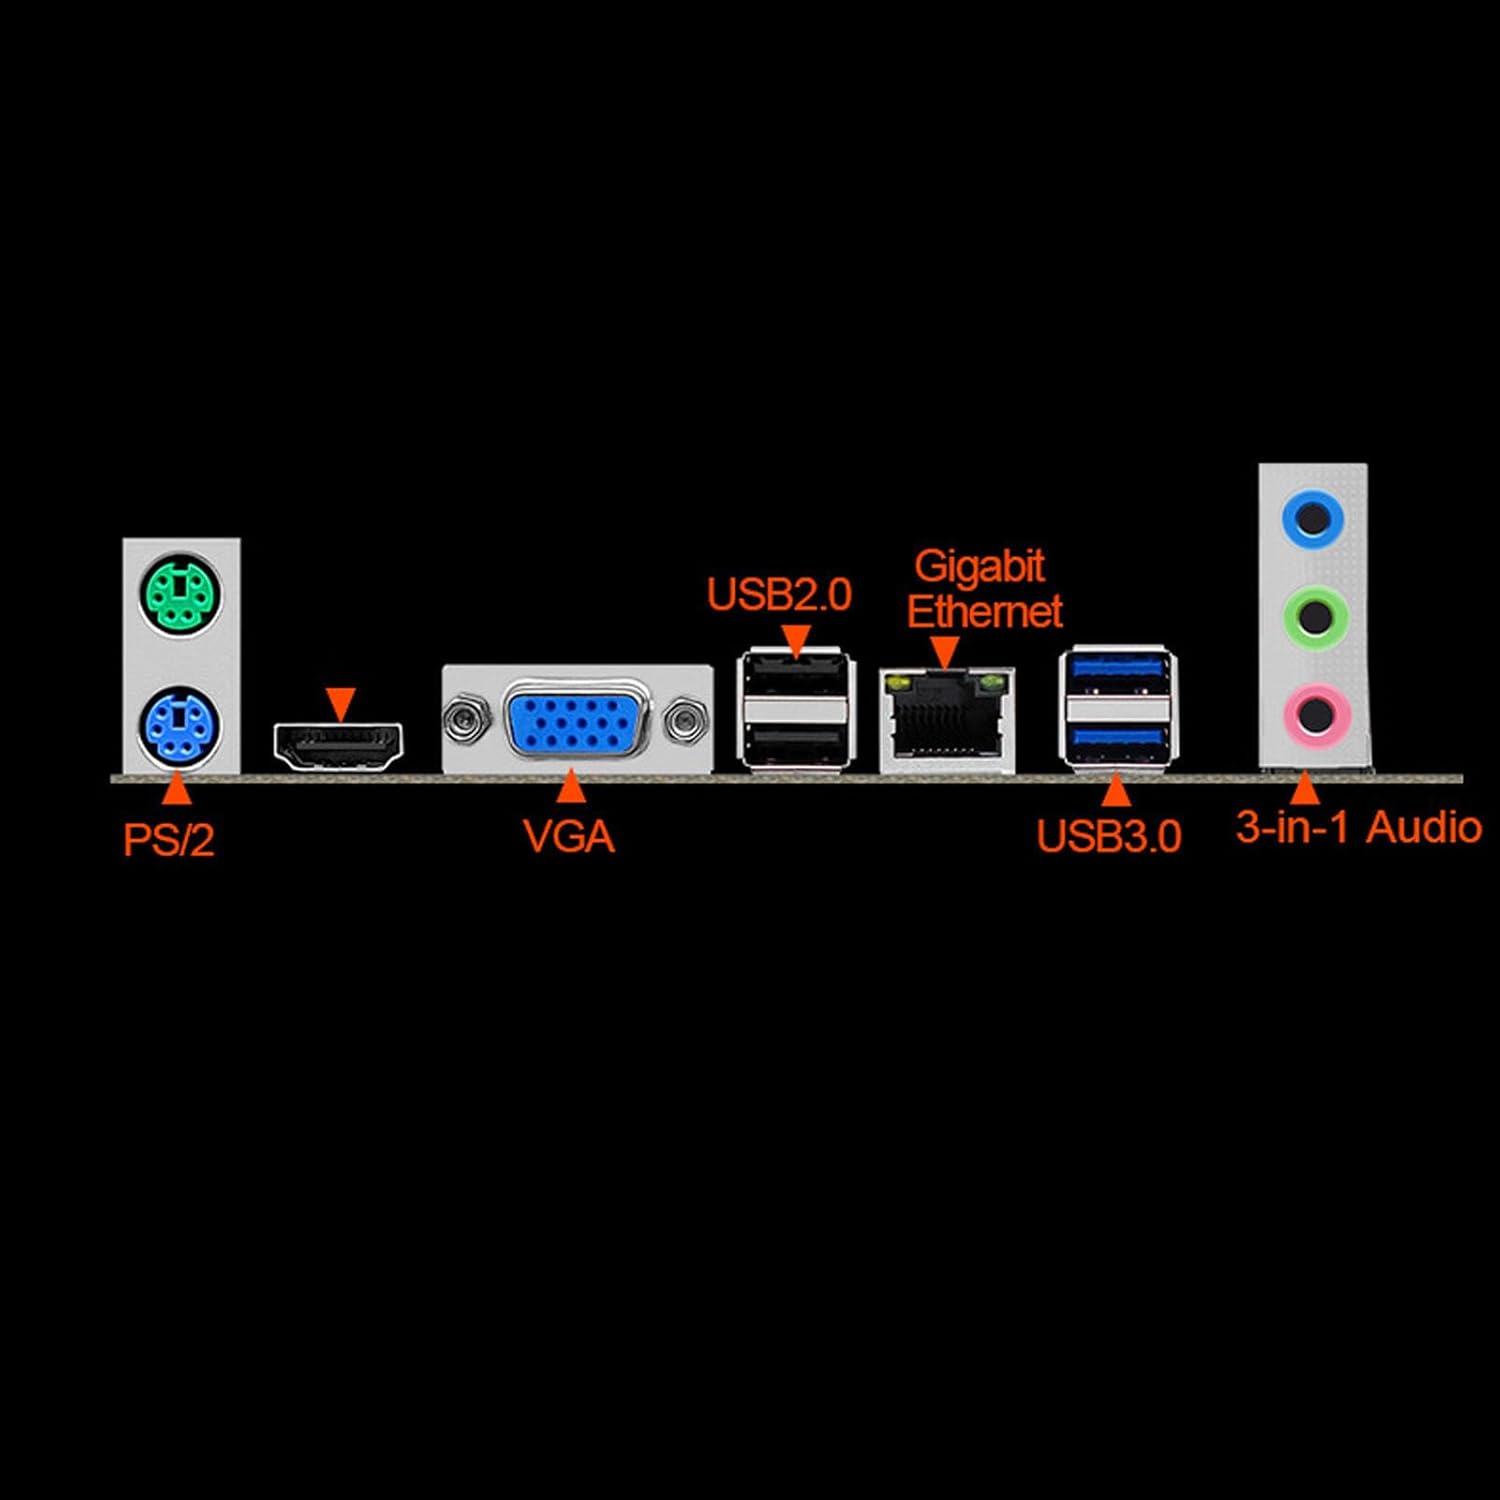
Image 3: Rear Input/Output (I/O) Panel. This image displays the various ports available on the rear of the motherboard, including PS/2 ports for keyboard/mouse, a VGA port for display output, USB 2.0 ports, a Gigabit Ethernet port, USB 3.0 ports, and 3-in-1 audio jacks.
- 2 x PS/2 Ports (Keyboard/Mouse)
- VGAポート x 1
- USB 2 ポート x 2.0
- ギガビットイーサネットポート x 1
- USB 2 ポート x 3.0
- 3 x オーディオ ジャック (ライン入力、ライン出力、マイク入力)
5. セットアップとインストール
マザーボードとコンポーネントをインストールするには、次の手順に従ってください。
5.1マザーボードの取り付け
- ケースを準備する: Install the I/O shield (metal plate) into the rear opening of your computer case.
- マザーボードをマウントします。 Carefully align the motherboard with the standoffs in your case and secure it with screws. Ensure no components are touching the case directly without proper insulation.
5.2 CPUの取り付け(LGA1150)
- CPUソケットを開きます: Gently push down the load lever on the LGA1150 socket and pull it to the side to open the metal retention frame.
- CPUを挿入: CPUの三角形のマークをソケットの対応するマークに合わせます。無理に押し込まず、慎重にCPUをソケットに差し込みます。
- CPUソケットを閉じる: Close the metal retention frame and push the load lever back into its locked position.
- CPUクーラーをインストールします。 Apply thermal paste (if not pre-applied) and install your CPU cooler according to its manufacturer's instructions. Connect the CPU fan cable to the "CPU_FAN" header on the motherboard.
5.3 メモリ(RAM)のインストール
- 空き DIMM スロット: DDR3 メモリ スロットの両端のクリップを開きます。
- RAMモジュールを挿入します: Align the notch on the DDR3 memory module with the key in the DIMM slot. Press down firmly on both ends of the module until the clips snap into place.
- デュアルチャネル構成: For optimal performance, install memory modules in matching slots (e.g., both in the same color slots if applicable, or as indicated in the motherboard diagram). This motherboard has 2 UDIMM DDR3 slots.
5.4 ストレージデバイスのインストール (SATA)
- Connect SATA Data Cable: Connect one end of the SATA data cable to a SATA port on the motherboard (SATA3.0 for faster drives) and the other end to your SSD or HDD.
- SATA電源ケーブルを接続します。 Connect a SATA power cable from your power supply unit (PSU) to your SSD or HDD.
5.5 Graphics Card Installation (PCI Express x16)
- Open PCIe Slot Latch: If present, open the retention latch at the end of the PCI Express x16 slot.
- グラフィック カードを挿入します: Align your graphics card with the PCI Express x16 slot and press down firmly until it is fully seated and the latch (if applicable) snaps into place.
- セキュアカード: Secure the graphics card to the computer case with a screw.
- 接続電源: If your graphics card requires additional power, connect the appropriate PCIe power cables from your PSU.
5.6 電源接続
- 24ピンATX電源: Connect the main 24-pin ATX power connector from your PSU to the corresponding socket on the motherboard.
- 4ピンATX 12V電源: Connect the 4-pin ATX 12V power connector (CPU power) from your PSU to the socket near the CPU.
5.7 フロントパネルと周辺機器の接続
- フロントパネルヘッダー: Connect the power switch, reset switch, HDD LED, and power LED cables from your computer case to the front panel header pins on the motherboard. Refer to the motherboard diagram for correct pin assignments.
- USB ヘッダー: Connect front panel USB 2.0 and USB 3.0 cables to the corresponding headers on the motherboard.
- オーディオヘッダー: Connect the front panel audio cable to the "F_AUDIO" header.
- 周辺機器: Connect your keyboard, mouse, monitor (to the graphics card or motherboard VGA port), and Ethernet cable to the rear I/O panel.
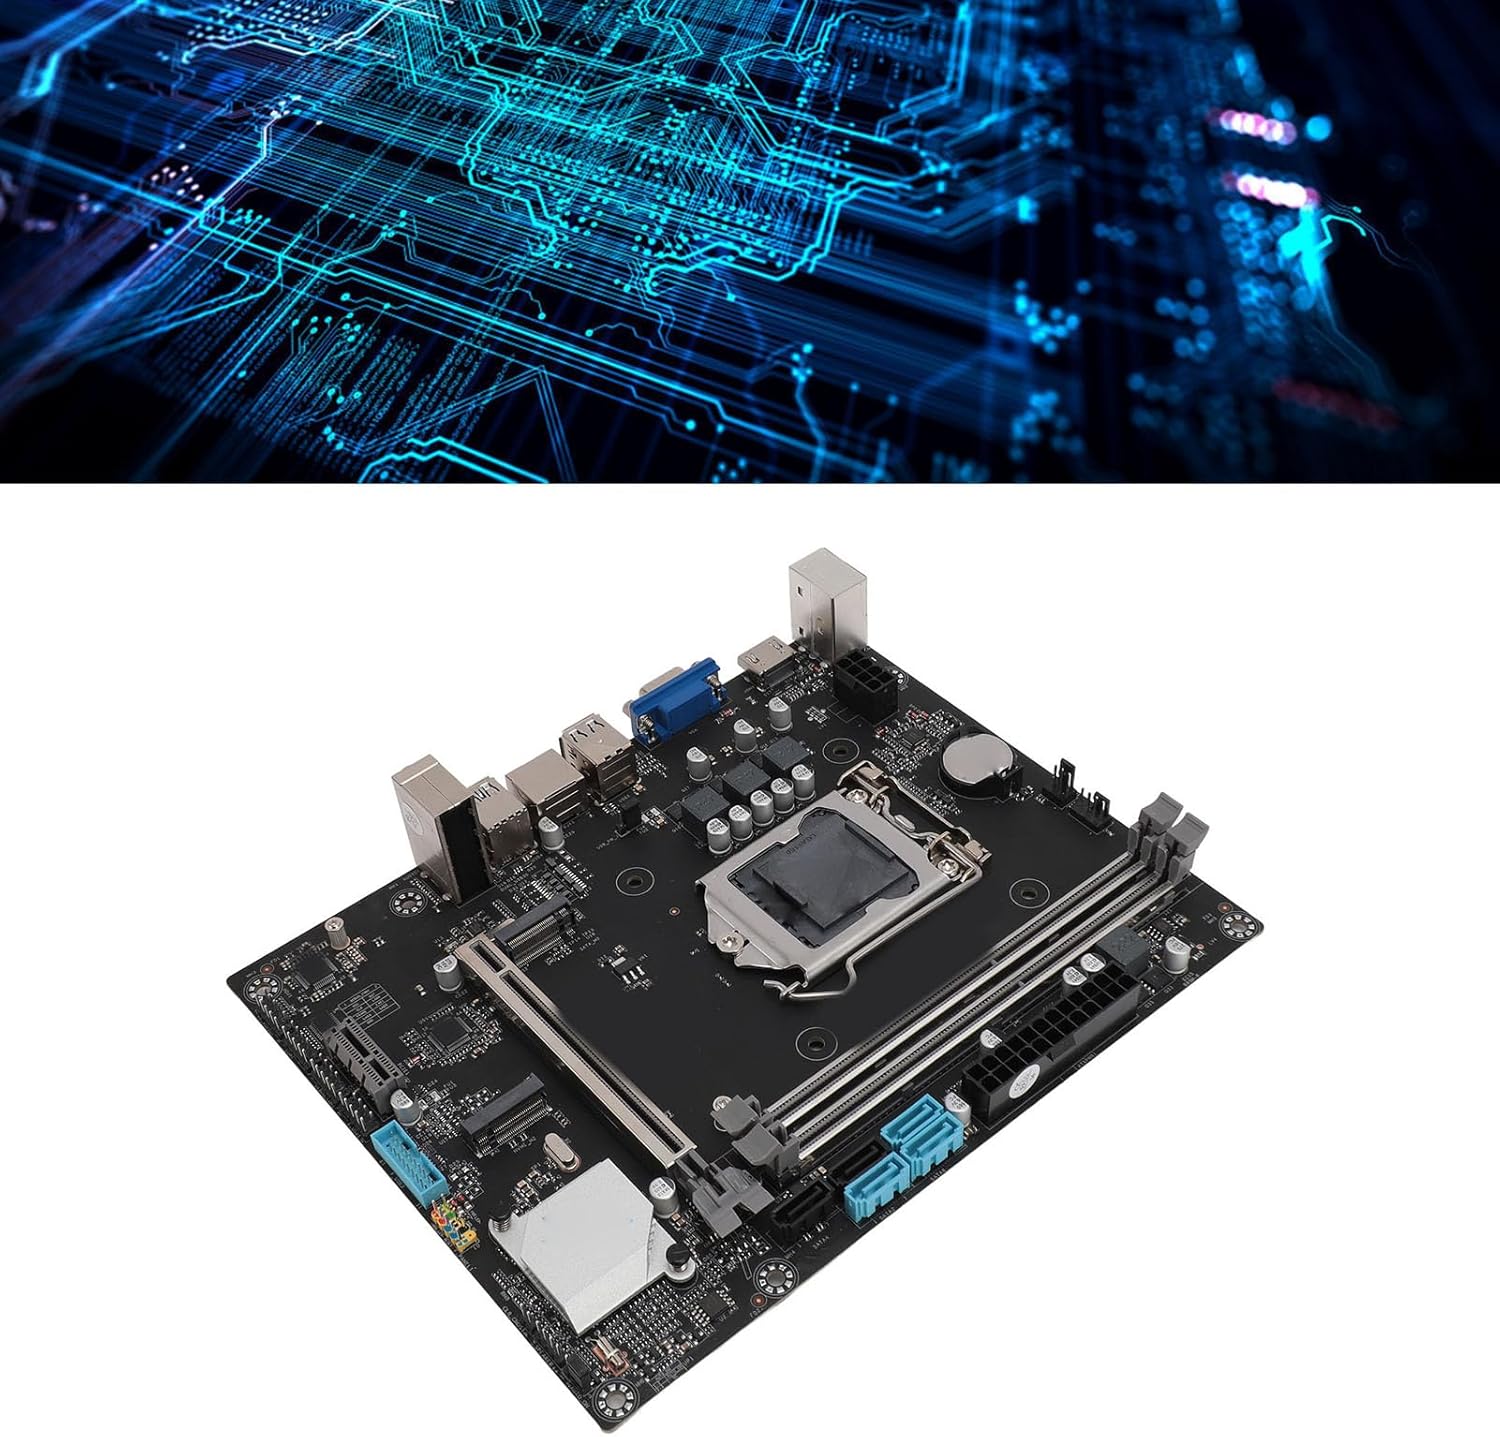
画像4: 角度付き view of the CCYLEZ B85M K Motherboard. This image provides a general perspective of the motherboard layout, including the CPU socket, RAM slots, and various connectors.
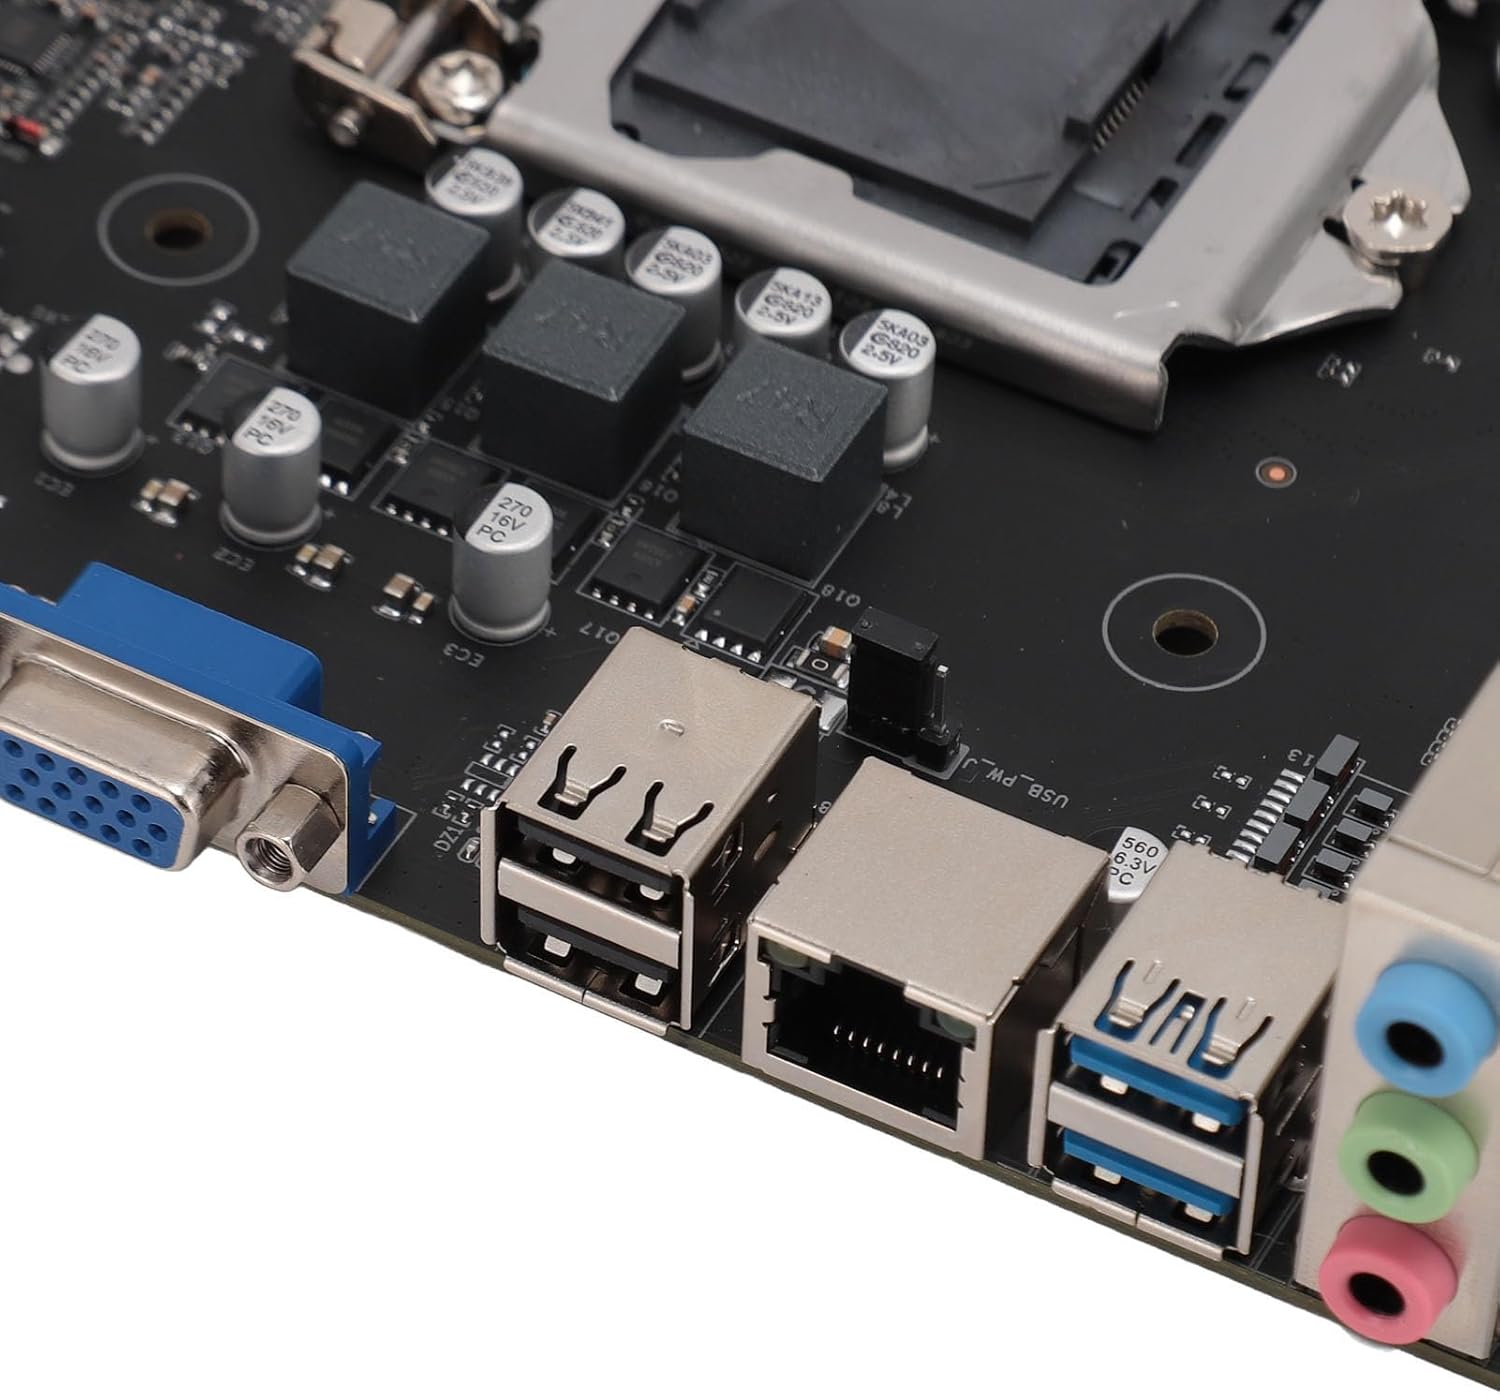
Image 5: Close-up of USB, Ethernet, and Audio Ports. This image provides a detailed view of the connectivity options on the rear I/O panel, specifically highlighting the USB 2.0, USB 3.0, Gigabit Ethernet, and audio ports.

Image 6: Close-up of Internal Headers and SATA Ports. This image shows the front panel headers (power, reset, LEDs), the USB 3.0 header, and the SATA data ports for connecting storage devices.

Image 7: Close-up of 24-Pin ATX Power Connector and SATA Ports. This image details the main power input for the motherboard and additional SATA ports.
6. 操作手順
- 電源オン: After all components are installed and connected, connect the power cord to your PSU and press the power button on your computer case.
- BIOS/UEFI セットアップ: 起動中に、指定されたキー(通常は 削除 or F2) to enter the BIOS/UEFI setup utility. Here you can configure boot order, system time, and other advanced settings.
- オペレーティング システムのインストール: オペレーティング システムのインストール メディア (USB ドライブまたは DVD) を挿入し、画面の指示に従って希望する OS をインストールします。
- ドライバーのインストール: After OS installation, install the necessary drivers for your motherboard (chipset, audio, LAN, etc.) from the manufacturer's webサイトまたは含まれるメディア。
7. メンテナンス
定期的なメンテナンスは、マザーボードとシステムの寿命を延ばし、安定した動作を確保するのに役立ちます。
- ほこりの除去: 圧縮空気を使用して、コンピューターケース内部、特にファンやヒートシンクの埃を定期的に除去してください。清掃前に、システムの電源をオフにし、プラグを抜いてください。
- BIOS/UEFI アップデート: メーカーの webBIOS/UEFIアップデートについては、こちらのサイトをご覧ください。アップデートにより、互換性、安定性、パフォーマンスが向上する場合があります。システムの損傷を防ぐため、アップデート手順を注意深く守ってください。
- ケーブル管理 空気の流れを改善し干渉を防ぐために、ケーブルがきちんと配線されていることを確認してください。
8。 トラブルシューティング
問題が発生した場合は、次の一般的なトラブルシューティング手順を参照してください。
- 電源なし:
- 電源ユニット(PSU)がオンになっているかどうかを確認します。
- すべての電源ケーブル (24 ピン ATX、4 ピン CPU、グラフィック カード用の PCIe) がしっかりと接続されていることを確認します。
- フロントパネルの電源スイッチとマザーボードの接続を確認します。
- 表示なし:
- Ensure your monitor is connected to the correct video output (graphics card or motherboard VGA port).
- グラフィック カードとメモリ モジュールを装着し直します。
- Test with a single RAM stick if multiple are installed.
- システムの不安定性/クラッシュ:
- CPUとGPUの温度を確認してください。クーラーが正しく取り付けられていることを確認してください。
- RAM モジュールが正しく装着されていることを確認します。
- メモリ診断ツールを実行します。
- すべてのドライバーが最新であることを確認してください。
- 周辺機器が検出されません:
- 周辺機器を別の USB ポートに接続してみてください。
- デバイス マネージャーでドライバーの問題を確認します。
9. 仕様
Detailed technical specifications for the CCYLEZ B85M K Motherboard:
| 特徴 | 仕様 |
|---|---|
| マザーボードのモデル | B85MK |
| フォームファクター | M-ATX |
| CPUソケット | 1150 号線 |
| 互換性のあるプロセッサ | Intel Core i3-4xxx, i5-4xxx, i7-4xxx, i3-5xxx, i5-5xxx, i7-5xxx |
| チップセット | インテル B85 |
| メモリスロット | 2×UDIMM DDR3 |
| サポートされているメモリタイプ | DDR3 1066/1333/1600MHz |
| 最大メモリ容量 | 16GB |
| グラフィックカードスロット | 1 x PCI Express x16 |
| 拡張スロット | 1 x PCI Express x1 |
| SATA ポート | 3 x SATA3.0, 2 x SATA2.0 (Total 5) |
| USBポート(背面) | 2 x USB2.0, 2 x USB3.0 (Total 4) |
| イーサネット | 1 x RTL8111H Gigabit NIC |
| ビデオ出力 | 1 X VGA |
| オーディオ | 3-in-1 Audio Jacks |
| 電源コネクタ | 1 x 24ピンATX、1 x 4ピンATX 12V |
| 内蔵バッテリー | 1 x 240mAh CR2032 Battery |
10. 保証とサポート
For product support, please refer to the retailer where the product was purchased. This product typically includes a standard return policy of 30 days from the date of purchase for refund or replacement, as per retailer terms.
拡張された補償にはオプションの保護プランが利用できる場合があります。
- 3年間の保護プラン
- 4年間の保護プラン
- Complete Protect(月額サブスクリプション)
Please check with your retailer for details on available protection plans and their terms.