
1.製品オーバーview
The QRD Wireless Controller (Model: US-T5-JB02) is a high-performance replacement controller designed for Nintendo Switch, Switch Pro, Lite, and OLED models. It features advanced technologies such as Hall Effect joysticks for precise, drift-free control, dual vibration motors for immersive feedback, and a 6-axis gyroscope for accurate motion sensing. This controller also includes programmable back buttons and customizable LED backlighting, enhancing your gaming experience.
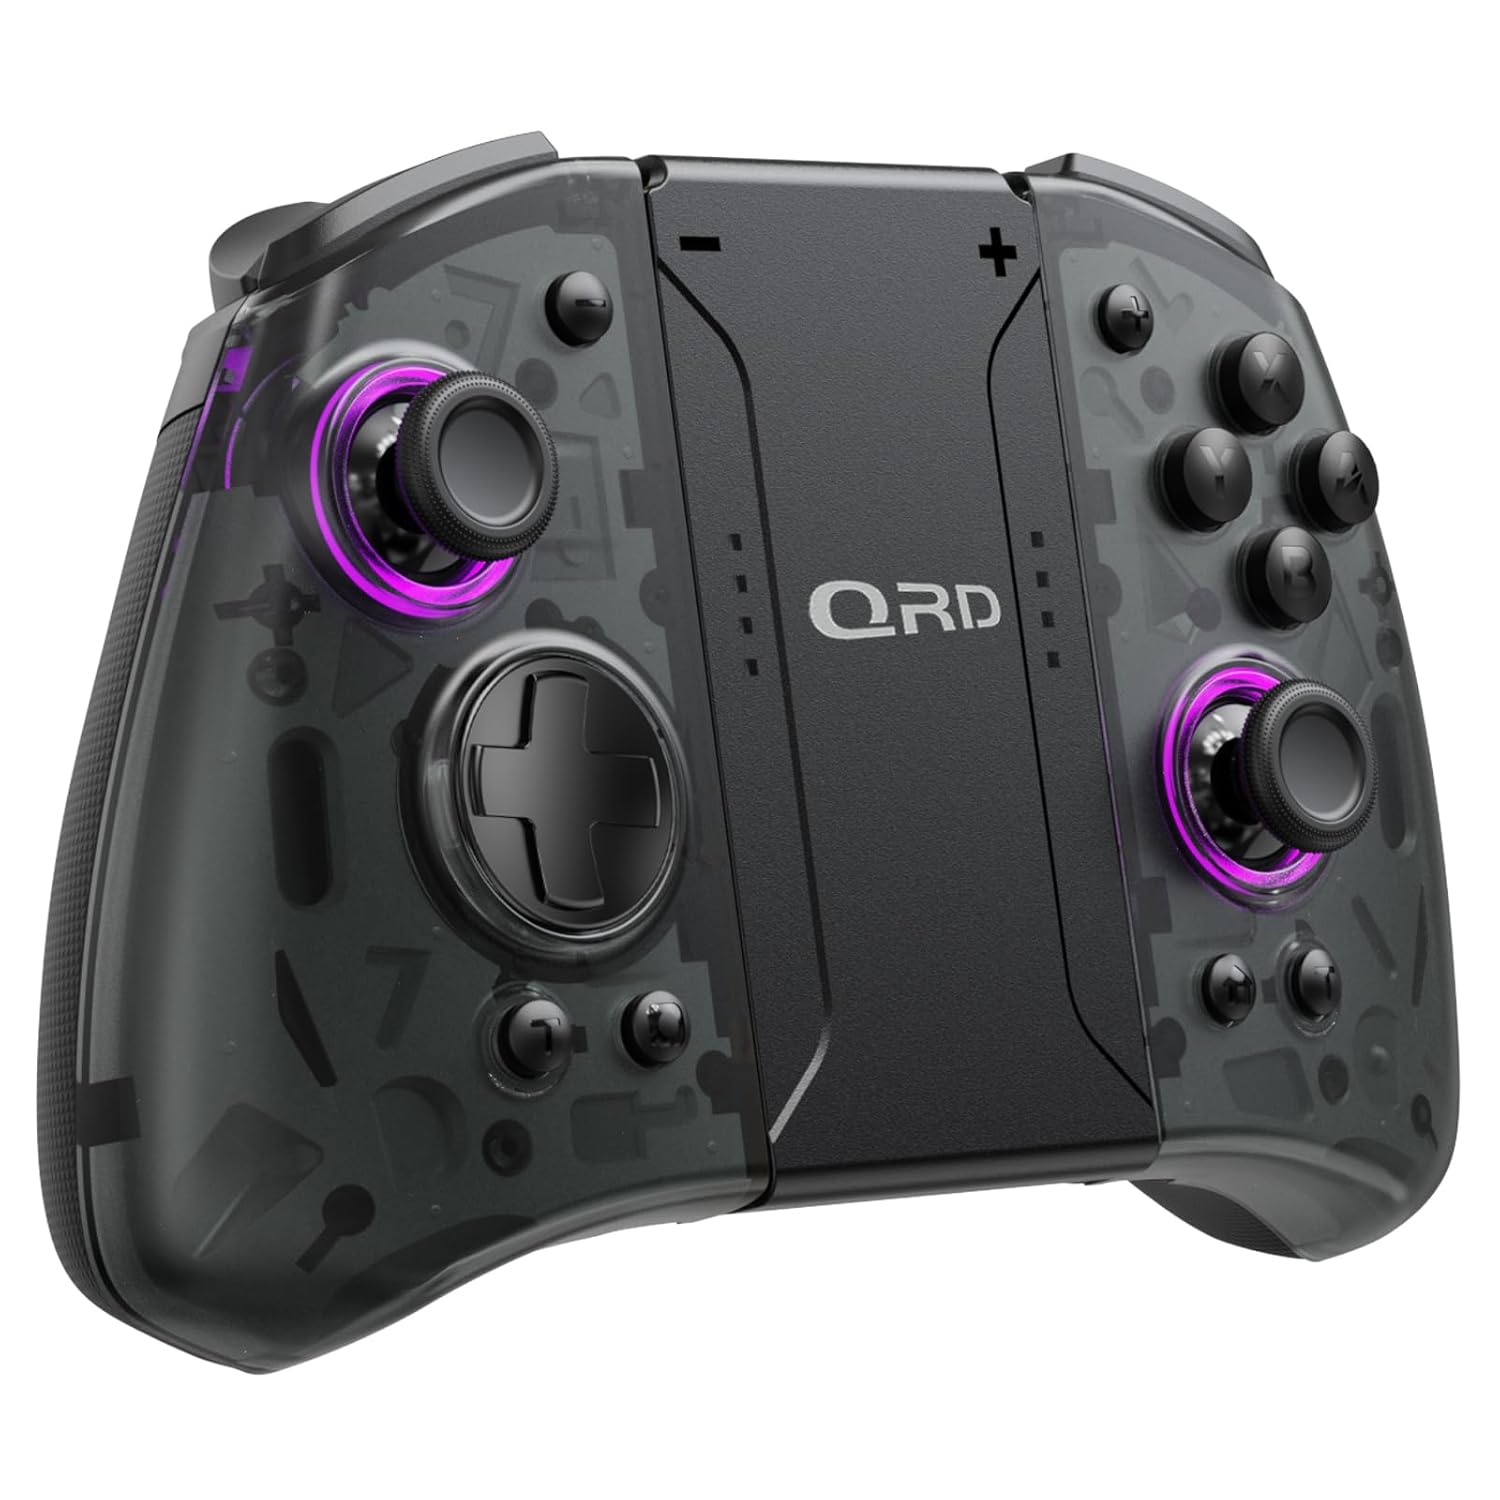
画像1.1:正面 view of the QRD Wireless Controller, showcasin人間工学に基づいたデザインとボタンレイアウト。
2. 主な特徴
- ワイヤレス Bluetooth 5.3 接続: Ensures stable, lag-free connection for seamless gameplay.
- ホール効果ジョイスティック: Provides 360° precise, drift-free control and extended lifespan.
- デュアル振動モーター: Offers 3 levels of adjustable vibration for enhanced tactile feedback.
- 6軸ジャイロスコープモーションセンシング: Enables accurate tilt detection for precise aiming and movement in compatible games.
- プログラム可能なバックボタン: Customize controls with single or multiple mappings for efficient combo execution.
- ターボ機能: Allows for rapid firing of buttons.
- LEDバックライト: Features 8 different colors with static, breathing, and flashing modes for personalized aesthetics.
- 長いバッテリー寿命: Up to 10 hours of uninterrupted gameplay on a single charge (2 hours charging time).
- 人間工学に基づいたデザイン: Comfortable grip for extended gaming sessions, includes a screenshot function.

Image 2.1: Diagram highlighting key features such as Bluetooth 5.3, Dual Vibration, 6-Axis Gyro, Turbo, Macro Back Paddles, and Colorful Options.

Image 2.2: Illustration demonstrating the Hall Effect Joysticks, emphasizing drift-free and accurate control.
3. セットアップと接続
3.1 Nintendo Switchとの初期ペアリング
- Nintendo Switch 本体の電源がオンになっており、最新のシステム バージョンに更新されていることを確認してください。
- HOMEメニューから「コントローラー」>「持ち方・順番変更」を選択します。
- On the QRD Wireless Controller, press and hold the ホームボタン (usually located in the center) for 3-5 seconds until the LED indicators start flashing rapidly.
- コントローラーのペアリングが正常に完了すると、コントローラー上の対応するプレーヤー LED が点灯します。
- The controller can also be connected by sliding it into the Nintendo Switch Dock while the console is attached.
3.2 コントローラの再接続
以前にペアリングしたコントローラーを再接続するには、 ホームボタン once. The controller will automatically attempt to connect to the last paired console.
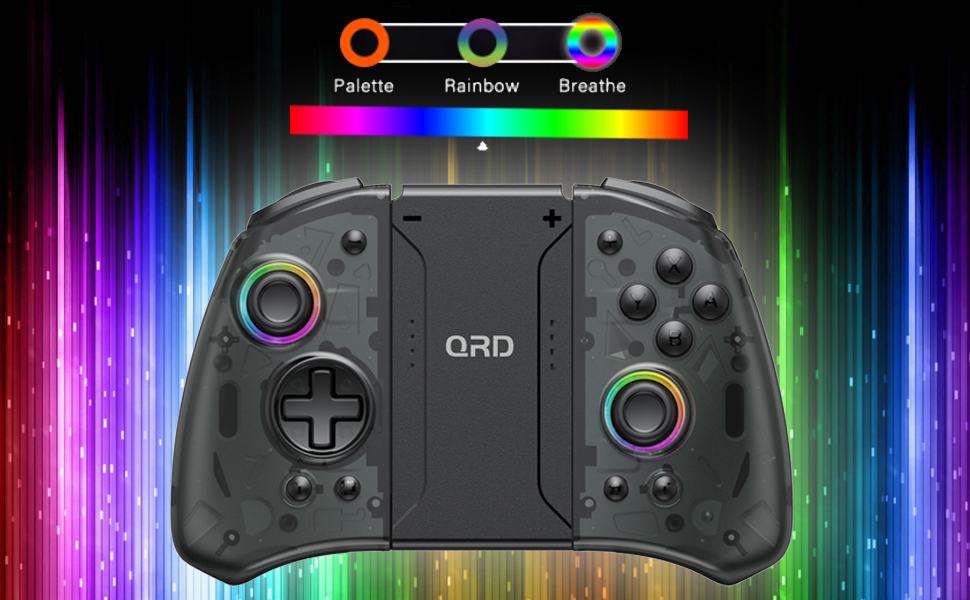
Image 3.1: Visual representation of controller compatibility with Nintendo Switch and Switch OLED models. Note: Not compatible with Switch Lite.
4. 操作手順
4.1 ボタン配置
コントローラーのボタンレイアウトをよく理解してください。
- 左ジョイスティック: 移動制御。
- 右ジョイスティック: カメラまたは照準の制御。
- 十字キー: 方向入力。
- A/B/X/Y ボタン: アクション ボタン。
- L/Rボタン: 肩ボタン。
- ZL/ZR ボタン: トリガーボタン。
- ホームボタン: Returns to the HOME Menu, powers on/off the controller.
- スクリーンショットボタン: スクリーンショットをキャプチャします。
- +/- ボタン: ゲーム内機能用のプラスボタンとマイナスボタン。
- M1/M2 (Back Buttons): Programmable macro buttons.
4.2 振動の強さを調整する
The controller supports 3 levels of vibration intensity. To adjust, press and hold the ターボボタン そして、 Dパッド上 or Dパッド下 to cycle through intensity levels (Low, Medium, High, Off).
4.3 Turbo Function Setup
To set a button to Turbo mode:
- を押し続けます ターボボタン.
- While holding Turbo, press the desired action button (e.g., A, B, X, Y, L, R, ZL, ZR). The button will now continuously register input when held down.
- To clear Turbo for a specific button, repeat the process. To clear all Turbo settings, press and hold the ターボボタン 5秒間。
4.4 Programming Back Buttons (Macro)
The M1 and M2 back buttons can be programmed to execute a sequence of button presses (macro). Each macro can store up to 16 button presses.
- を押し続けます M1 or M2 プログラムしたいボタン。
- While holding the M button, press the SETボタン (refer to manual diagram for location, typically a small button on the back). The indicator light will flash slowly.
- Enter the desired sequence of button presses (e.g., A, B, X, Y, D-Pad directions).
- を押す SETボタン もう一度押すとマクロが保存されます。インジケーターライトの点滅が止まります。
- To clear a macro, press and hold the programmed M button and then press the SETボタン 二度。
4.5 LED Backlight Adjustment
The controller features customizable RGB lighting. To cycle through modes and colors:
- を押す LEDボタン (refer to manual diagram for location) to change between static color, breathing, and flashing modes.
- In static mode, press the LEDボタン 繰り返して、使用可能な 8 つの色を循環します。

Image 4.1: Display of the controller's LED backlight options, including Palette (static colors), Rainbow, and Breathe modes.
5. 充電とバッテリー寿命
The QRD Wireless Controller is equipped with a built-in rechargeable Lithium Polymer battery. A 2.5m USB-C cable is included for charging.
- Connect the USB-C end of the cable to the controller's charging port and the USB-A end to a power source (e.g., Nintendo Switch Dock, USB wall adapter, computer USB port).
- フル充電には約2時間かかります。
- フル充電すると、最大 10 時間連続してゲームをプレイできます。
- The LED indicators on the controller will show charging status and battery level.
6. メンテナンス
To ensure the longevity and optimal performance of your QRD Wireless Controller, follow these maintenance guidelines:
- クリーニング: コントローラーは柔らかく乾いた布で拭いてください。頑固な汚れには、軽くamp布を水で拭いてください。刺激の強い化学薬品、溶剤、研磨剤入りの洗剤の使用は避けてください。
- ストレージ: コントローラーは、直射日光、極端な温度、高湿度を避け、涼しく乾燥した場所に保管してください。
- 取り扱い: Avoid dropping the controller or subjecting it to strong impacts. Do not disassemble the controller, as this may void the warranty and cause damage.
- 充電: コントローラーを完全に充電した後、長時間充電したままにしないでください。
7。 トラブルシューティング
| 問題 | 考えられる原因 | 解決 |
|---|---|---|
| コントローラーが接続されません。 | Low battery; Not paired; Interference. | Charge the controller; Re-pair the controller following Section 3.1; Move closer to the console or away from other wireless devices. |
| ゲームプレイ中の入力遅延または切断。 | Wireless interference; Distance from console; Low battery. | Ensure no strong wireless signals are nearby; Reduce distance to console; Charge the controller. |
| Joysticks drift or are unresponsive. | Calibration issue; Physical debris. | Go to Switch System Settings > Controllers and Sensors > Calibrate Control Sticks. Clean around the joystick base. |
| ボタンが反応しません。 | Stuck button; Software glitch. | Ensure buttons are not physically stuck. Try resetting the controller (if a reset button is present, otherwise power cycle). |
| 振動が機能しません。 | Vibration setting off; Game does not support vibration. | Adjust vibration intensity (Section 4.2). Verify game compatibility. |
8. 仕様
| 特徴 | 詳細 |
|---|---|
| モデル番号 | US-T5-JB02 |
| 接続性 | ブルートゥース5.3 |
| 互換性 | Nintendo Switch, Switch Pro, Switch OLED |
| ジョイスティックタイプ | ホール効果 |
| 振動 | デュアルモーター、3段階調節 |
| モーションコントロール | 6-Axisジャイロスコープ |
| プログラム可能なボタン | Yes (Back Buttons) |
| 電池のタイプ | リチウムポリマー |
| 充電時間 | 約2時間 |
| プレイタイム | 最大10時間 |
| 充電ポート | USB-C |
| 寸法 | 7.95×5.51×2.36インチ(約) |
| 重さ | 12.35オンス(約) |
9. 保証とサポート
9.1 保証情報
QRD products are manufactured with high-quality materials and undergo rigorous testing. This product comes with a standard manufacturer's warranty against defects in materials and workmanship. Please refer to the product packaging or the official QRD web具体的な保証条件と期間については、サイトをご覧ください。
9.2 カスタマーサポート
For technical assistance, troubleshooting, or warranty claims, please contact QRD Customer Support. Have your product model number (US-T5-JB02) and purchase information ready when contacting support.
- オンラインサポート: Visit the official QRD website for FAQs, updated manuals, and support contact forms.
- メールサポート: [Insert QRD Support Email Address Here - if available, otherwise omit]
- 電話サポート: [Insert QRD Support Phone Number Here - if available, otherwise omit]
We are committed to providing excellent customer service and ensuring your satisfaction with QRD products.